• Skip to main content
  • Skip to primary sidebar
  • Skip to footer

Practical and Pretty logo

  • HOME
  • DYEING
  • DIY
  • PARTIES
  • CRICUT
  • SHOP
  • ABOUT
  • CART
You are here: Home / DIY / Monogram Concrete Coasters

January 16, 2017

Monogram Concrete Coasters

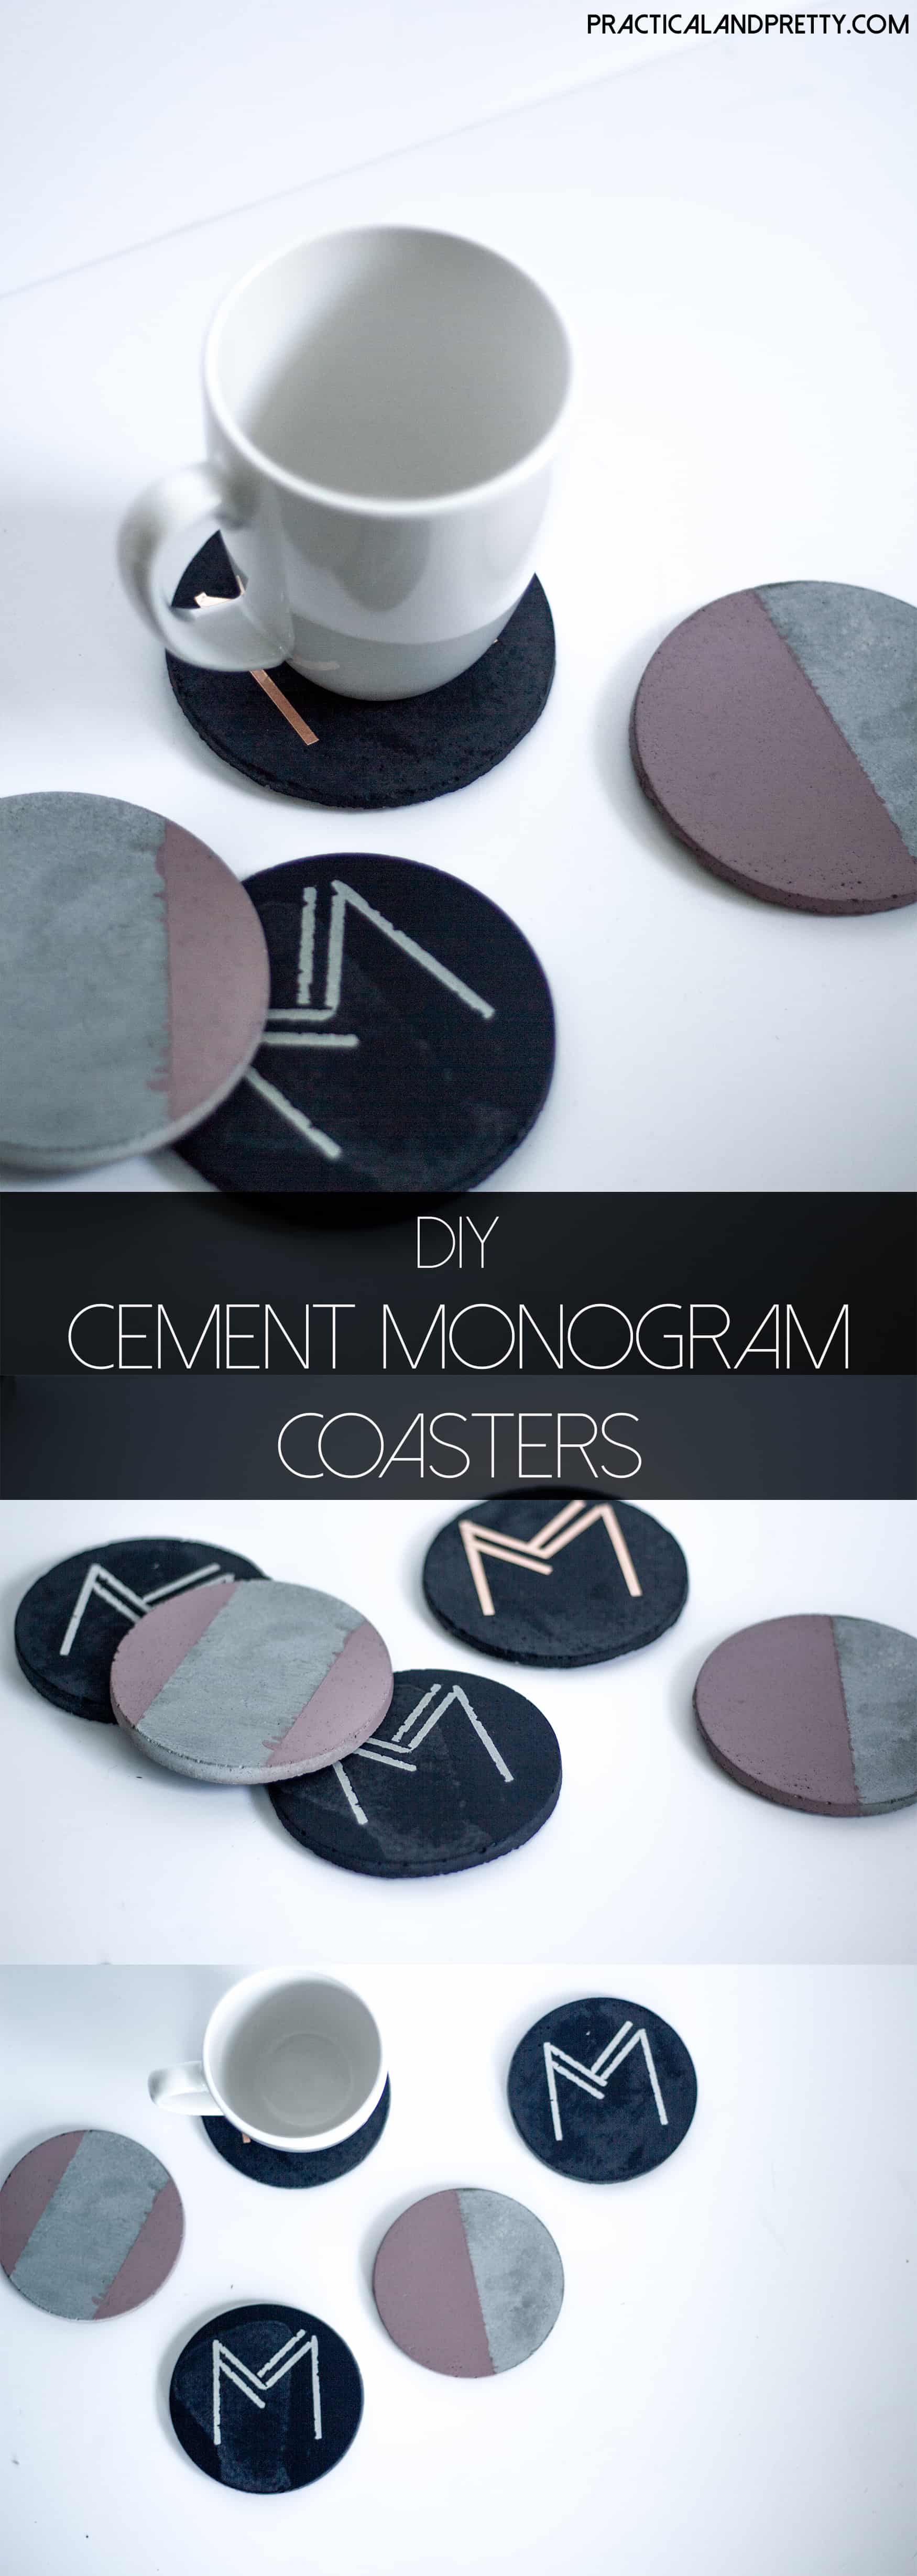
Every home needs a set (or 7) of coasters laying around. They are a necessity in my book! I saw some concrete coasters on Etsy that I just loved and thought, ‘Hey I could make those!’ Plus, I’d always wanted to do a DIY with cement. 

You may like this super easy Ikea Hemnes dresser hack. I also have a simple custom license plate tutorial.

DIY cement coasters and instructions. Monogrammed with Art Deco font! Every house needs a set of these.

Materials for Concrete Coasters
  • Cement
  • Round Molds
  • Water
  • Spray Paint (optional)
  • Tape (optional)
Steps to make the coasters

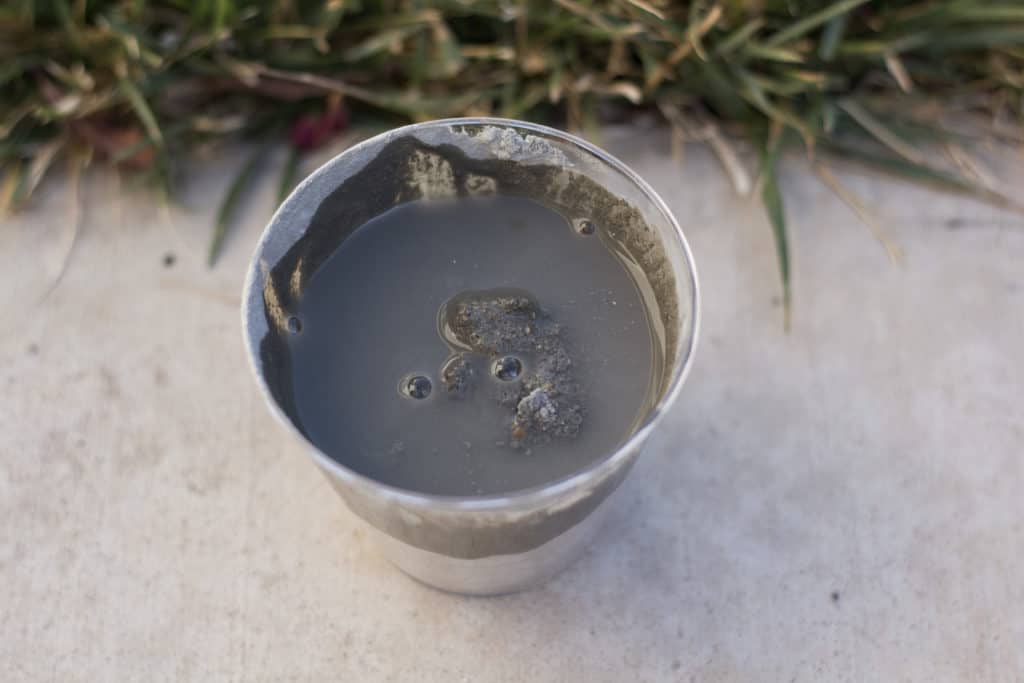
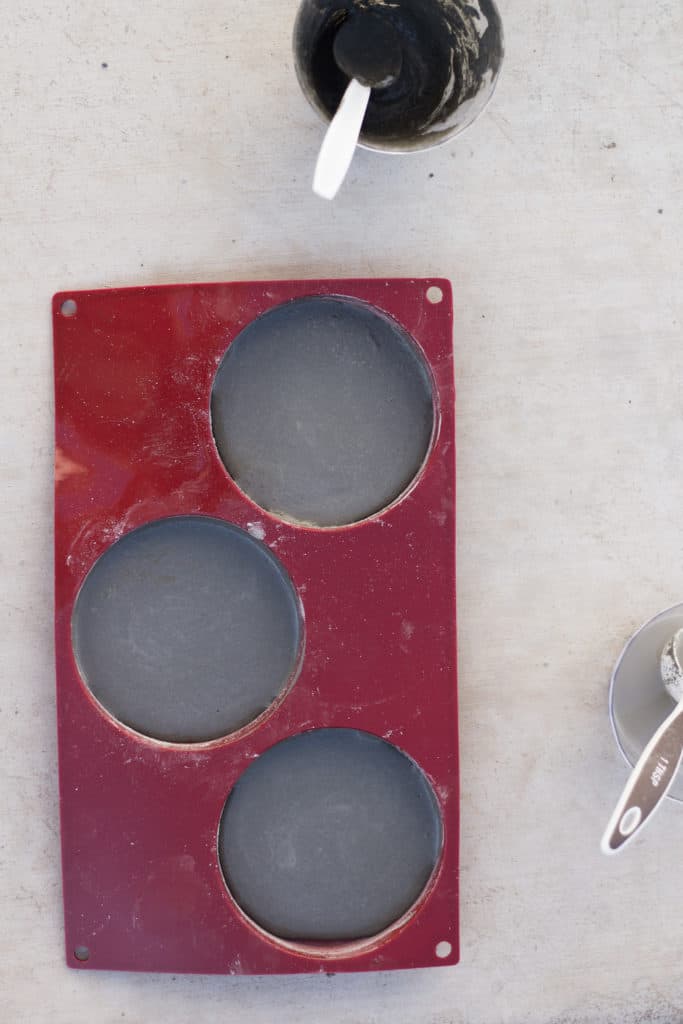
First I mixed the cement with the water. I didn’t want to use the whole bag so I found that doing about 9 tablespoons of powder to about 2-3 tablespoons of water worked out well. I only bought one set of 3 molds so I didn’t want all that cement to go to waste!

DIY cement coasters and instructions

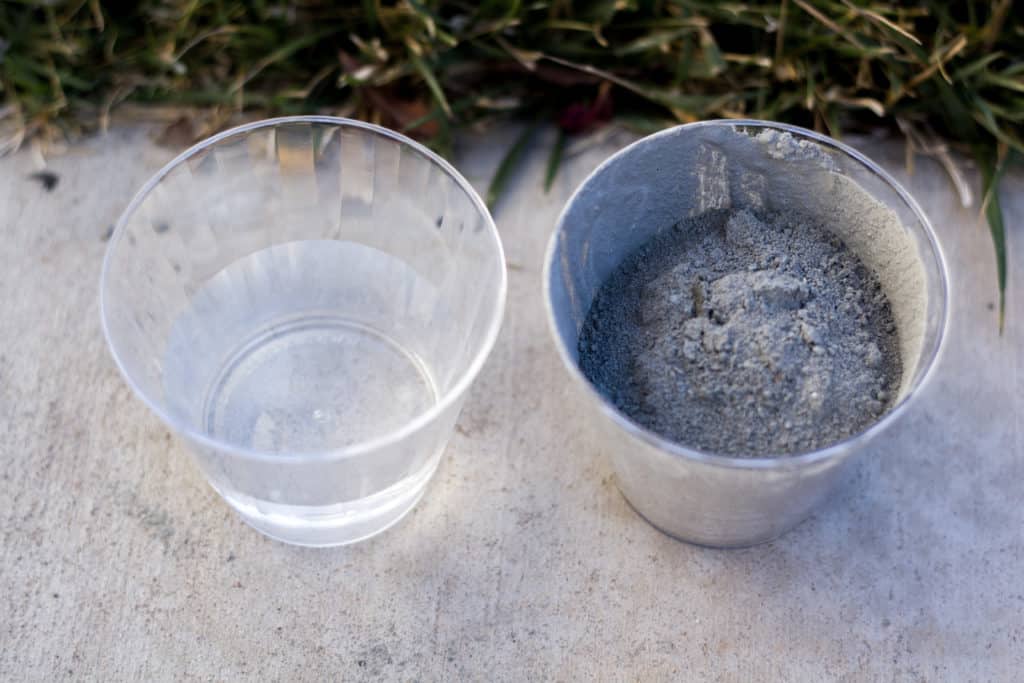
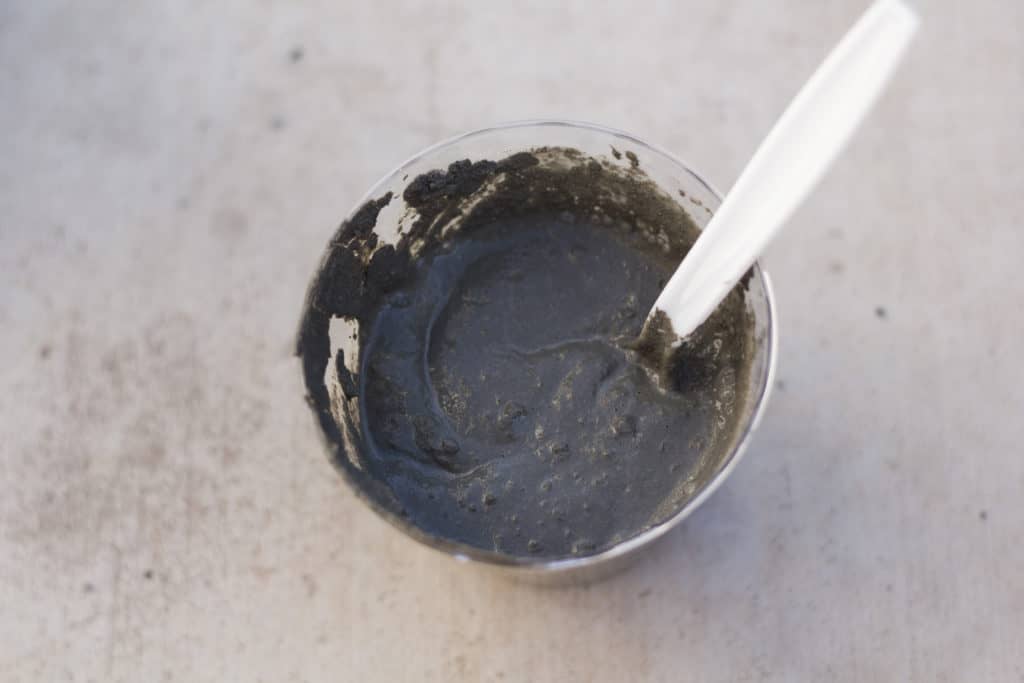
Mix the mixture until it is about the consistency of brownie batter. When I read that on the directions I thought ‘oh great that’s about as vague as it gets’, but then I realized brownie batter consistency isn’t too hard to spot.

DIY cement coasters and instructions

DIY cement coasters and instructions

Pour your cement into the molds. I tried to keep these pretty thin because they look nicer that way and I could make more! However you don’t want them to break, so I put about 1/4 of an inch in each mold.

DIY cement coasters and instructions

Wait for them to dry for about 12-24 hours. If it’s a hot sunny day you can get away with 12 but I waited about 24. When I didn’t wait (because let’s face it, I messed up two batches of these before I got it right), they cracked and were unusable!

Once they are done, sand the rough edges around the rim. Don’t be too aggressive because you can ruin the soft texture. Just sand it enough that it isn’t sharp.

Monogram Lettering

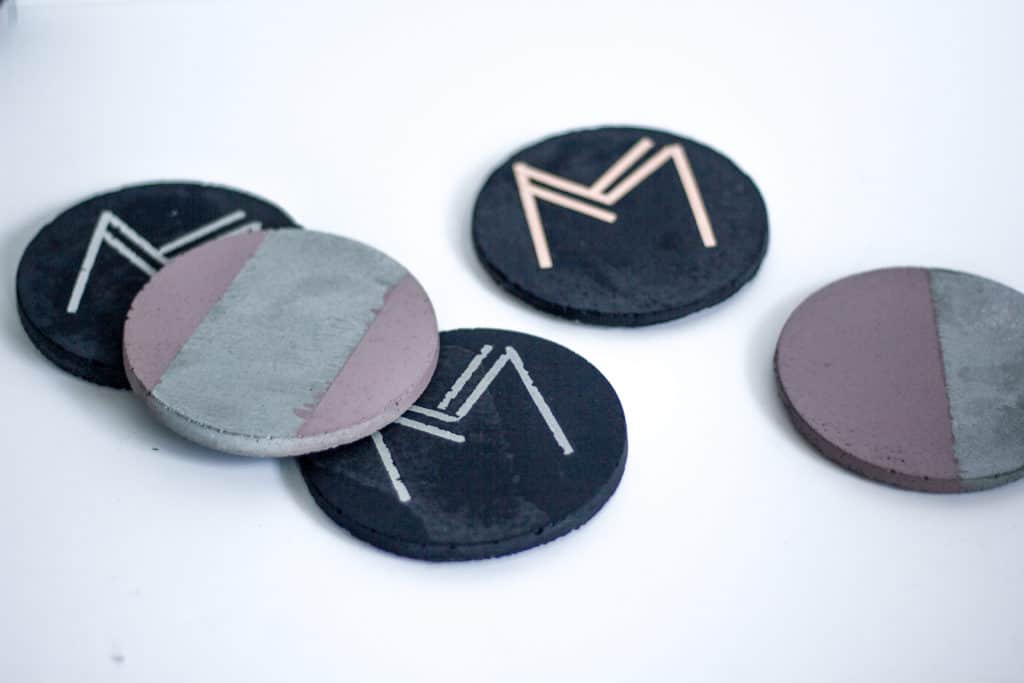
I decided I wanted to put an ‘M’ on our set because it’s our last initial and also because I wanted these to be a little more unique than every other concrete coaster I’ve seen. I found this beautiful font that I felt would be a simple enough ‘M’ to tape off with my 1/8 inch tape. I’m glad M’s don’t have too many curves or this wouldn’t have worked so well!

I simply taped off my letter then spray painted over the tape. The spray paint bled just a little bit, but I thought it looked kind of cool and industrial so I didn’t mind at all!

DIY cement coasters and instructions. Monogrammed with Art Deco font!

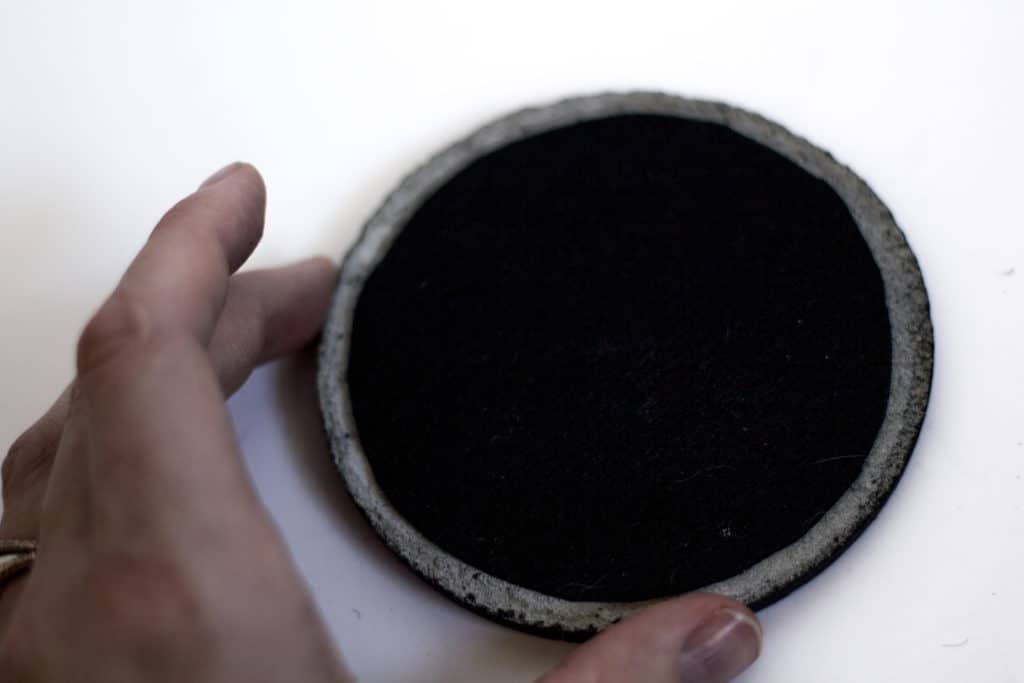
After I decorated them a bit I got some adhesive felt and pasted it to the bottom so they wouldn’t scratch my glass tables.

DIY cement coasters and instructions. Monogrammed with Art Deco font!

DIY cement coasters and instructions. Monogrammed with Art Deco font!

Then you’re done! The hardest part of these was waiting for them to dry. Patience has never been one of my strong suits. I love how these turned out! What do you think? Will you make yourself a set or two?

DIY cement coasters and instructions. Monogrammed with Art Deco font!

Filed Under: DIY, Home Decor

Reader Interactions

Comments

  1. Anika says

    January 16, 2017 at 10:26 pm

    These turned out super cute!! I love concrete crafts!!

    Reply
  2. Louise Nygaard says

    February 4, 2023 at 10:12 am

    I love the coasters you made for us! Only one has survived the mission and the move.

    Reply

Trackbacks

  1. Friday Roundup: January 20 | A Life Well Consumed says:
    January 20, 2017 at 1:02 pm

    […] Habits) 7. These pictures of the snow tree birds in Portland are stunning (Bored Panda) 8. These DIY concrete coasters look like a fun project (Practical & […]

    Reply

Leave a Reply Cancel reply

Your email address will not be published. Required fields are marked *

Primary Sidebar

SEARCH

I’m Anna!

Welcome!

I’m Anna and love practical and pretty things. You will find DIYs here as well as party ideas and of course, natural dyeing tutorials. I’m so glad you’re here.

FEATURED ON

PARTIES

DIY Custom Tablecloths

Customize a tablecloth to your event using this step by step tutorial for custom tablecloths. This was for a birthday party but it will apply to any event!

Blippi Party Ideas and Supplies

Customize this party hat to your color scheme and needs for your next fun party! I show you how I made a simple pom pom and assembled the hat.

Birthday Blippi Shirt

This silly Blippi shirt is perfect for the birthday child or you could even make a few for all the guests! They will get a kick out of what it says. 

Free ‘It Is Your Birthday’ Banner

it is your birthday banner

NATURAL DYEING

Forest Fairy Costume Featuring Tie Dye

How to Dye with Pine Cones

pine cone dye vat

Dye with Quebracho for a Beautiful Red

If you're looking for a beautiful red natural dye, look no further than quebracho! This gave the most beautiful hue and was a simple process.

How to Dye with Turmeric Video Tutorial

Here I will show you how I dye with turmeric to get a rich orange and yellow color. I demonstrate you in real time with a video!

CRICUT PROJECTS

DIY Disneyland Coupons with New Maker Tools

This coupon book of fun Disneyland coupons is a great idea for your next Disneyland trip! I'll walk you through how I created it with my Cricut Maker Tools.

DIY Yoga Shirts with Your Cricut

Random Acts of Kindness Cards

Use these little kindness cards to spread kindness on February 17th or any day you want to celebrate random acts of kindness!

DIY Bath Salt Recipe with Free Sticker Label

This simple bath salt recipe is an easy way to gift a nice DIY to your favorite person and I included a label to make it feel even more custom.

Footer

Copyright © 2023 Practical and Pretty on the Brunch Pro Theme