Howdy partner! Anna here — today I’m showing you exactly how to make your own ice dye bucket hat. This is one of my favorite projects because it’s simple, unique, and gives you that flowy watercolor look that ice dye does best.
(And yes, there’s a link below if you want to grab the exact cotton bucket hat I used — it even has a chin strap, perfect for rafting, hiking, or chasing toddlers in the wind.)
Let’s get into it!
How to Prep Your Bucket Hat for Ice Dye
Start by soaking your cotton bucket hat in a soda ash solution (1 cup soda ash to 1 gallon of water). Let it soak for at least 20 minutes, then wring it out so it’s damp but not dripping. With this specific bucket hat I’m using, there are metal elements. If your item has some metal on it make sure not to let it sit in the soda ash too long. Soda ash is corrosive and can get rusty! BUT this step is crucial for bright, long-lasting color when you ice dye a bucket hat.
I placed my hat on top of a piece of fleece fabric. This helps create little peaks and valleys so the dye can flow beautifully. If I’m being honest, I’m not sure it makes much of a difference. You could also just scrunch it up. used Magic Tracks (yep, the kids’ toy) to hold my fleece in place, but you can use anything flexible and washable. You can also use painter’s tape. If you use rubberbands, it will be scrunched tighter, resulting in more white space.
Ice Dyeing Your Bucket Hat: The Fun Part
Once your setup is ready:
- Scrunch your bucket hat to add texture and dimension.
- Place it on a cookie rack or something elevated.
- Cover the whole hat with ice. Crushed ice gives more texture, but cubed ice works great too and is what I prefer.

Best Ice Dye Colors for Bucket Hats
For this project, I used three of Dharma’s ice dye-specific colors:
- Phoenix Flame – warm reds and oranges with surprising splits
- Alchemist – earthy tones with golden hints
- Kaleidoscope Eyes – psychedelic blends that keep you guessing

I’ve done tons of color combinations other than these, but this one is probably my favorite so far. Some others I’ve done are just tangerine on it’s own. I also love doing seaglass and eggplant together.

When sprinkling dye, a little goes a long way. Lightly dust it over the ice and let it melt and work its magic. You can always add more if you notice the bottom of your item isn’t saturated.
I use Dharma dyes but to see how the most popular dye brands compare to each other read this post here.
Pro Tip: Use an Incline
To get that soft watercolor movement on your ice dye bucket hat, tilt your rack just a touch. It helps the ice melt downward and the dye to flow like a tiny lazy river. Just don’t overdo it — you don’t want the ice sliding off.
How to Rinse & Wash Your Ice Dyed Bucket Hat
Once the ice has fully melted and your bucket hat has batched for at least 24 hours:
- Rinse with cold water first to flush out loose dye.
- Switch to hot water to lift more excess.
- Use a bit of Dawn dish soap to help clear any leftover pigment.
- Wash on hot in your machine with Synthrapol or another dye-safe detergent.
These hats are 100% cotton and pre-shrunk, so they’re safe to toss in the dryer but I prefer to airdry them.
To see how long to let your dye sit, check out this post.
Check out my full rinse-out process here.

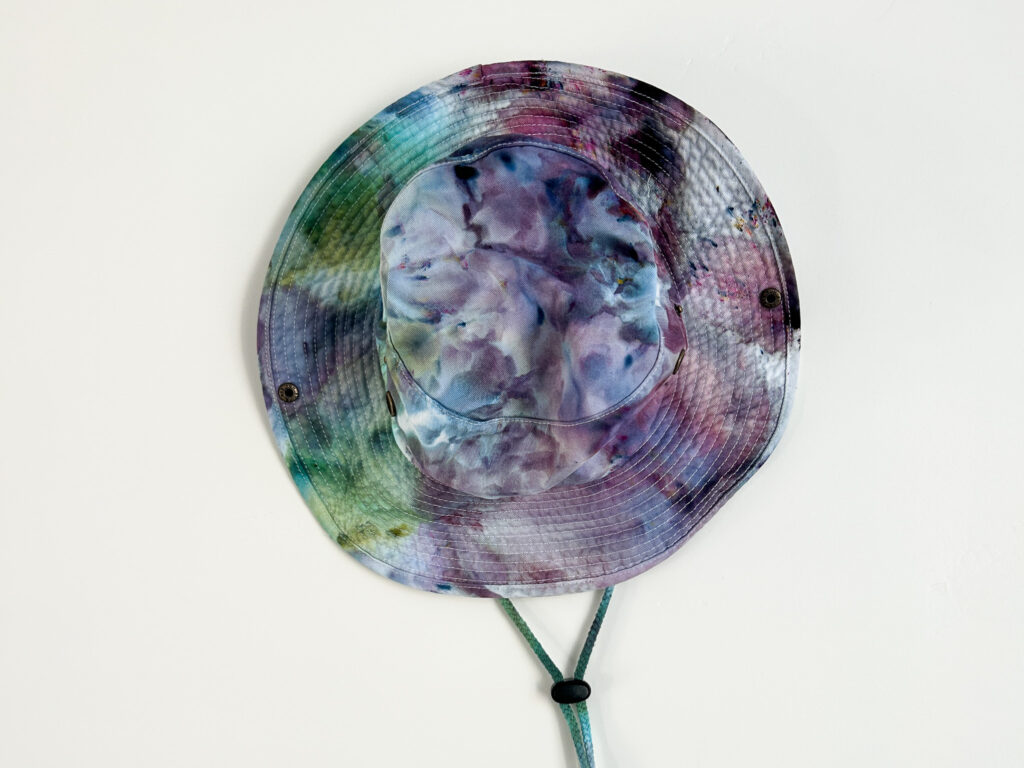
See My Finished Ice Dye Bucket Hats!
Even though I used the same process on two hats, they turned out totally different. One was fiery and bold, the other soft and dreamy. That’s the magic of ice dye — no two pieces are ever the same.
👉 Watch the full process here on YouTube
🛒 Supplies for Ice Dyeing a Bucket Hat
Here’s everything I used (or close to it). You can find it all in my Amazon storefront:
- Cotton bucket hats with chin strap
- Dharma Trading Co. ice dyes
- Soda ash
- Cookie rack
- Fleece scrap
- Magic Tracks
- Dawn dish soap
💌 Grab My Free Tie Dye Folds Guide
Want a free printable of my 12 favorite tie dye folds? I’ll send it straight to your inbox.
And if you want to shop pieces like these, check out my Etsy store — they tend to go quick!
Ice Dye Bucket Hat FAQs
At least 24 hours under ice is best for deep, vibrant colors.
I love Dharma’s ice dye line, especially Phoenix Flame, Alchemist, and Kaleidoscope Eyes for watercolor effects.
Yes! Rinse well, then wash on hot with Synthrapol or dye-safe detergent. These hats are 100% cotton and pre-shrunk.
For even more tie dye FAQs check this out here!
Have questions? Drop them below or come hang out on Instagram @storebrandanna. Happy dyeing, friend! 🎨👒
Pin this for later!


