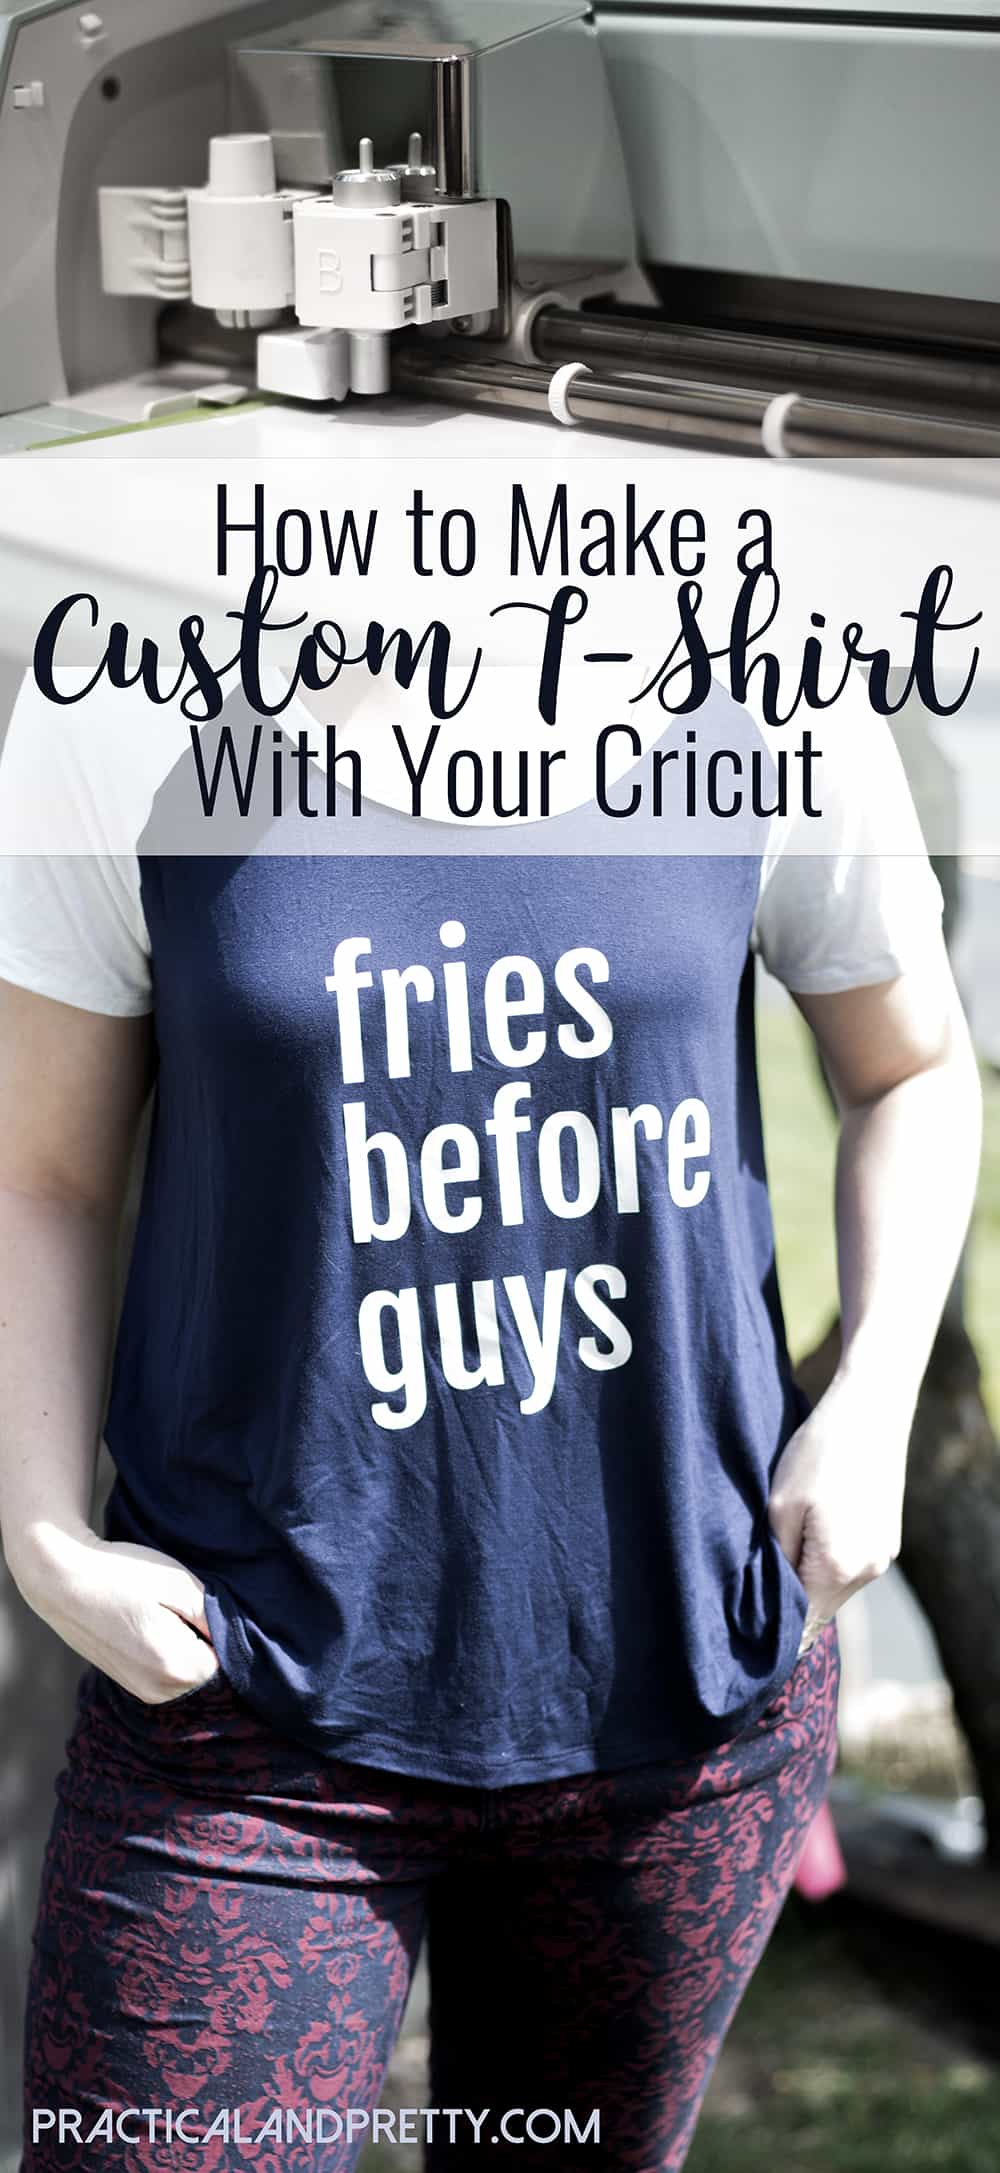
Making t-shirts custom should NOT cost you an arm and a leg! Let me show you how to make custom shirts for whatever occasion!
Today my post is all about how to make exactly what you want to make. Creating your own t-shirt isn’t hard but you do need to know what you’re doing or you might waste a lot of iron on vinyl! It would be super cool to iron a shirt customized with reverse tie dye!
Customizing your t-shirt requires two important steps. First, you have to decide what you want to say! I suggest sticking with one color on your first try. Sayings, phrases, or words are perfect for this. Second, you need to pick out what shirt you’d like your saying on. I made this specific shirt for my beautiful sister and she ran to Target and found a soft flowy shirt she loved. Make sure the shirt is ok to be ironed because you will be using an iron on it! The shirt I picked was mostly Rayon. I’m not sure I’d suggest this material, especially on your first shirt. It was stretchy to the point that removing the sticky part from the ironed-on vinyl was challenging. But, it will still work if you’re up for the challenge.
I’m going to walk you through how to create this shirt step by step here. If you’re more of a visual learner, I’ve attached screenshots for you so you can see exactly what I’m talking about.
Steps to Cut the Iron on Vinyl
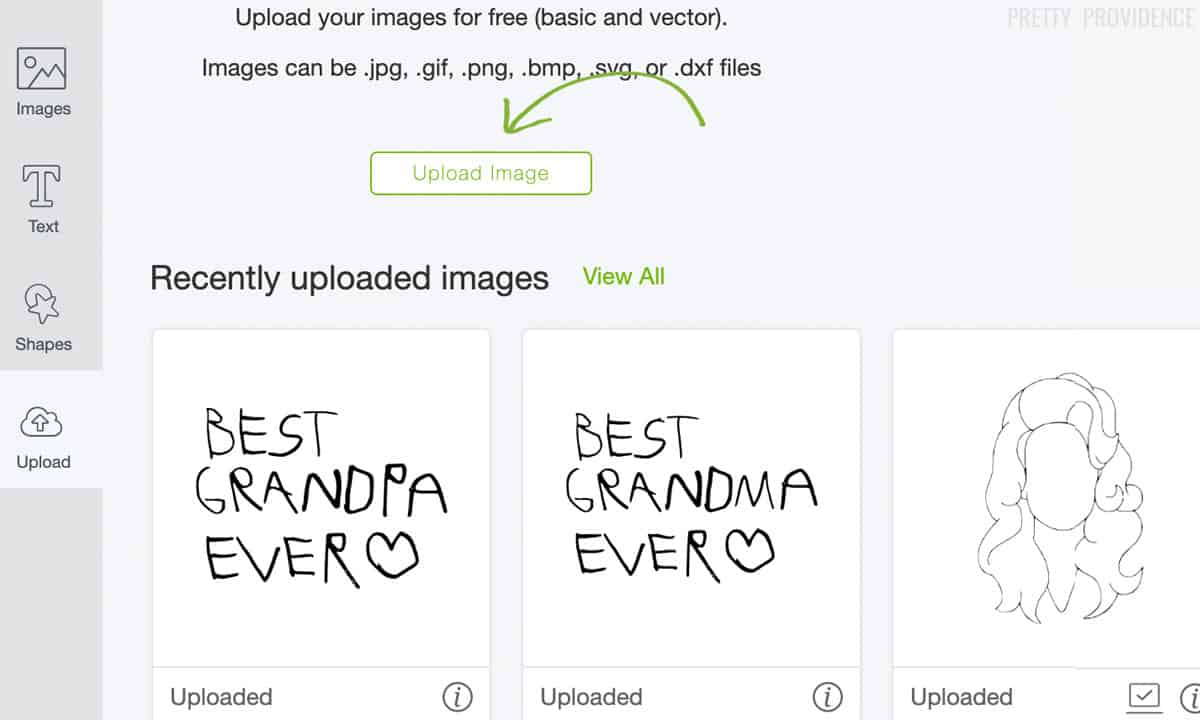
- You’ll start with your image. You can create an image in Photoshop or put text right in Design Space. I wanted to upload an image so you could see what it’s like if you want to do a shape instead of just text!
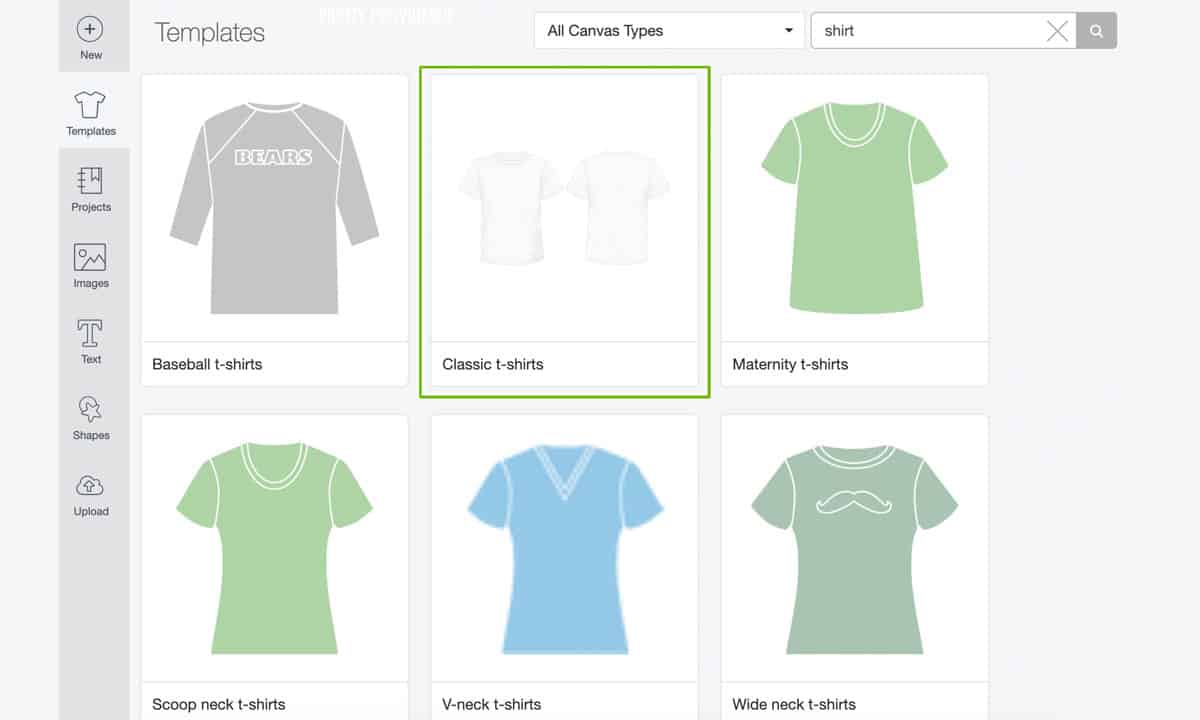
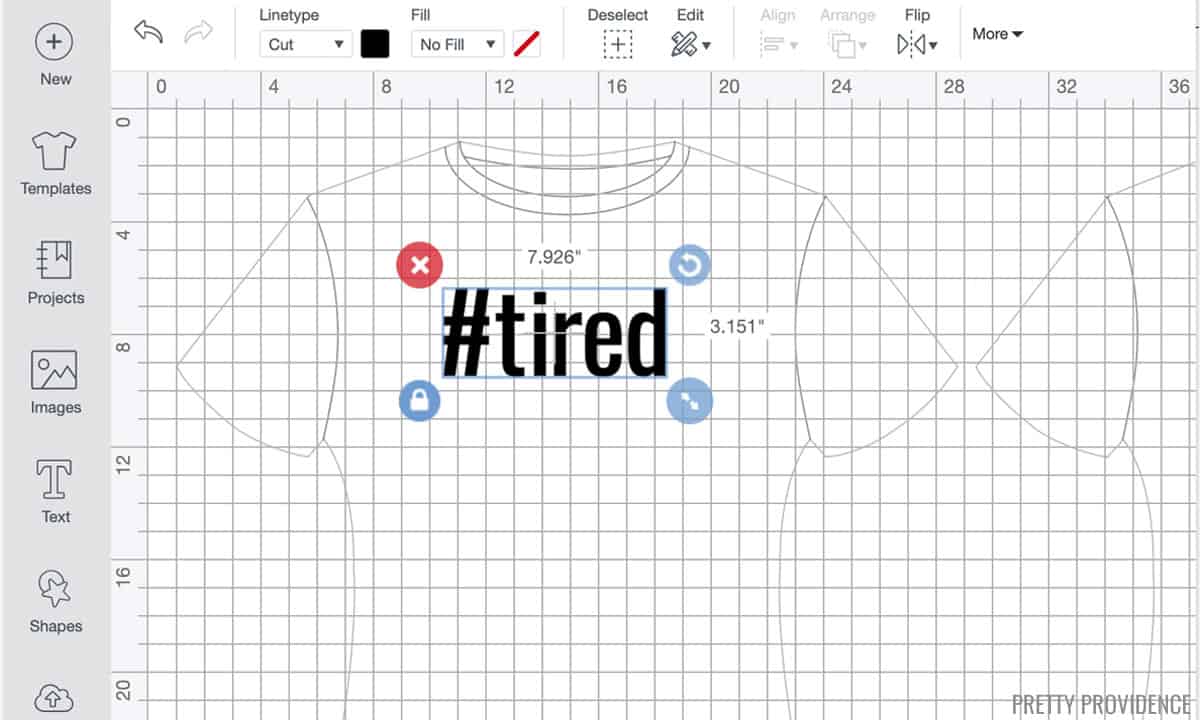
- Open Cricut Design Space! Choose your canvas by clicking ‘Canvas’ on the left. This is a baseball tee-type shirt so I selected that. Make sure to set the size of the shirt under ‘Canvas’ on the right.
- Click ‘Upload and image’ on the left. Select your image by browsing your files and selecting what type of image it is. For this project, and most projects with iron on, you’ll select ‘Simple Cut’.
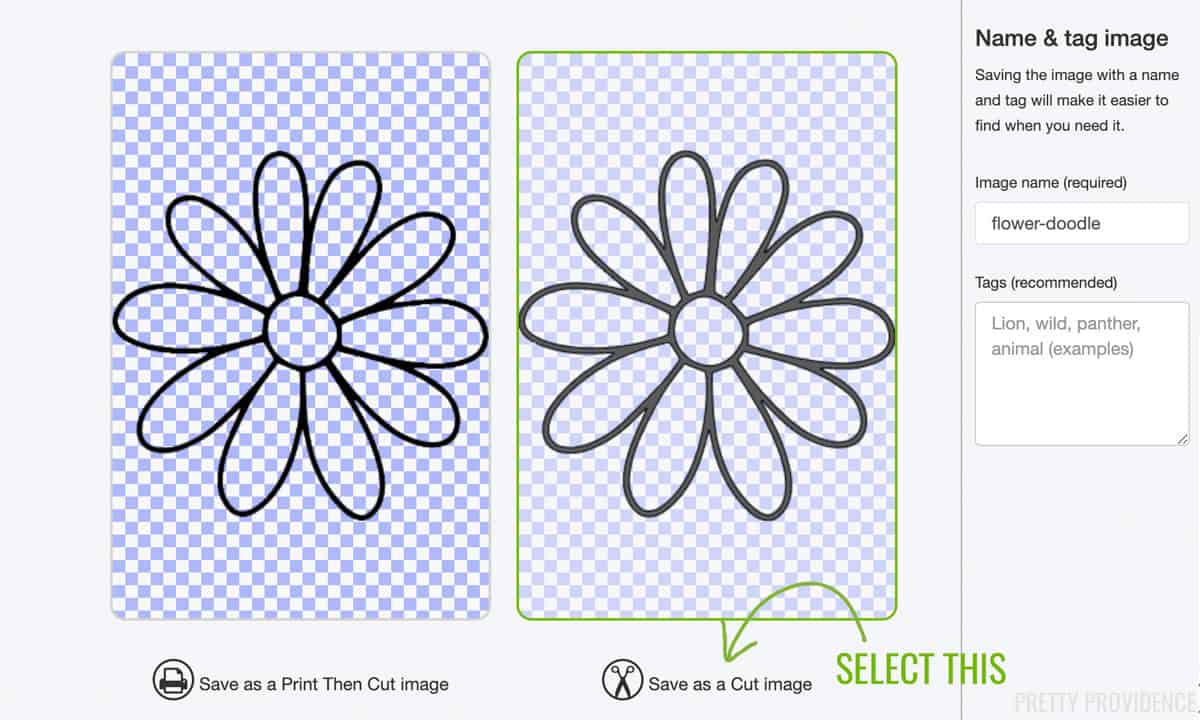
- Now you click the whitespace that you’d like cut out. Remember to get the insides of each letter. This is really fun for me for some reason. It takes me back to my Paint days when I used to use the Bucket tool. Remember that?
- This next step is important! (Most of them are important but this is pretty easy to miss.) Select ‘Cut Image’ NOT ‘Print then Cut Image’. You don’t want to print off your saying, you want it cut!
- Put this image on your canvas and size it to your liking.
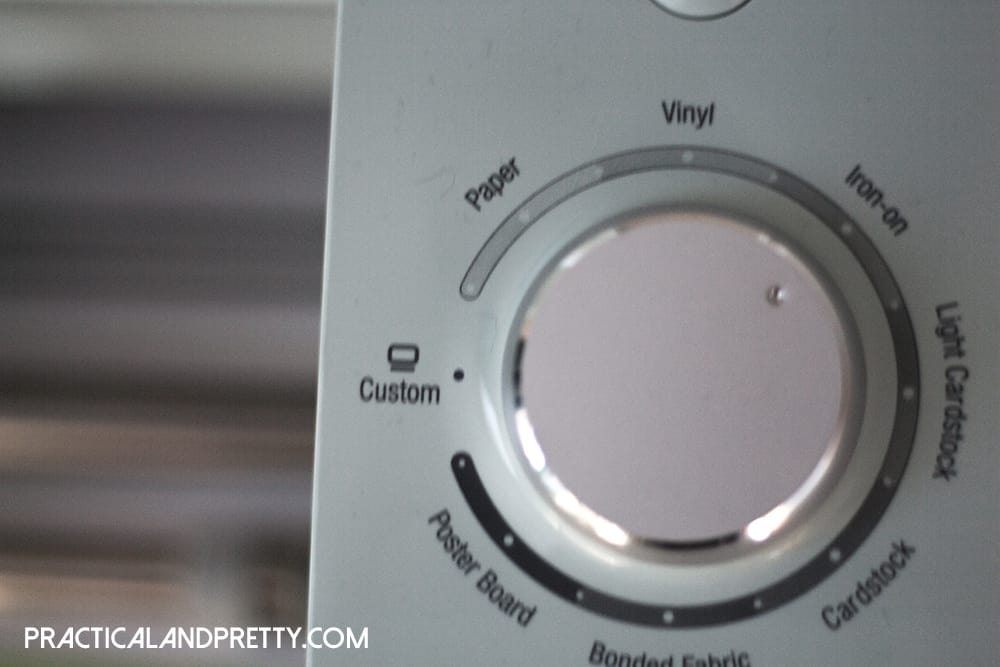
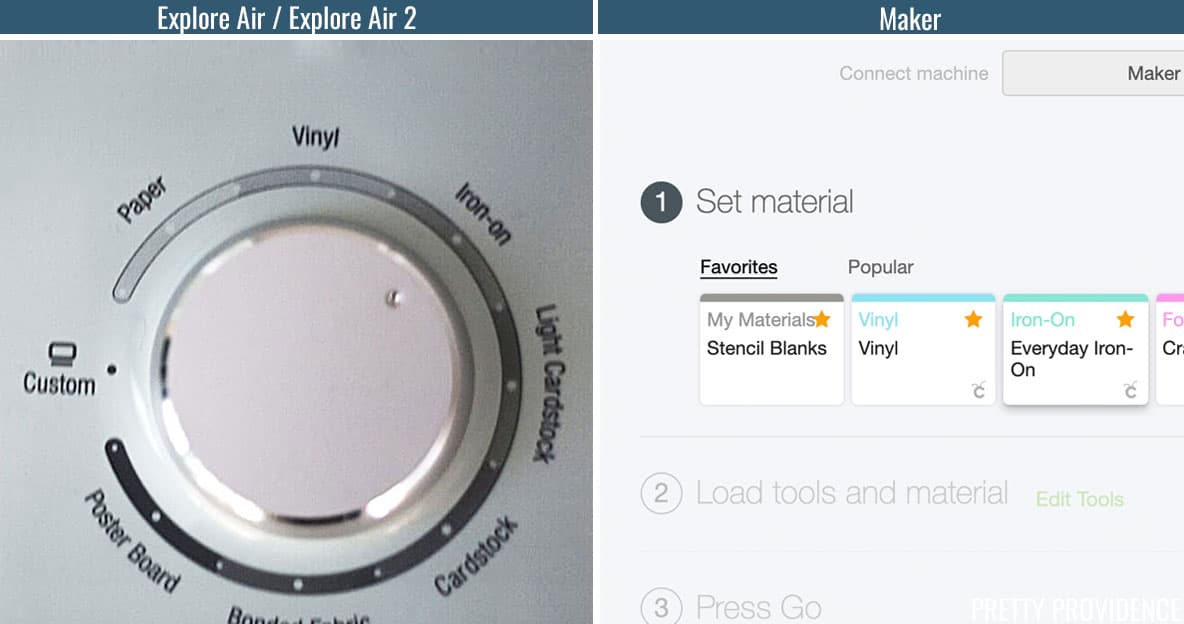
- Place your iron on vinyl shiny side down on your mat and turn the dial to Iron-on
- Then click ‘Cut’!
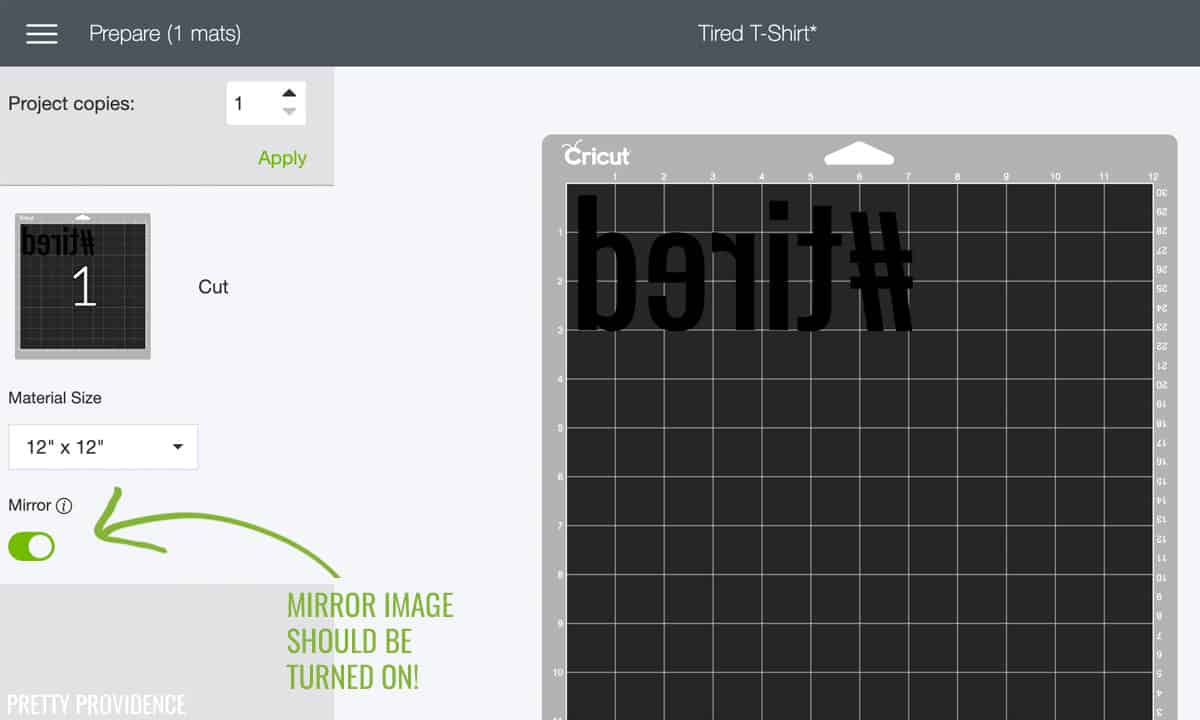
- Ok, here’s another important and easy-to-miss step. Click ‘Mirror image for Iron-On’ before hitting ‘Go’!
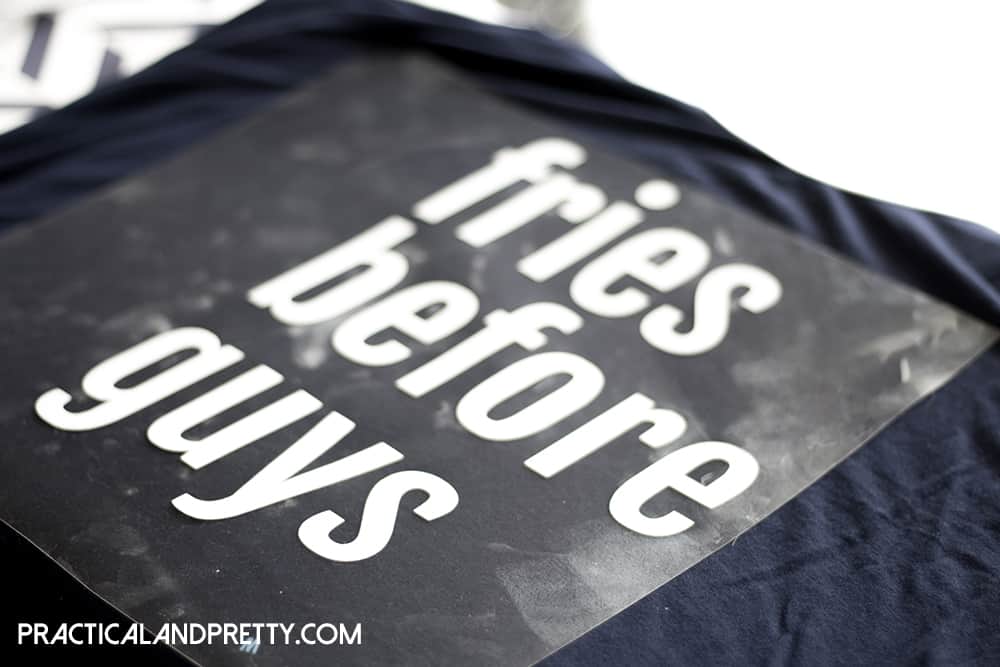
- After the cut is done, remove the excess vinyl around the edges. Use your weeding tool to take out the little pieces in the letters.


Steps to Iron on the Vinyl
- Now you get to iron it on! Set your iron to ‘Cotton’ or the hottest setting it will go to. Make sure there is no steam.
- Start by getting the material warm. Put the iron on the shirt for about 15 seconds.
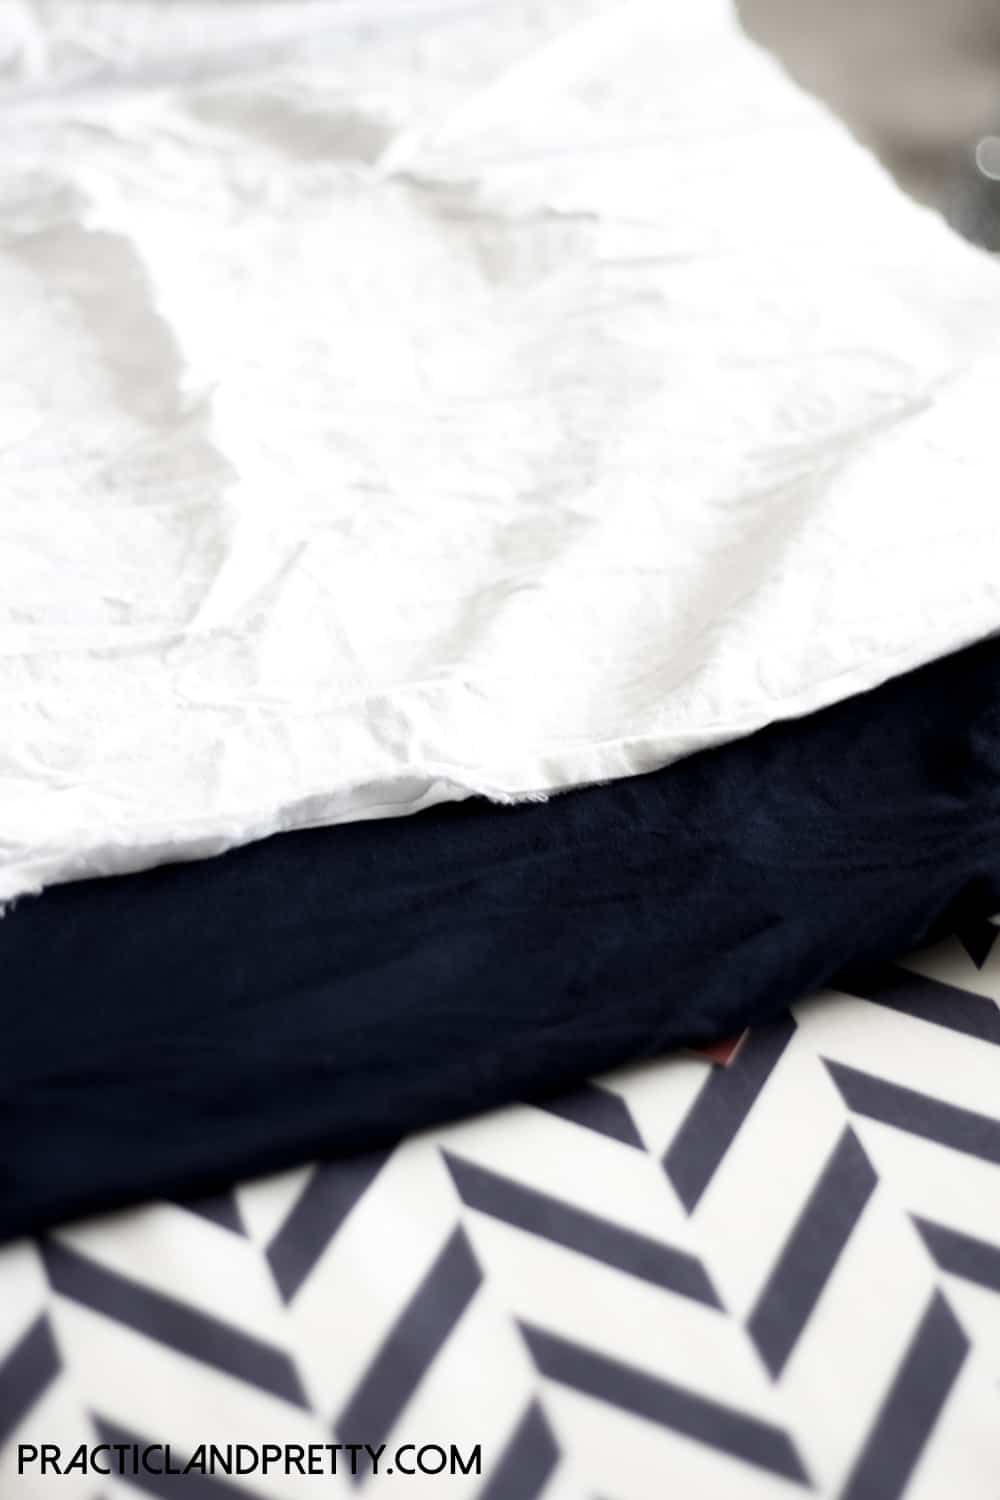
- Place your vinyl on where you’d like it. Put a press cloth, or plain cotton cloth, on top of the plastic. This is important so you don’t melt the plastic onto your shirt.
- Put the iron on top of the press cloth for about 30 seconds. Flip your shirt over, and do the same thing on the opposite side of the shirt.
- Now you will pull off the sticky part and separate it from the vinyl. Do this while it’s hot! It will be a lot easier. If a piece isn’t coming off, place the iron directly on the part you are trying to pull up and it should pull off.
- The plastic should be removed from the vinyl now! Put the press cloth back on and do another run with the iron so you know it’s on there really well.
You’re done! It seems like a lot of steps, but I promise it’s so simple! I have already made so many custom t-shirts (almost 20!!) and I’ve had my Cricut for about a month. I hope you’ll share your fun t-shirt creation too!

How-to Make a T Shirt with an Iron
Making t-shirts custom should NOT cost you an arm and a leg! Let me show you how to make custom shirts for whatever occasion!
Materials
- T Shirt
- Iron on (HTV)
Tools
- Iron
- Cricut (These instructions are for a Cricut Air)
Instructions
- Set your iron to ‘Cotton’ or the hottest setting it will go to. Make sure there is no steam.
- Start by getting the material warm. Put the iron on the shirt for about 15 seconds.
- Place your vinyl on where you’d like it. Put a press cloth, or plain cotton cloth, on top of the plastic. This is important so you don’t melt the plastic onto your shirt.
- Put the iron on top of the press cloth for about 30 seconds. Flip your shirt over, and do the same thing on the opposite side of the shirt.
- Now you will pull off the sticky part and separate it from the vinyl. Do this while it’s hot! It will be a lot easier. If a piece isn’t coming off, place the iron directly on the part you are trying to pull up and it should pull off.
- The plastic should be removed from the vinyl now! Put the press cloth back on and do another run with the iron so you know it’s on there really well.
Recommended Products
As an Amazon Associate and member of other affiliate programs, I earn from qualifying purchases.


IF you like this post you might also like


3 thoughts on “How to Make a T-Shirt With Your Cricut and an Iron”