Bullseye tie dye is one of the simplest tie dye patterns to fold, but the results can look completely different depending on the method you use. In this step by step tutorial I am going to walk you through exactly how to do bullseye tie dye, then compare two different methods (liquid dye versus ice dye) so you can pick the one that fits your project.
I tested both methods on identical bullseye tie dye shirts using black dye for both, and the results were honestly surprising.

Watch the full video tutorial here:
What You Need to Make a Bullseye Tie Dye Shirt
For folding:
- White cotton shirt (one for each method if you are doing both)
- Sinew or rubber bands
- Sinew puller (optional but very helpful)
For dyeing (liquid method):
- Jacquard Jet Black fiber reactive dye
- Soda ash for pre-soaking
- Squeeze bottle (use a 6 ounce or larger, you will need it)
For dyeing (ice method):
- Black fiber reactive dye powder (Jacquard Jet Black)
- Soda ash for pre-soaking
- Ice (regular ice cubes work better than pebble ice for me. See what ice I use for ice dyeing here.)
- Magic Tracks or another stiff ice barrier
For rinsing:
- Dawn dish soap (the standard Blue Dawn)
How to Do Bullseye Tie Dye Step by Step
The bullseye tie dye fold is the same regardless of which dye method you are using. This is the technique that creates the classic concentric circle pattern you see on bullseye tie dye shirts.
Step 1: Find the Center of the Shirt
I like to fold my shirts inside out so the front and back match as closely as possible. Fold the shirt in half, then in half again so you can find the center point. I aim for right at the base of the armpits.
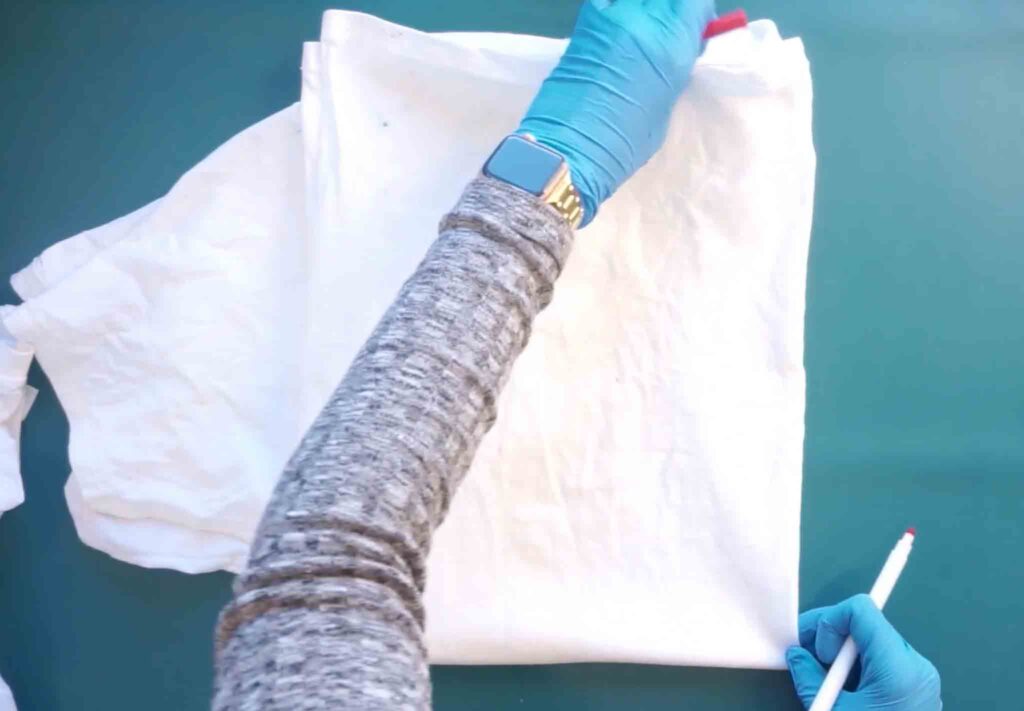
Step 2: Gather the Fabric
Pinch the center point and gather the fabric, pulling the front and back at the same time so they stay aligned. Pull it out into a long shape that runs the full length of the shirt. This is the foundation of the bullseye tie dye technique.
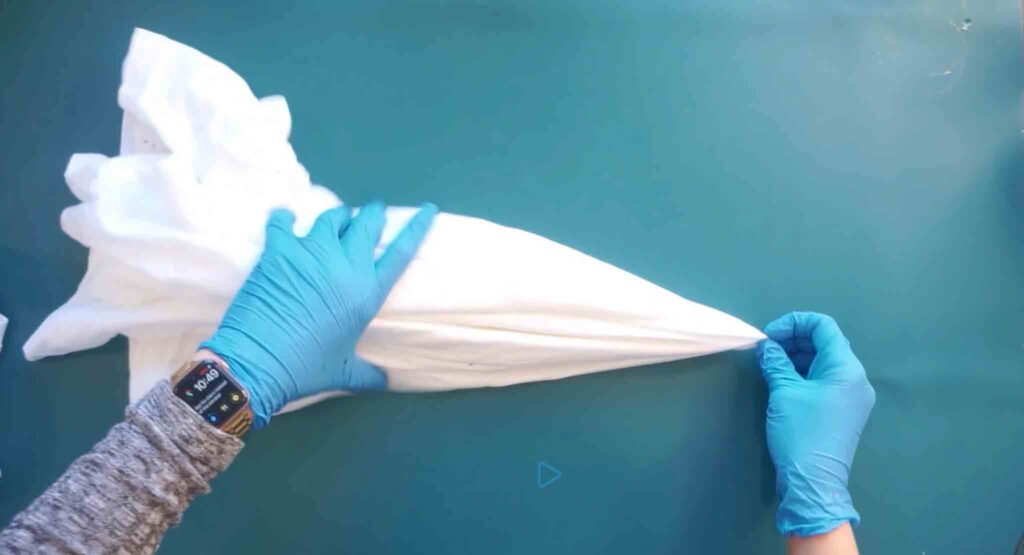
Step 3: Bind With Sinew or Rubber Bands
Wrap your sinew or rubber bands around the gathered shirt. Sinew will give you stark white lines where it sits, which creates beautiful crisp definition in the finished bullseye tie dye pattern. Rubber bands work too, but you will probably want to use more color variation if you choose rubber bands because the lines they leave are softer.
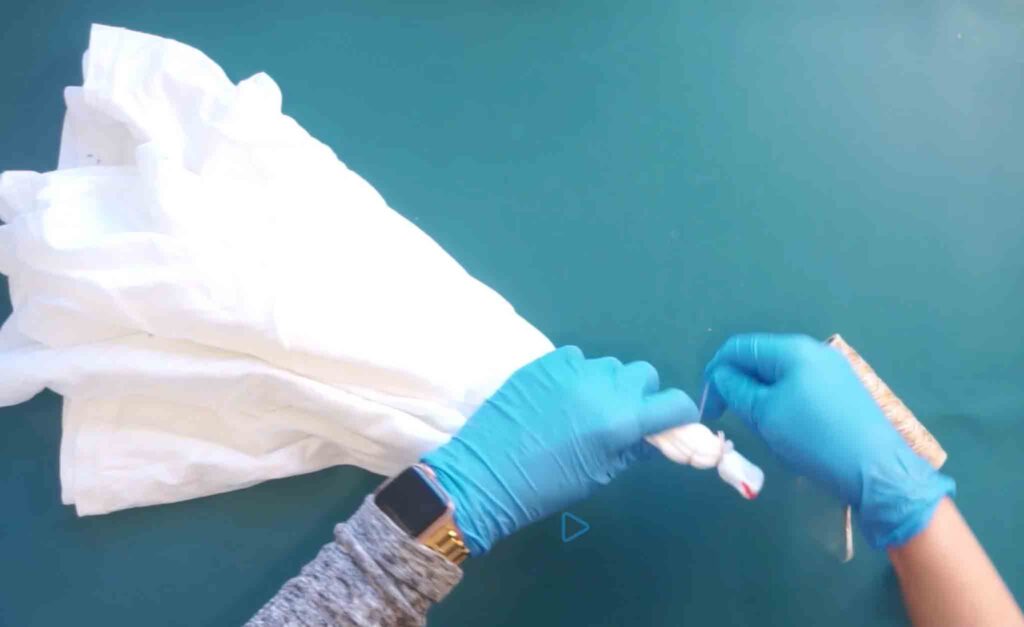
I wrap my sinew around three to five times in each spot, then pull it tight with my sinew puller. Some people leave part of the shirt untied, but I prefer to bind the entire shirt all the way to the bottom.

Each shirt took me about 5 minutes to fold and bind. The fold itself is simple but the binding is what takes the time, especially if you want lots of crisp white lines.
How to Make a Perfect Bullseye Tie Dye Pattern
If you want your bullseye tie dye to look as crisp and professional as possible, here are the things that matter most:
- Make sure your front and back are folded together evenly so the pattern lines up on both sides
- Use sinew rather than rubber bands for the cleanest white circles
- Pull your sinew tight enough to create resist, but not so tight that you damage the fabric or snap the sinew
- Pre-soak your shirt in soda ash for at least 20 minutes before dyeing
- Choose your dye method based on the look you want (more on this below)
Bullseye Tie Dye Method 1: Liquid Dye
For the liquid dye bullseye, I used Jacquard Jet Black mixed at one teaspoon of dye per ounce of water. Black is a color that requires a LOT of dye, so do not skimp here. I started with a 6 ounce bottle and had to refill it halfway through, so go bigger if you can.
How I Applied the Liquid Dye
Both shirts were soda ash soaked for about 20 minutes before I started. This is essential for the dye to bond properly to the fabric.
I applied the liquid dye to the front of the shirt, let it sit for a moment to soak in, then flipped it over and dyed the back. The color did not penetrate all the way through, which is totally normal for a dense fold like this.
Liquid Dye Pros and Cons
Pros:
- Very saturated, dark, true black color
- Crisp white lines from the sinew
- Predictable results
Cons:
- Uses a LOT of dye, especially for black
- Long rinse time (took me 18 minutes)
- Can be intimidating to apply enough without over saturating
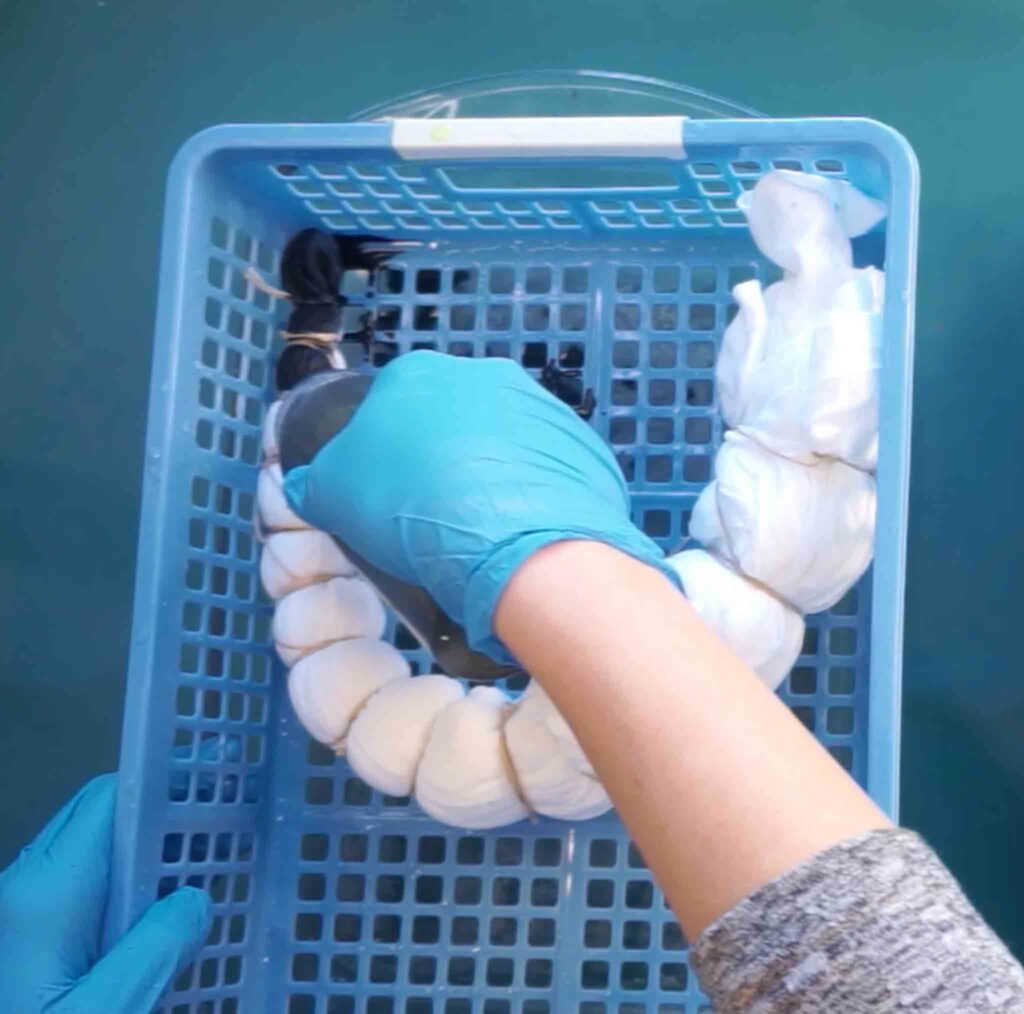
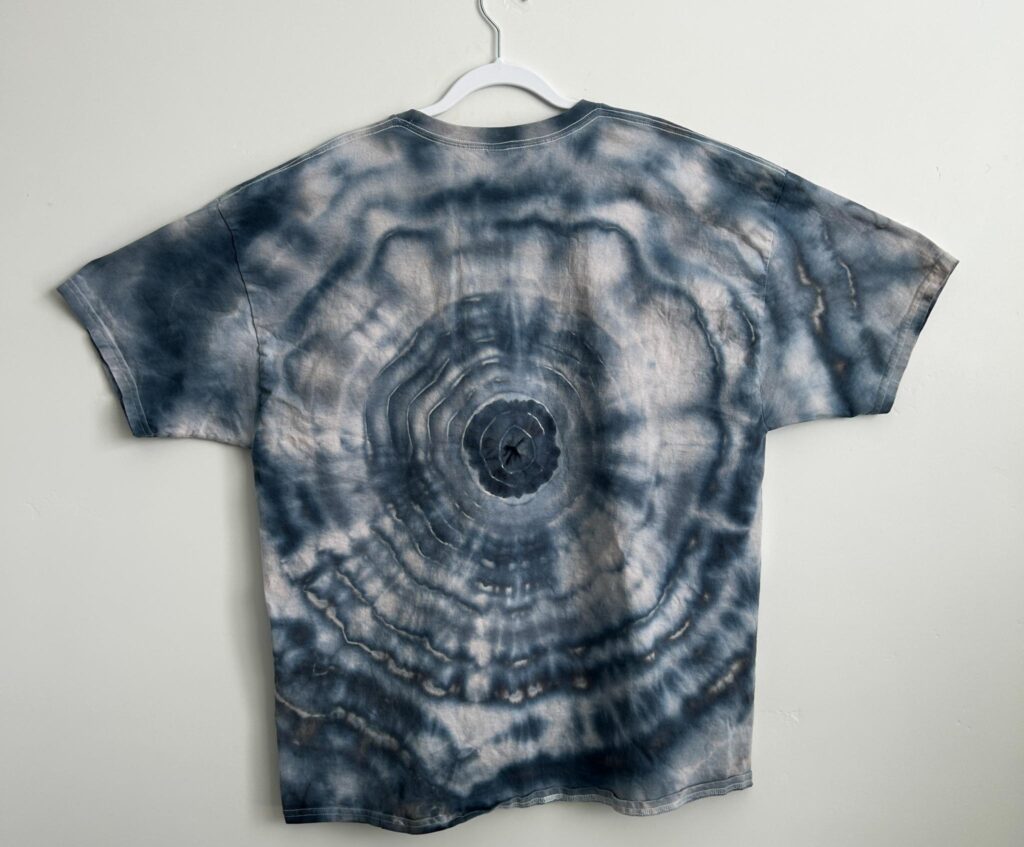
Bullseye Tie Dye Method 2: Ice Dye
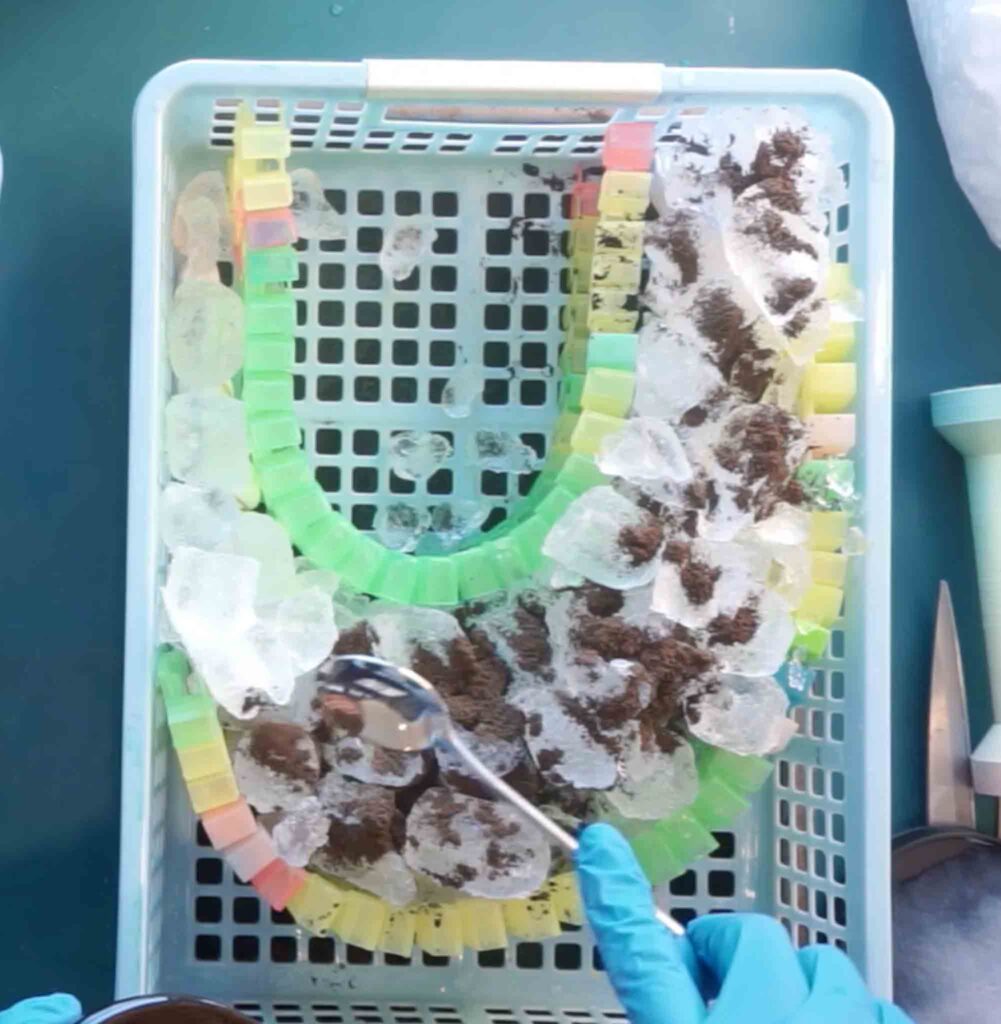
For the ice dye bullseye, I used the same fold and the same soda ash pre-soak. The difference is that instead of liquid dye, I built ice barriers around the shirt using Magic Tracks, then piled on ice and sprinkled black dye powder over the top.
How I Set Up the Ice Dye
Magic Tracks are a kid’s toy but they happen to be perfect for this. They are stiffer than cardboard or tin foil so they hold their shape as the ice melts. If you do not have Magic Tracks, silicone molds or cake pans can also work.
I added a generous layer of ice, then sprinkled the black dye powder over the top. Then I let the ice melt completely and let the project sit for 24 hours before rinsing. After that I flipped it over and added more ice and dye to the back so the color could penetrate from both sides.
Ice Dye Pros and Cons
Pros:
- Less hands-on application time
- Beautiful organic color blending where it works
- Slightly faster rinse time (13 minutes vs 18 for liquid)
Cons:
- My result washed out significantly during rinsing
- Final color came out more gray than black
- Less predictable than liquid dye
- Choice of black powder matters a lot. I would use Dharma Raven next time, not Jacquard
How to Rinse Out a Bullseye Tie Dye Shirt
Both shirts followed the same rinse process:
- Rinse in cool water first to flush out as much excess dye as possible
- Move to hot water and continue rinsing
- Add Blue Dawn dish soap, get it sudsy, and keep rinsing in hot water
- Wash in your washing machine on a hot wash cycle
The liquid dye bullseye took me 18 minutes to rinse out. The ice dye bullseye took 13 minutes. Both were significant time investments, so plan accordingly. Black is one of the hardest colors to rinse no matter the method.
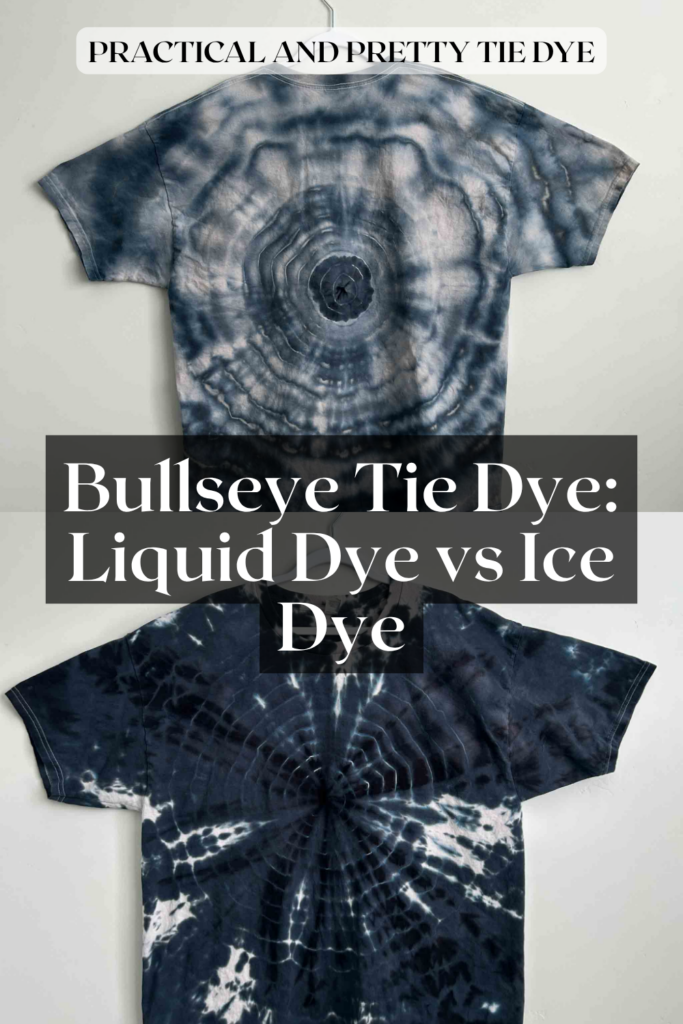
Liquid Dye vs Ice Dye Bullseye Tie Dye: Final Results
Here is the honest comparison after both shirts came out of the wash:
Liquid dye result:
Turned out beautifully. Dark, saturated, with crisp white circles where the sinew was. This is the bullseye tie dye result most people picture when they think of this pattern.
Ice dye result:
Disappointing if I am being honest. The black washed out significantly and the final color came out almost gray with hints of blue. The bullseye pattern itself was still visible, but the color depth was nowhere near the liquid version. I would absolutely use Dharma Raven instead of Jacquard if I tried this again.
Which Bullseye Tie Dye Method Should You Choose?
Based on this experiment, here is my honest recommendation:
- Choose liquid dye if you want a deep, saturated, classic bullseye tie dye shirt with crisp white circles
- Choose ice dye if you want a softer, more organic look and you are using a black dye that performs well in ice form (Dharma Raven, not Jacquard)
- For most beginners, liquid dye is the more reliable bet for this specific pattern
Bullseye Tie Dye FAQ
How do I make a bullseye tie dye pattern?
Find the center of the shirt at about armpit height, gather the fabric front and back together, pull it into a long shape, and bind it with sinew or rubber bands. Then apply your dye and let it set.
How do you make a perfect bullseye tie dye?
The key to a perfect bullseye tie dye pattern is making sure your front and back are folded evenly so the pattern matches on both sides, using sinew for the cleanest white lines, and pre-soaking your shirt in soda ash before applying dye.
What are the best brands for bullseye tie dye dye?
For liquid dye I recommend Jacquard fiber reactive dyes (Jet Black is excellent for bullseye). For ice dye, Dharma Trading Company has the best black powder for this technique, specifically the color Raven.
Can you use rubber bands instead of sinew for bullseye tie dye?
Yes, but the lines you get from rubber bands are softer and less crisp than what you get from sinew. If you use rubber bands, consider using more color variation in your design to compensate.
How long should bullseye tie dye sit before rinsing?
For liquid dye on cotton, let it sit for at least 6 to 24 hours before rinsing. For ice dye, let the ice melt completely and then let it sit for an additional 24 hours.
Where can I buy bullseye tie dye shirts?
If you would rather buy than make, I sell handmade tie dye items in my Etsy shop. But if you want the satisfaction of making your own, this tutorial gives you everything you need.
Watch the Full Bullseye Tie Dye Tutorial
Related Tie Dye Tutorials
- Best Black Tie Dye Colors: Tested and Ranked
- How Long Should Tie Dye Sit Before Rinsing
- How to Wash Tie Dye the First Time
Final Thoughts on Bullseye Tie Dye
Bullseye tie dye is one of the most iconic patterns out there, and now you have everything you need to make one yourself. Whether you choose liquid dye for the classic deep saturated look or ice dye for a softer organic feel, the fold itself is the same and the results are always wearable.
Drop a comment below if you try this. I love seeing how everyone’s bullseye tie dye shirts turn out!
Pin this post for later!


To make this a true comparison you should have used the same exact dyes. You’re comparing Jacquard Jet Black vs. Dharma’s Raven. You’re going to get differences regardless of what method you use. Just my two cents for whatever it’s worth!
Sorry you misunderstood but these are both Jet Black from Jacquard on the liquid and ice dye projects!