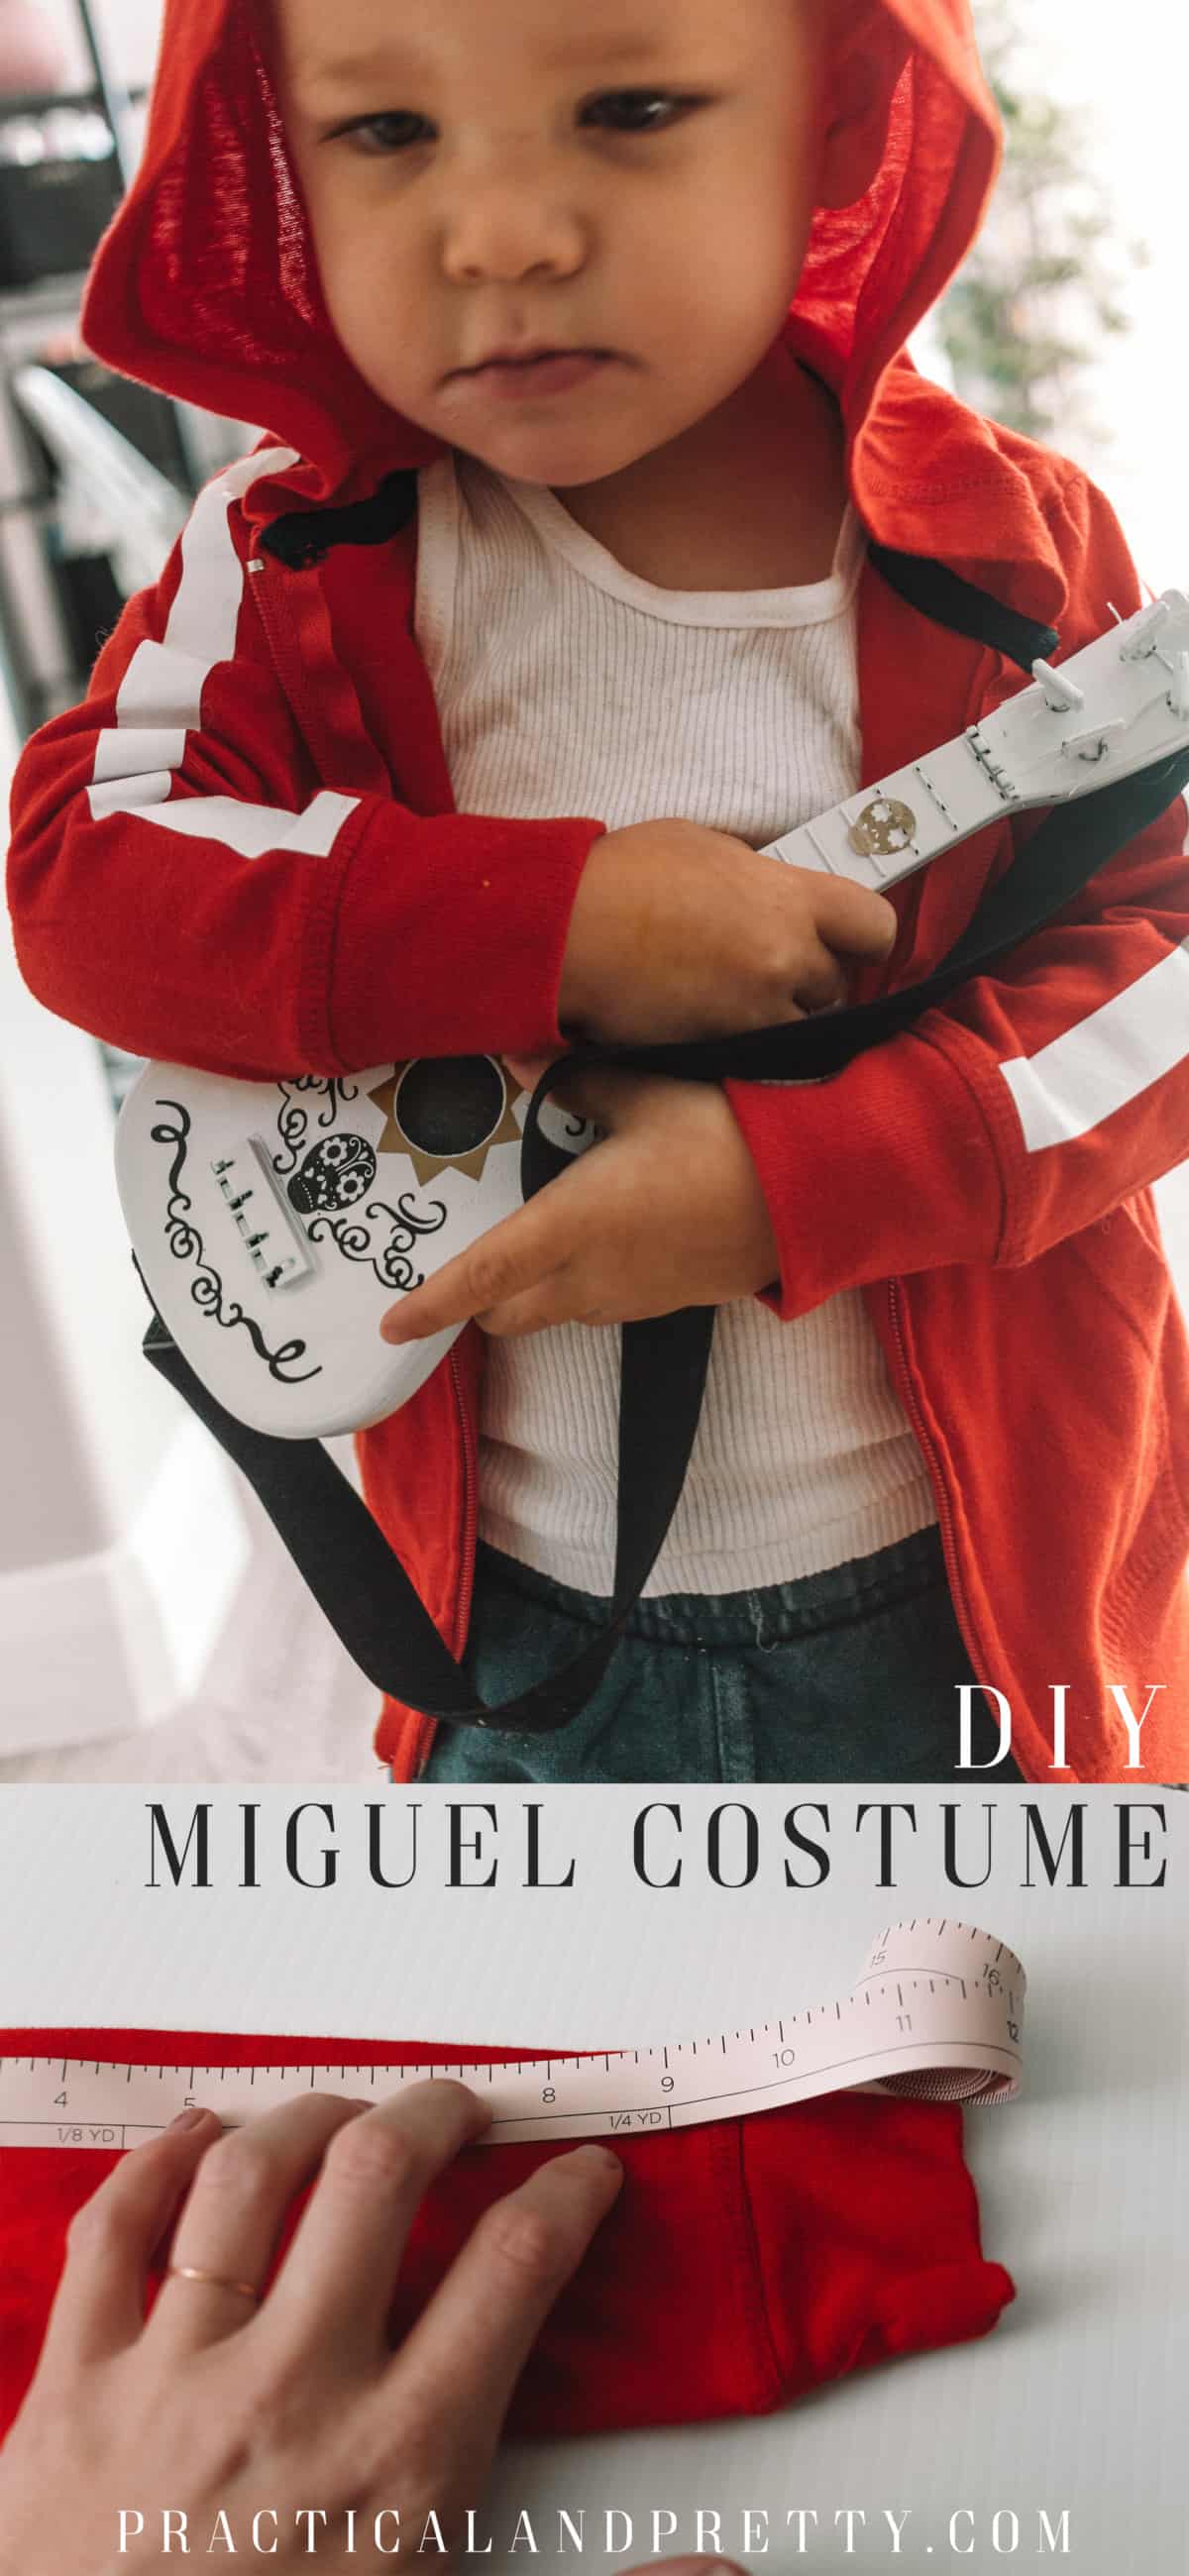
Have yourself a handmade Halloween with this simple tutorial for a DIY Miguel Coco costume! Perfect for a baby, toddler, child, OR adult!
This simple Miguel costume is one that can be used on Halloween and beyond. Who doesn’t love a ‘costume’ that can be worn as regular clothes come November 1st?! You can use a Cricut or just a pair of simple scissors.
My newest costume is this fun bluey costume. Don’t miss it and all my other DIYs, Halloween, and more!
I never fully understood why people love Halloween so much. Then I had a child. It is SO FUN!! Are you ready for an adorableness overload?! My son is so in love with Coco right now so I thought it would be a perfect and simple Halloween costume.
See the tutorial for this adorable guitar hop over here!
What you need for your DIY Miguel Coco Costume
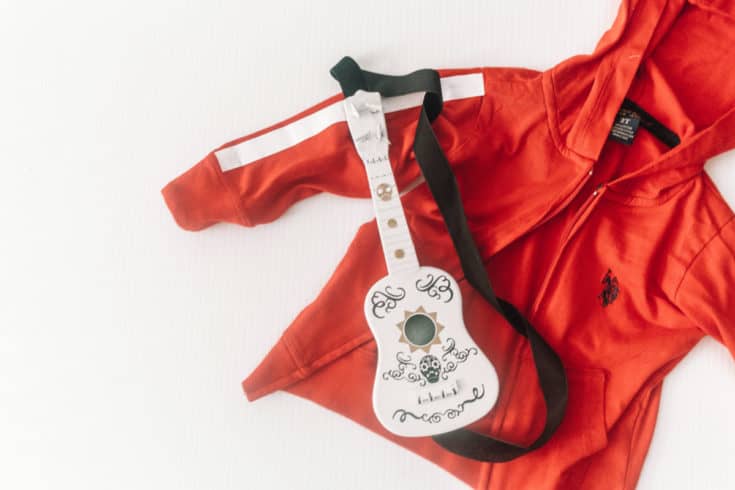
- Red Hooded Zip down Sweatshirt
- White Everyday Iron On
- White tank top
- Jeans (Similar Here)
- Cricut Maker
- Standard Grip Mat
- Tape Measure
- This File
- EasyPress 2 (or iron)
Make Your Coco Costume!
First, you will wash your hoodie! With such a rich color like this, I highly suggest washing this alone. I had to bleach my white tank tops because I washed them together. (That was dumb!)
After you have washed it pull out your tape measure! You will measure from the top of the shoulder seam to the arm cuff.
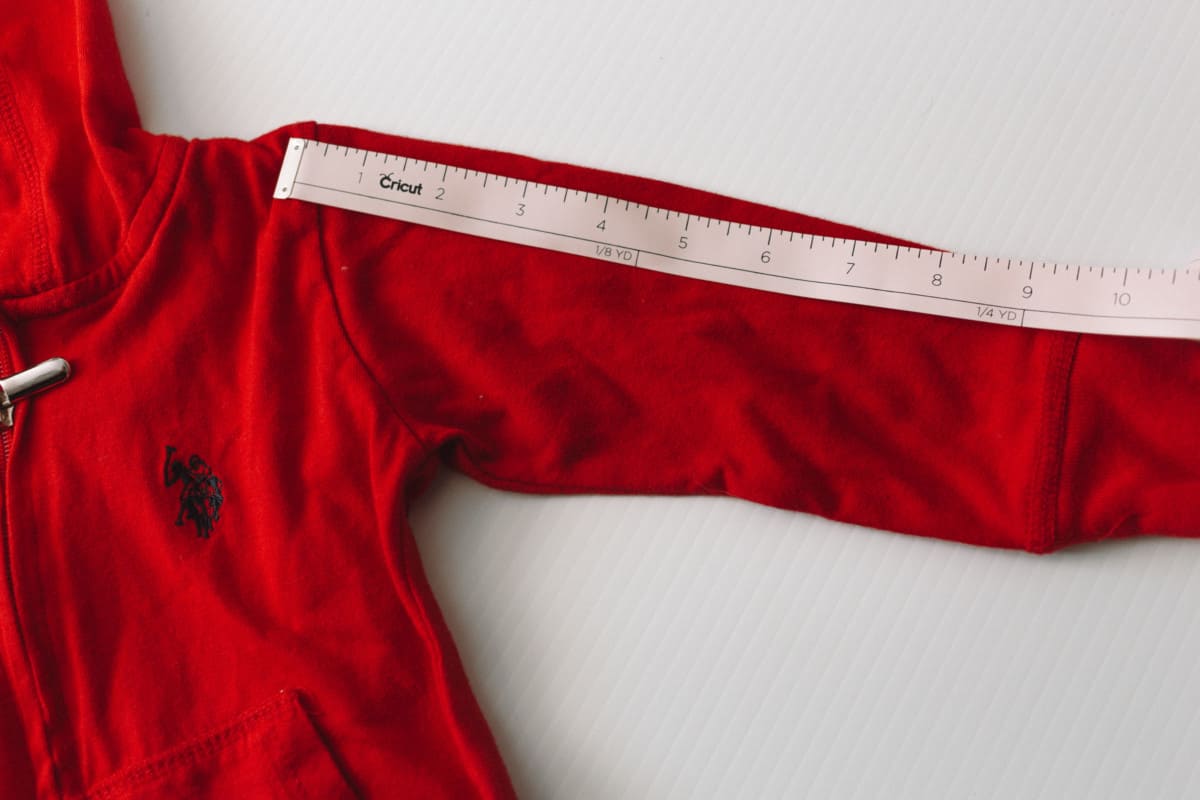
For a 2t, I measured 9.25 inches. It’s always best to overestimate and just cut off what isn’t needed after you cut it.
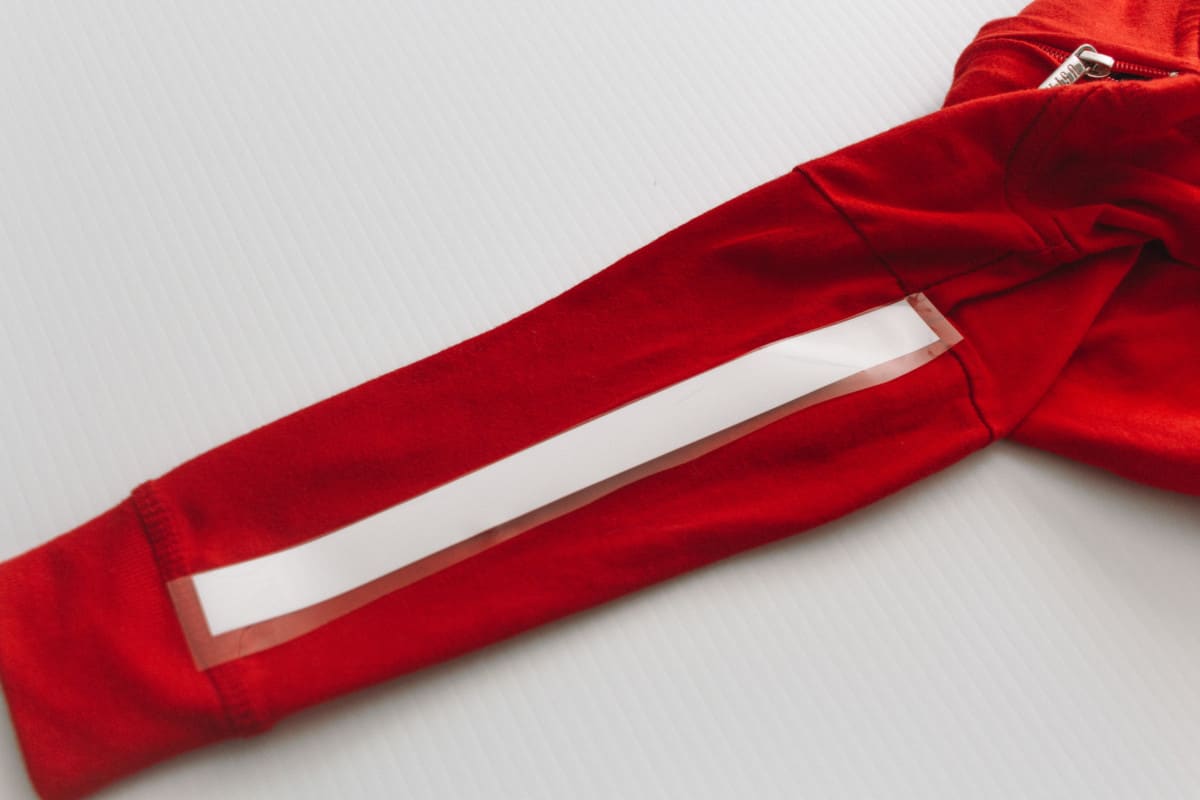
Load up your Cricut and cut your Everyday Iron on. You can use this file if you don’t know how to make a stripe yourself! You will need to adjust the length if you need it bigger or smaller.
If you don’t have a Cricut, simply use a straight edge and some scissors to cut out the stripe. The Cricut will make this a lot easier for you but cutting out a rectangle isn’t too hard either!

Once you have cut your iron on, you will lay the sleeve as pictured above. You want it to be right on the top of the child’s arm and on mine there was a line that showed me exactly where it needed to be!
Heat up your EasyPress to 320 and then press it on the sweater for 5 seconds to warm it up.
The EasyPress 2 makes this so dang simple. I used the 12″x9″ size so I only needed 30 seconds per side!
Remove your plastic and repeat this step on the other sleeve.
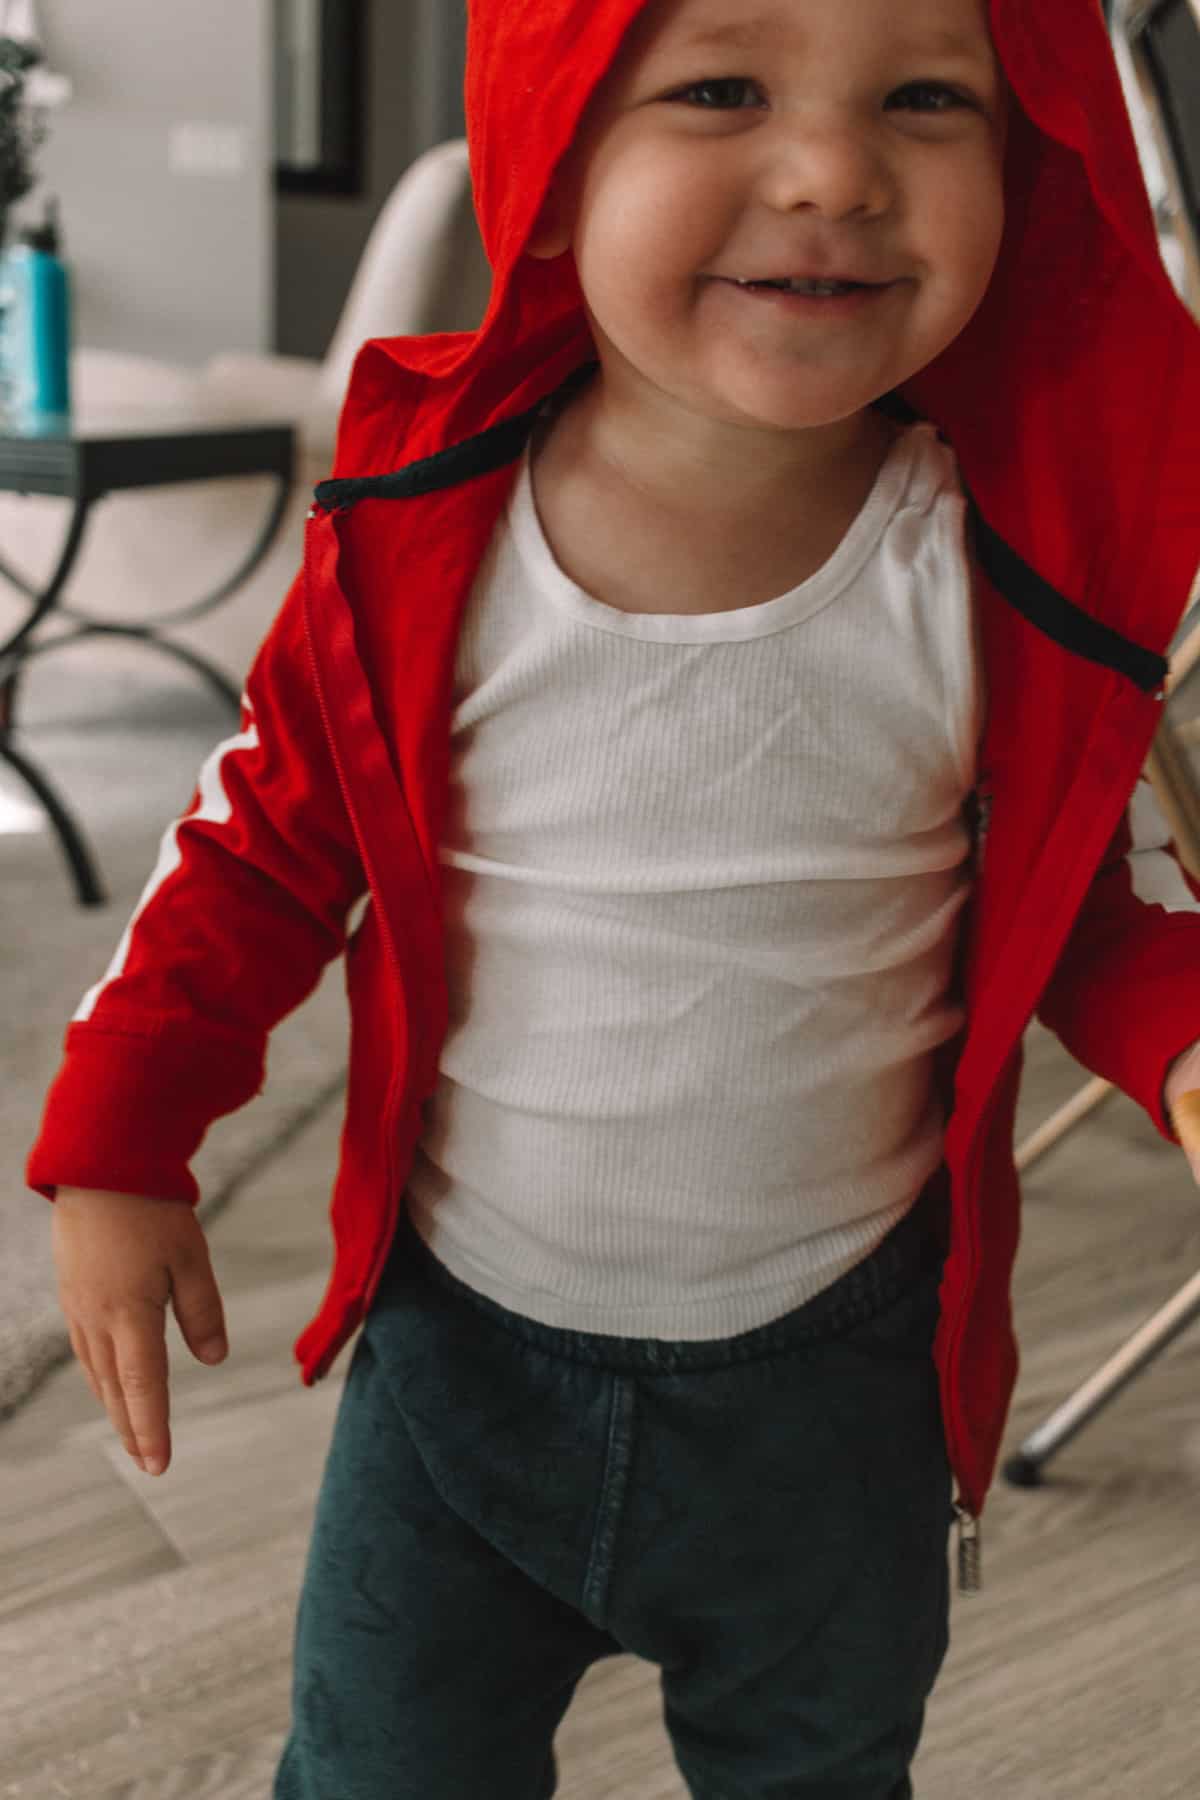
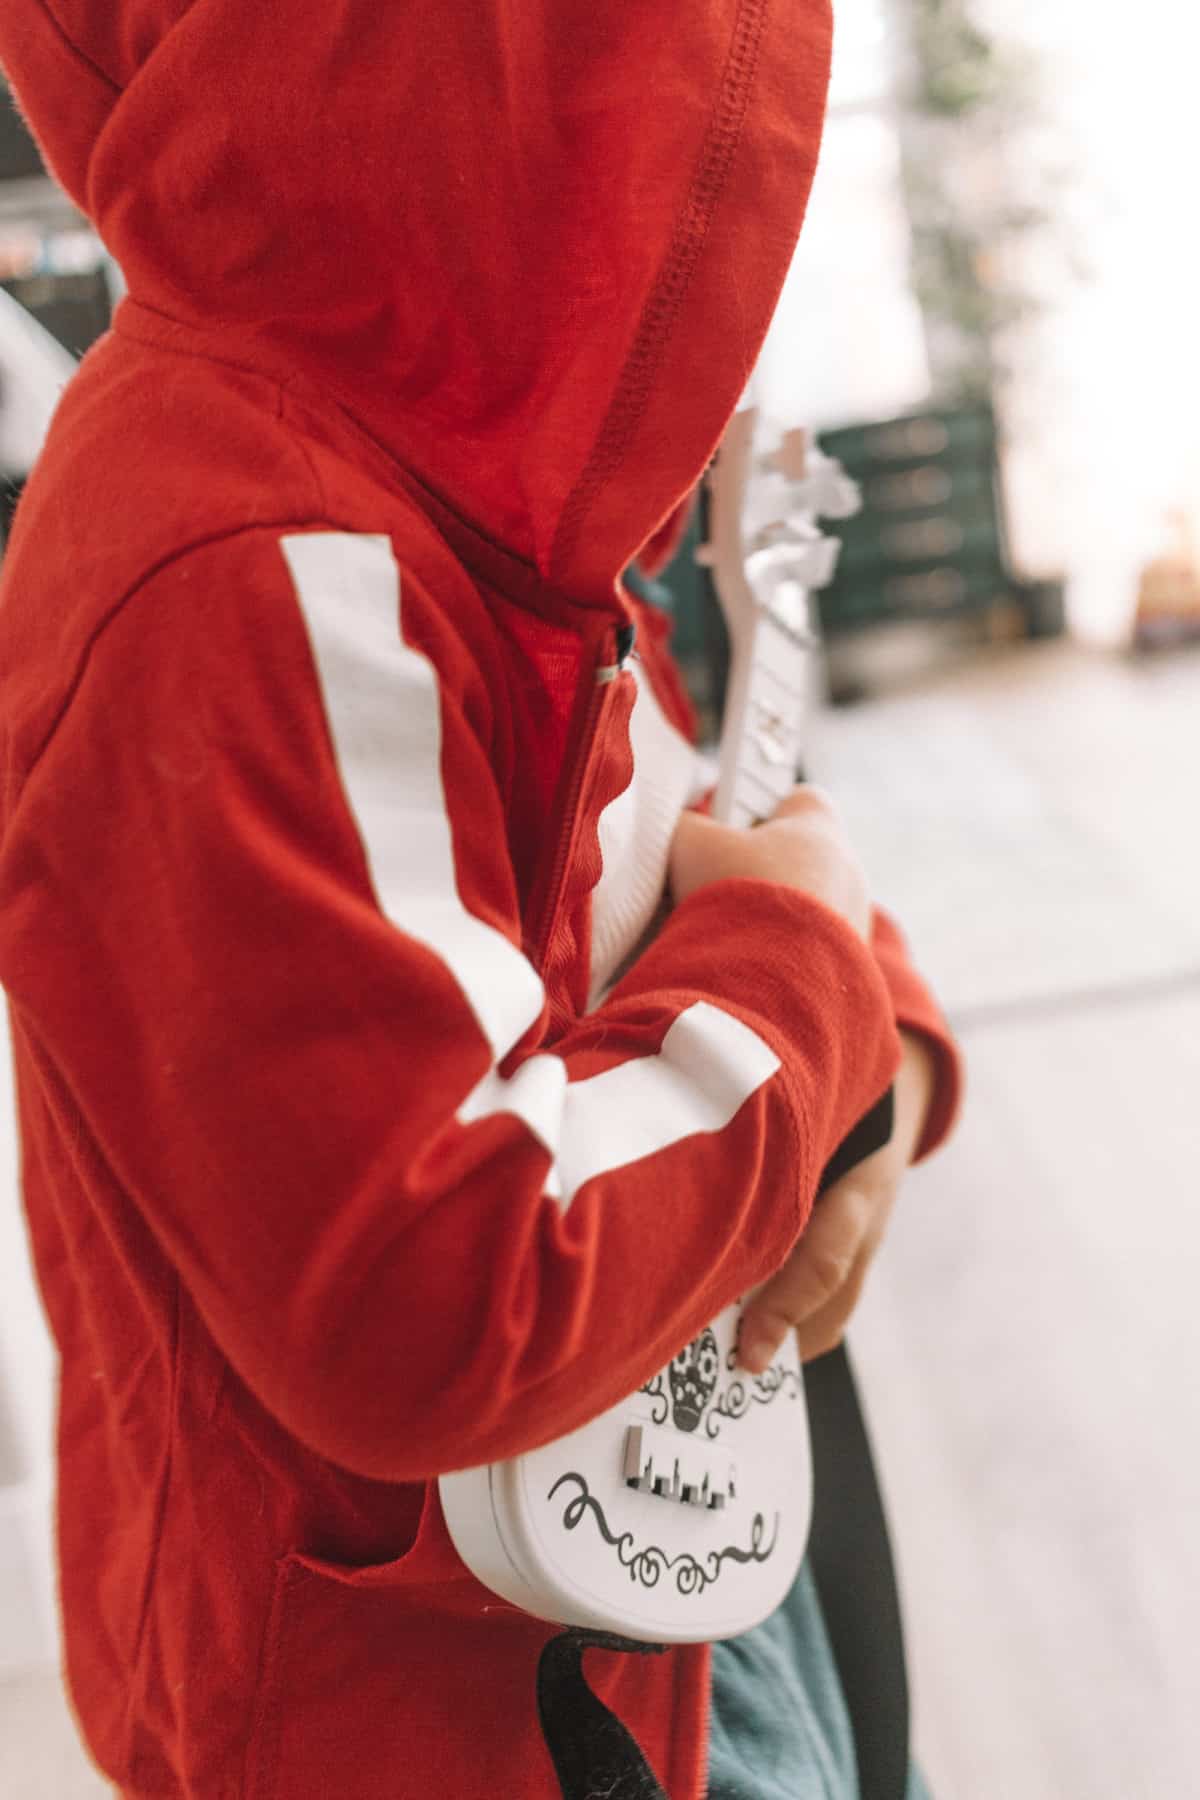
Put on the white tank top and jeans then layer the cute red sweater and you are all done! You will definitely want to make this DIY guitar too because it just totally completed the outfit for me.
I cannot wait for Halloween this year so everyone can see my little Miguel all ready to trick-or-treat in his handmade Halloween costume!
DIY Miguel Coco Costume with Your Cricut
Have yourself a handmade halloween with this simple tutorial for a DIY Miguel Coco costume! Perfect for a baby, toddler, child OR adult!
Materials
- Red Hooded Zipdown Sweatshirt
- White Everyday Iron On
- White tank top
- Jeans
Tools
- Cricut Maker
- Standard Grip Mat
- Tape Measure
- Cut File
- EasyPress 2
Instructions
- First you will wash your hoodie! With such a rich color like this, I highly suggest washing this alone. I had to bleach my white tank tops because I washed them together. (That was dumb!
- After you have washed it pull out your tape measure! You will measure from the top of the shoulder seam to the arm cuff
- For a 2t, I measured 9.25 inches. It's always best to .overestimate and just cut off what isn't needed after you cut it
- Load up your Cricut and cut your Everyday Iron on. You can use this file if you don't know how to make a stripe yourself! You will need to adjust the length if you need it bigger or smaller.
- Once you have cut your iron on, you will lay the sleeve like pictured above. You want it to be right on the top of the child's arm and on mine there was a line that showed me exactly where it needed to be!
- Heat up your EasyPress to 320 and then press it on the sweater for 5 seconds to warm it up.
- The EasyPress 2 makes this so dang simple. I used the 12"x9" size so I only needed 30 seconds per side!
- Remove your plastic and repeat this step on the other sleeve.
- Put on the white tank top and jeans then layer the cute red sweater and you are all done! You will definitely want to make this DIY guitar too because it just totally completed the outfit for me.
Recommended Products
As an Amazon Associate and member of other affiliate programs, I earn from qualifying purchases.
-
 Cricut EasyPress 2 Heat Press Machine (9 in x 9 in), Ideal for T-Shirts, Tote Bags, Pillows, Aprons & More, Precise Temperature Control, Features Insulated Safety Base & Auto-Off, Raspberry
 -
 GDMINLO Soft Tape Measure Double Scale Body Sewing Flexible Ruler for Weight Loss Medical Body Measurement Sewing Tailor Craft Vinyl Ruler, Has Centimetre Scale on Reverse Side 60-inch(White)
 -
 Cricut StandardGrip Cutting Mat 12"X24" 2/Pkg
 -
 Cricut Maker - Smart Cutting Machine - With 10X Cutting Force, Cuts 300+ Materials, Create 3D Art, Home Decor, Bluetooth Connectivity, works with iOS, Android, Windows & Mac, Champagne,26.38 x 11 x 11
 -
 Cricut Everyday Iron On - 12” x 2ft - HTV Vinyl for T-Shirts - StrongBond Guarantee, Outlast 50+ Washes, Use with Cricut Explore Air 2/Maker, White
 -
 Hanes Boys' Tank Undershirt, EcoSmart Cotton Shirt, Multiple Packs Available, White, Medium
 -
 Spring&Gege Youth Solid Full Zipper Hoodies Soft Kids Hooded Sweatshirt for Boys and Girls Size 3-4 Years Red
 -
 OshKosh B'Gosh girls Denim Jegging Jeans, Cornwall, 4T US


Where did you get the guitar?
Dollar tree!