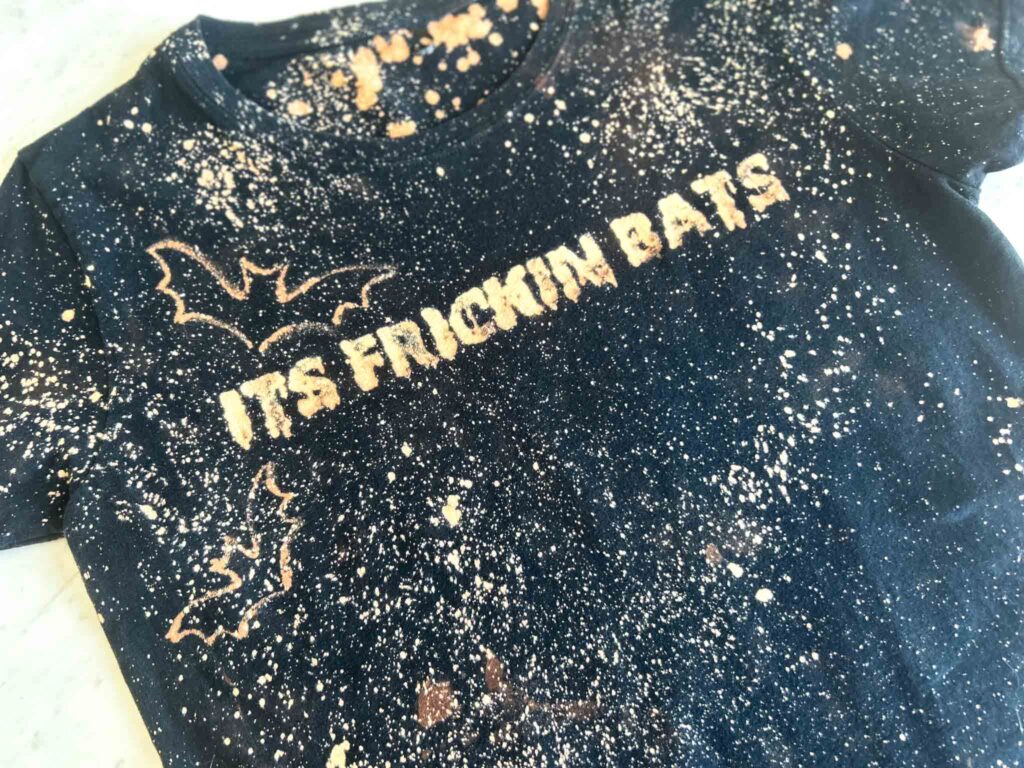
Painting with bleach might not be the first technique that comes to mind when you think of creating art, but it’s surprisingly simple!
I messed around and made all the mistakes while painting bleach so you didn’t have to. Check out the video tutorial and text instructions as well for all your questions about how exactly to paint with bleach utilizing a stencil.
Table of contents
You’ll find loads of dyeing and tie-dyeing tutorials here on my blog. Take a look around while you’re here! You may find this post interesting where I compared the different brands of dye to each other.
Whether you’re a seasoned artist or just looking for a new creative outlet, painting with bleach is a unique process that allows you to produce intricate designs and patterns on a variety of t shirts or other dark fabric.
In this guide, I’ll take you through the steps of how to paint with bleach, sharing tips, safety precautions, and inspiring ideas along the way.
Materials for Bleach Painting
Materials You’ll Need: Before we dive into the step-by-step process, let’s gather the essential materials:
- Bleach: Choose regular household bleach, which you can find at most grocery or convenience stores.
- Water: You’ll need water to dilute the bleach and control its intensity.
- Fabric or Paper: Decide what surface you want to paint on. Common choices include T-shirts or denim. I used a shirt for my project!
- Spray Bottle or Brushes: Depending on your preferred technique, you can use a spray bottle for a more diffused effect or brushes for finer details. You’ll want a thinner brush than you think because the bleach will spread.
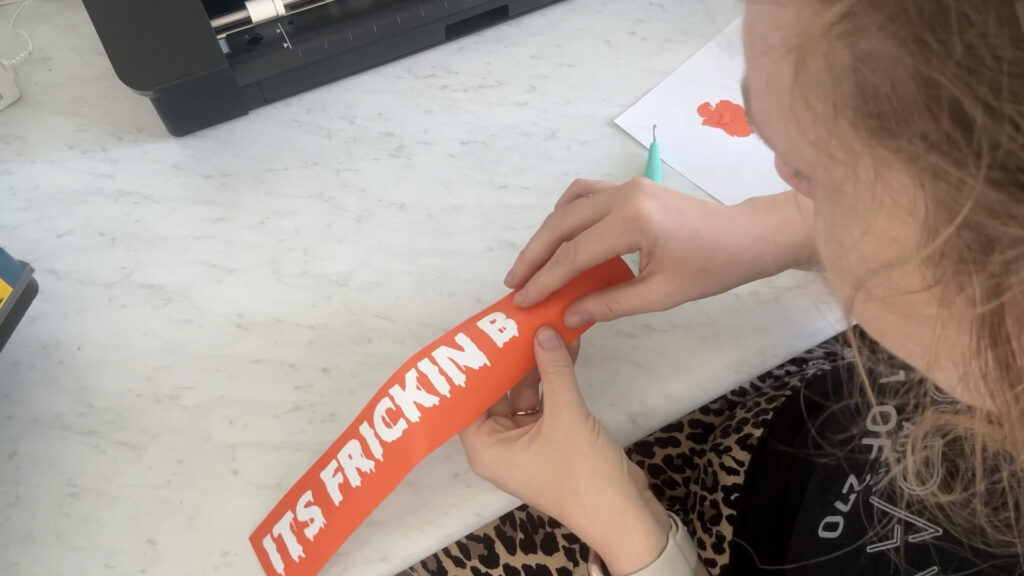
- Optional Stencil: Stencils can help you create precise patterns, while brushes are great for freehand designs. I used my Cricut to create the stencil you see in this post.
- Protective Gear: Safety first! Wear gloves, and an apron, and ensure proper ventilation in your workspace.
Painting with Bleach
Painting with bleach might not be the first technique that comes to mind when you think of creating art, but it's surprisingly simple!
Materials
- Bleach
- Water
- Fabric (shirt)
Tools
- Brushes
- Optional Stencil - I made mine with my Cricut
- Gloves
- Apron
Instructions
- Cut out or create your stencil if you're using one
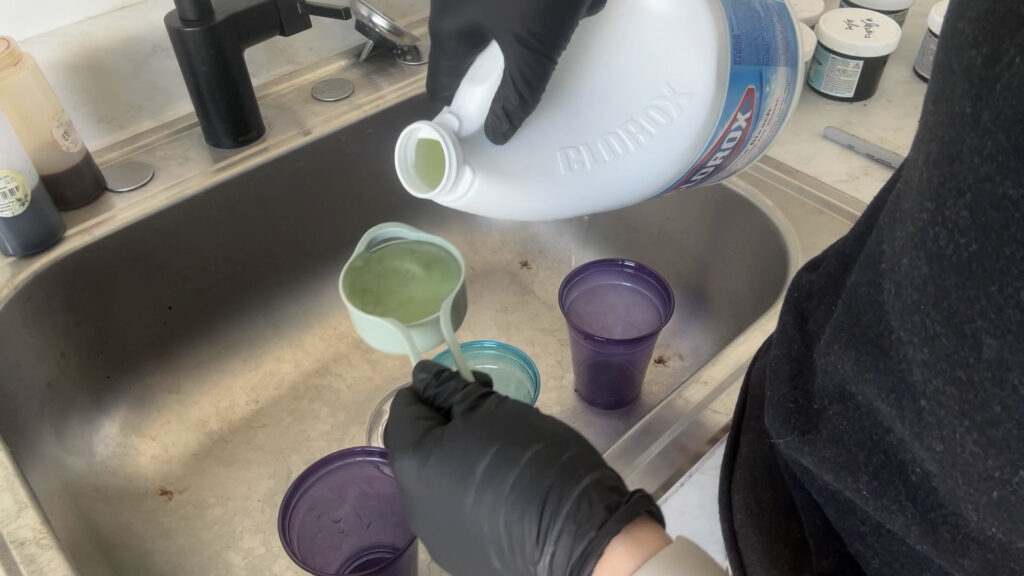
- Mix your bleach with water depending on how strong you'd like the bleach. I used 1/3 bleach, 2/3 bleach, and straight bleach.
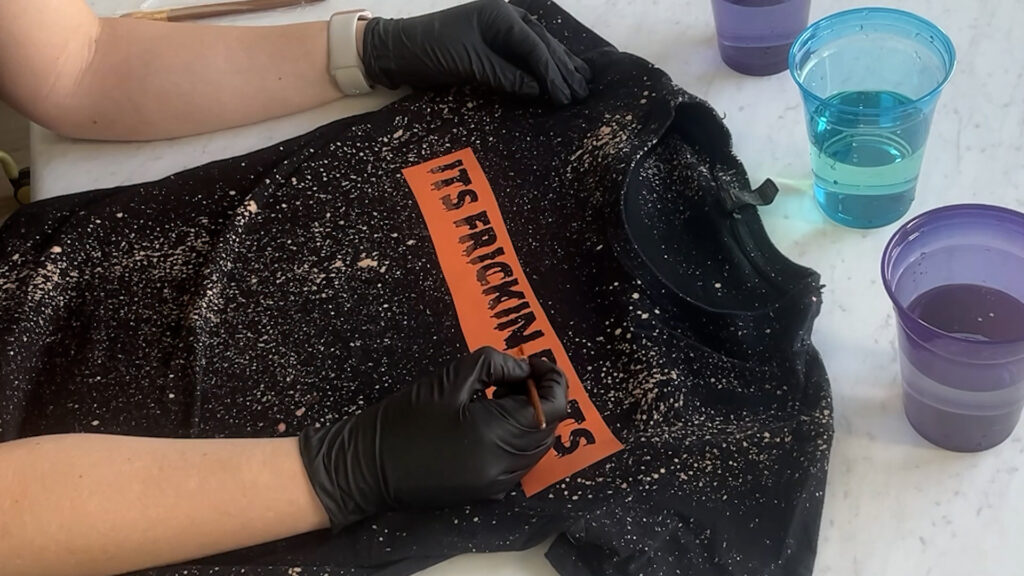
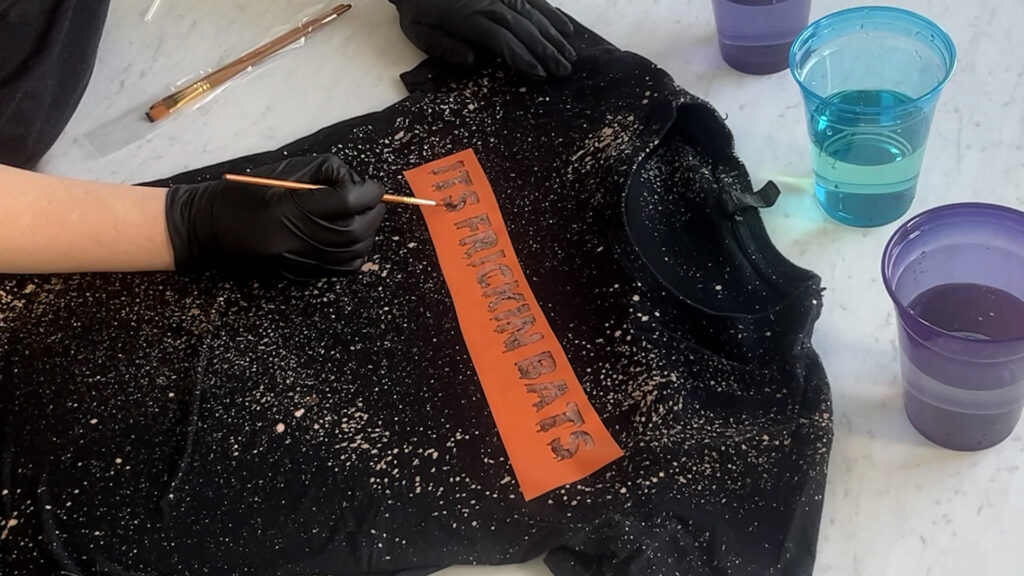
- Use your brush to brush on the paint. Start with the more diluted bleach first.
- Let your bleach sit until it's to your preferred level of bleaching.
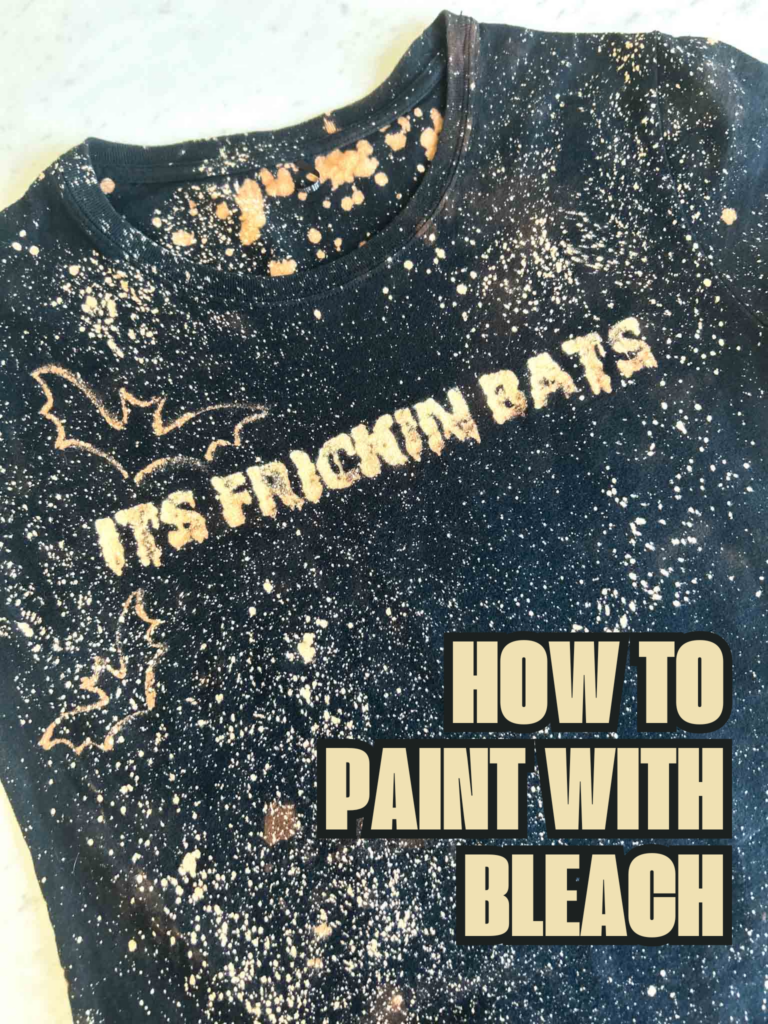
- Remove the stencil and rinse out with water.
Recommended Products
As an Amazon Associate and member of other affiliate programs, I earn from qualifying purchases.
-
 20 Pcs Paint Brush Set for Acrylic Painting, Watercolor Brushes, Acrylic Paint Brushes for Acrylic Oil Watercolor, Miniature Detailing, and Rock Painting
 -
 Hanes mens Essentials Short Sleeve T-shirt Value Pack (4-pack) toy tools, Black, X-Large US
 -
 Clorox 30966 Concentrated Regular Bleach, 121 Oz. | Pack of 2
Step 1: Preparing Your Workspace Set up a well-ventilated workspace. Bleach fumes can be strong, so it’s crucial to work in an area with good airflow. Lay down plastic or old newspapers to protect your surfaces from accidental bleach spills.
Step 2: Preparing Your Design Decide on the design you want to create. If you’re new to bleach painting, start with a simple pattern or shape. You can either freehand your design or use stencils for more intricate details. I used the Cricut to create my stencil. What I have found is that the more intricate designs actually turn out a bit better than trying to get crisp and sharp lines.
Step 3: Mixing Bleach and Water The bleach-to-water ratio depends on the desired effect. For a subtle look, mix one part bleach with 2 parts water. Medium strength solution is achieved through two parts bleach with one part water. For a bolder result, use a 1:1 ratio. Always add bleach to water, not the other way around, to prevent splashing.
Step 4: Testing on Scrap Fabric or Paper Before applying bleach to your final project, it’s crucial to test it on a scrap piece of fabric or paper. This will help you understand how the bleach interacts with your chosen material and determine the best application method.
Step 5: Applying Bleach Depending on your design, you can apply bleach using a spray bottle, brushes, or a combination of both. If using a spray bottle, adjust the nozzle for the desired spray pattern. Be cautious not to oversaturate the fabric or paper.
Step 6: Waiting and Rinse After applying the bleach, let it sit for a few minutes until the color is as vivid as you’d like it. The bleach will continue to work even after applying bleach. Once you achieve the desired color change, rinse the fabric thoroughly with cold water to stop the bleaching process.
Step 7: Drying and Fixing Allow your artwork to air dry or use a dryer on low heat. To set the bleach and prevent further fading, you can iron your piece or run it through a heat dryer.
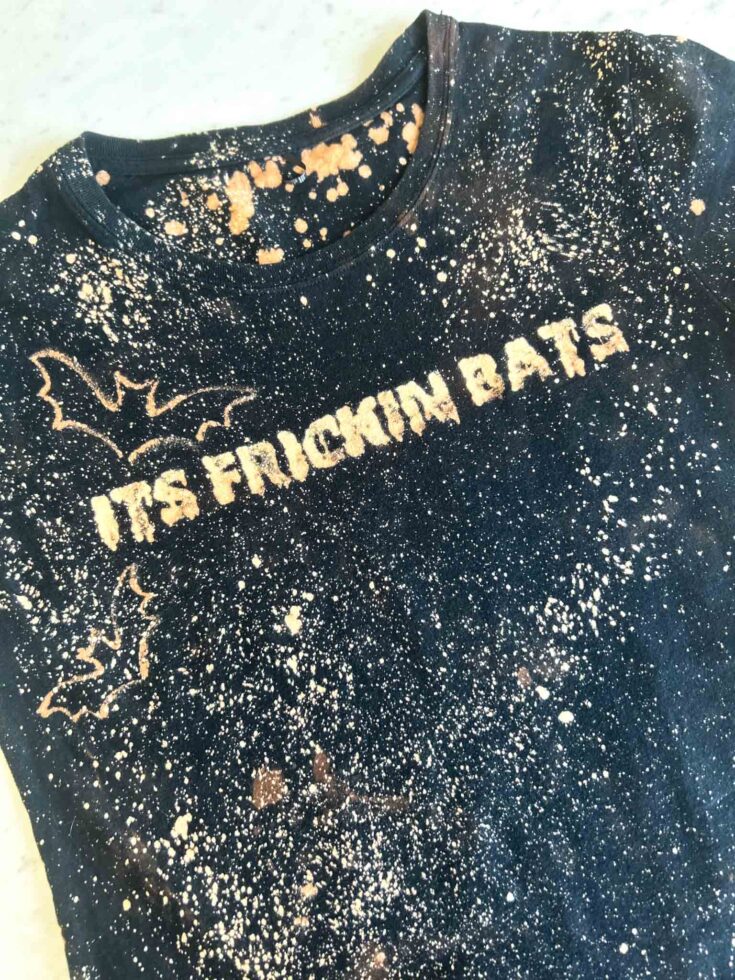
Step 8: Final Touches Your bleach-painted fabric is complete! Depending on your design, you can further enhance it with fabric markers, embroidery, or additional layers of bleach.
Bleach Painting FAQs
Do you wash clothes after bleach painting?
Yes, it’s important to wash clothes after bleach painting to remove any residual bleach and to ensure the safety of the wearer. Here’s a simple guide on how to wash clothes after bleach painting:
- Rinse: After you’ve achieved the desired bleaching effect on your clothing, rinse the bleached area thoroughly with cold water. This will help stop the bleaching process and remove excess bleach.
- Separate: Separate the bleach-painted clothing from other garments to prevent any potential transfer of bleach during the washing process.
- Washing Machine: You can usually wash bleach-painted clothing in a washing machine, but it’s a good idea to do it separately from your regular laundry. Use cold water and a mild detergent to wash the garment. Avoid using hot water, as it can reactivate the bleach and potentially damage the fabric.
- Gentle Cycle: Use a gentle cycle setting on your washing machine to minimize wear and tear on the clothing.
- Extra Rinse: Consider adding an extra rinse cycle to ensure all bleach residue is removed.
- Hand Washing: If you’re concerned about potential bleach residue or if the garment is delicate, you can also opt to hand wash it. Use cold water and a mild detergent, and gently agitate the garment to remove any remaining bleach.
- Drying: After washing, allow the clothing to air dry. Avoid using a high-heat dryer, as heat can further weaken fabric fibers and potentially affect the bleach-painted design.
- Final Check: Once the garment is dry, check to ensure that the bleach-painted area looks as intended. If any additional touch-ups or adjustments are needed, you can make them at this stage.
Remember that bleach can weaken fabric fibers over time, so it’s a good idea to wash bleach-painted clothing gently and separately from your regular laundry. Additionally, always check the care label on the clothing item to ensure you’re following the manufacturer’s recommendations for washing and care.
Do I use regular bleach to do bleach art?
Yes, you can use regular household bleach to create bleach art. Regular household bleach is typically what most people use for bleach art and tie-dye projects. However, it’s important to note that different brands of bleach may have varying concentrations of sodium hypochlorite, which is the active ingredient in bleach.
Best bleach painting ratio
This is all up to you. I did 33%, 66%, and 100% bleach for this project. In this video I tested strengths by 20 percentage points. It will help you pick what strength might be best for your project!
Safety Tips:
- Work in a well-ventilated area.
- Wear protective gear, including gloves and an apron.
- Avoid contact with eyes, skin, and clothing.
- Never mix bleach with ammonia or other cleaning products.
- Keep bleach away from children and pets.
Painting with bleach is a fascinating and accessible way to unleash your creativity and produce unique works of art. Whether you’re looking to customize clothing or experiment with abstract designs, this technique offers endless possibilities. So, gather your materials, protect your workspace, and dive into the world of bleach painting. You’ll be amazed at the stunning and original artwork you can create.


I really love your t shirt, great design. Thanks, I’m thinking of doing a bit of bleach work. 🙂
Thank you so much Maria!
have you ever tried bleach painting with OWB? Like mixing it with water and painting with it?
thanks!
I have! It doesn’t make a liquid it makes more of a paste so it’s pretty hard.