If you’ve been scrolling through tie dye inspiration and wondering where to start, you’re in the right place. Today I’m walking you through nine of my most popular tie dye patterns, ranked from easiest to most challenging. Whether you’re a total beginner or you’ve been tying for a while and want to level up, this guide will help you figure out which patterns to try first and what to expect when you get there.
I also made a full video going through all six of these — you can watch it here
Let’s get into it.
Quick Difficulty Overview
Here’s a snapshot of all nine tie dye patterns before we dig into the details:
| Rank | Pattern | Difficulty |
|---|---|---|
| 1 | Crumple | Very Easy |
| 2 | Spiral | Easy-Medium |
| 3 | Shibori | Easy-Medium |
| 4 | Bullseye | Easy-Medium |
| 5 | Heart | Medium |
| 6 | Fan Fold | Medium |
| 7 | Deity Roll | Medium-Hard |
| 8 | Geode | Hard |
| 9 | Glitch | Hardest |
1. Crumple (Easiest)
Why it’s ranked #1: You literally scrunch up a shirt. There’s no precise folding, no special tools, and the results are always gorgeous.
How to do a crumple:
The basic crumple is as simple as it sounds: grab your damp, soda-ash-soaked shirt and scrunch it into a ball, then secure it and apply your dye. That’s it.
A few tips to elevate your crumple results:
- Try a half crumple. Fold the shirt in half before crumpling for a more intentional, symmetrical look. It adds a little structure without making it harder.
- Apply dye to the bottom. Putting your darkest dye on the bottom of the crumple adds depth and dimension to the finished piece.
- Try it in the muck. If you’re doing a muck dye or doing dye over ice (DOI) with your crumple, the results are really fun and unexpected.
The crumple is a great starting point for beginners because you can’t really mess it up. Every crumple is one of a kind.
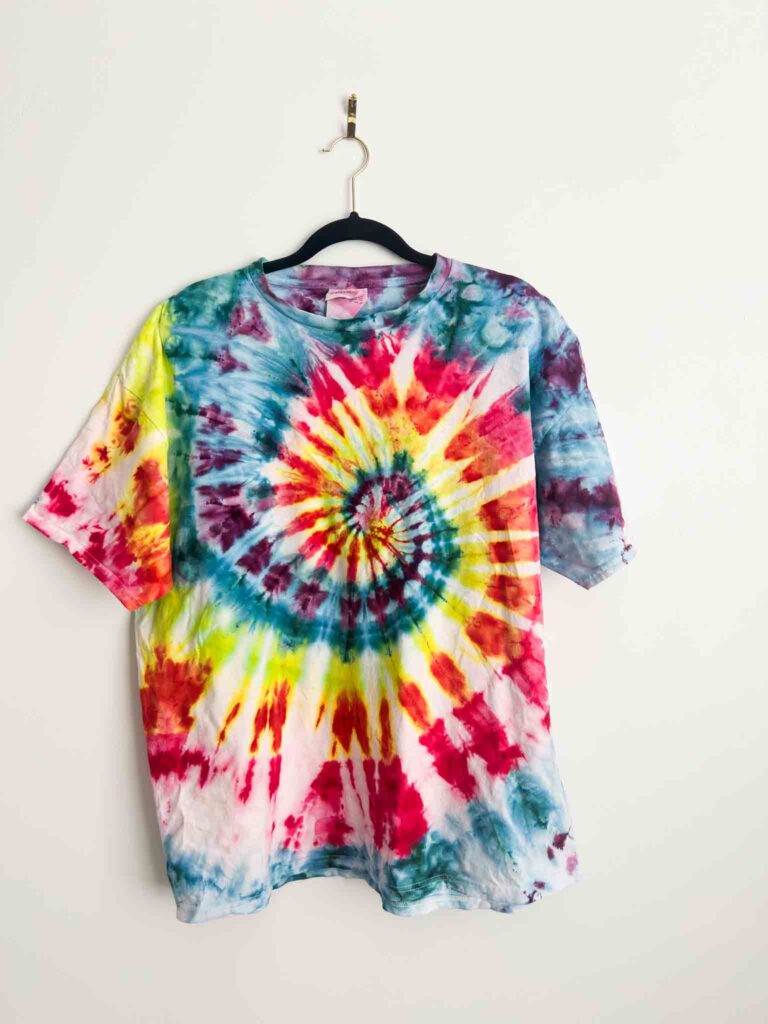
2. Spiral (Easy-Medium)
Why it’s ranked #2: A spiral is technically beginner-friendly, but it can get as precise and complex as you want it to be. That range is why it’s not in the #1 spot.
How to do a spiral:
- Lay your shirt flat and pinch the center point where you want your spiral to begin (above the belly button area is a classic starting point).
- Twist the shirt around that center point, keeping it flat as you go, until the whole shirt is coiled into a disc shape.
- Secure with rubber bands or painters tape, dividing the disc into sections like a pie.
- Apply dye to each section.
A note on securing your spiral: I personally prefer painters tape over rubber bands because it doesn’t bunch up the fabric and is easier to work with. That said, if you’re doing a reverse tie dye (bleach on a colored shirt), rubber bands are the way to go since they’re more bleach-resistant.
The spiral is forgiving at a basic level, but people spend a lot of time perfecting their spirals. The tighter and more even your coil, the cleaner your result. So it’s easy to learn but has a high ceiling.
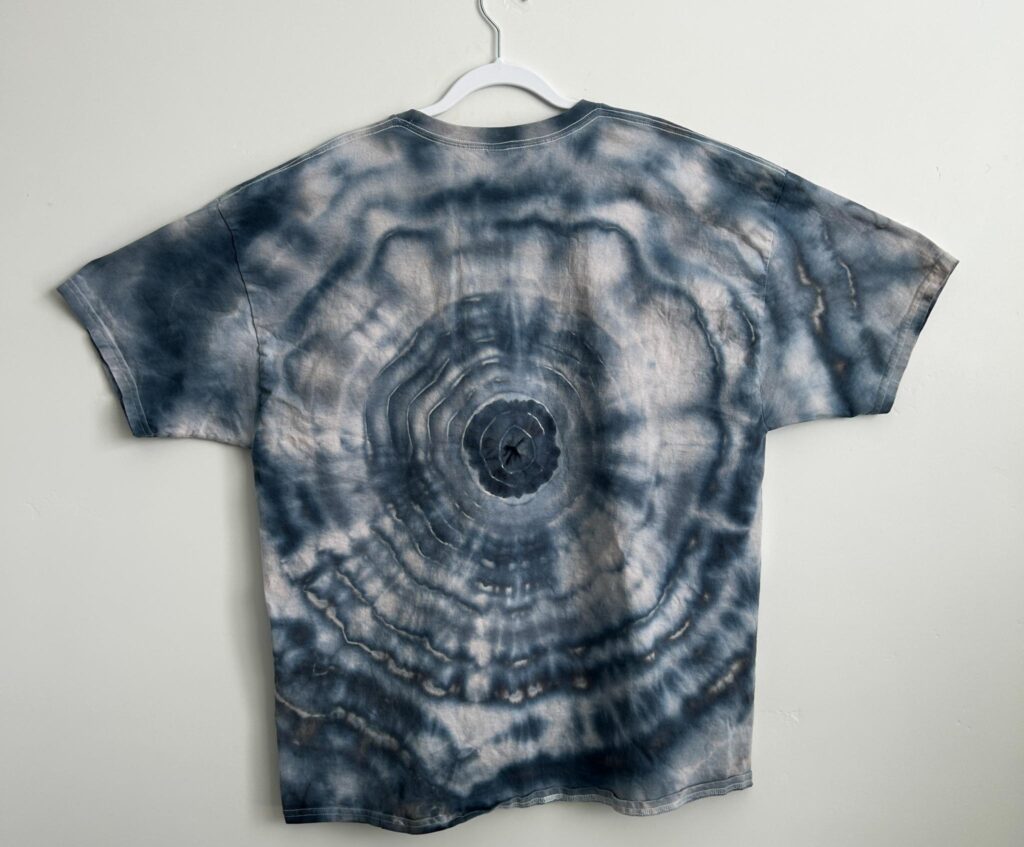
3. Shibori (Easy-Medium)
Why it’s ranked #3: Shibori is really a category of Japanese resist-dyeing techniques rather than one single pattern, so the difficulty depends on which version you’re doing. The triangle fold method below is one of the most approachable versions, it’s just fold, secure, and dip, with no precise measuring or tight binding required.
How to do a shibori clamp fold:
- Accordion-fold your fabric into a long strip.
- Fold that strip again into a smaller shape, like a triangle or square, so you end up with a compact folded bundle.
- Use rubber bands to secure the bundle.
- Dip the clamped bundle into your dye bath, or pour dye over the exposed edges. The areas under the clamps stay resisted and undyed. If you’re ice dyeing, place the triangle on it’s side and add ice and dye.

Tips for cleaner shibori results:
- The tighter your clamps, the crisper your resist lines. Loose clamps let dye seep under the edges.
- Try different clamp shapes (triangles, squares, circles) to change up the geometric pattern you get.
Traditional shibori is done with indigo, but the clamp-fold technique works beautifully with fiber reactive dyes too. It’s also the same basic idea I use for my shibori fold beach towels, just scaled up to a bigger piece of fabric.
4. Bullseye (Easy-Medium)
Why it’s ranked #4: A bullseye is really just a series of small spirals lined up next to each other, so if you’ve got the spiral down, this one is a quick next step. The tricky part is keeping your pinch points evenly spaced so the finished rings don’t crowd each other.
How to do a bullseye:
- Lay your shirt flat and pinch a small point of fabric wherever you want a bullseye to appear. Most shirts fit two or three comfortably.
- Pull the pinch point up and let the fabric fall into a loose cone shape around it.
- Wrap rubber bands around the cone at even intervals, working from the tip down to the base, so you end up with several distinct rings. In the below image I used sinew so I could do tighter rings. If you’re using rubberbands they may be larger circles.
- Apply a different color dye to each ring section. Or keep them all the same like I did!
Tips for a cleaner bullseye:
- Keep your rubber bands snug and evenly spaced. Uneven gaps make some rings thicker than others.
- Two or three bullseyes on one shirt looks more intentional than scattering five or six randomly if you’re using rubberbands.
The bullseye is a great pattern once you’ve got a spiral or two under your belt. It uses the same basic pinch-and-band motion, just repeated in smaller sections.
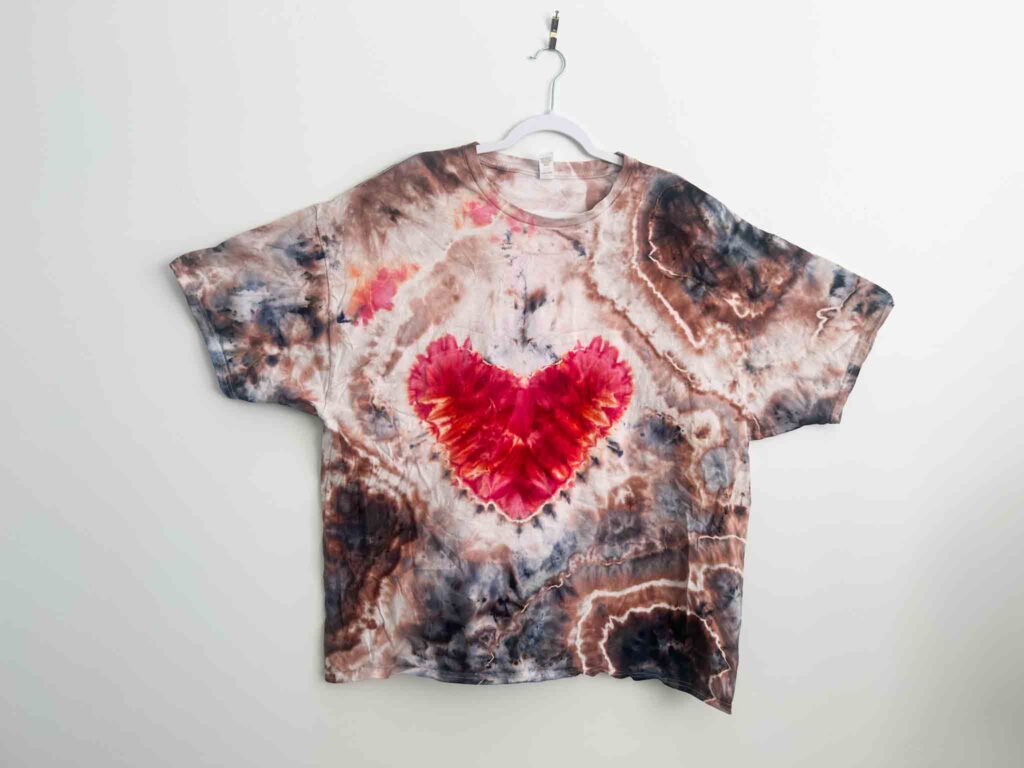
5. Heart (Medium)
Why it’s ranked #5: The shape itself takes a little planning since you’re drawing and folding along an outline rather than just twisting or scrunching. It’s not hard once you’ve done it, but your first attempt will probably take some trial and error to get the proportions right.
How to do a heart:
- Fold your shirt in half vertically and use chalk or a washable marker to sketch half of a heart shape along the fold, starting the point near the hem.
- Accordion-fold the fabric along your drawn line in small, even pleats, following the curve of the heart as you go.
- Secure the folded outline with rubber bands at regular intervals to hold the heart shape.
- Apply dye along the folded heart outline, and a contrasting color to the rest of the shirt if you want a background color.
Tips for a better heart:
- Keep your chalk line light. You want a guide, not a hard line to fold exactly on.
- Smaller, tighter pleats give you a crisper heart outline than long, loose folds.
This one is popular for gifts and kids’ shirts, and it’s worth practicing on a scrap piece of fabric first so you get a feel for the proportions before committing to your good shirt.
6. Fan Fold (Medium)
Why it’s ranked #6: The fold itself is not difficult, but the setup requires a little more planning than a crumple or a spiral. You need a way to elevate the folded shirt, and that extra step is what bumps it up in difficulty.
How to do a fan fold:
- Accordion-fold your shirt back and forth in equal pleats (like folding a paper fan). For a double fan fold, rotate the shirt and fold again in the other direction.
- Bind the folded shirt with rubber bands or sinew.
- Elevate the bound shirt in a gutter or gutter-like structure (a folded piece of cardboard works great).
- Apply dye and let gravity pull it down through the folds.
Why the elevation matters: A fan fold typically benefits from a gravity setup, meaning you want the dye to flow downward through the layers. Laying it flat will give you different results. The gutter holds the shape up while dye does its thing.

Check out a playlist of fan folds here.
Single vs. double fan fold: A single fold gives you parallel lines across the shirt. A double fold (accordion both horizontally and vertically) creates a grid-like pattern. Both are stunning. You can also fold from the bottom hem up for a completely different look.
7. Deity Roll (Medium-Hard)
Why it’s ranked #7: It looks simple, but there’s nuance to it. A deity roll is basically a spiral roll done twice, with the two rolls wrapped around each other. The wrapping is where people get tripped up.
I have a full tutorial video on this one that I’d recommend watching before you try it.
How to do a deity roll:
- Roll the shirt into a tight tube from one end.
- Roll it again from the other direction, creating a second roll.
- Wrap the two rolls around each other, securing them with rubber bands or sinew.
- For best results, elevate in a gutter just like a fan fold to let gravity work.
Tips for a better deity roll:
- Keep your rolls tight and even. Loose rolls result in muddy, undefined lines.
- When wrapping the rolls around each other, try to keep the tension consistent so the final shape is compact and holds together.
Once you get the hang of it, deity rolls come together quickly and the results are really distinctive. Just expect your first few to be a learning experience.
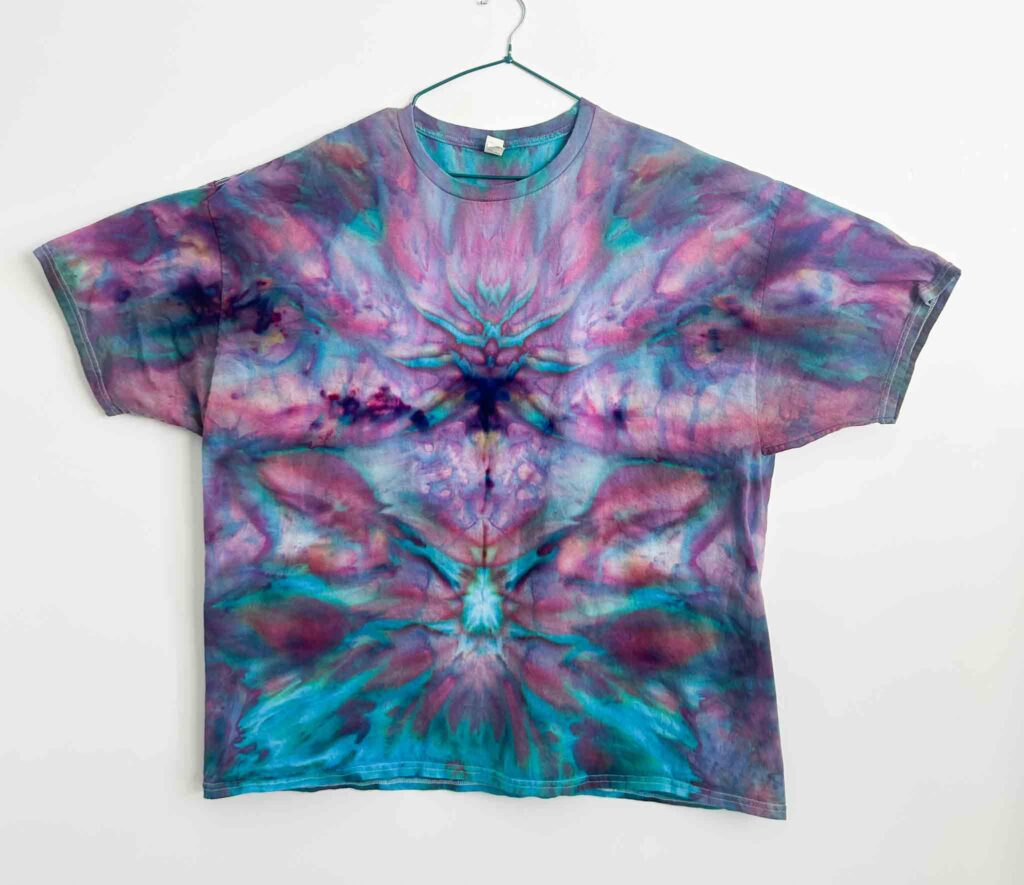
8. Geode (Hard)
Why it’s ranked #8: Geodes are not impossibly difficult, but they take practice to get right. Your first geode is probably not going to look like the ones you see on Pinterest, and that’s completely normal.
I have a full geode playlist that walks through the technique with different fabrics and sizes:
How to do a geode fold:
- Gather the shirt into a rough ball shape, creating nodules (little bunched-up sections of fabric) as you go.
- Secure the nodules with sinew, wrapping around each cluster of fabric to create the irregular, rock-like shapes that give geodes their look.
- Apply dye to the outside of the tied sections and in the recesses between them.

What makes geodes tricky:
- The nodules need variety. If your nodules are all the same size and neatly wrapped, they’ll look like concentric circles instead of a geode. You want different sizes, crumpled textures, and irregular shapes.
- It takes experimentation. You can watch 25 tutorials and still need to get your hands dirty to figure out what works for your hands, your fabric, and your dye.
One thing that helps: watch a few different geode videos before you start so you can see the technique on different fabric types. What works on a cotton tee is different from what works on a rayon dress.
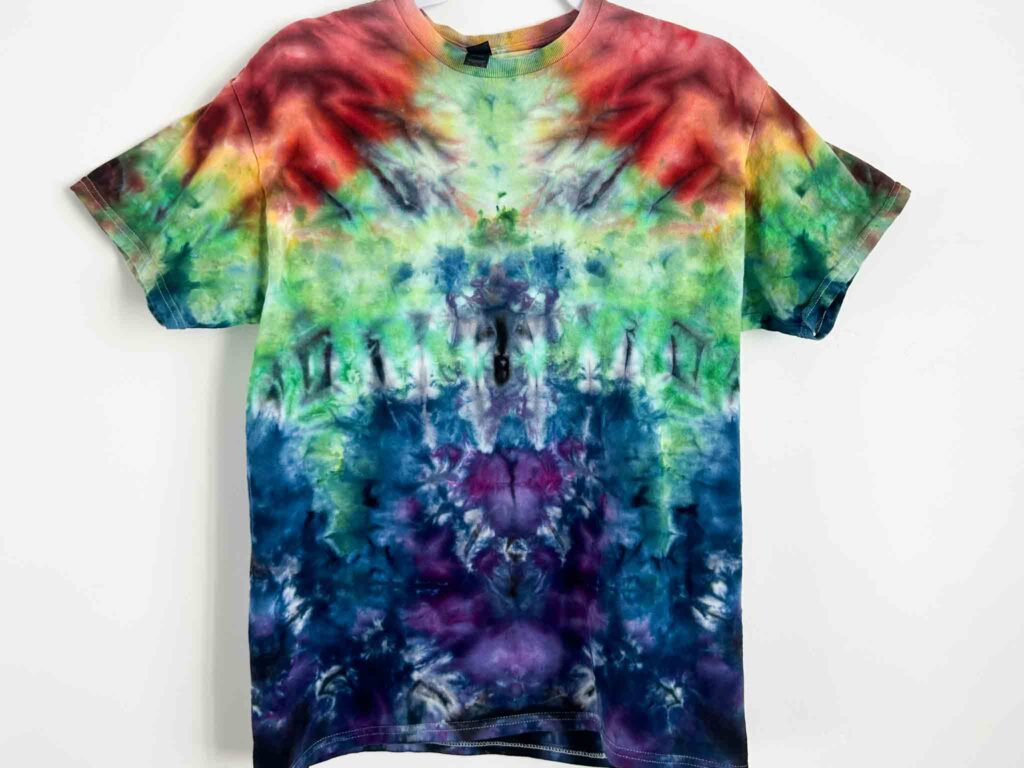
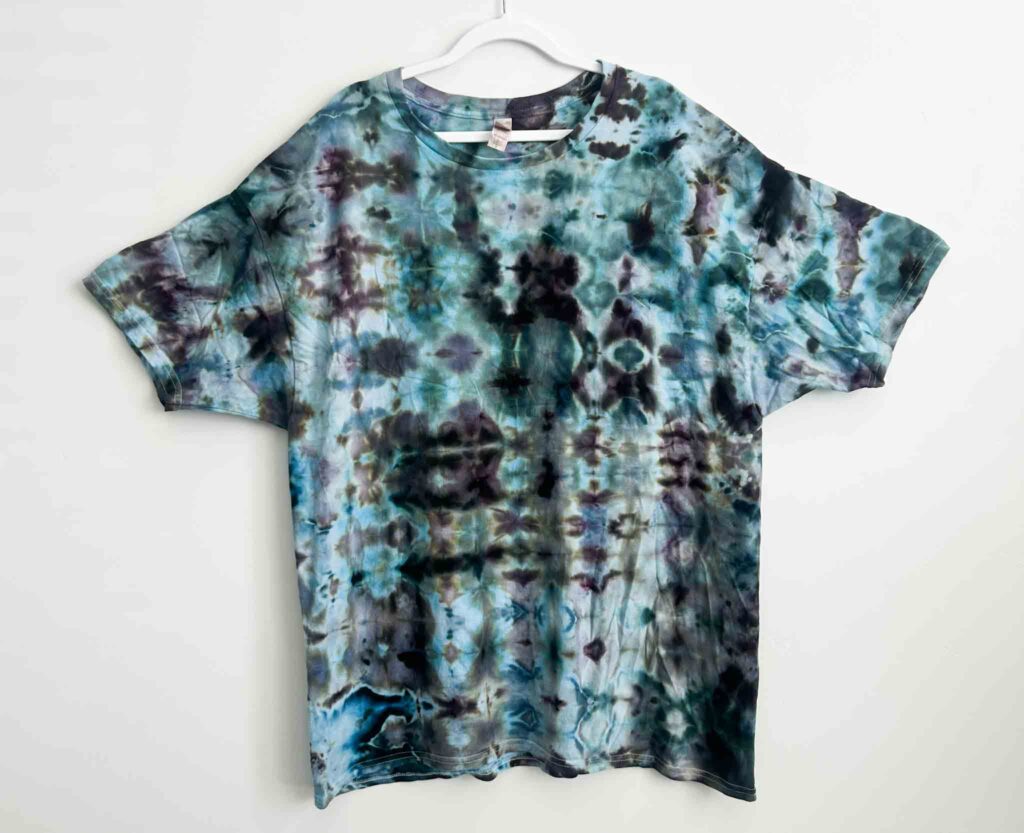
9. Glitch (Hardest)
Why it’s ranked #9: This is the most time-intensive fold on the list. The technique itself is not complicated, but the execution is slow and requires patience, which is honestly the hardest part for a lot of people (myself included).
I have a full glitch fold tutorial here.
How to do a glitch fold:
- Create horizontal and vertical pleats across the shirt. This is where the time goes. You’re measuring and folding precise lines, which requires a ruler. A 22-inch ruler is ideal; 18 inches will work.
- Accordion-fold the pleated shirt.
- Secure with rubber bands or sinew. For my glitch folds, I often use sinew more like kite string, wrapping it loosely rather than binding tightly.
- Apply dye.
Glitch timing reality check: A geode takes me about 5 minutes to tie up. A glitch takes me about 20 minutes. If you are an impatient person, that is useful information to have before you start.
Why it’s worth it: The finished result of a glitch fold is unlike anything else. Even with just two colors, the geometric patterning is stunning. The time investment absolutely pays off in the final piece.
Want even more folds? Check out my free ebook!
What to Try First
If you’re brand new to tie dye patterns, start with a crumple. Make a few. Get comfortable with how your dyes behave, how long to leave them, how to rinse. Then move on to a spiral.
Once you’re feeling confident with those two, try a shibori clamp fold or a bullseye, both use skills you’ve already built. From there, the heart and fan fold are great next steps. The deity roll, geode, and glitch are all techniques worth learning once you’ve got some patterns under your belt, and they each produce results that feel genuinely special when you finally nail them.
For full tutorials on each of these patterns, check out my YouTube channel and my geode playlist in particular if you want to dive into that one.
Want to see finished examples of all nine? Head to my Etsy shop to see real pieces made with these techniques.
Shop Supplies
Here’s what I use for most of these patterns:
- Fiber reactive dyes: Amazon storefront
- Sinew for geodes and glitch folds: Amazon storefront
- Clamps or wood blocks for shibori: Amazon storefront
- Jacquard dyes (use code ANNA for 20% off): Amazon storefront
Have questions about any of these tie dye patterns? Drop them in the comments. And if you try one of these, I would love to see it. Tag me on Instagram @storebrandanna or TikTok @practicalandpretty.


