• Skip to main content
  • Skip to primary sidebar
  • Skip to footer

Practical and Pretty logo

  • HOME
  • DYEING
  • DIY
  • PARTIES
  • CRICUT
  • SHOP
  • ABOUT
  • CART
You are here: Home / DIY / Infusible Ink Christmas Coasters

November 1, 2019

Infusible Ink Christmas Coasters

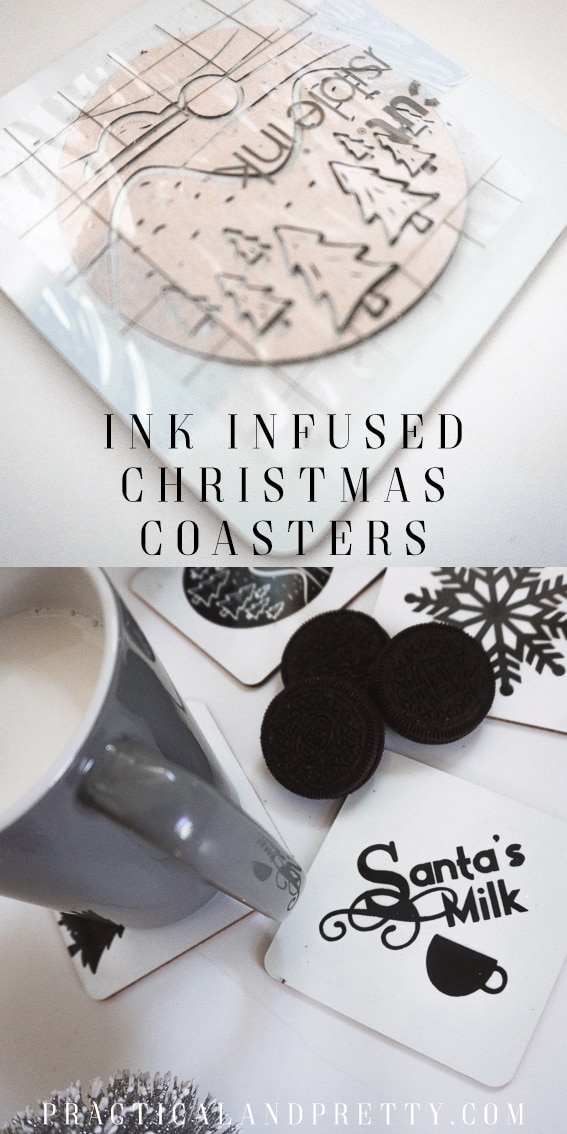
A simple yet professional-looking Christmas coaster tutorial. Use my designs or create your own and use Infusible Ink for the best results. 

Check out this post on how to make a t-shirt. If you want to use your infusible ink to make the t-shirts check out this post on infusible ink blanks too.

I recently did a project with infusible ink on a t-shirt and didn’t want to just stop there! I decided to put together a little coaster tutorial too so I could experiment with Cricut’s coaster blanks. This project was so fun and the end result honestly looked store bot. Those are my favorite!!

Check out this simple yet professional looking Christmas coaster tutorial. Use my designs or create your own and use Infusible Ink for the best results. 

What you need for your Christmas Coasters

Infusible Ink 

Coaster Blanks

Weeding Tool

Cricut (Maker or Explore Air 2)

EasyPress 2

EasyPress Mat

Cardstock

Heat Resistant Tape

Christmas Coasters Cut File

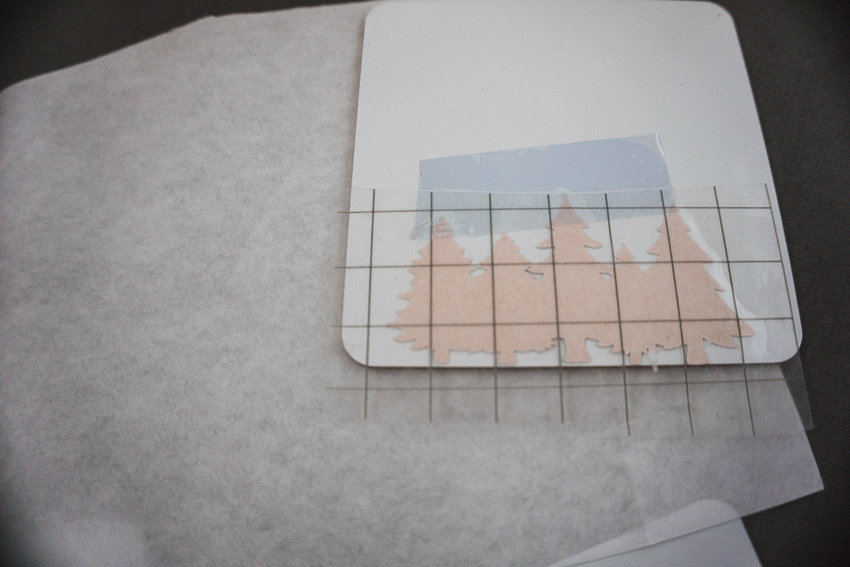
If you have never used infusible ink before, you are in for a treat. It gives such a professional finish and is really not too complicated. The first thing you will want to do is mirror for iron on with your cut file. This step is very important! Unless you have symmetrical shapes then I guess it doesn’t matter.. but if you have words do this!

If you have a Maker you simply select ‘Infusible Ink’ as your material and then start the cutting.

Cricut Maker cutting infusible ink

Once your design is cut take care as you weed your design. If you’ve weeded iron on or vinyl before this is going to feel different so take your time until you get the hang of the different texture. The texture is similar to that of a lightly sticky cardstock.

Once you have your design weeded, use your heat-resistant tape to secure the design where you’d like it on your coaster. This ensures that you won’t get a ‘ghosting’ effect which happens if the sheet shifts a bit during the heating process.

Check out this simple yet professional looking Christmas coaster tutorial. Use my designs or create your own and use Infusible Ink for the best results. 

Place your EasyPress 2 on the design (use the Heat guide if you’re unsure or if your materials differ but for these coasters, I did 385 degrees for 40 seconds.) Allow for your coasters to cool before you handle them they are very hot! If you notice in the picture below you can see the black ink below the tan sheet. This is a good sign! I was nervous it would look like it smeared when I saw this but it didn’t, it just means it has infused.

Check out this simple yet professional looking Christmas coaster tutorial. Use my designs or create your own and use Infusible Ink for the best results. 

Remove the plastic and top piece of the sheet. It should leave the color (or in my case.. lack thereof) where your sheet was.

Check out this simple yet professional looking Christmas coaster tutorial. Use my designs or create your own and use Infusible Ink for the best results. 

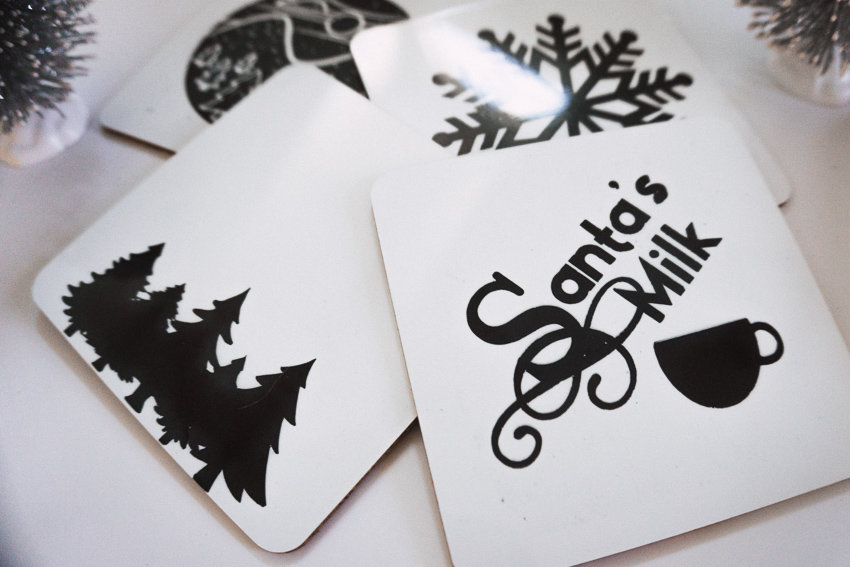
The designs turned out so crisp and professional. I’m planning to make all sorts of these babies as Christmas gifts and more! It was so easy and they look beautiful. Win-win.

Filed Under: Christmas, Cricut, DIY, Home Decor Tagged With: Christmas, christmas diy, cricut, gift idea, home decor, quick diy

Reader Interactions

Trackbacks

  1. Cricut Infusible Ink Blanks - Do I Really Need Them? - Practical and Pretty says:
    November 10, 2019 at 9:54 am

    […] Infusible Ink Christmas Coasters […]

    Reply

Leave a Reply Cancel reply

Your email address will not be published. Required fields are marked *

Primary Sidebar

SEARCH

I’m Anna!

Welcome!

I’m Anna and love practical and pretty things. You will find DIYs here as well as party ideas and of course, natural dyeing tutorials. I’m so glad you’re here.

FEATURED ON

PARTIES

DIY Custom Tablecloths

Customize a tablecloth to your event using this step by step tutorial for custom tablecloths. This was for a birthday party but it will apply to any event!

Blippi Party Ideas and Supplies

Customize this party hat to your color scheme and needs for your next fun party! I show you how I made a simple pom pom and assembled the hat.

Birthday Blippi Shirt

This silly Blippi shirt is perfect for the birthday child or you could even make a few for all the guests! They will get a kick out of what it says. 

Free ‘It Is Your Birthday’ Banner

it is your birthday banner

NATURAL DYEING

Forest Fairy Costume Featuring Tie Dye

How to Dye with Pine Cones

pine cone dye vat

Dye with Quebracho for a Beautiful Red

If you're looking for a beautiful red natural dye, look no further than quebracho! This gave the most beautiful hue and was a simple process.

How to Dye with Turmeric Video Tutorial

Here I will show you how I dye with turmeric to get a rich orange and yellow color. I demonstrate you in real time with a video!

CRICUT PROJECTS

DIY Disneyland Coupons with New Maker Tools

This coupon book of fun Disneyland coupons is a great idea for your next Disneyland trip! I'll walk you through how I created it with my Cricut Maker Tools.

DIY Yoga Shirts with Your Cricut

Random Acts of Kindness Cards

Use these little kindness cards to spread kindness on February 17th or any day you want to celebrate random acts of kindness!

DIY Bath Salt Recipe with Free Sticker Label

This simple bath salt recipe is an easy way to gift a nice DIY to your favorite person and I included a label to make it feel even more custom.

Footer

Copyright © 2023 Practical and Pretty on the Brunch Pro Theme