I compared Cricut Infusible Ink on Cricut blanks to just regular cotton. I’ll give you my completely honest opinion if it’s worth it.
Wondering how to use Cricut infusible ink on coasters or totes? I’ve got a post breaking it down. I also have a post here on how to make a t-shirt using iron on. Don’t miss out on ALL my Cricut projects.
Cricut has released Infusible Ink and I have been playing around with them a bit. I have been super impressed with the professional quality it produced but wondered if there was any way I could use it on some of my own clothes. I’m currently pregnant and my son is a little too small for their smallest tee shirt size right now so I grabbed some of our shirts to see if I could get away with using infusible ink on cotton.

What I used in this Project
- Patterned Infusible Ink
- Solid Black Infusible Ink
- Cricut Blank Tee Shirt Women’s Medium
- Cricut Blank Tee Shirt Youth Small
- Plain Cotton Maternity Tee Shirt
- Plain Cotton Toddler Tee Shirt
- Cricut EasyPress 2
- Cricut Maker
- Plain Cardstock
- Butcher Paper (Came in my infusible ink rolls)
- “WOOF DAVID” cut file
- Mickey cut the file from this post
First things first, these were 100% cotton. Cricut tee shirt blanks are polyester so that alone may be a big factor!
So my methods: I used the same heat and sheet of Cricut infusible ink for both of these comparisons. I tried as best I could to not have any variation. Of course, with patterns, I can’t get the exact spot of the patterned ink on both shapes.
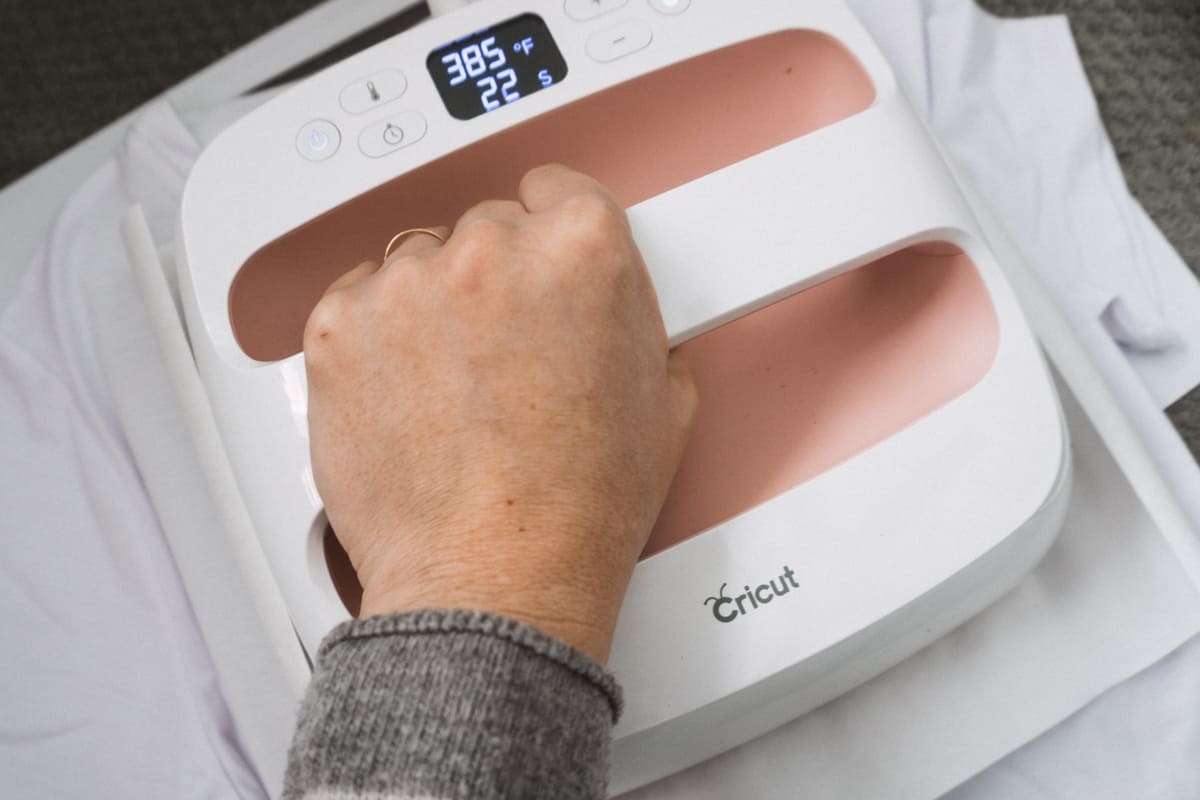
I heated them at 385 degrees for 40 seconds each with my EasyPress 2
How to Use Infusible Ink
I compared Cricut Infusible Ink on Cricut blanks to just regular cotton. I'll give you my completely honest opinion if it's worth it.
Materials
- Infusible Ink
- Infusible ink blank
Tools
- EasyPress
- Cricut
- Cardstock
Instructions
- Open your cut file and before you go to cut make sure you mirror for iron on!
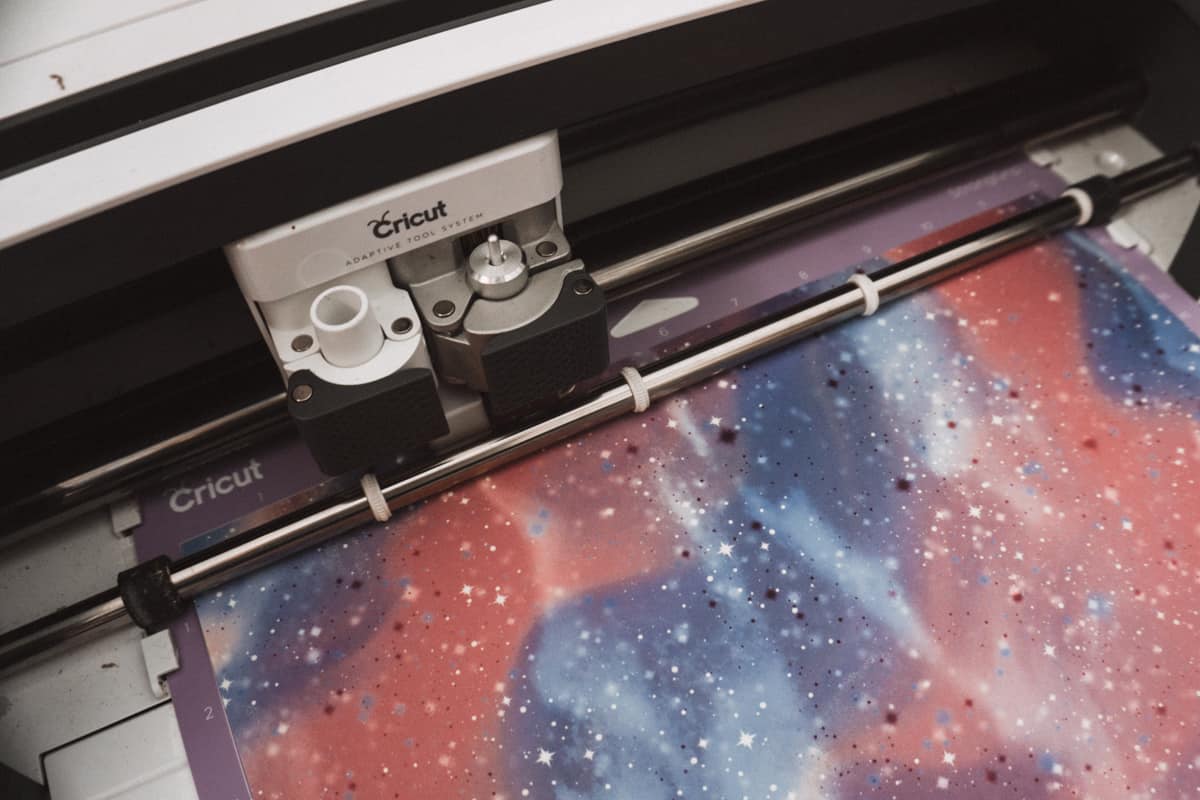
- Start by cutting your Infusible ink. Place the sheet face up on the mat. Set your Explore Air 2 smart dial to 'Custom' and select 'infusible
ink' as your material. - Use your fingers to weed the Infusible ink. I suggest wearing gloves to prevent transferring the ink to the plastic.
- Place your regular iron-on on a standard grip mat with the shiny side facing down and cut it out
- Start with your infusible ink by placing a piece of cardstock in the shirt.
- Place the weeded sheet upside down with the color facing the shirt.
- Place a piece of butcher paper over the plastic and then place your EasyPress 2 on for 40 seconds at 385 degrees. Let the ink cool before removing all of the pieces.
- Next, you will remove the plastic piece and see the design!
- After the blue part is finished you will place the orange piece on and then place the butcher paper over it again. I did this to protect the infusible ink I already had applied. This time you will heat it at 320 degrees for 30 seconds.
- Remove the plastic once it is cooled off and you are all done!
Recommended Products
As an Amazon Associate and member of other affiliate programs, I earn from qualifying purchases.


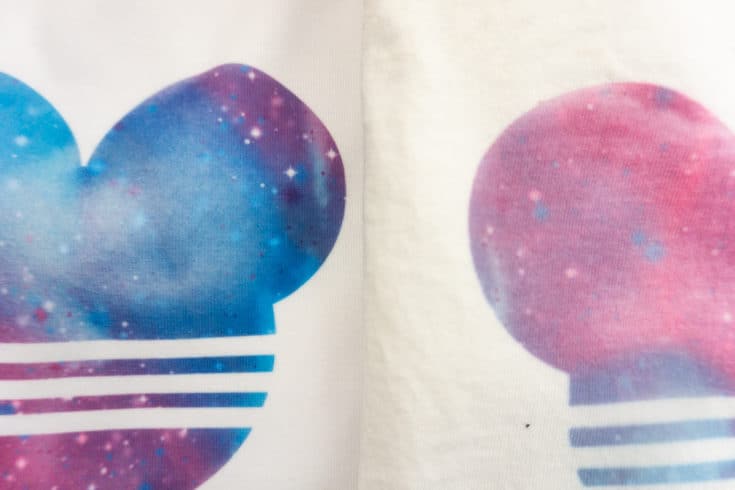
Solid or Patterned Infusible Ink?
One of the first comparisons you will see here is pattern vs solid color. From what I found I will say if you must use cotton, opt for a patterned infusible ink. The imperfections are much less noticeable. The solid color makes it very apparent that it is uneven.

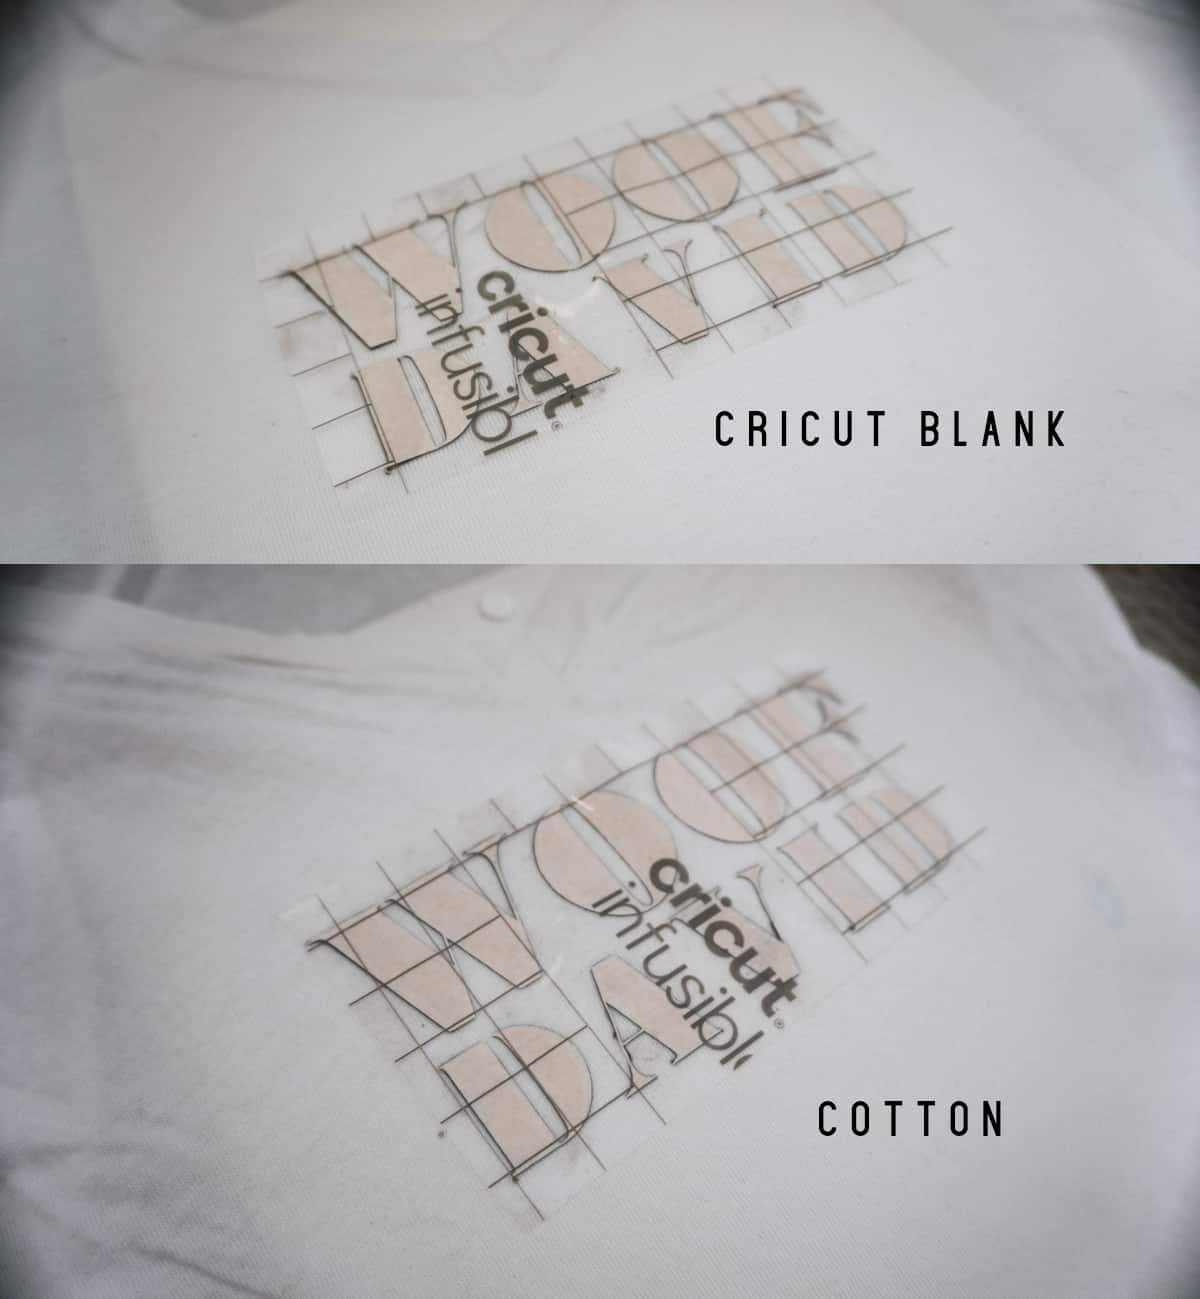
How does cotton take infusible ink?
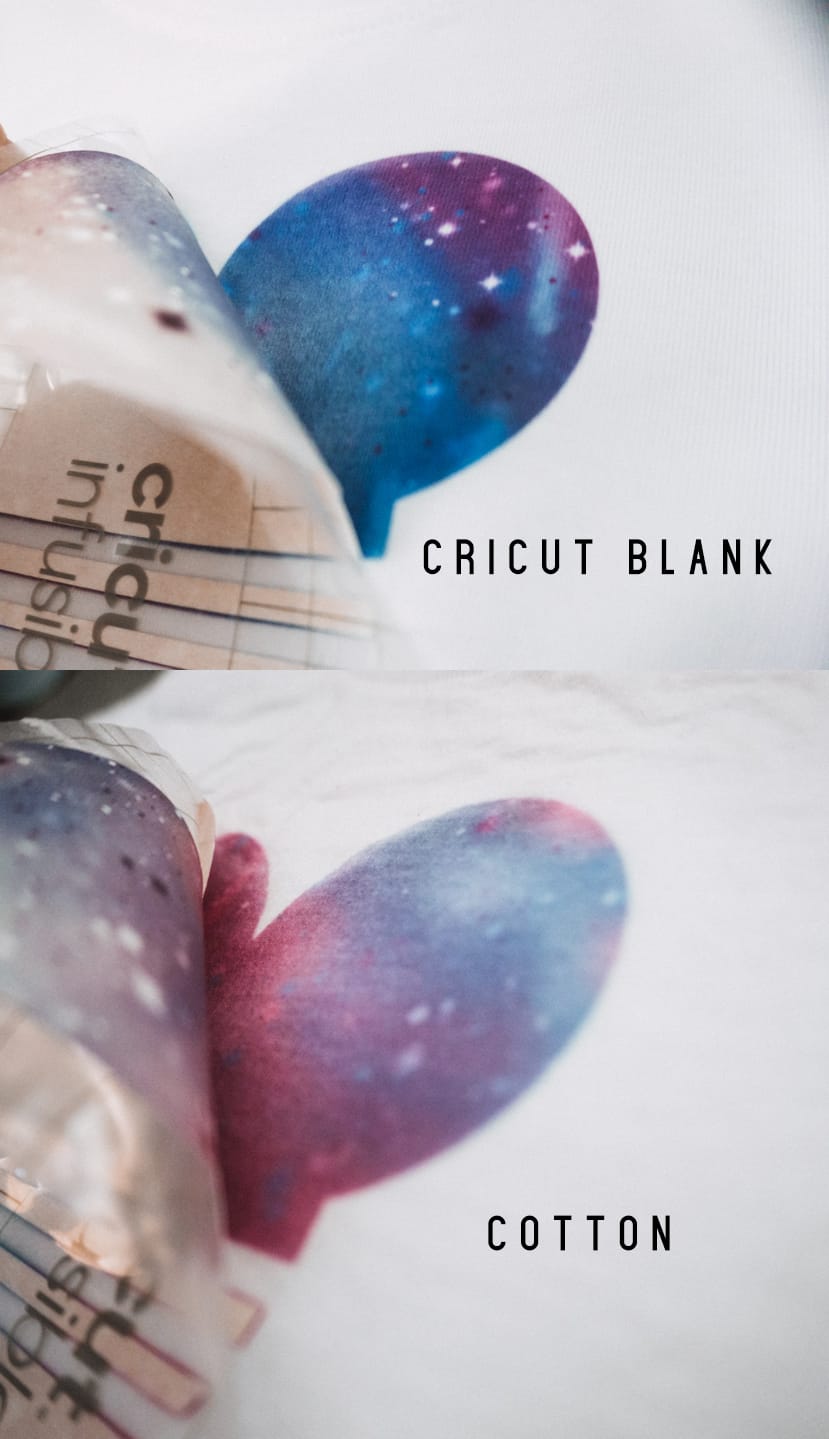
Infusing the ink seemed to work the same way for both. I tried to see if they looked different before I removed the coverings. See for yourself!
Here’s another bit of imagery to display how much ink was actually infused into the fabric. You can see on the piece I lifted up how many colors were left on the sheet versus the shirt. Obviously, the Cricut blank took WAY more of the color.
Will my design differ if I use cotton?
The last thing I want to point out is likely the most important point. If you’re doing skinny little things in your design, go for a Cricut blank. Look at how the text warped on my cotton shirt here.
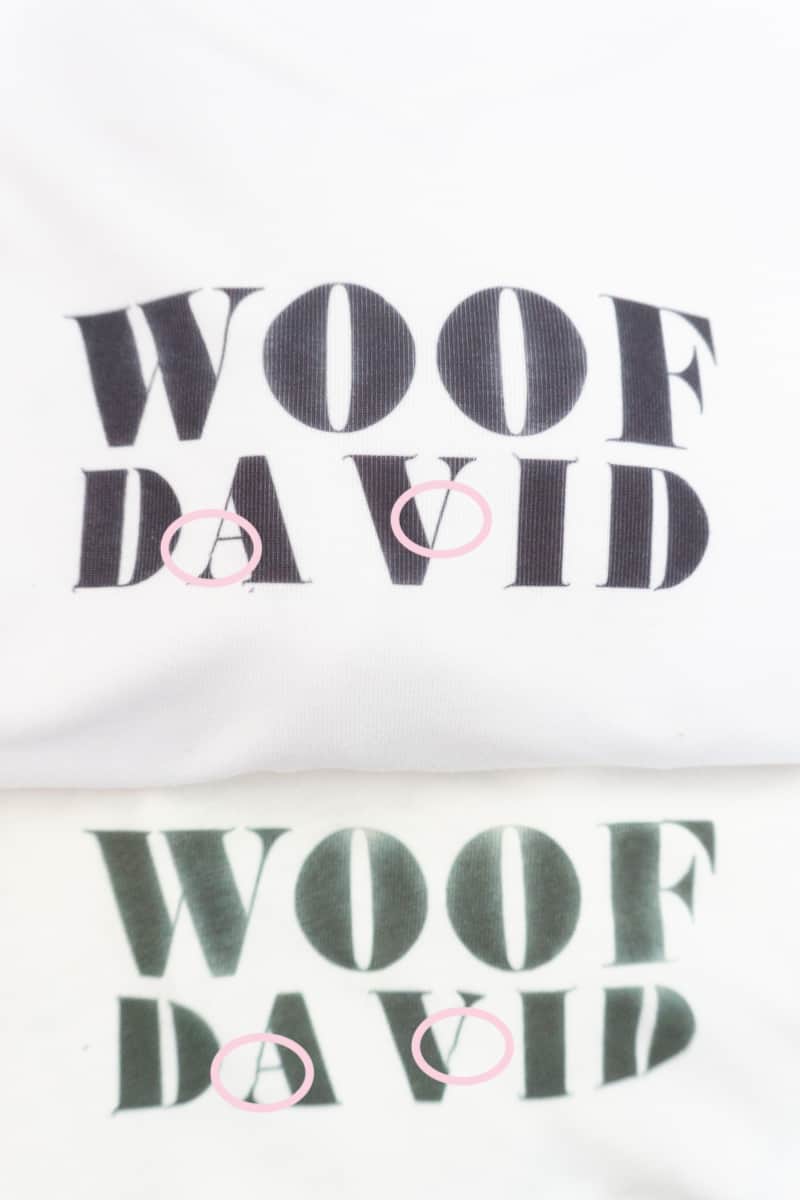
The Cricut Blank just kept my design how it should look as opposed to a more DIY look with letters.
In conclusion, the designs on the cotton still won’t lift and peel off like regular iron-on, so that is a win. Especially with my toddler who thinks my iron-on is a sticker and pulls at it! This Mickey shirt will last us quite a while. I will also definitely be wearing my maternity shirt because I love the design on it but I WISH I could have the vivid colors the blank created here. Long story short, it’s worth it to buy blanks if you care about a professional level of quality! If you’re just making silly fun shirts you’ll wear once, then sure use your existing cotton shirt!
Never Used Infusible Ink?
Looking for more of a how-to with Cricut Infusible Ink? I’ve made these projects with tutorials in them.


One thought on “Cricut Infusible Ink Blanks – Do I Really Need Them?”