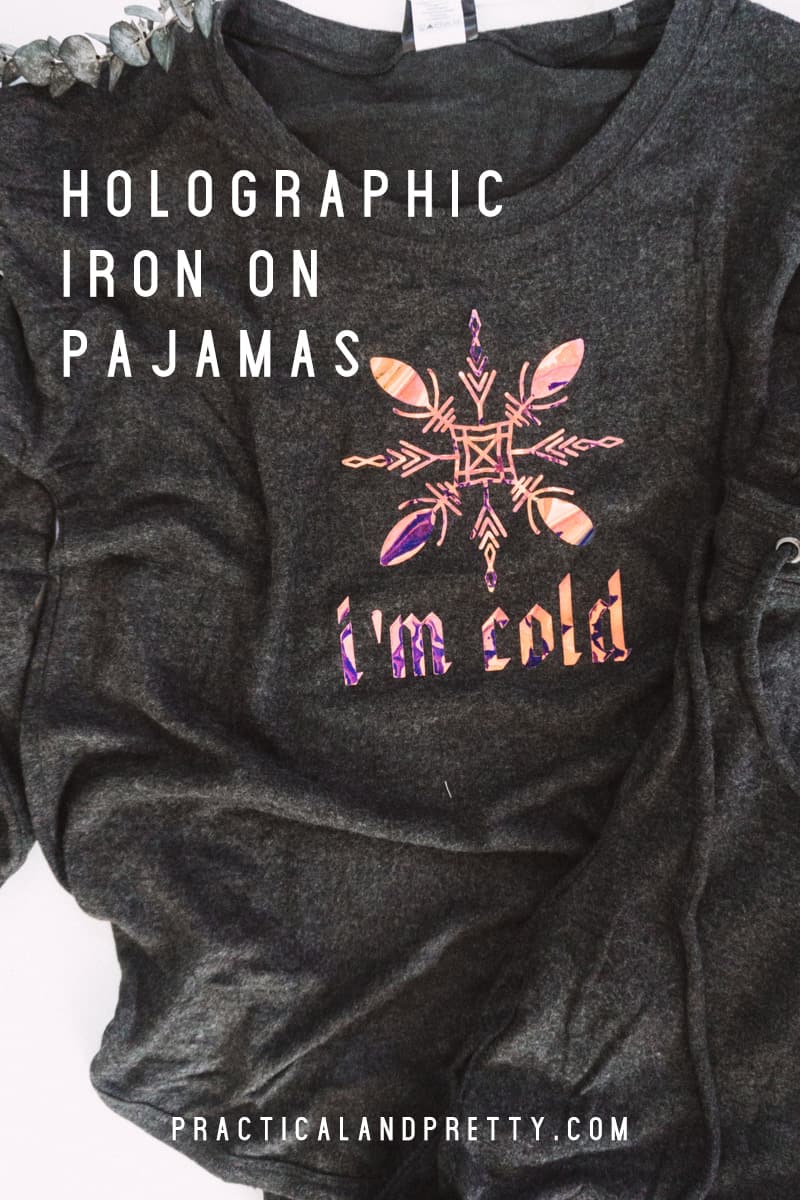
Use your favorite set of pajamas to make DIY Christmas pajamas for the whole family. This post features a holographic iron-on.
I post lots of Cricut content if you’re looking for more DIYs in that realm. Or if you’re in the mood to do more Christmas DIYs I have a whole page for that too!
Holographic Iron On is a little bit different than their normal iron on. Excessive heat can alter the color of your vinyl. So, it’s really important (always – but especially here) to follow Cricut’s instructions for the iron-on. I’ll break it down for you here. Plus you’ll get this fun cut file. I guess what I’m trying to say is you’ve come to the right place.
What You Need for Your Holographic Iron On Pajamas
Cut your File
Open up your cut file and make sure it’s the size you’d like. I have it sized to the above-linked pajamas!
Next, you will click ‘Make It’. This is where you will toggle to ‘Mirror for Iron On’. This is an important step. Do not skip this step. I have skipped this step and it is a very big bummer.
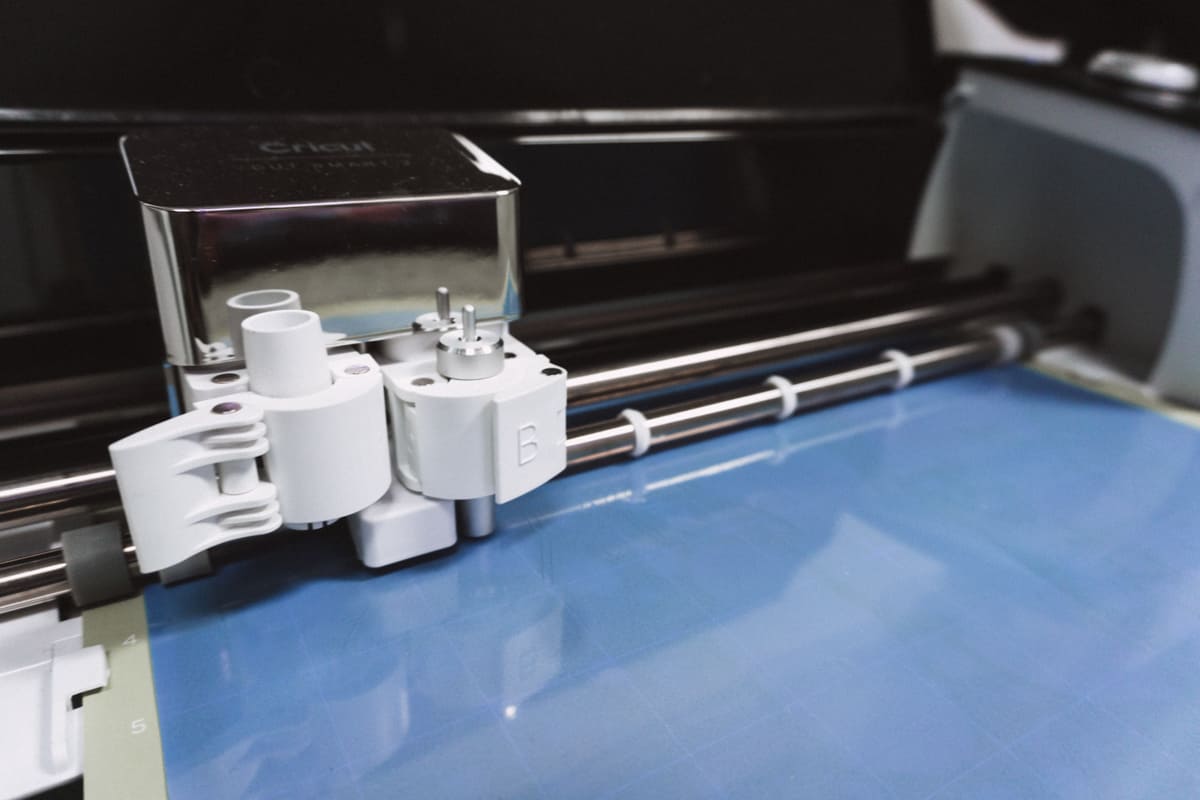
Set your dial on your ‘Custom’. This will pull up a screen on your computer after your Cricut has been connected that will prompt you to choose your custom material. You will search for ‘Holographic Iron On’ and select it.
Load your mat on your standard grip mat with the holographic side facing down. Now start cutting!
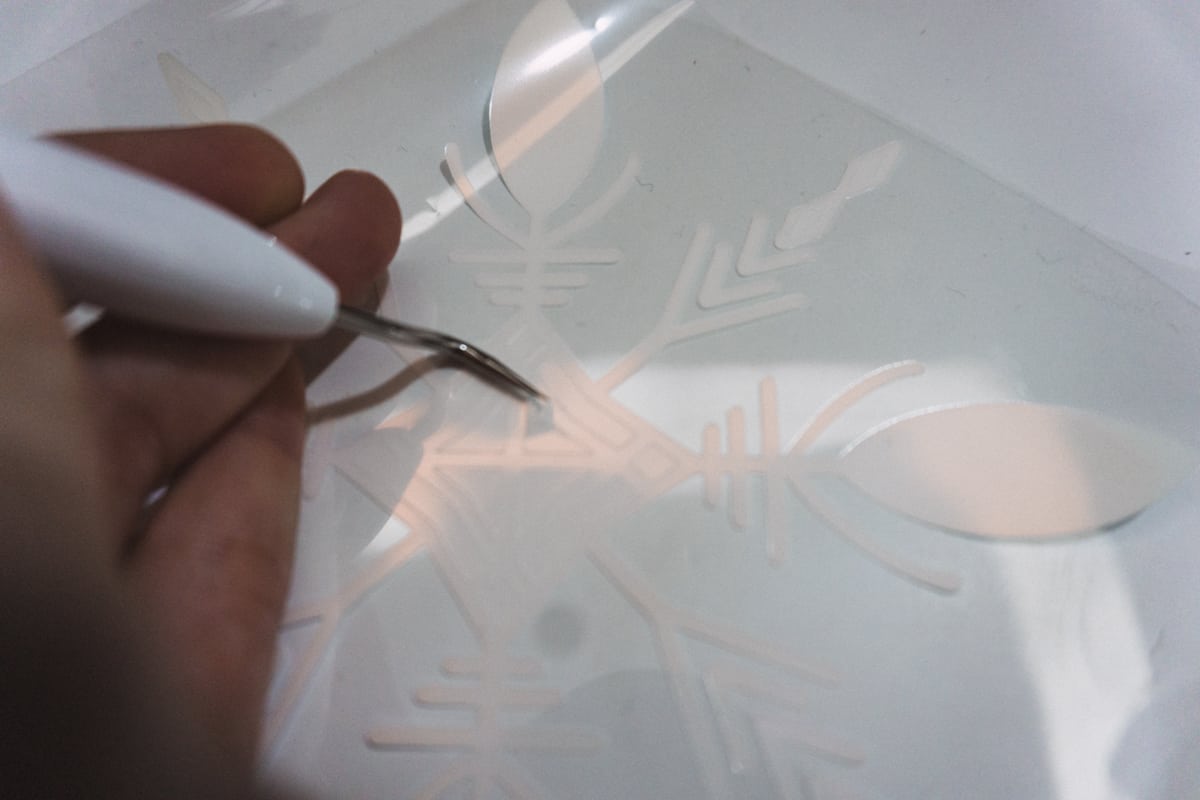
After your file is cut you will start weeding your project. I like to cut out the cut portion of the vinyl so as not to waste the edges that weren’t cut. Use your weeding tool to get the super small pieces and your fingers to get larger ones. I find this is the simplest way.
Apply the Iron On to your DIY Christmas Pajamas
For tips all about iron-on and how to never miss a step just print out this iron-on checklist.
Heat up your EasyPress 2 to 330 degrees if you are using the cotton/poly blend pajamas linked above and have an EasyPress mat! If these aren’t your specific variables then check out this heat guide from Cricut.
Put the vinyl down where you’d like it with the holographic side up and place your EasyPress 2 on it for 30 seconds.
Let the plastic cool and carefully remove the plastic film. After this, I flip my garment over and repeat the process for 15 seconds on the back to make sure no corners lift.
I also used holographic vinyl on this post for how to make a custom phone case!
Now you have some darling DIY Christmas pajamas! I like working with the holographic iron on quite a bit. Stay tuned for more projects utilizing this material.

DIY Christmas Pajamas
Use your favorite set of pajamas to make DIY Christmas pajamas for the whole family. This post features a holographic iron-on.
Materials
- Cricut Holographic Iron On
- Pajamas
Tools
- Standard Grip Mat
- EasyPress 2
- EasyPress Mat
- Weeding Tool
- Cricut Explore Air 2
Instructions
- Open your cut file and make sure it's the size you'd like. I have it sized to the linked pajamas!
- Next, you will click 'Make It'. This is where you will toggle to 'Mirror for Iron On'. This is an important step. Do not skip this step. I have skipped this step and it is a very big bummer.
- Set your dial on your 'Custom' if you have an Explore Air 2 This will pull up a screen on your computer after your Cricut has been connected that will prompt you to choose your custom material. You will search for 'Holographic Iron On' and select it. If you have a Maker, select Holographic Iron On in the drop-down menu.
- Load your mat on your standard grip mat with the holographic side facing down. Now start cutting!
- Heat up your EasyPress 2 to 330 degrees if you are using the cotton/poly blend pajamas linked above and have an EasyPress mat! If these aren't your specific variables then check out this heat guide from Cricut.
- Put the vinyl down where you'd like it with the holographic side up and place your EasyPress 2 on it for 30 seconds.
- Let the plastic cool and carefully remove the plastic film. After this, I flip my garment over and repeat the process for 15 seconds on the back to make sure no corners lift.
Recommended Products
As an Amazon Associate and member of other affiliate programs, I earn from qualifying purchases.


