The Cricut Joy is the perfect tool to create a growth chart! I walk you through how to cut iron on and then create a cute fabric growth chart.
The Cricut is so versatile and I have several different projects for you to see. Check out this post on how to make a t-shirt or here is a tutorial on how to use infusible ink!
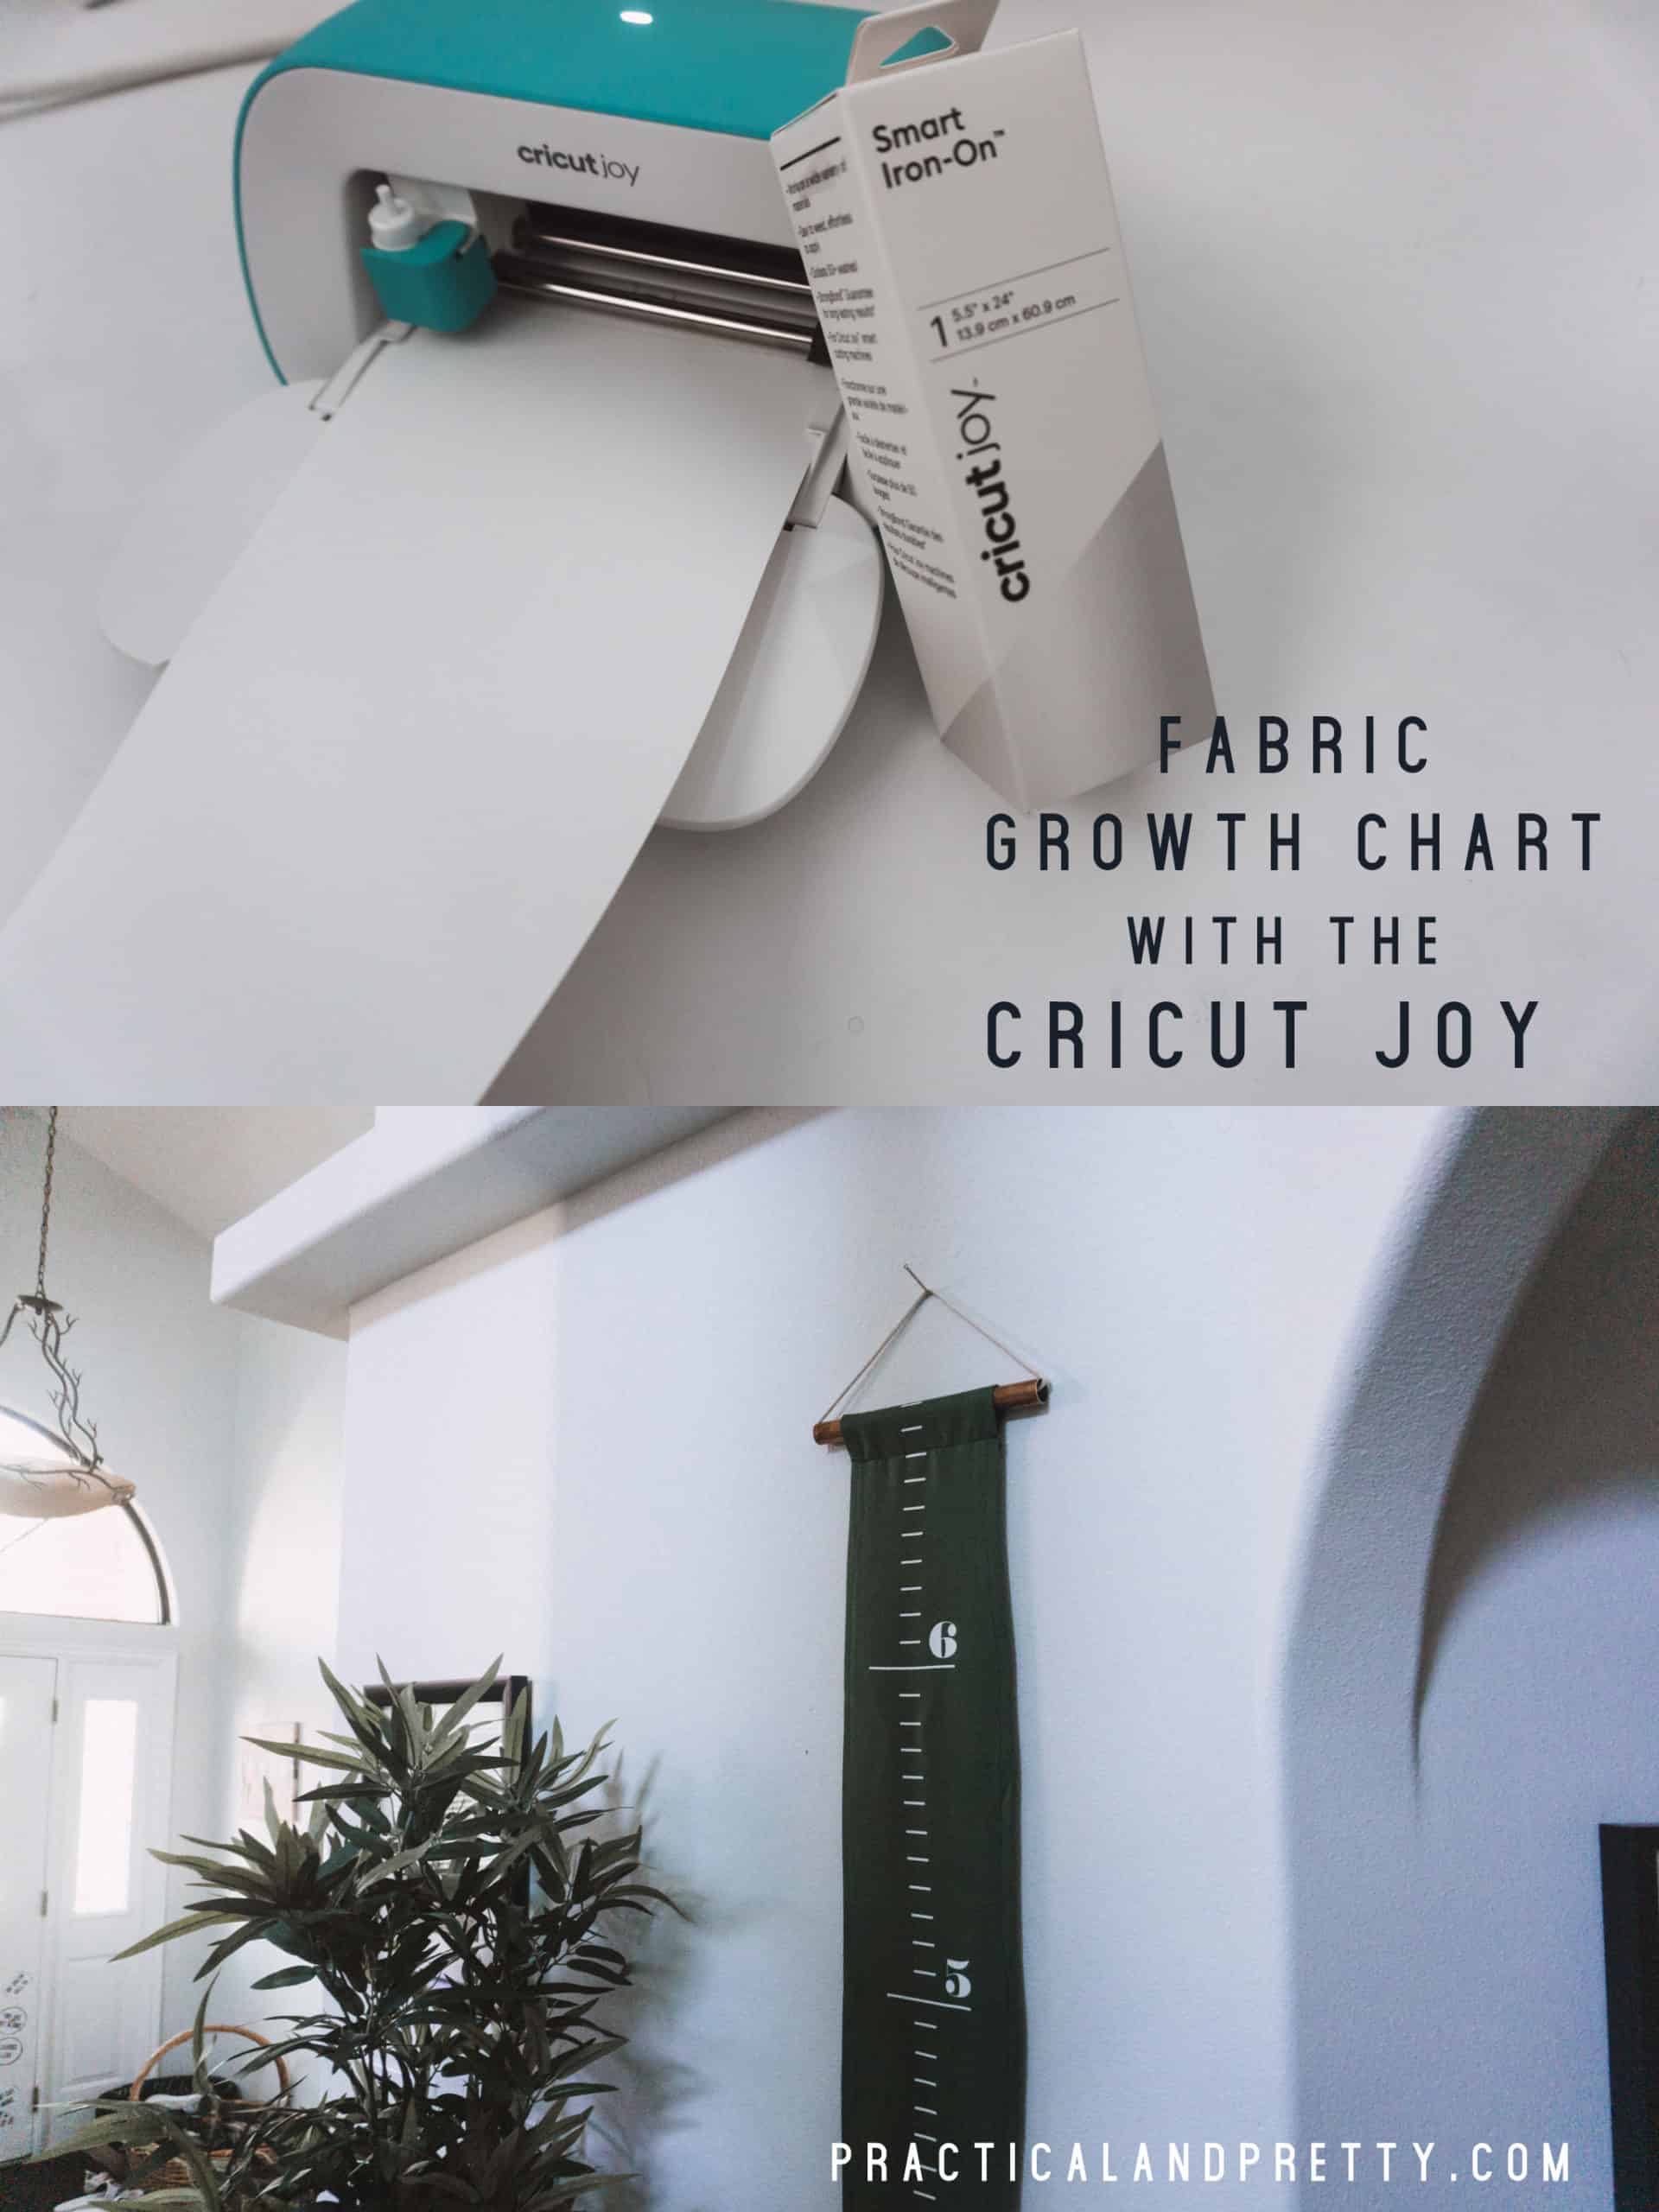
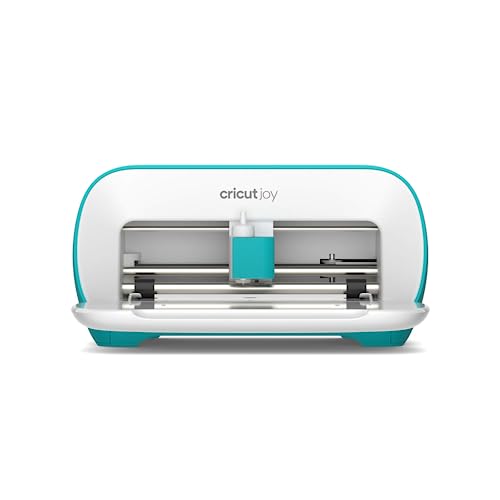
I am SO excited to share this project today. Cricut Joy is a new cutting machine that is super portable but doesn’t let the portability make you think that means you’re limited to little projects. Actually the opposite. This machine can cut up to TWENTY FEET! When I heard that my first thought was ‘of course I need to make a growth chart.’
What is the Cricut Joy?
Here are a couple of detailed features of the Cricut Joy and how it differs from the Maker and Air 2! (If you’re curious about those I have a post for the Maker here and the Air 2 here!)
- Cricut Joy is the perfect companion to quickly and easily personalize anything with one cut and one color, in 15 minutes or less. It is fun, functional, and simple to use. Practical, everyday projects have never been more accessible or easier! If you already have a Maker or Air 2, Cricut Joy opens additional creative possibilities with unique features and is the perfect companion for quick, mat-free projects and long cuts.
- Compact & Portable: Cricut Joy is Cricut’s smallest smart cutting machine ever! It fits in a cubby or looks great on a counter. Cricut Joy packs away easily and sets up instantly, making it super easy to move from room to room. Not having to transport a mat, combined with the smaller material size, makes the whole system compact and portable. No craft room is required.
- Mats optional! Cricut Joy has a full suite of brand-new materials that do not require a mat, meaning less to buy, fewer steps, and faster results. New Smart vinyl comes in extended sizes, with up to 20’ repeated cut capability, and no need to switch out multiple mats.
Suggested Materials
- Cricut Joy
- Smart Iron On
- 80″ of Fabric (I used an old curtain!)
- Rotary Blade
- Acrylic Ruler
- Cutting Ruler
- Pins
- EasyPress 2
- EasyPress Mat
- Sewing Machine
- 1/2″ Copper Pipe
- Pipe Cutter
- Cotton Cord
Unboxing the Cricut Joy
First things first, I made this video of my first unboxing of the Cricut Joy. I also show how I set it up and did the introduction project.
How to Set Up Cut on Cricut Design Space
Open up the Design Space file here. You will see the screen below. Click ‘Make It’.
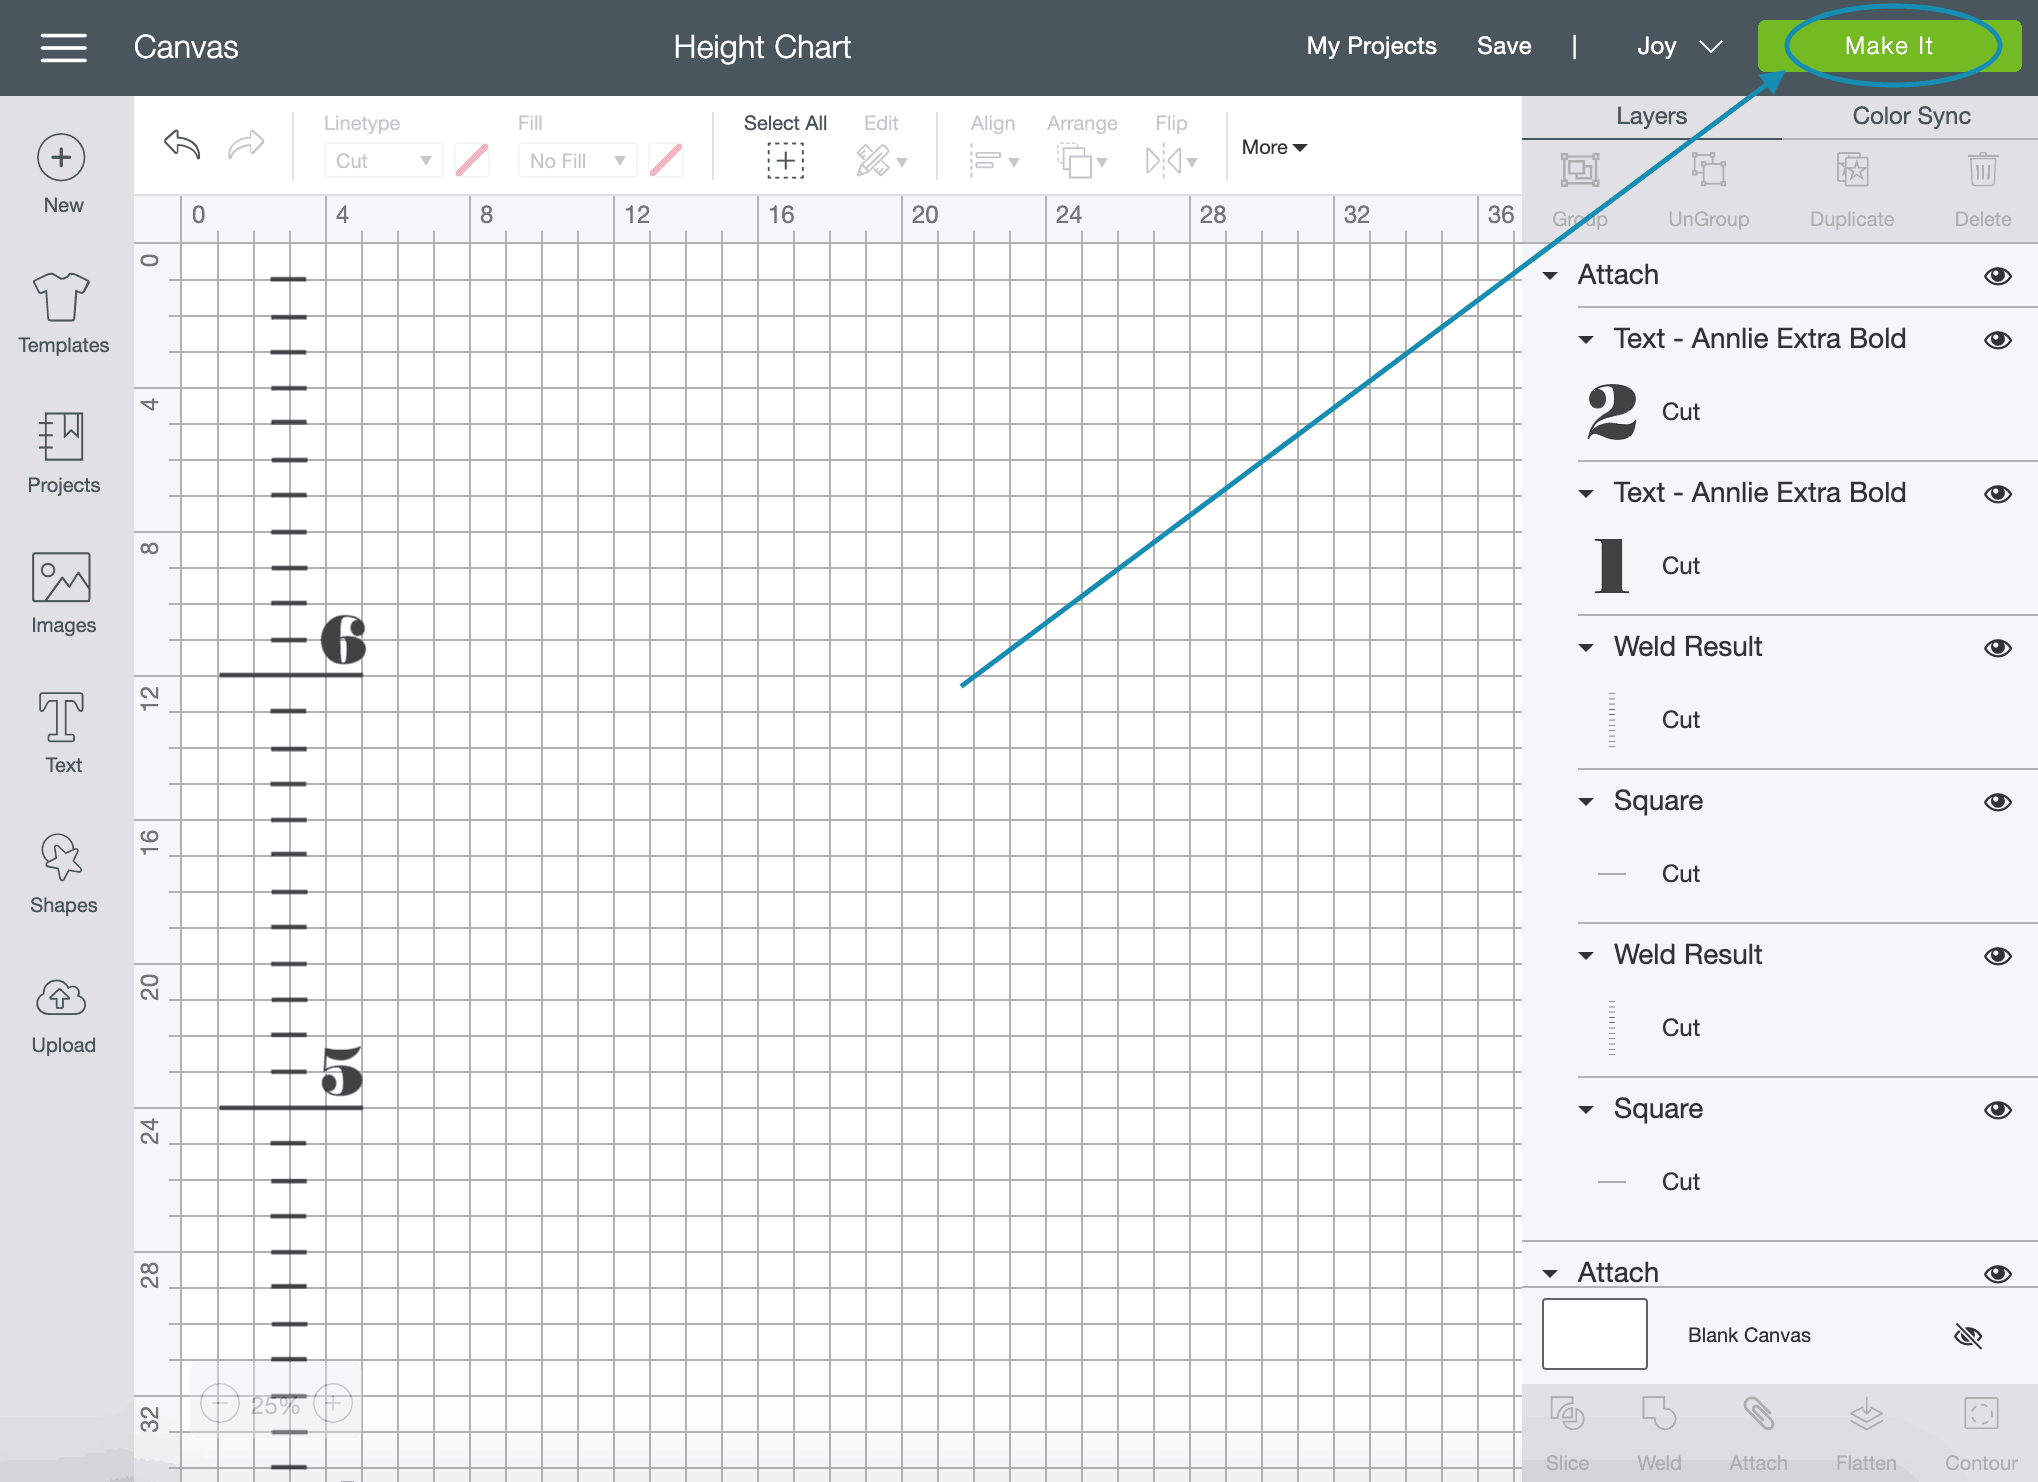
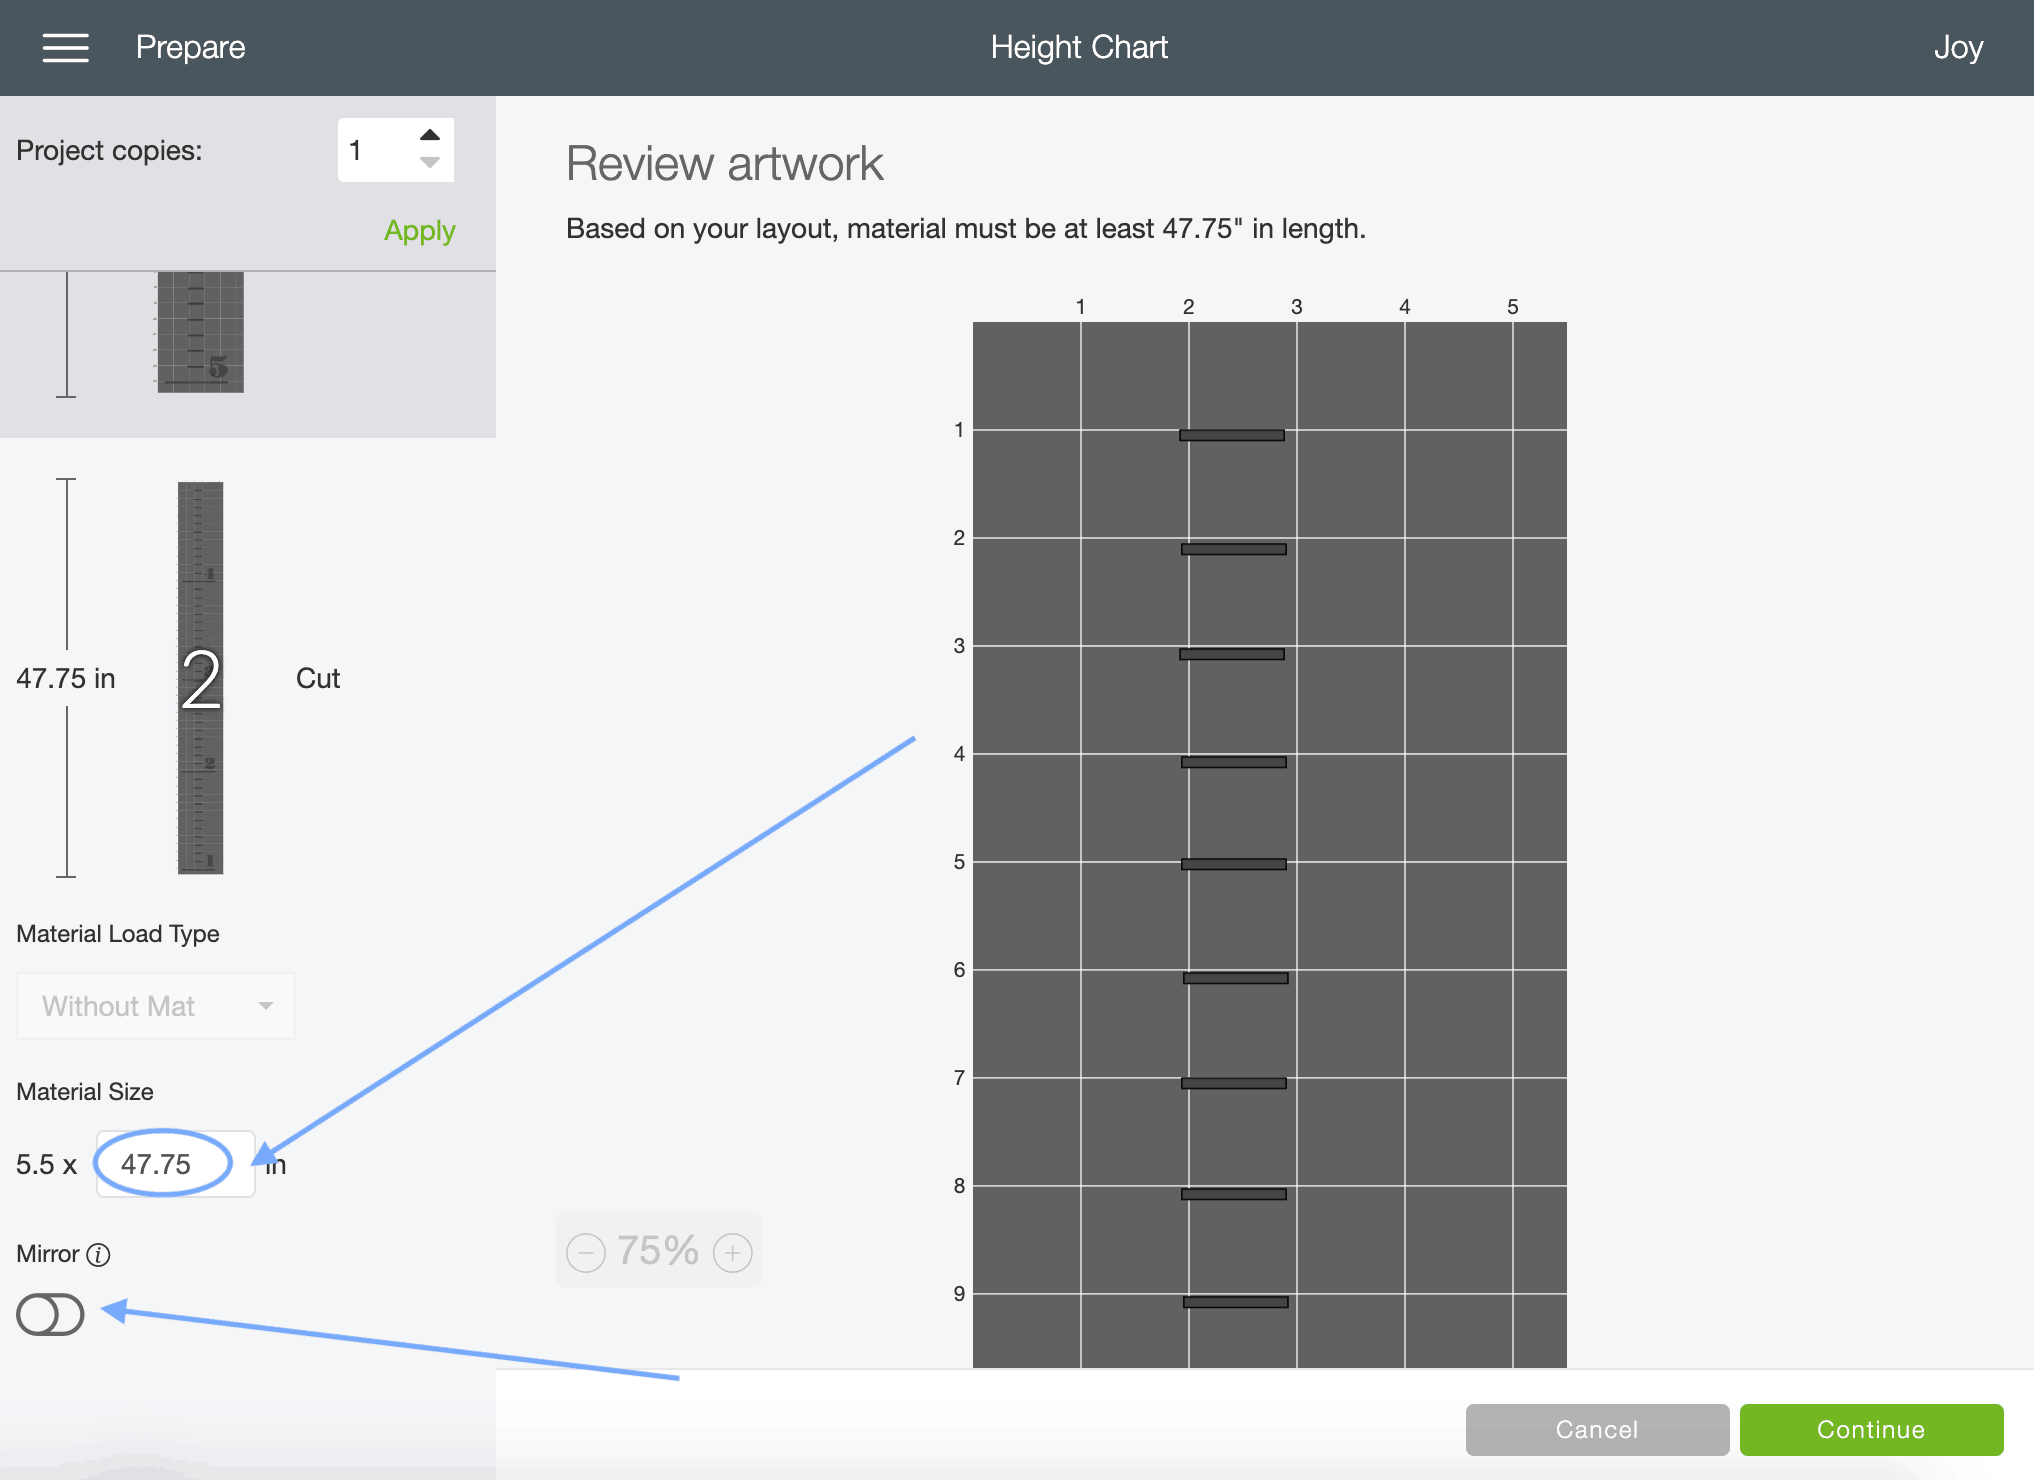
Now you need to change the length of the cut because the longest iron-on option is currently available in a length of 24″. So change the number in the box pictured below to “24”.
You’re going to repeat this process because you are going to do 3 cuts of 24″. Then make sure if you are doing iron on, that you mark ‘Mirror’ to On!!
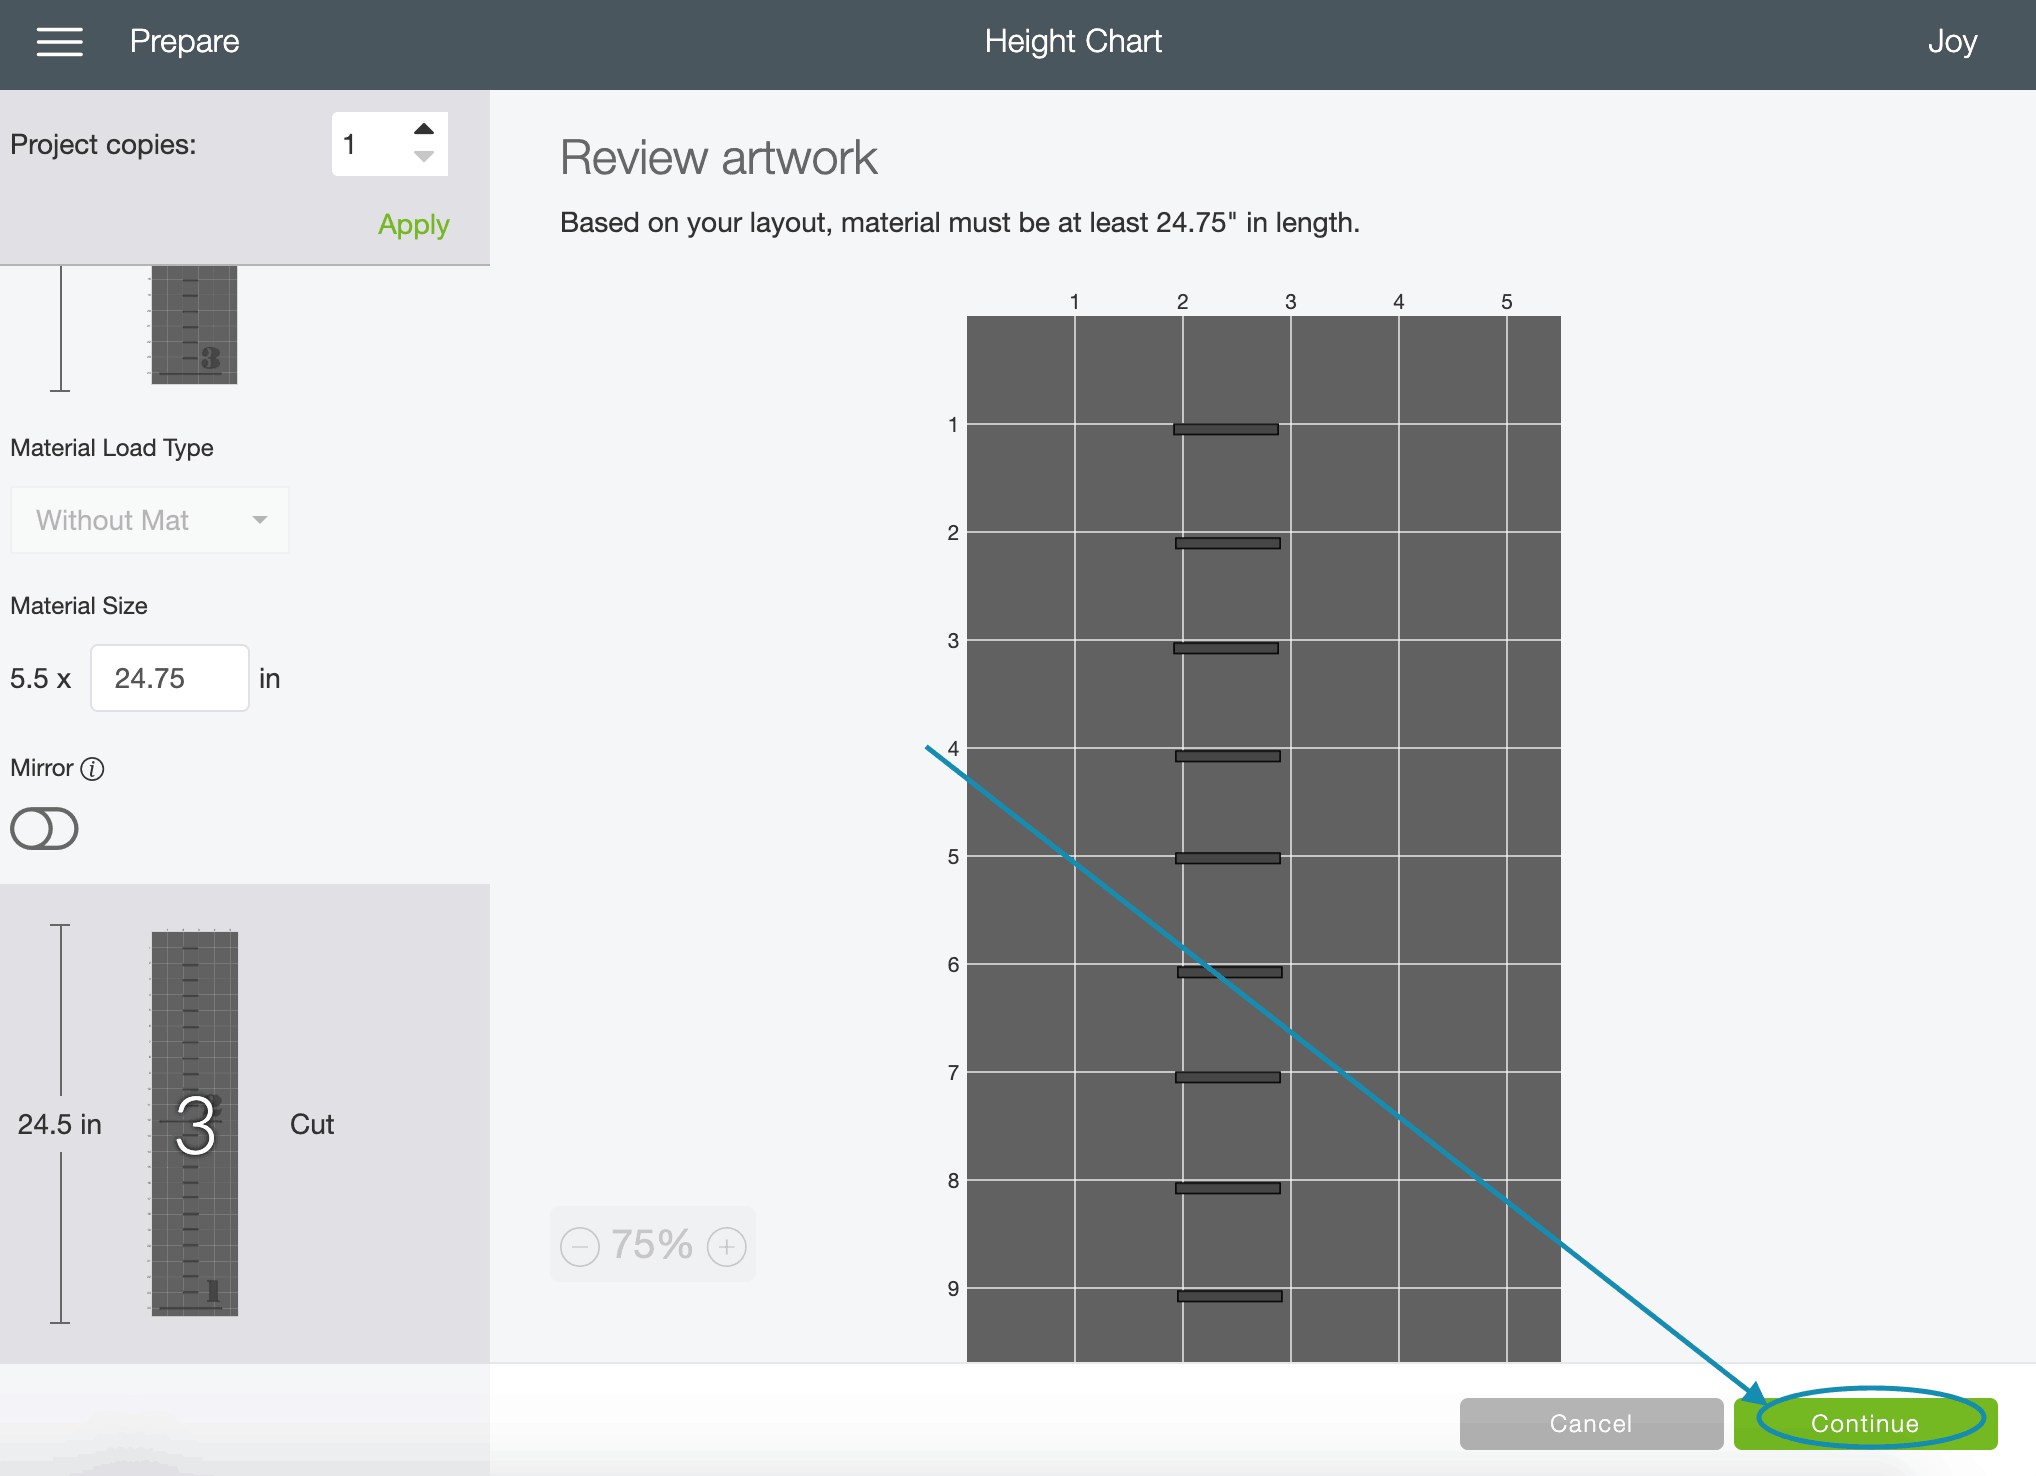
Now you will click “Continue”.
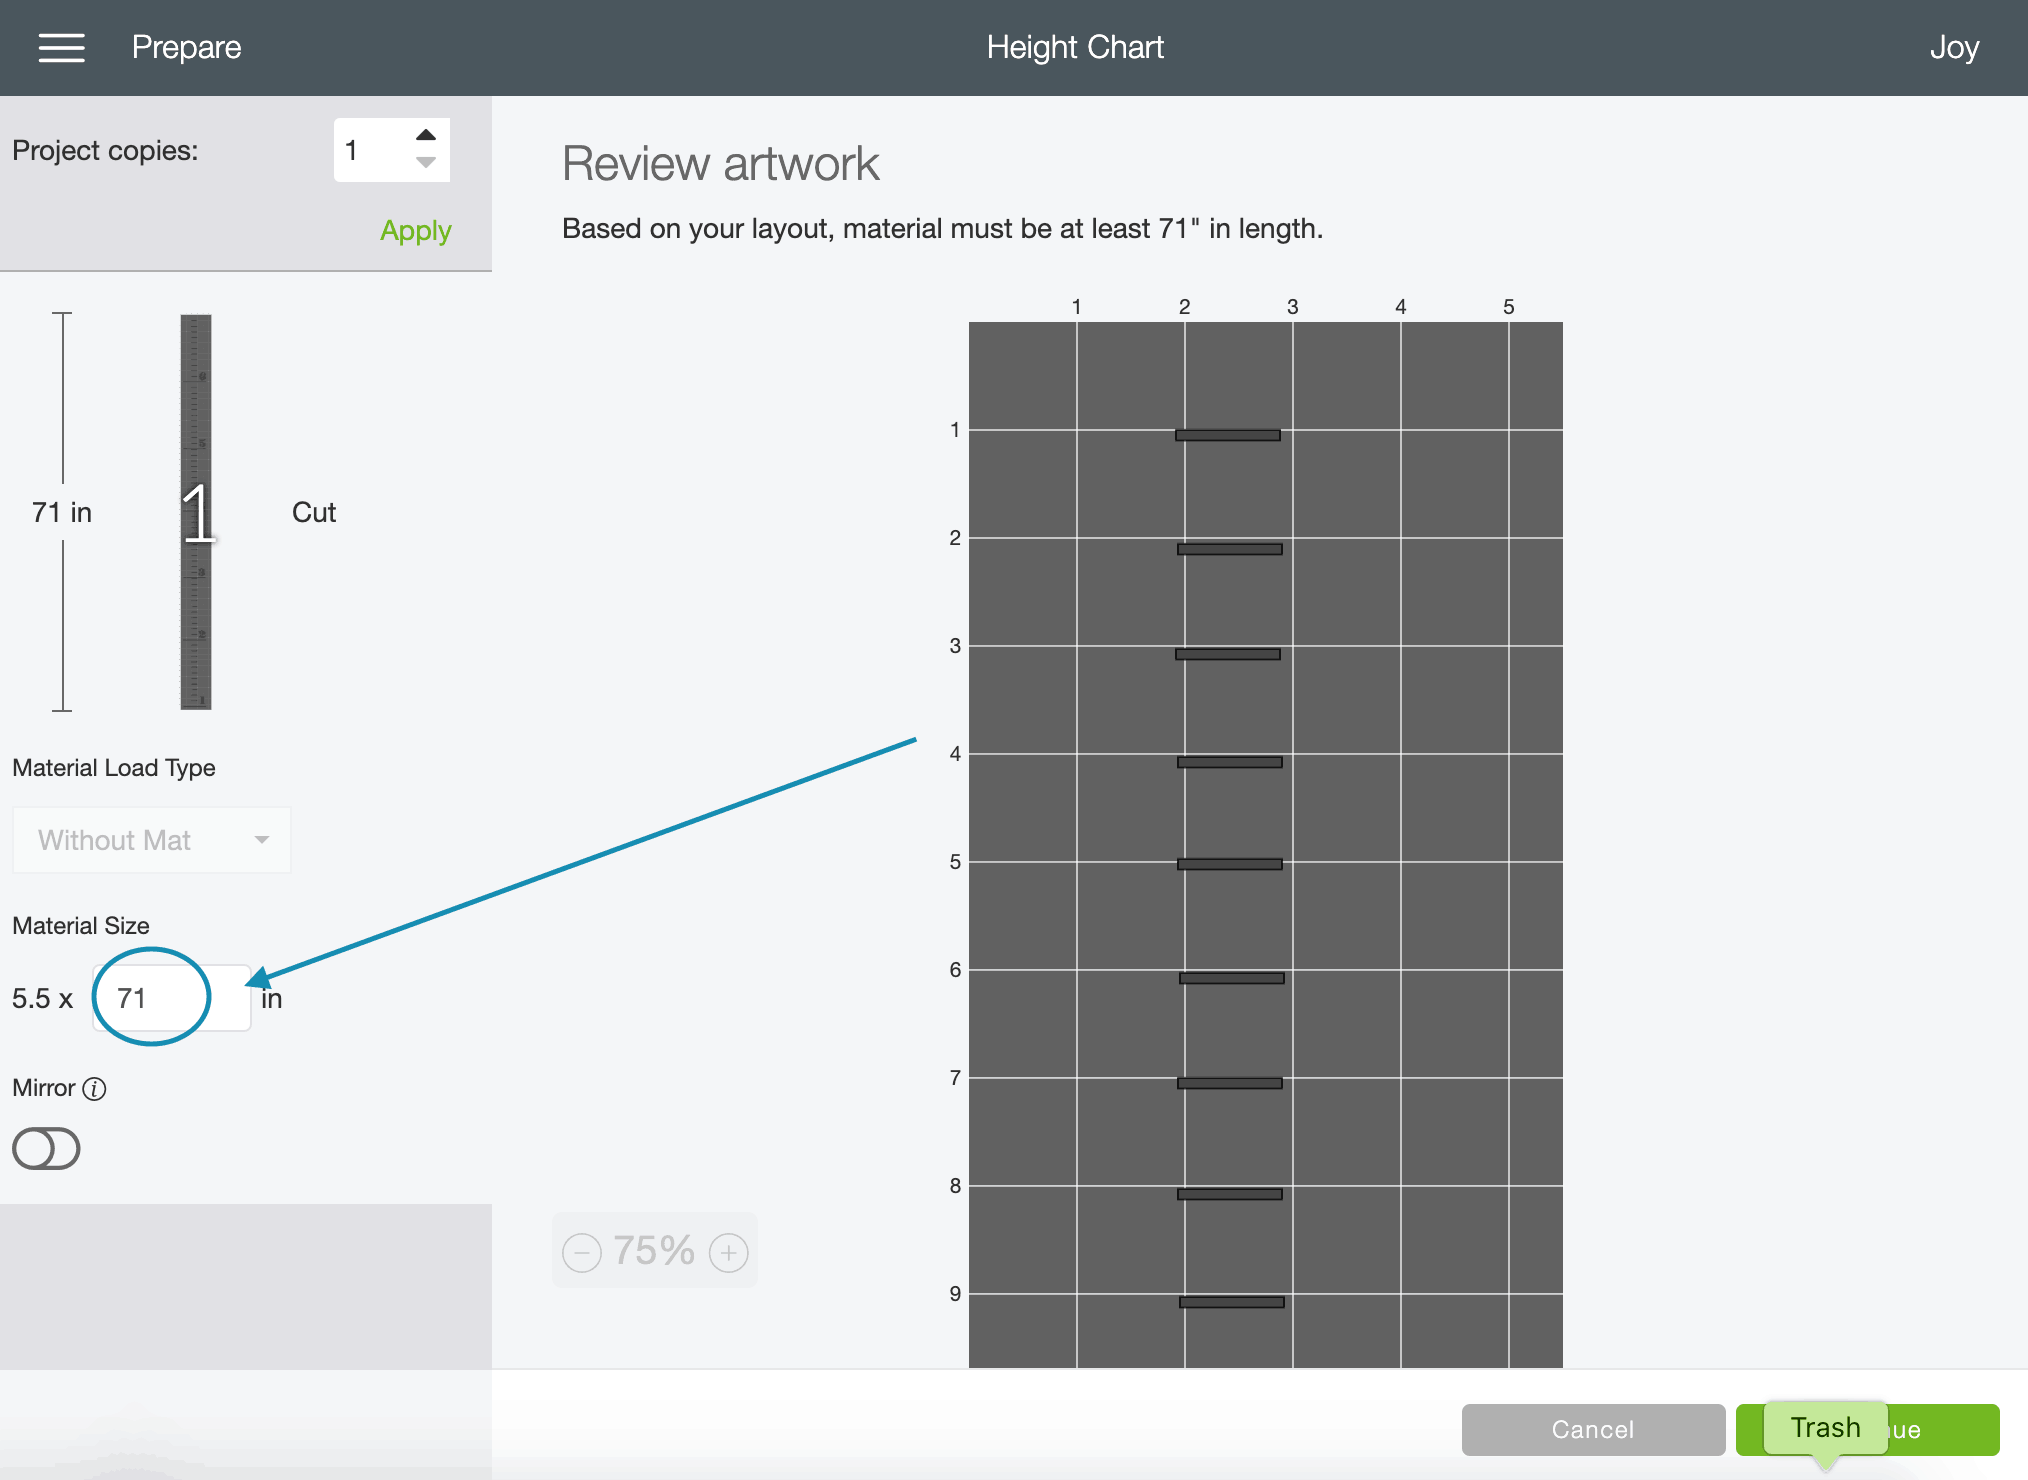
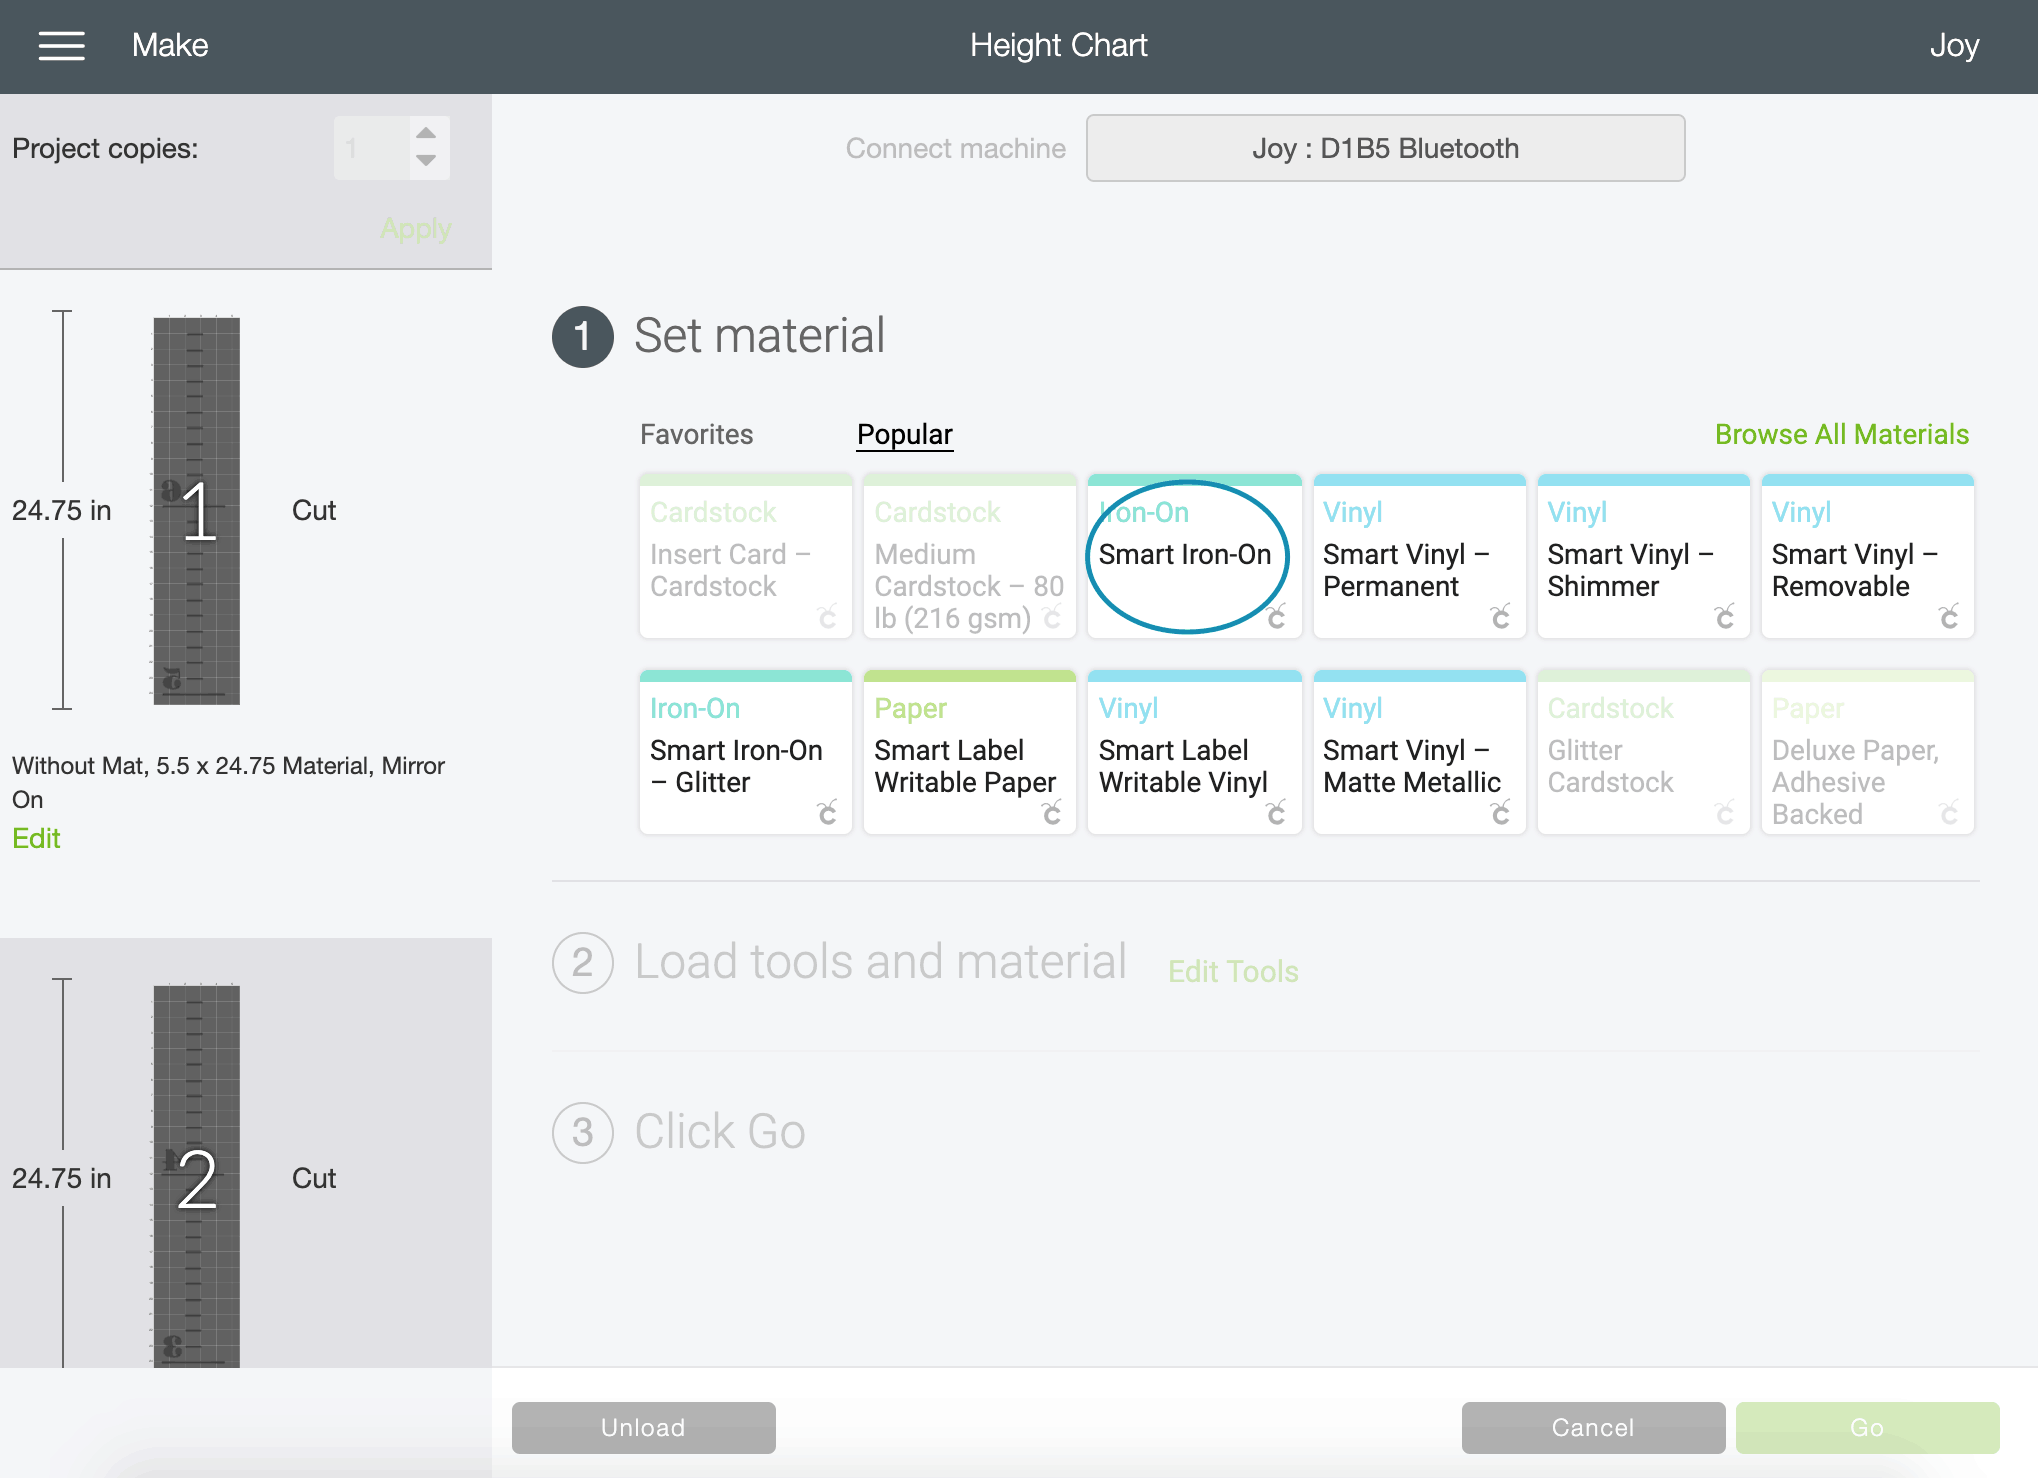
After you click continue you will connect your Cricut Joy. Watch my video above if you’ve never connected it before. If you have, it should appear in the list and connect! Select the material you are using. For this project, I used Smart Iron On.
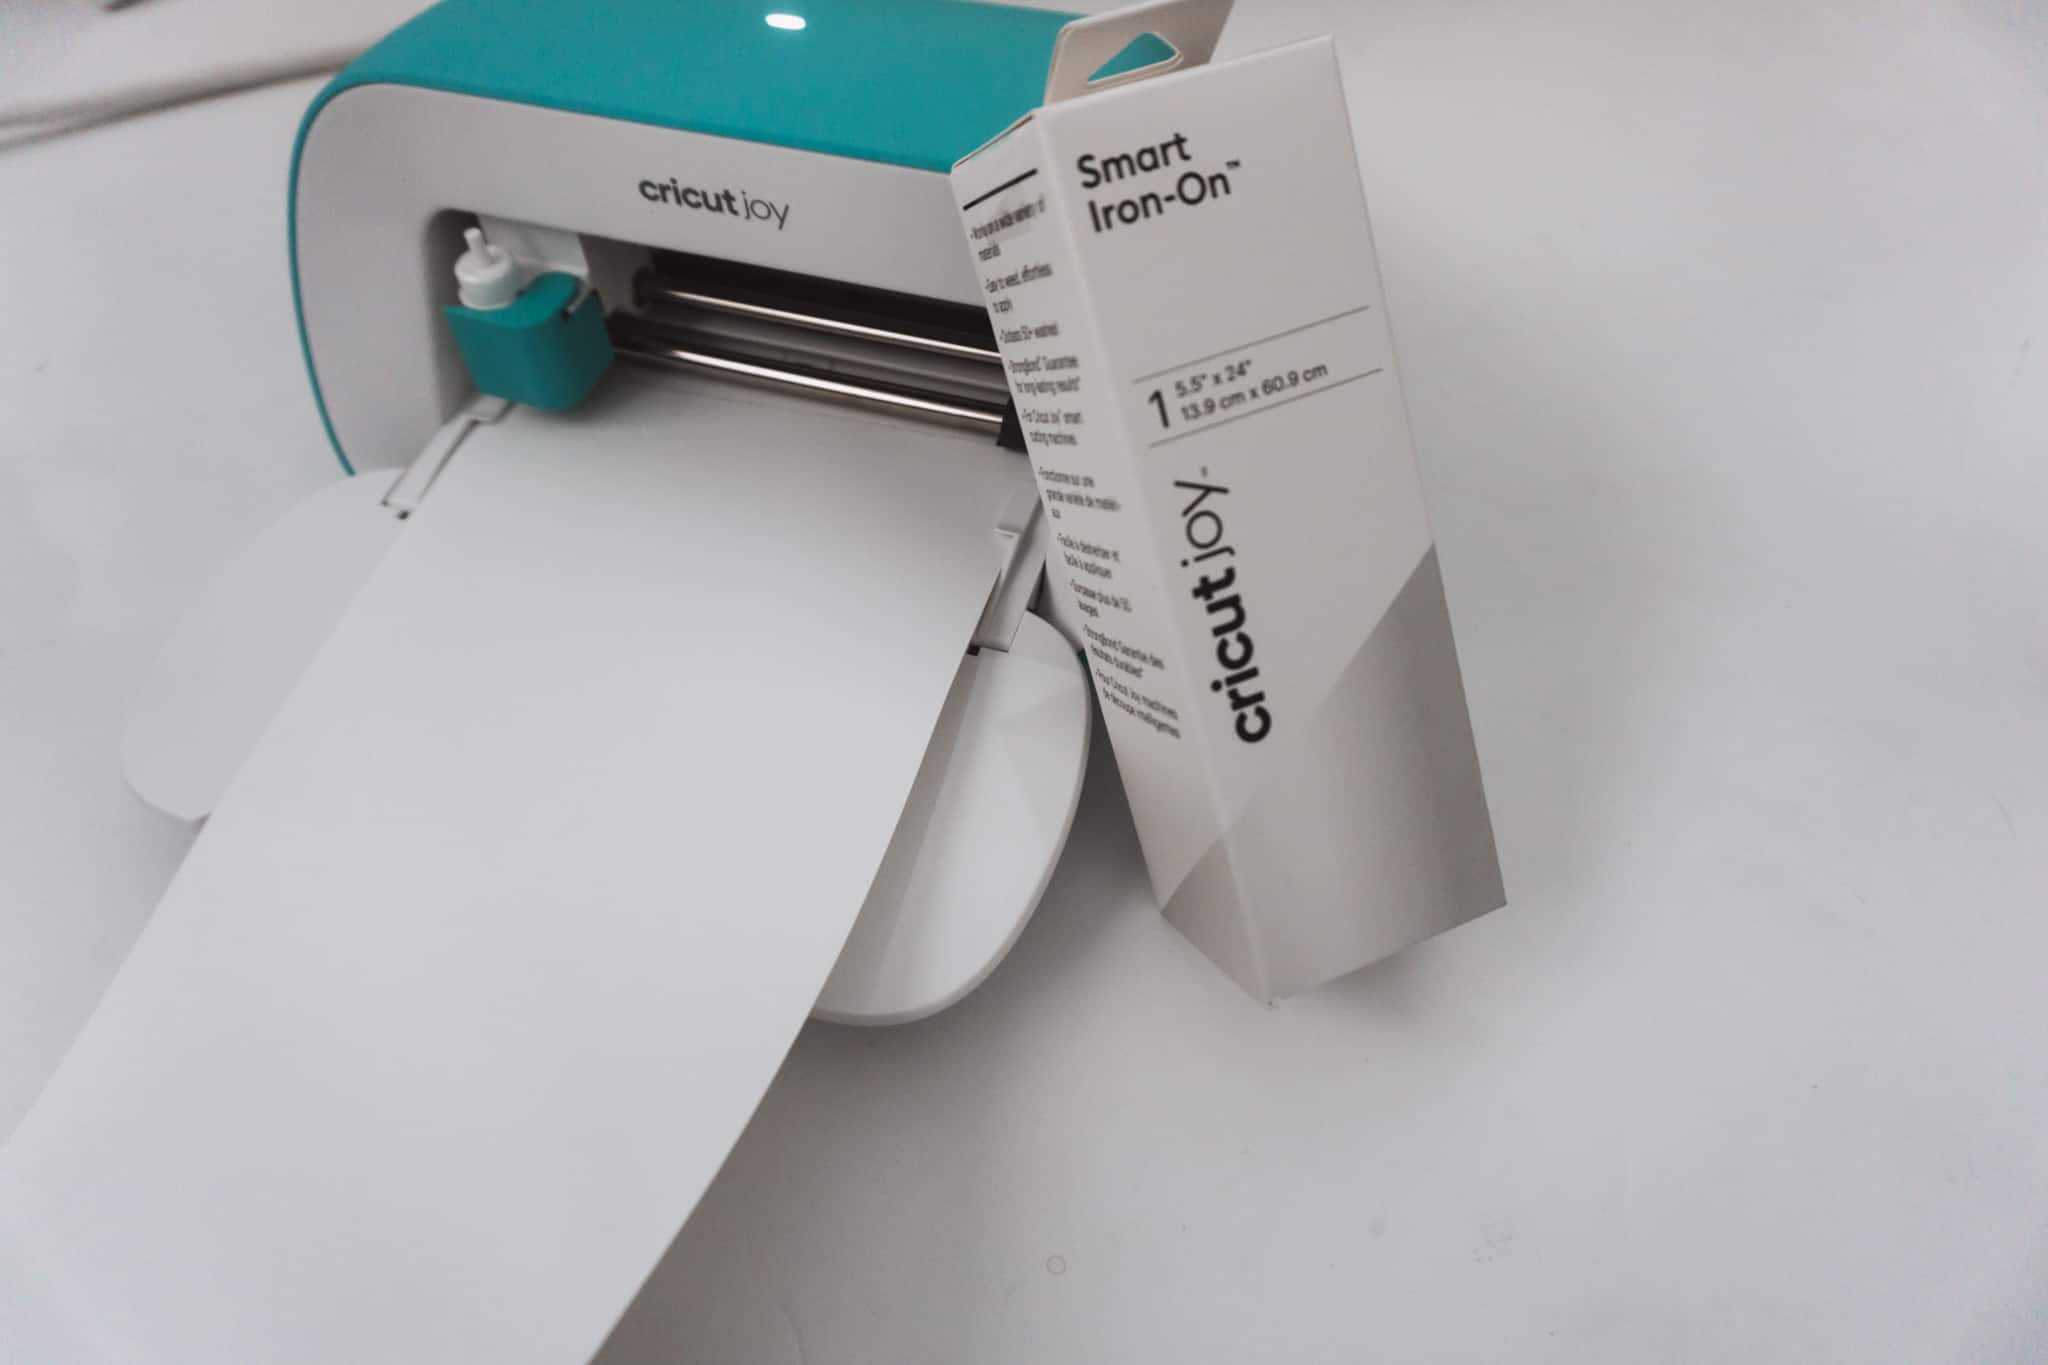
Load in your material and start the cut! Because the Smart Iron On doesn’t require a mat, this is so quick!
Making your growth chart
Now you should have your iron on all cut so it’s time to weed the vinyl. Luckily this project is SO easy to weed!
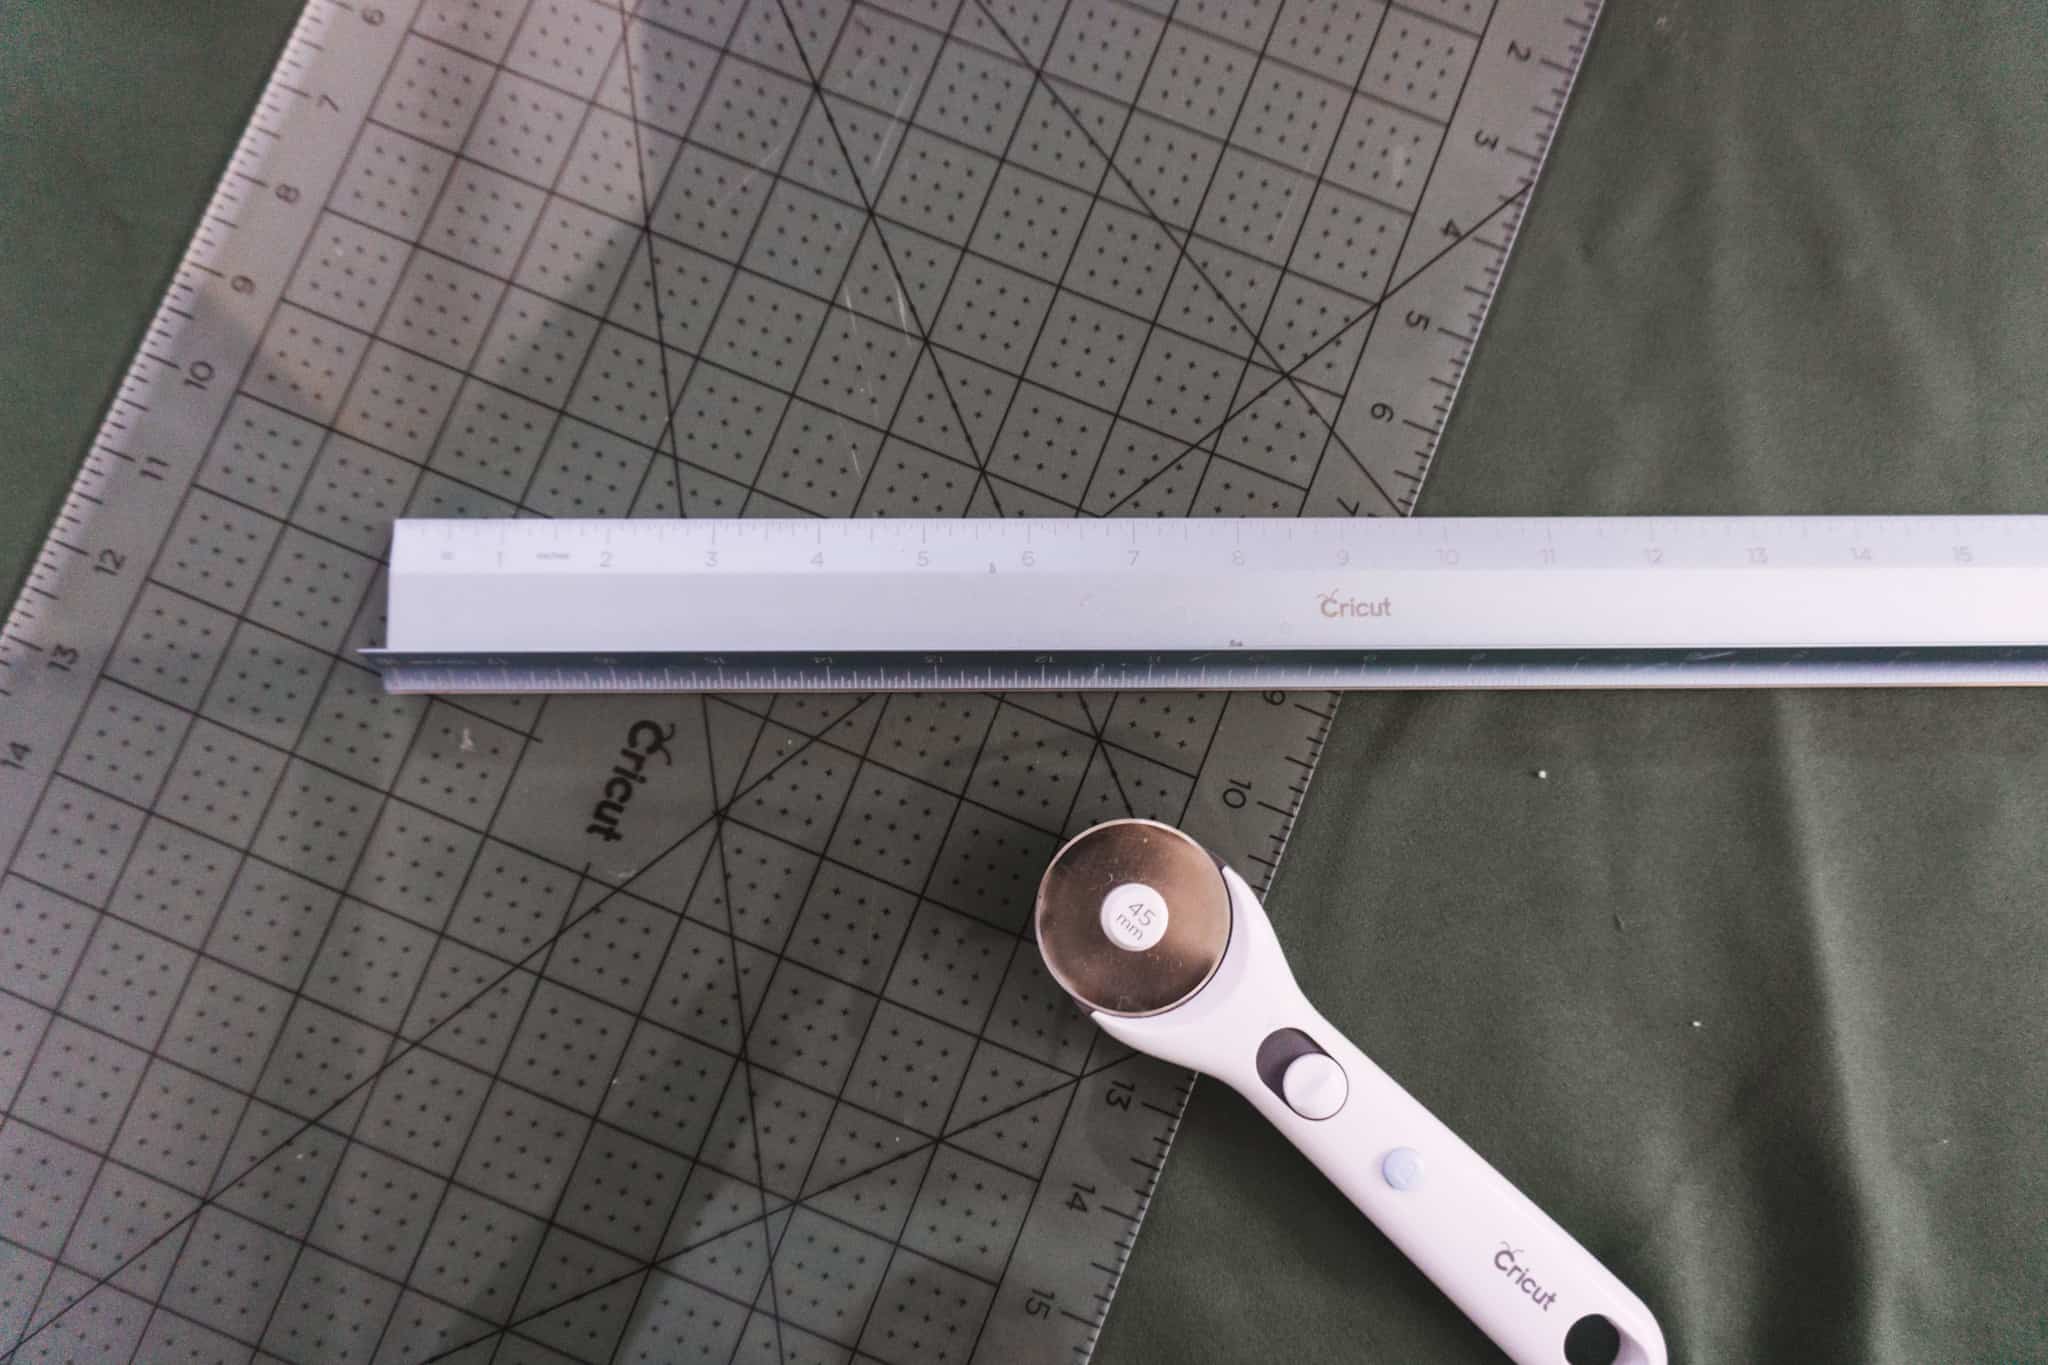
After your iron on is weeded, you will pull out your rotary cutter, acrylic mat, and cutting ruler. I cut mine 10″ wide and 80″ long.
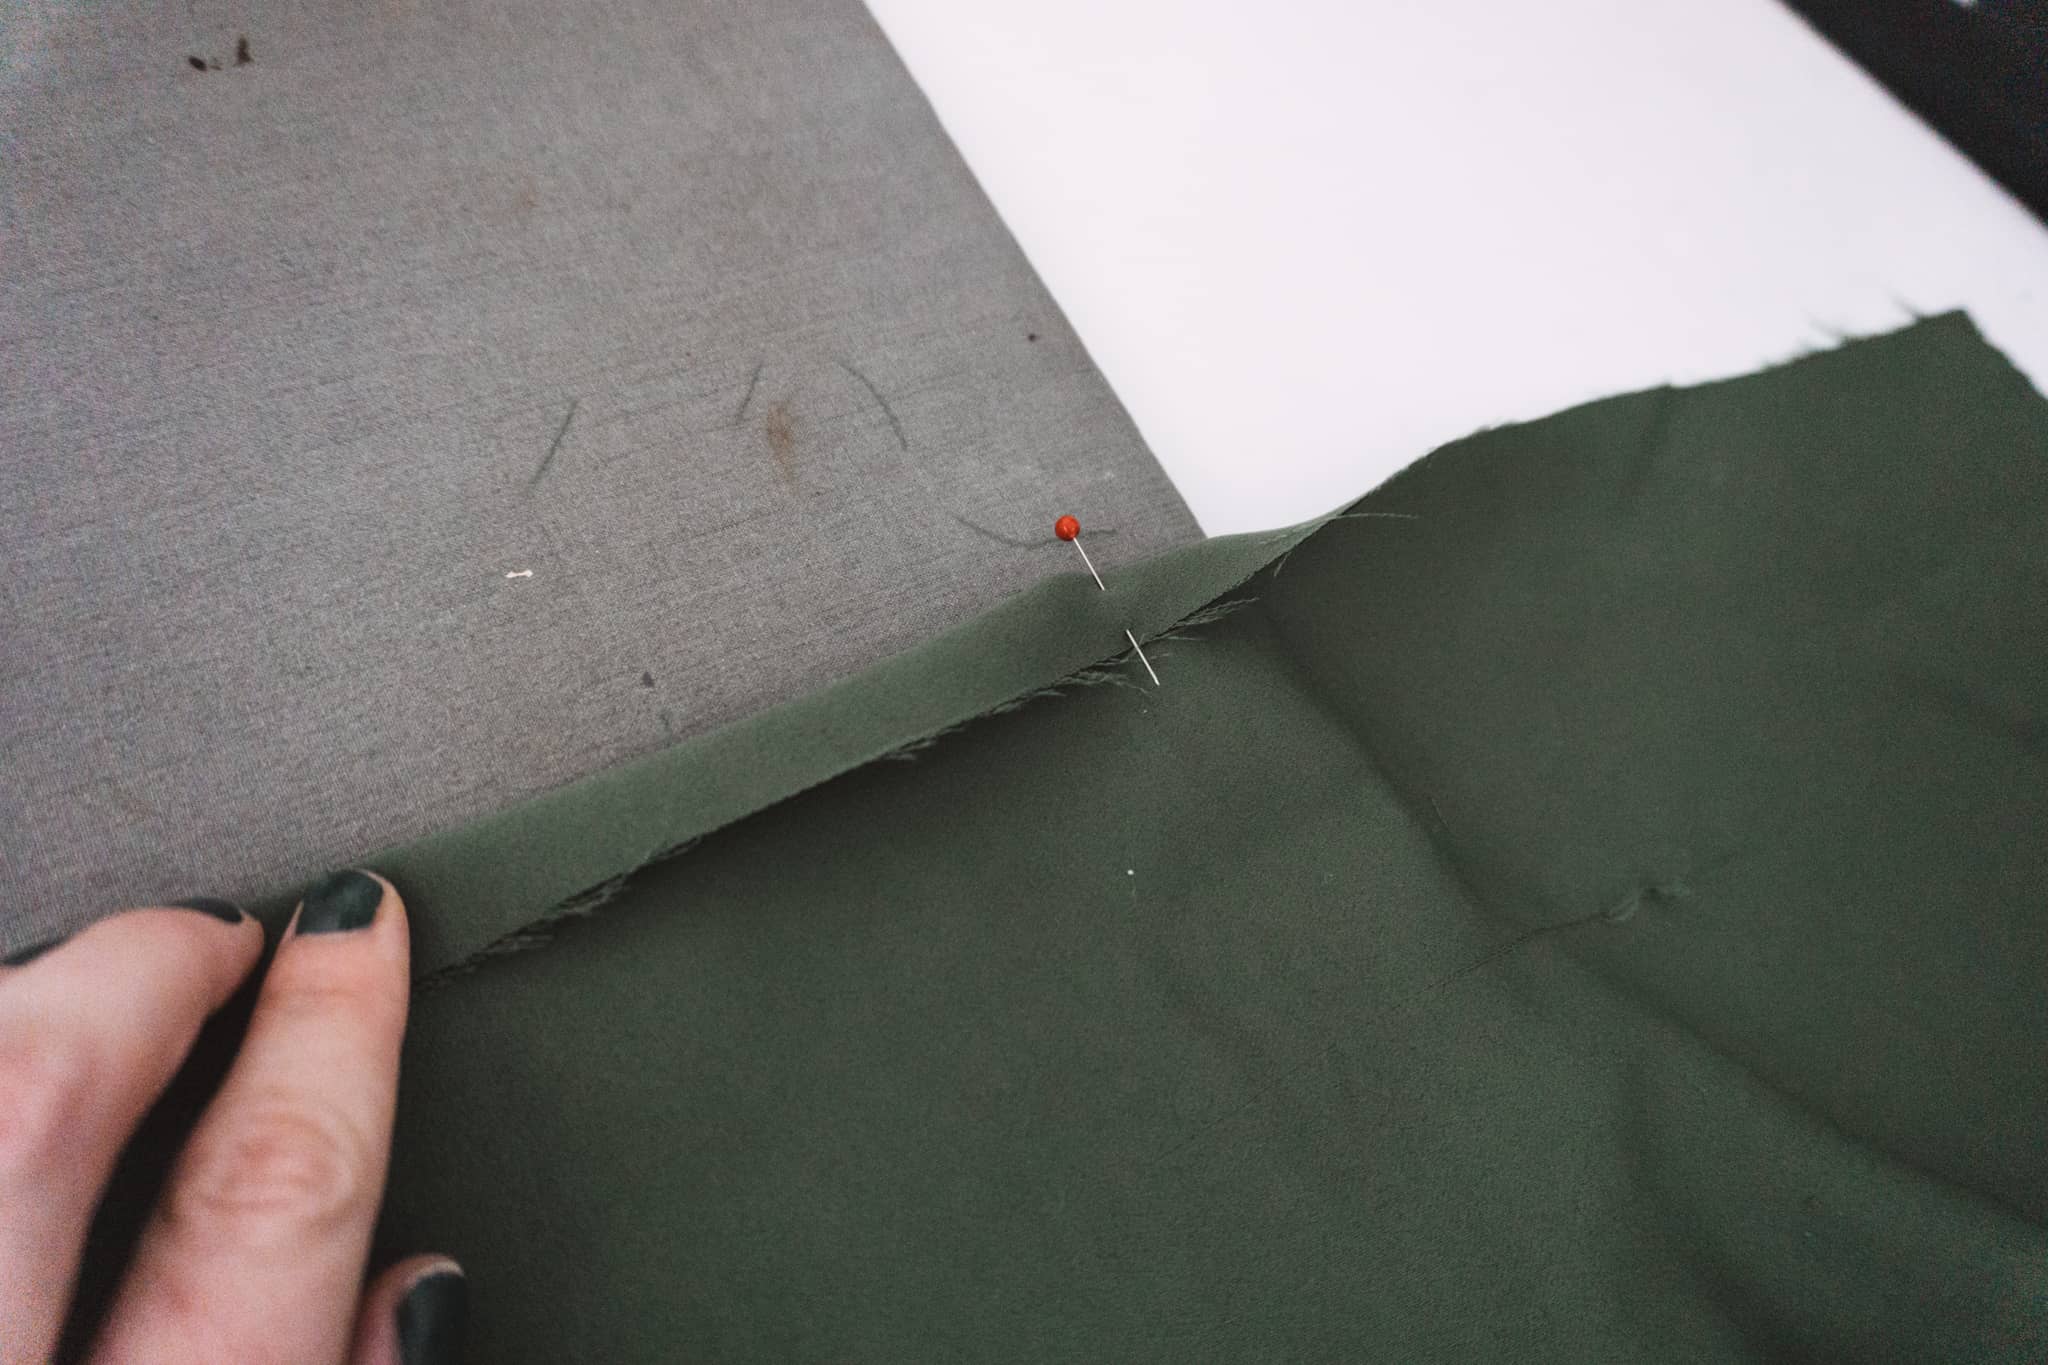
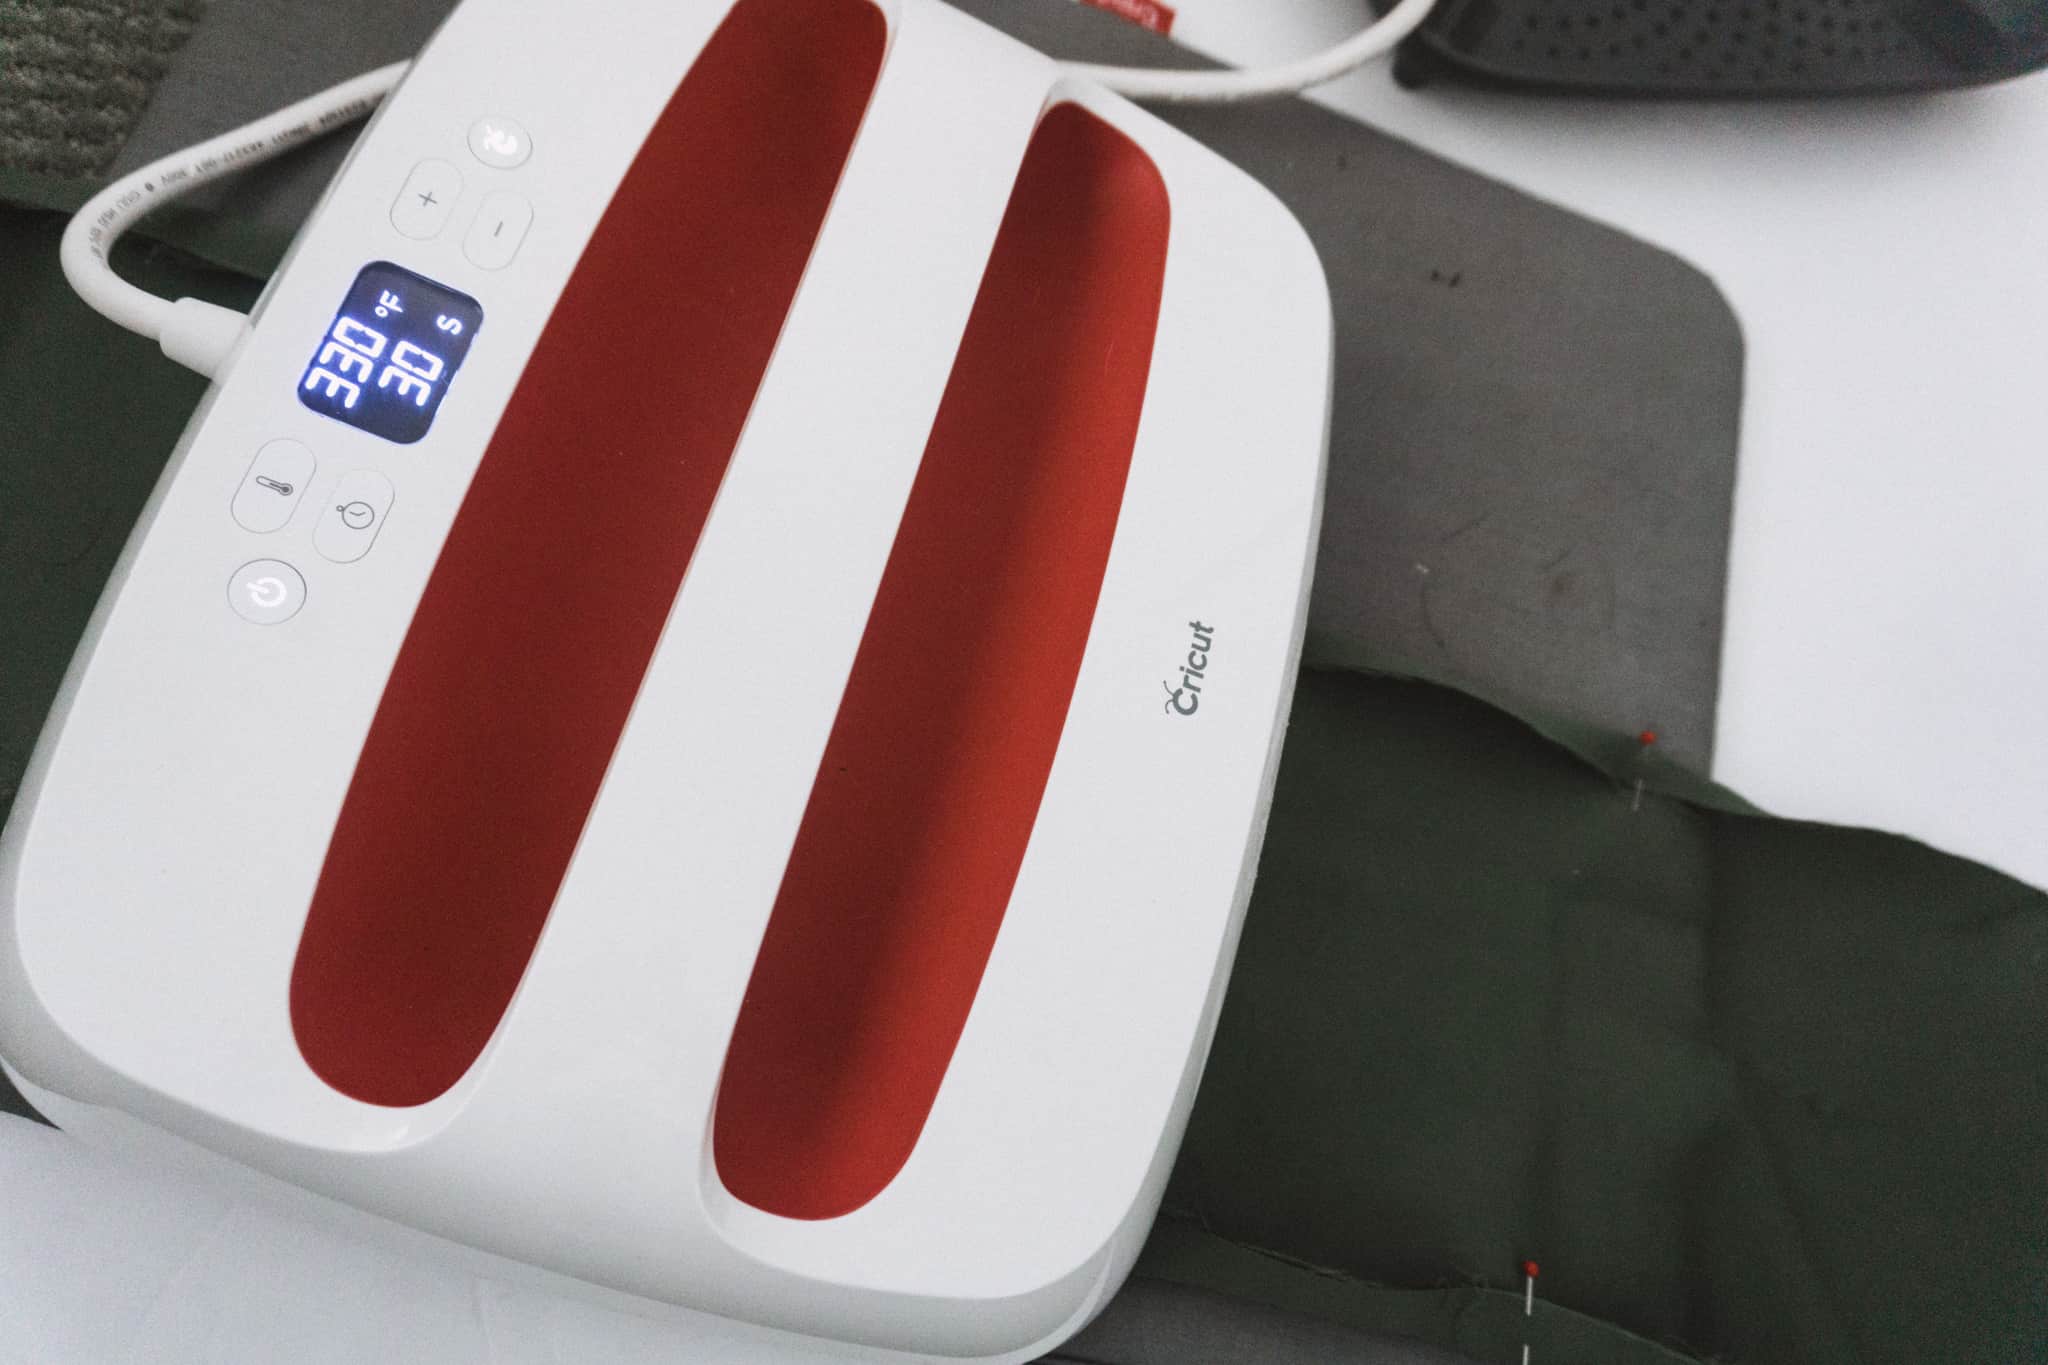
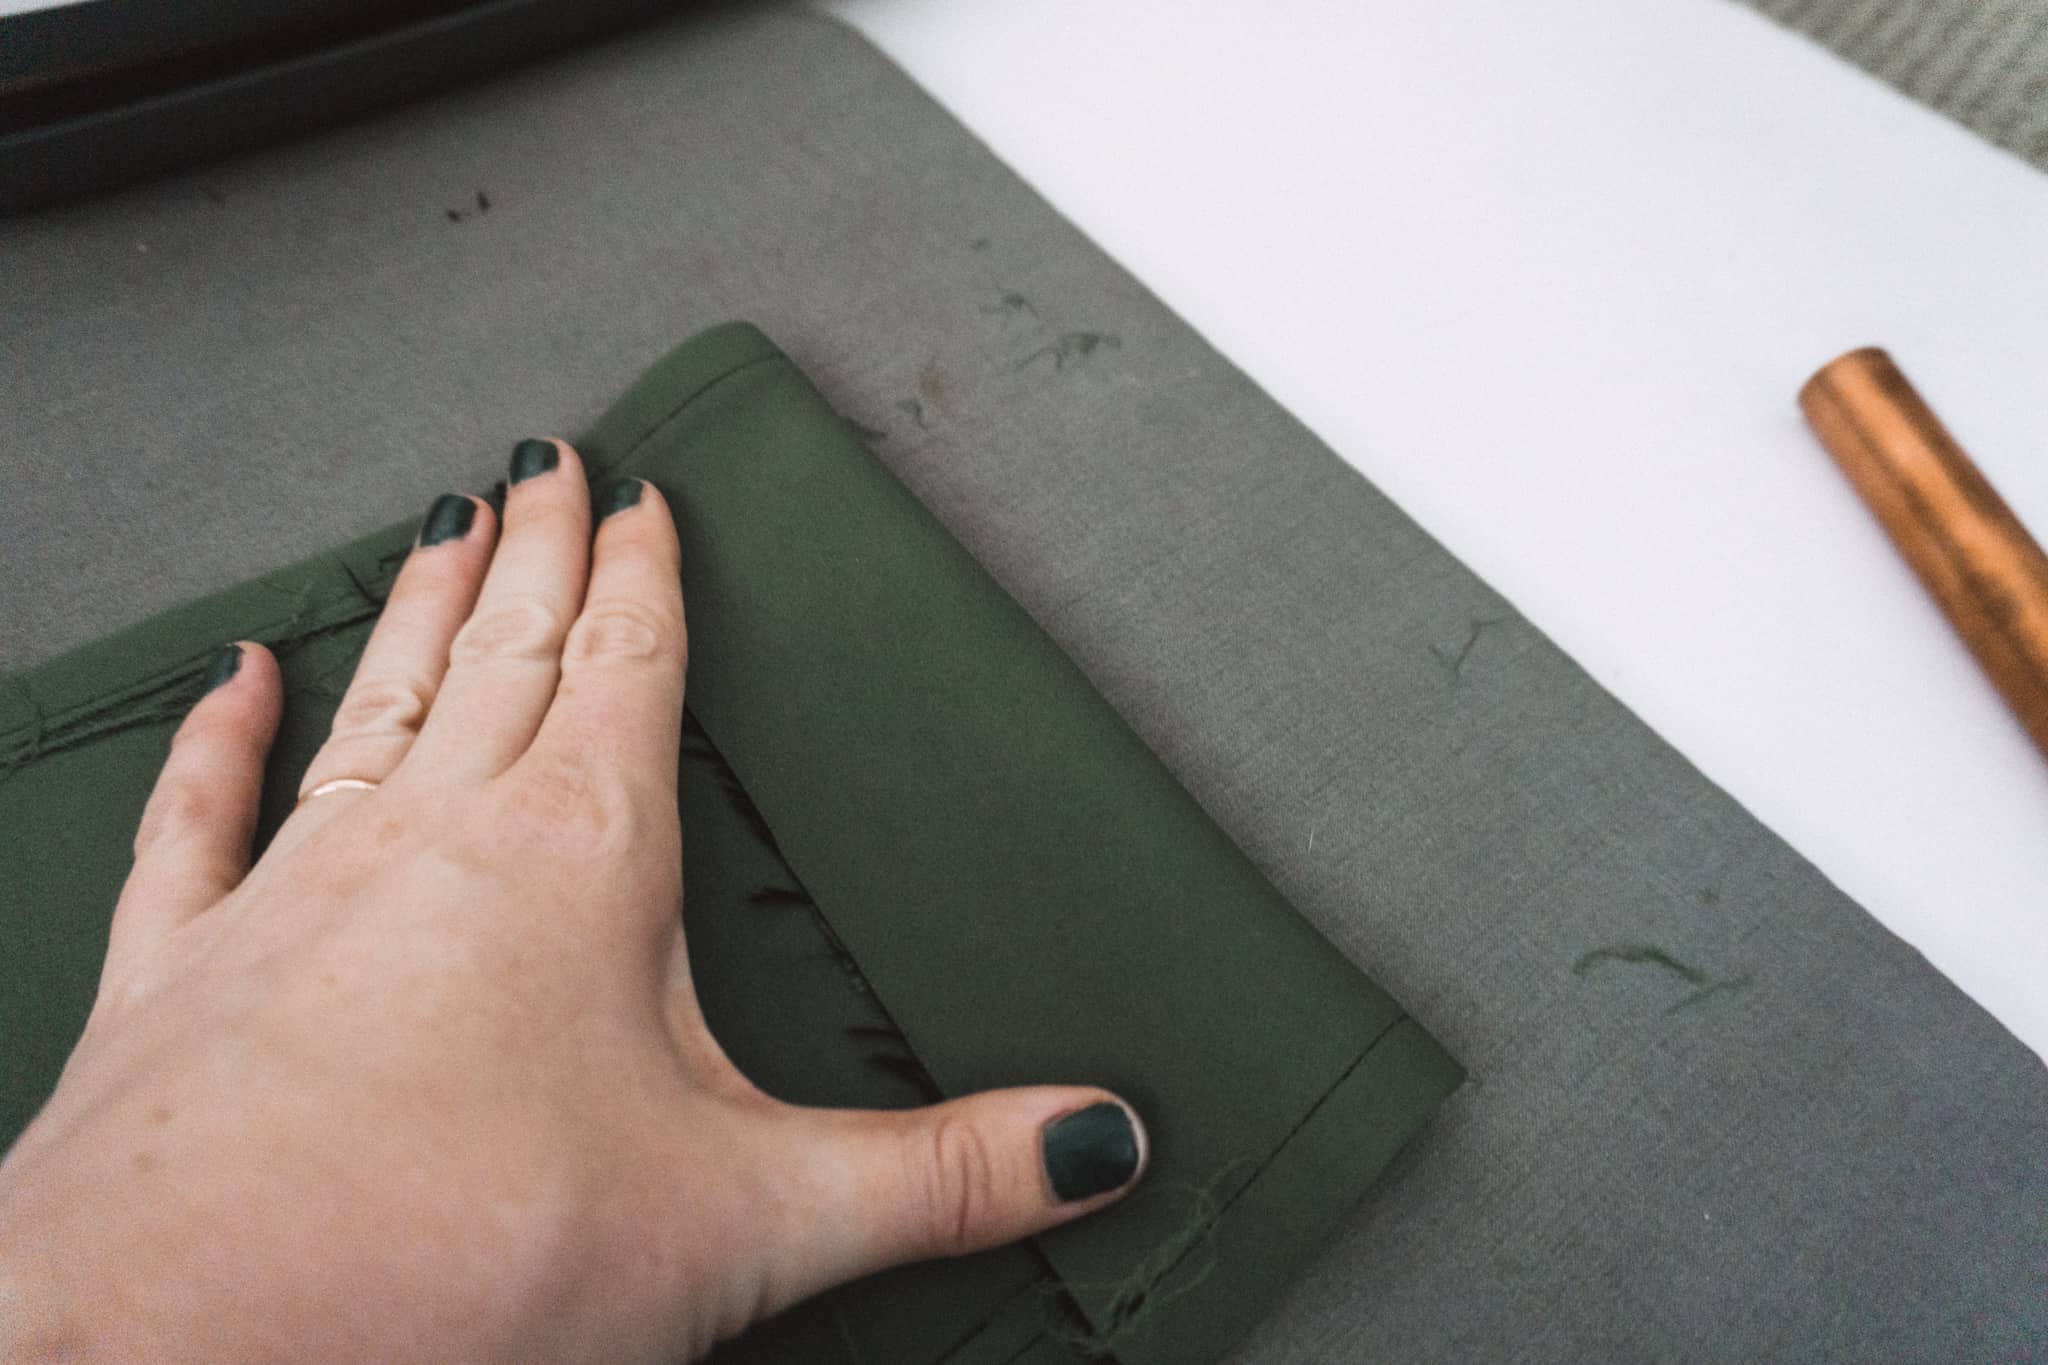
Now you will pin the long sides 1/2″ and then use your EasyPress 2 to press the seams. Look at the Cricut Heat Guide to know how hot to heat the EasyPress. Depending on your fabric the settings change!
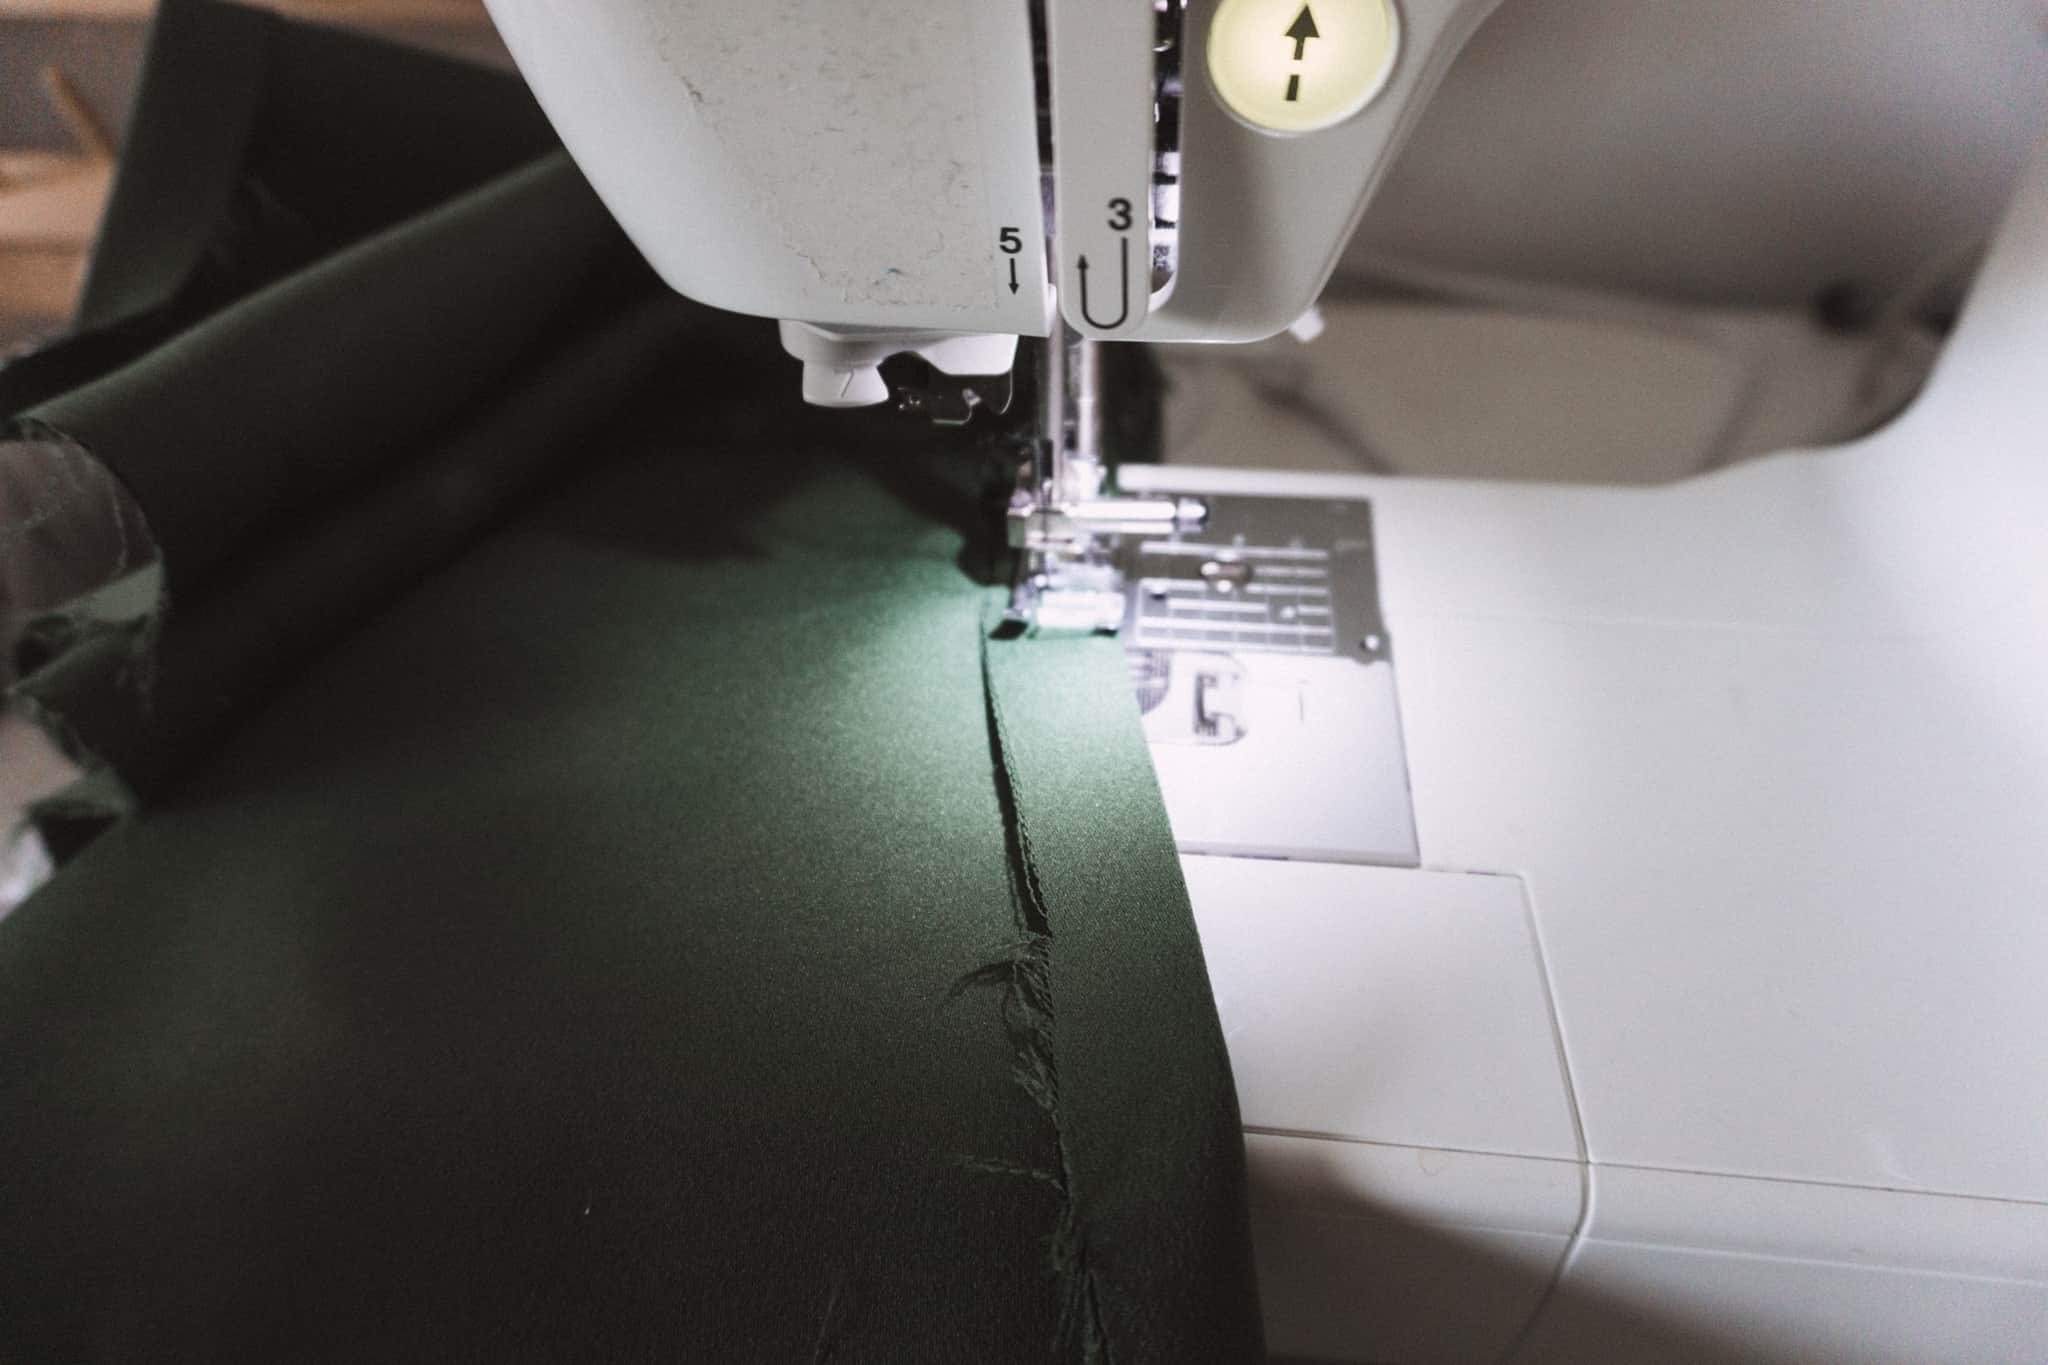
Now you will sew the seams 1/4″ from the edge.
Now you will fold the top and bottom down 2″ and repeat the above steps. Press the seams and then sew them! This time though sew 1/4″ from the raw edge part of the fabric. This is where your pipes will go.
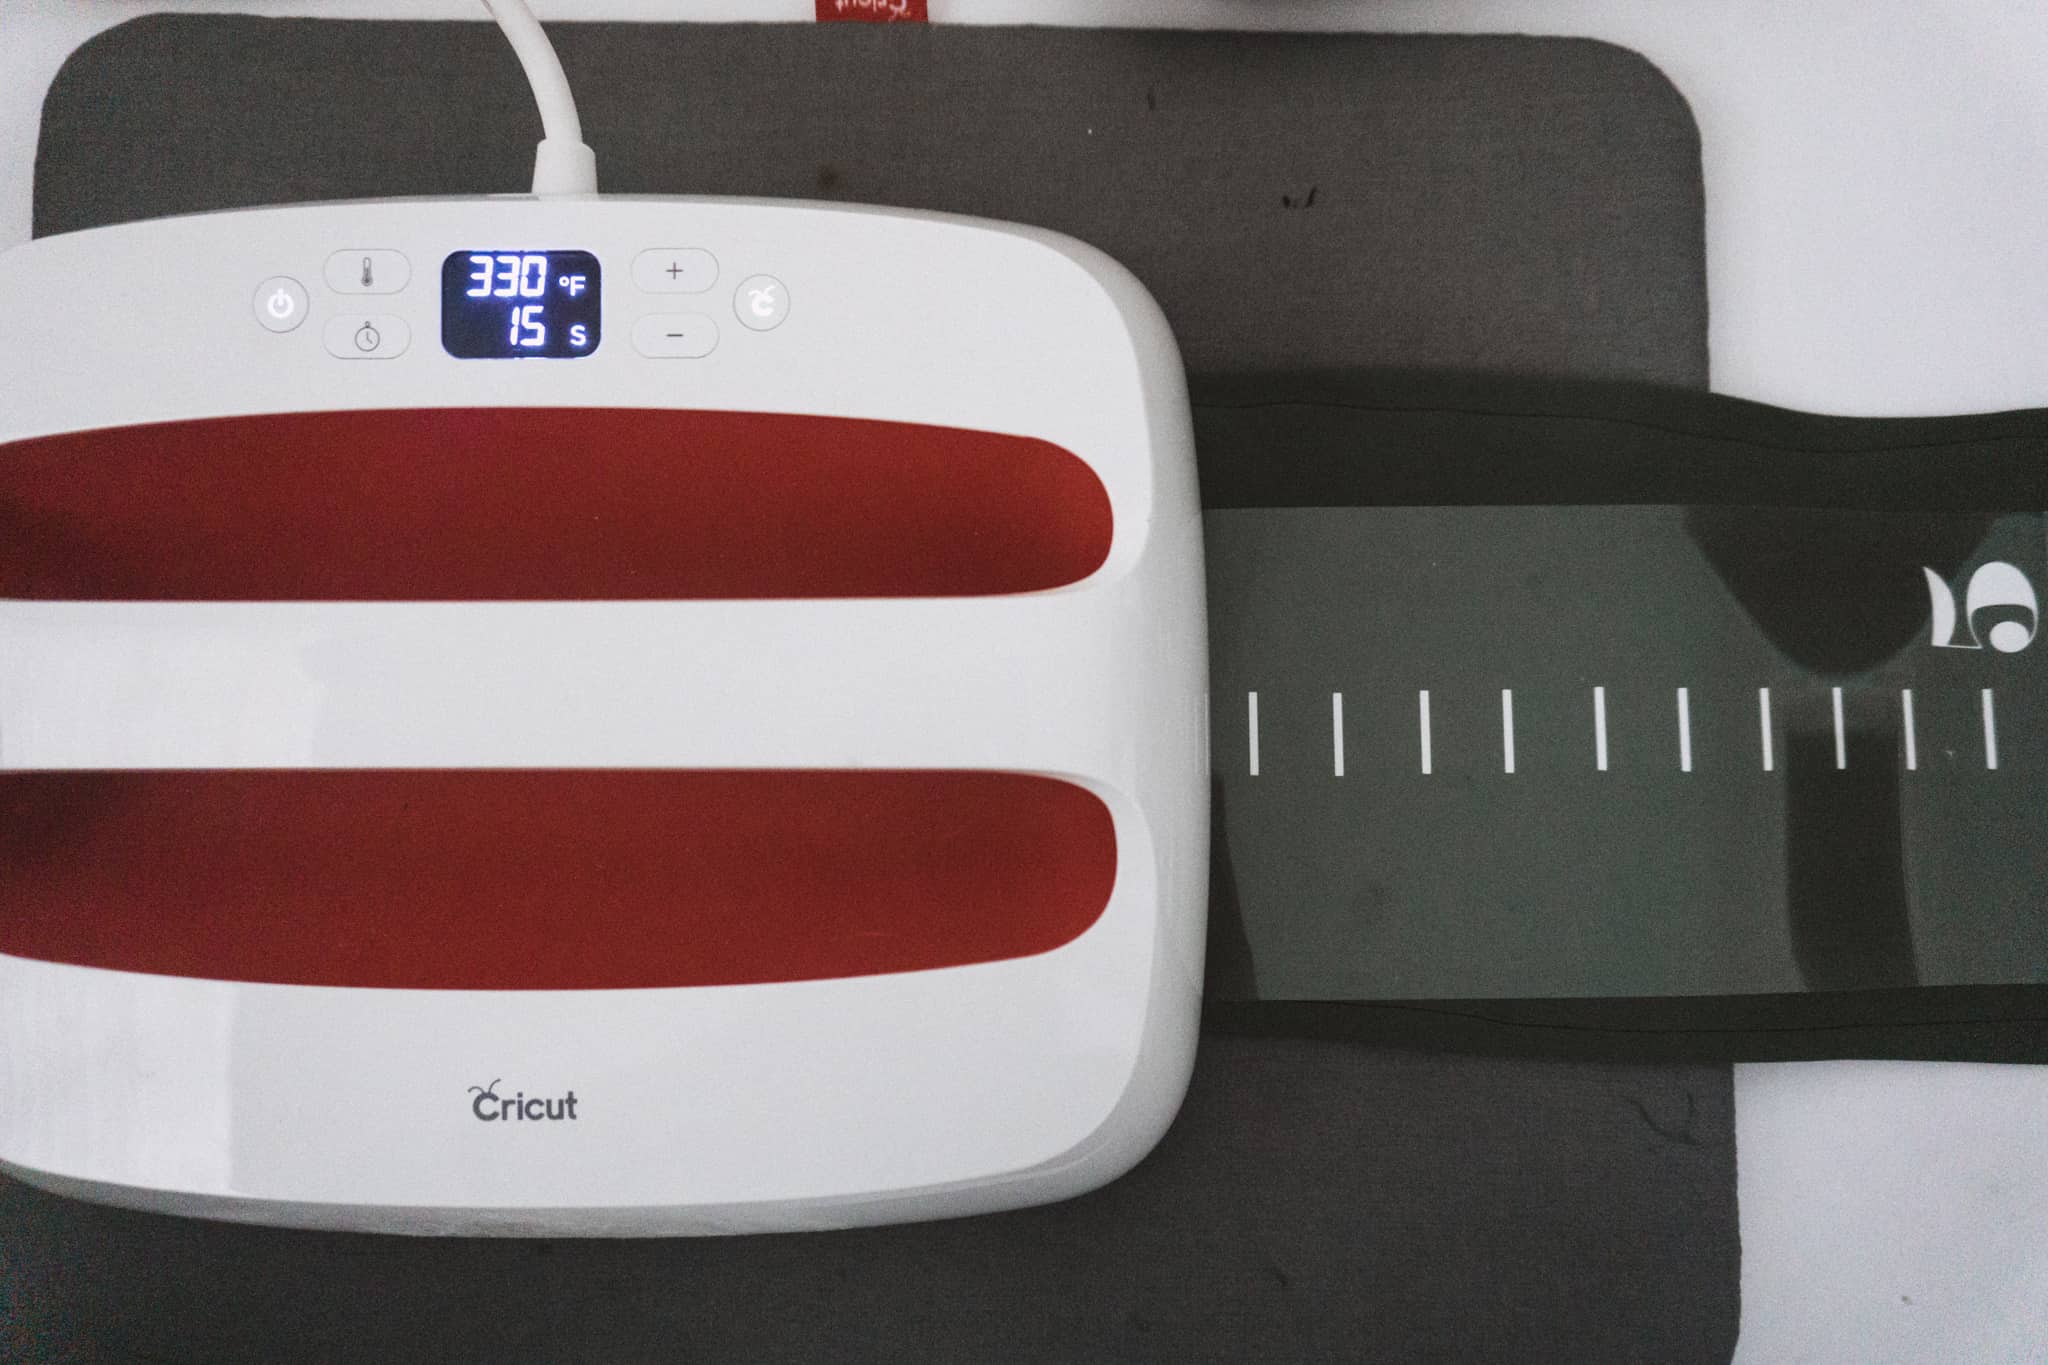
Now you will iron on your growth chart! The large EasyPress 2 makes this really simple. I think I only had to press it 4 times!
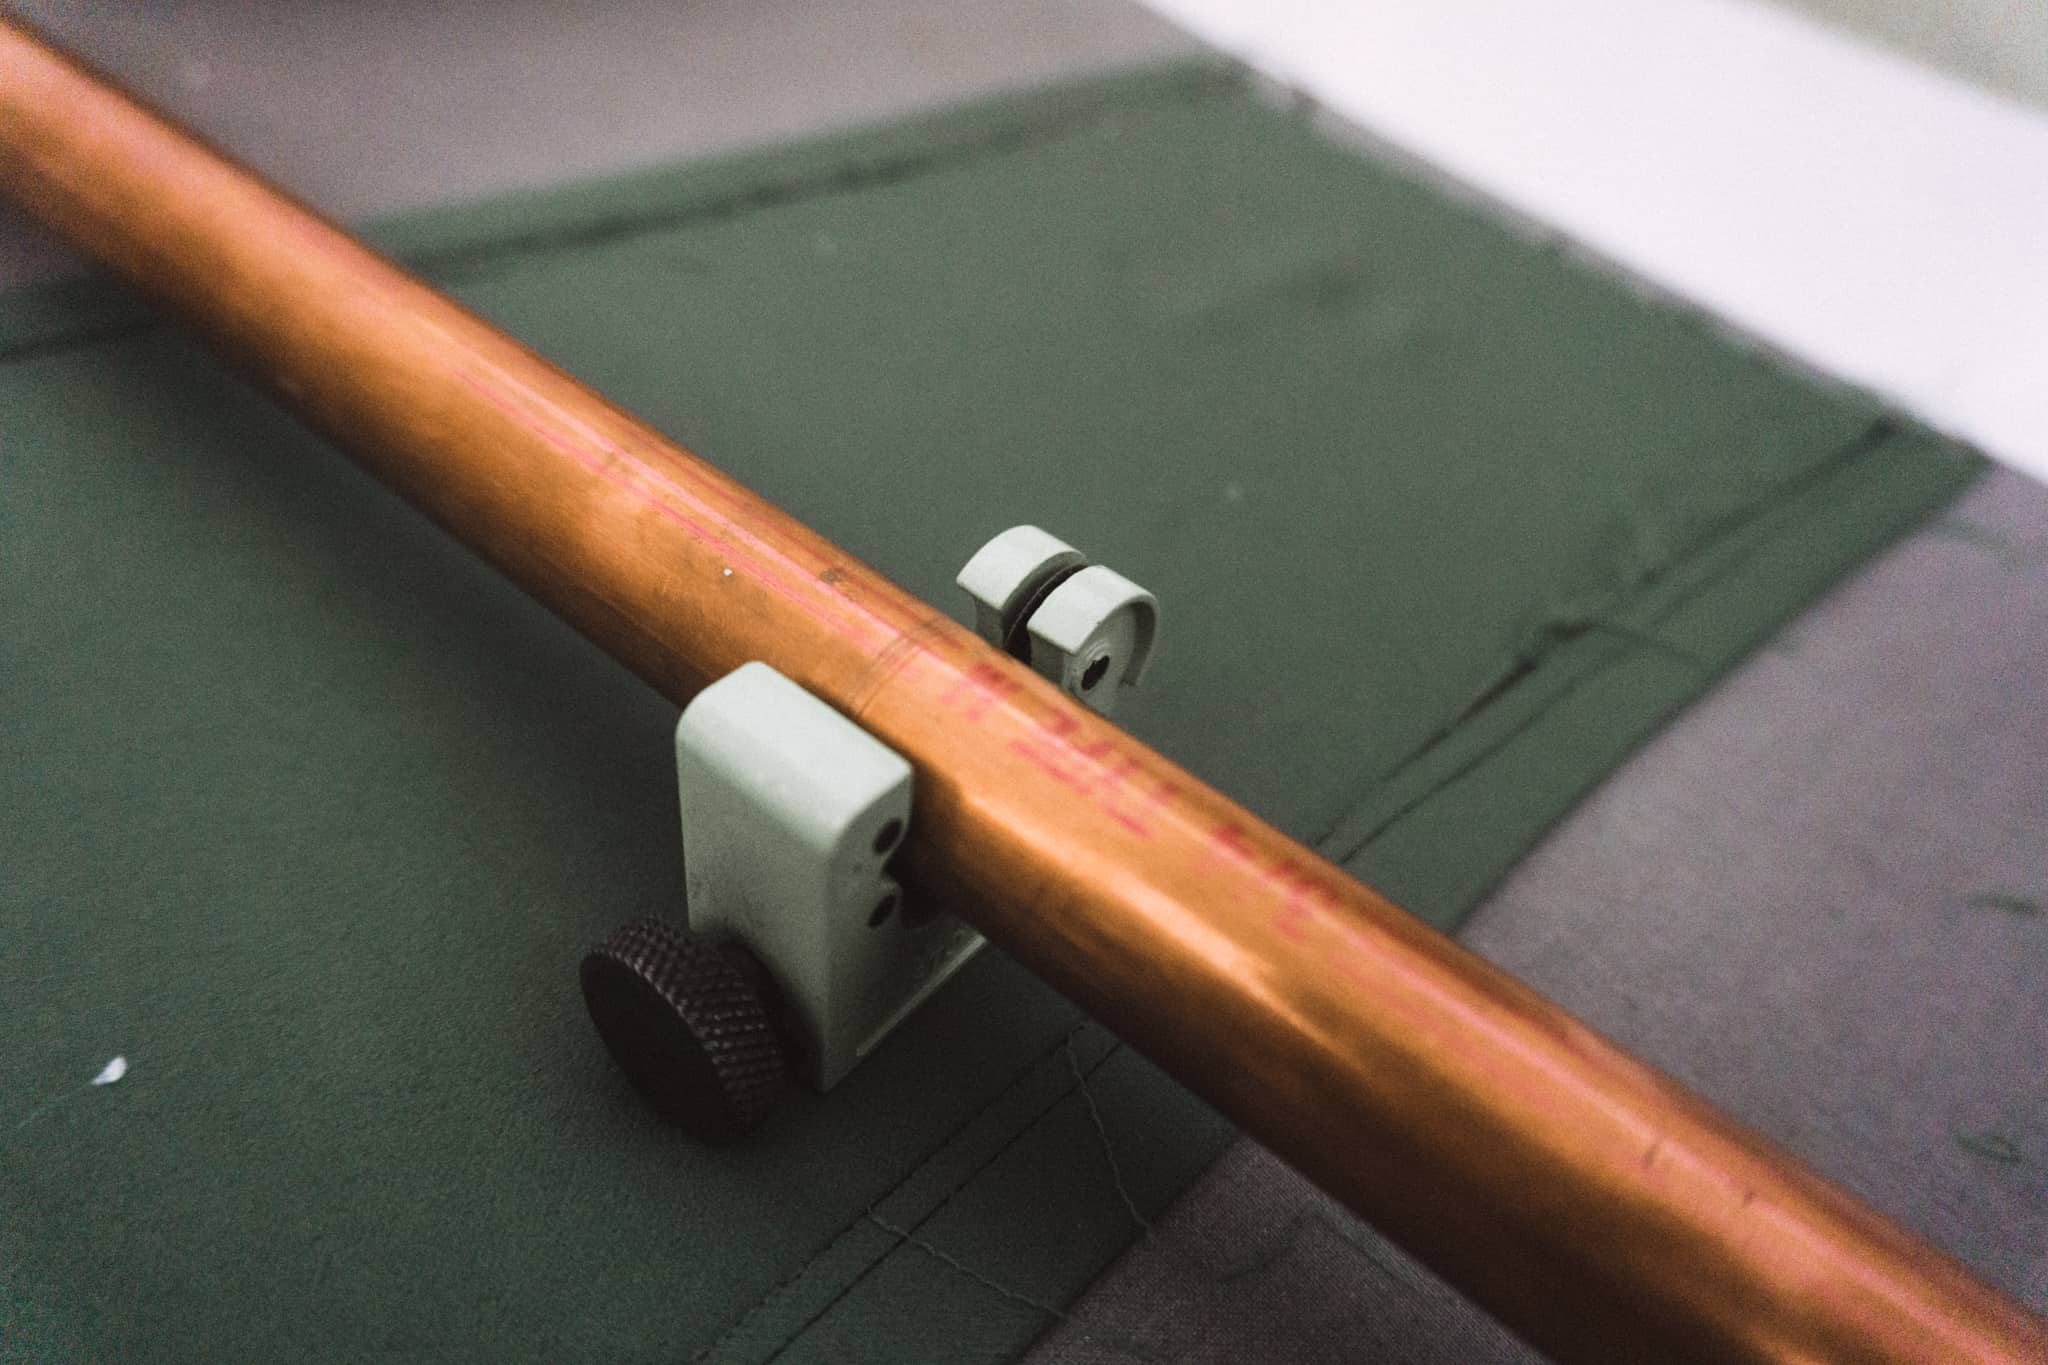
Grab your pipe cutter and cut your pipes to length. I cut mine 11″ long.
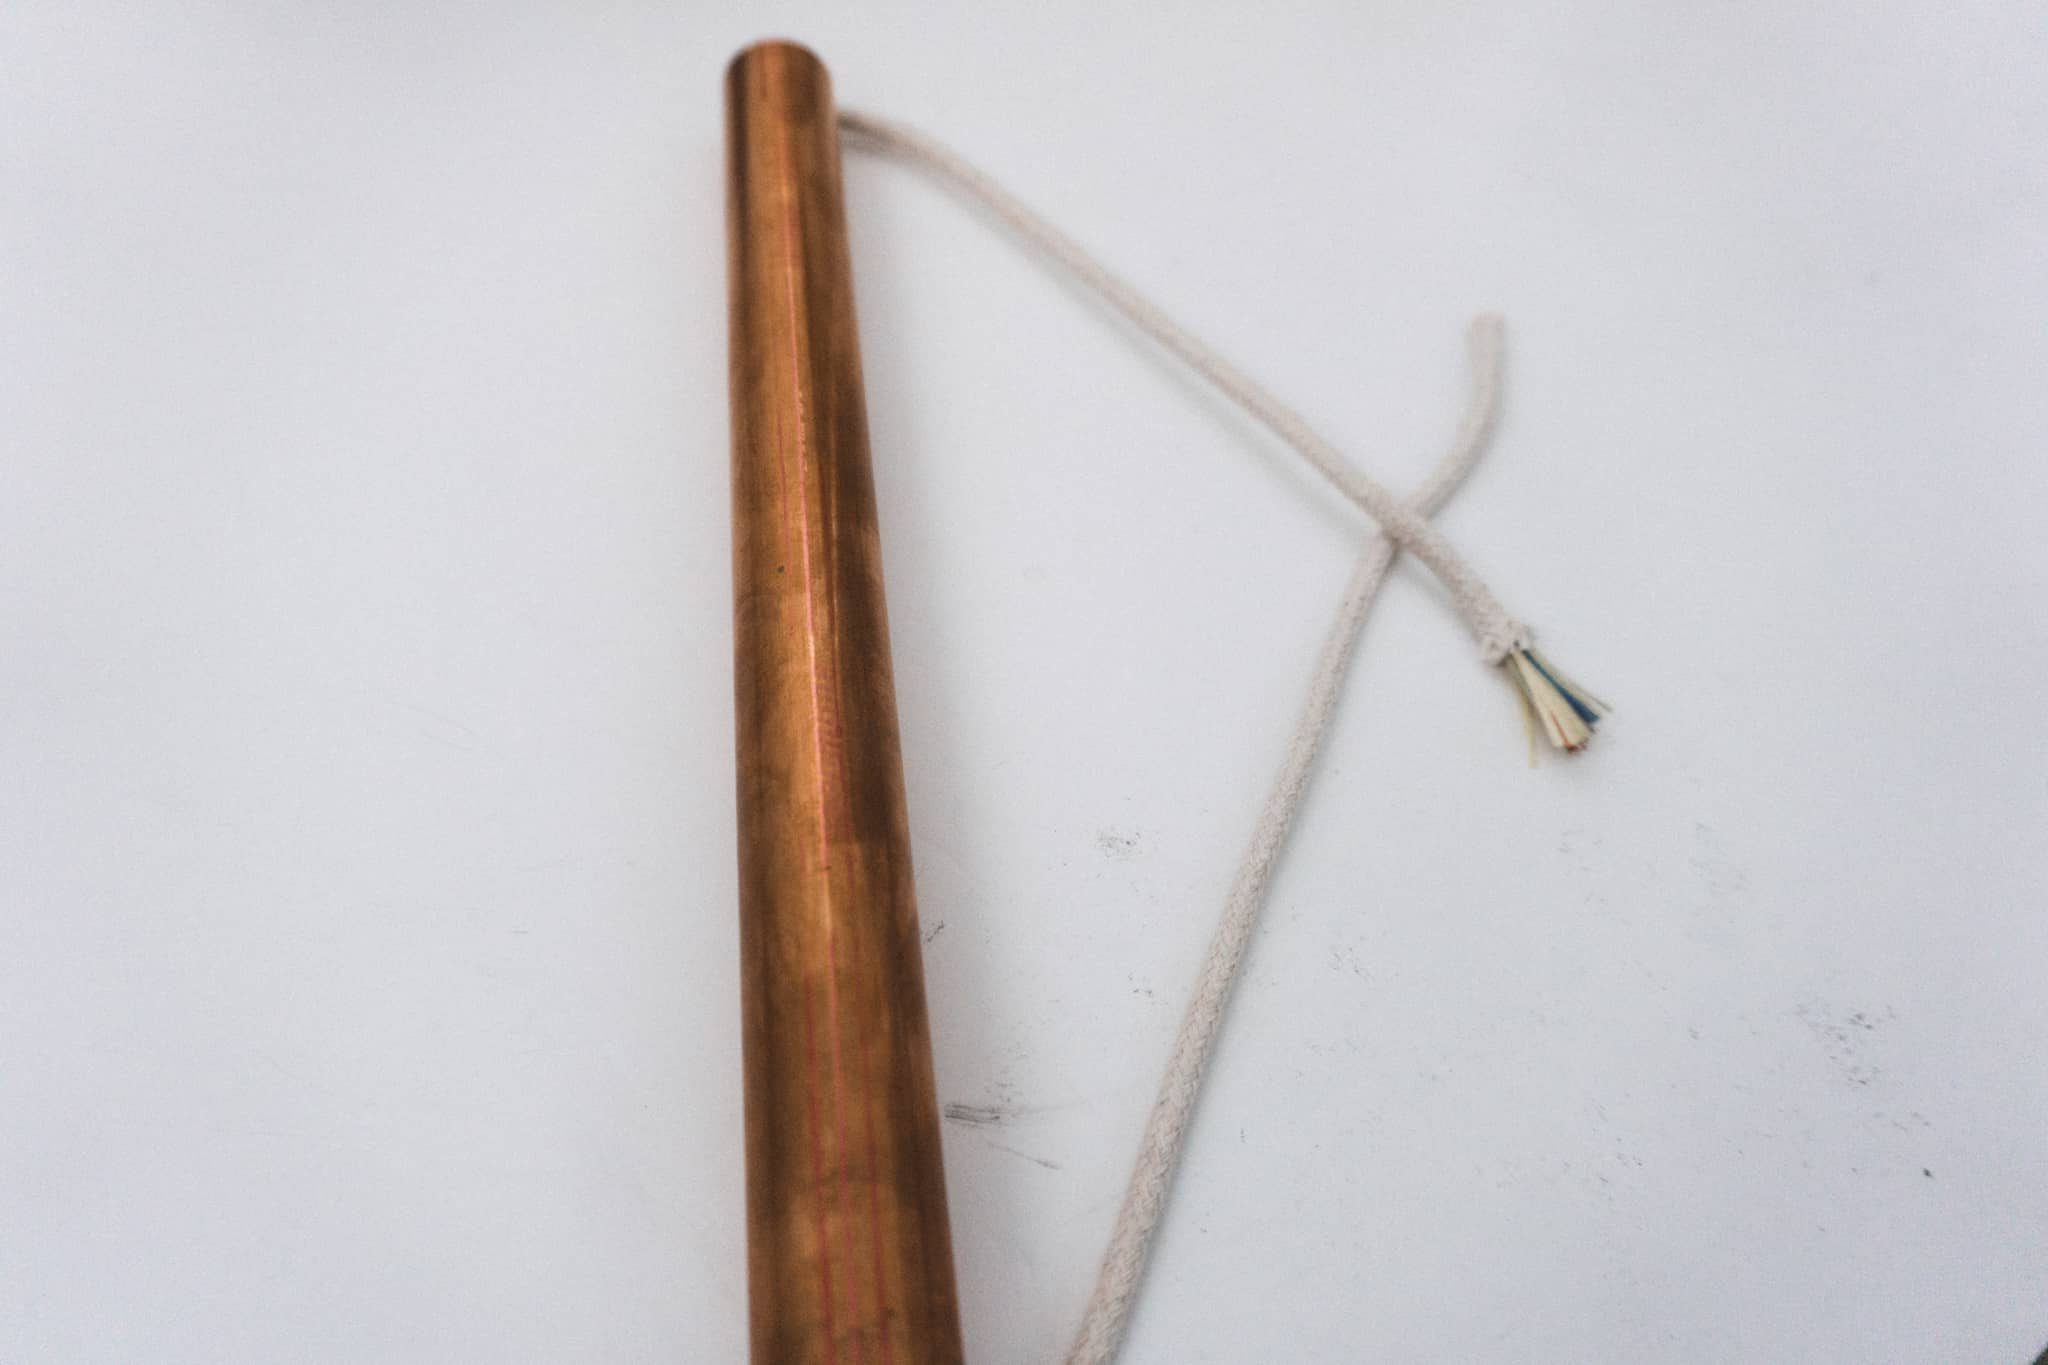
Grab your cotton cord and measure how long you’d like it. I wanted it to hang a little bit so you could see the cotton cord. If you’d prefer to keep it tighter then you can do that too! Make sure before you tie it that you thread the copper pipe and THEN tie your cord.
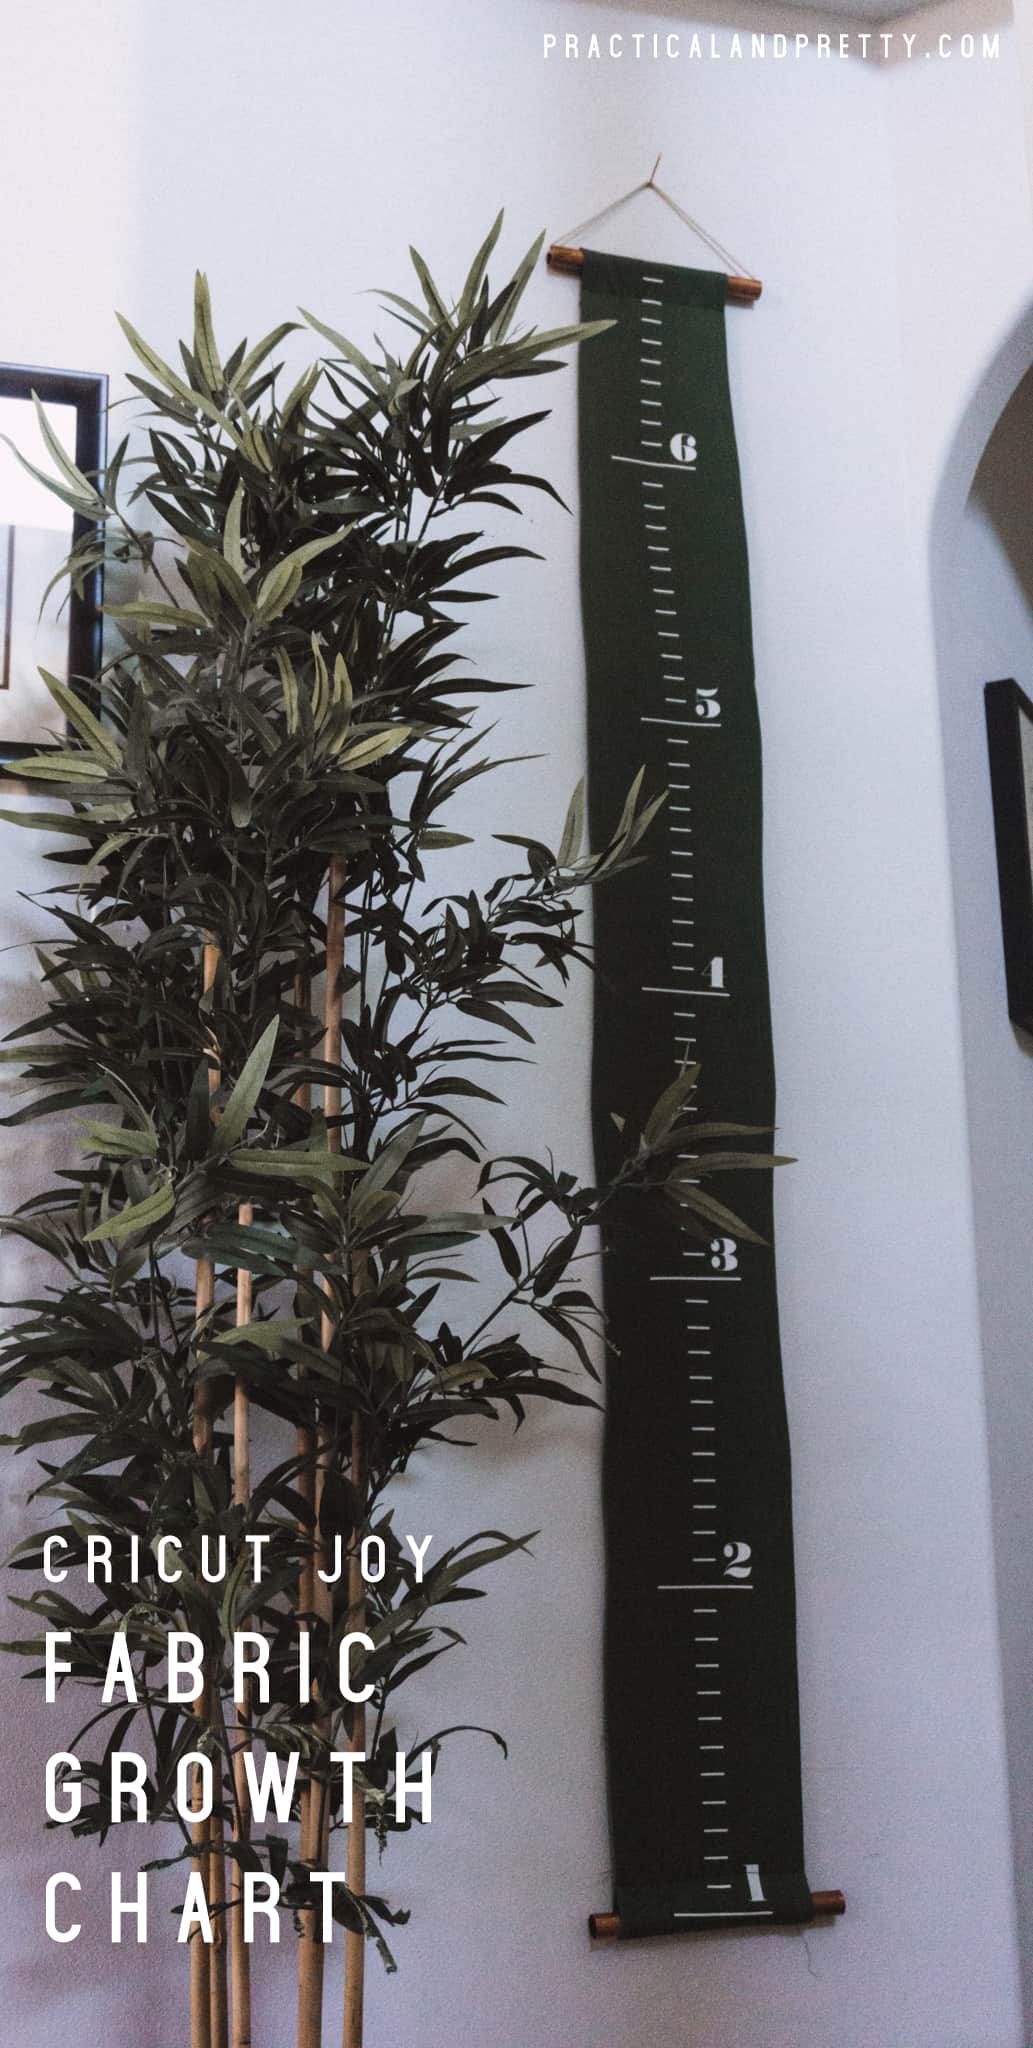
Thread the bottom copper pipe through the pocket and then hang the growth chart 1 foot above the ground and you are ready to get measuring!
DIY Fabric Growth Chart
The Cricut Joy is the perfect tool to create a growth chart! I walk you through how to cut iron-on and then create a cute fabric growth chart.
Materials
- Smart Iron On
- 80" of Fabric (I used an old curtain!)
- 1/2" Copper Pipe
- Cotton Cord
Tools
- Pipe Cutter
- Rotary Blade
- Acrylic Ruler
- Cutting Ruler
- Pins
- EasyPress 2
- EasyPress Mat
- Sewing Machine
- Cricut Joy
Instructions
- Open up the Design Space file here. Click 'Make It'.
- Now you need to change the length of the cut because the longest iron-on option is currently available in a length of 24". So change the number in the box pictured below to "24". You're going to repeat this process because you are going to do 3 cuts of 24". Then make sure if you are doing iron on, that you mark 'Mirror' to on!!
- Click "Continue".
- After you click continue you will connect your Cricut Joy. Watch my video above if you've never connected it before. If you have, it should appear in the list and connect! Select the material you are using. For this project, I used Smart Iron On.
- Load your material and start the cut! Because the Smart Iron On doesn't require a mat, this is so quick!
- Weed the iron on.
- After your iron on is weeded, you will pull out your rotary cutter, acrylic mat, and cutting ruler. I cut mine 10" wide and 80" long.
- Pin the long sides of the fabric 1/2" and then use your EasyPress 2 to press the seams. Look at the Cricut Heat Guide to know how hot to heat the EasyPress. Depending on your fabric the settings change!
- Sew the seams 1/4" from the edge.
- fold the top and bottom down 2" and repeat the above steps. Press the seams and then sew them! This time though sew 1/4" from the raw edge part of the fabric. This is where your pipes will go.
- Now you will iron on your growth chart! The large EasyPress 2 makes this really simple. I think I only had to press it 4 times!
- Get your pipe cutter and cut your pipes to length. I cut mine 11" long.
- Grab your cotton cord and measure how long you'd like it. I wanted it to hang a little bit so you could see the cotton cord. If you'd prefer to keep it tighter then you can do that too! Make sure before you tie it that you thread
the copper pipe and THEN tie your cord. - Thread the bottom copper pipe through the pocket and then hang the growth chart 1 foot above the ground and you are ready to get measuring!
Notes
The cut file can be found here: design.cricut.com/landing/project-detail/5eb089cc7e2a090ef44aef16
Recommended Products
As an Amazon Associate and member of other affiliate programs, I earn from qualifying purchases.


I actually made this chart for my mom. She is living away from her grandkids right now and misses them a lot. I thought this would be a fun way for her to keep track of their growth and feel like she’s there watching them grow up! For this chart, I’m going to use a metallic silver Sharpie to mark the current heights and set it with the chart so she can keep marking it as I send her updates.