Geode tie dye, sometimes called an agate tie dye effect, gives a gorgeous, gemstone-inspired result that’s well worth the time. There are so many beautiful options and outcomes with this technique!
Tying a geode pattern in your tie dye isn’t too complicated and after a few pointers you will find here, you’ll be set to start your first geode tying project. Remember, practice makes perfect! I’m still learning with each project too!
If you want more tie dye inspiration, here are my 5 favorite shibori folds and a full comparison of the best tie dye brands for vivid results.
Want to see 12 more of my favorite folds? Grab the guide here.
Table of contents
If you’re interested in tie-dye you can try these other ways of folding your fabric for tie-dye or use simple household items like turmeric for a natural dye option.
Before you start, make sure you have the right supplies! I put together a full guide to the Best Tie-Dye Supplies I use for every project — check it out here.
💡 Quick Tips for Geode Tie Dye
- Use sinew, not rubber bands – it holds tighter and gives you those crisp, ring-like edges.
- Go heavy on the soda ash soak – muted colors usually mean not enough prep.
- Layer your colors from dark to light for a more natural “stone” effect.
- Add extra ice if you want softer blends; use less ice for bolder contrasts.
- Patience pays off – let it sit at least 24 hours for full color saturation.
I love tie-dye and write blog post after blog post on how to get different results. But THIS tutorial might be my favorite so far! Although the way you tie is a bit more tedious than other ways of tying, it’s worth it.
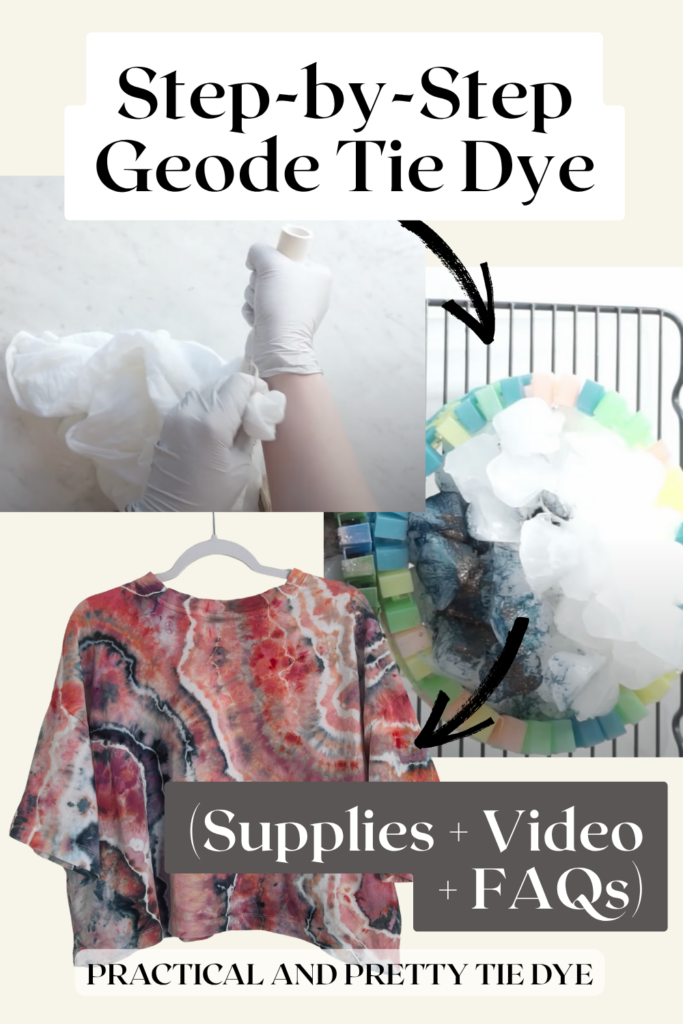
I have a step-by-step for you here in photo form, video form, AND a printable option. So I think you’re set up for success. Can’t wait to see your results!
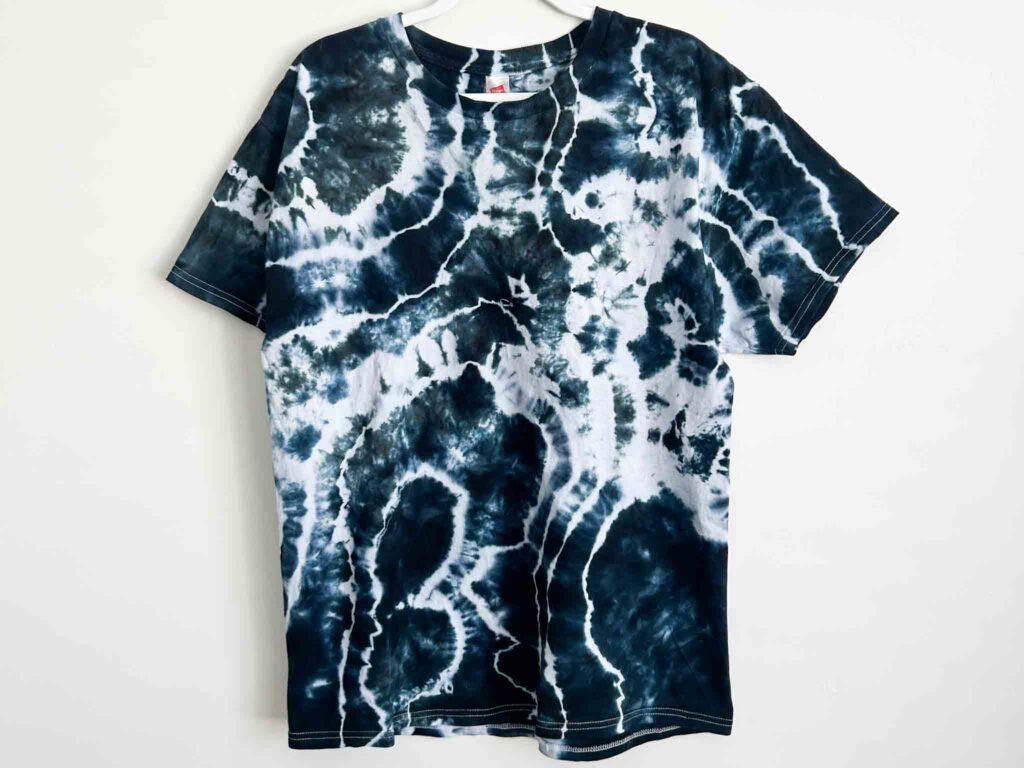
Below you can see how to do a geode on a tee shirt!
Supplies You’ll Need for Geode Tie Dye
- Blanket (or other natural fabric)
- Dye
- Soda Ash
- Sinew
- A pipe of some sort (I used a copper pipe I had lying around but now I use a sinew puller I got from Etsy!)
For a full list of my supplies check out my tie dye supply list here.
How to Tie a Geode Tie Dye Pattern
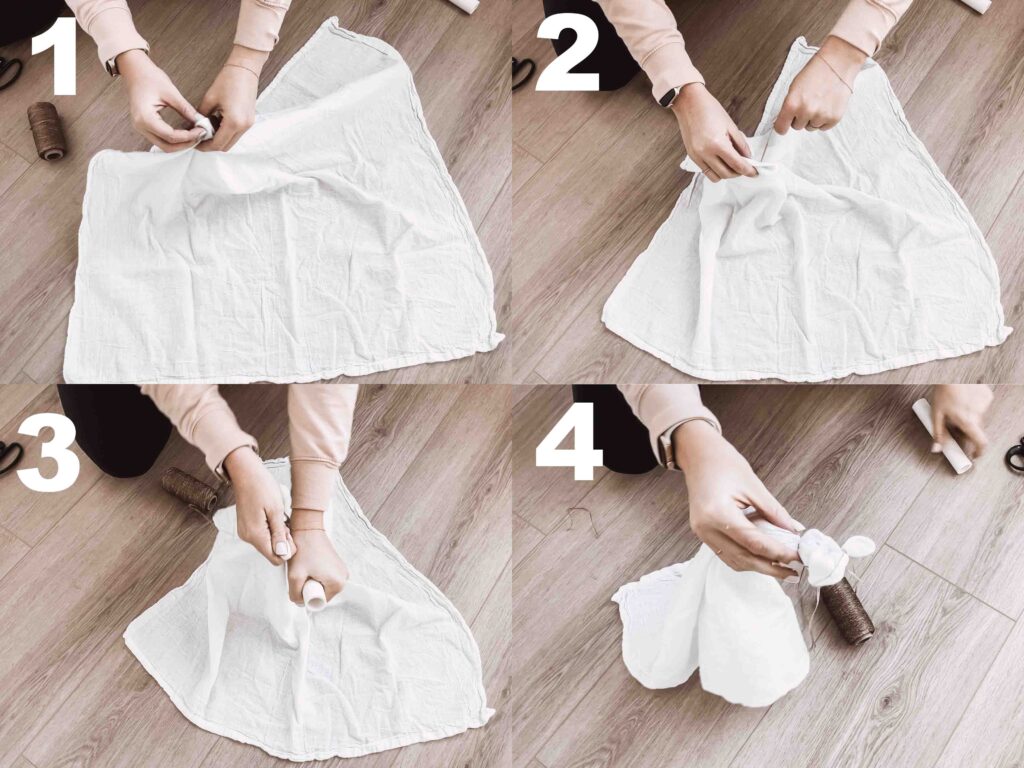
- Start by grabbing a random piece of your fabric. I like to go from off center a bit.
- Scrunch the fabric so it’s not just a perfect circle, and begin wrapping your sinew 3-5 times.
- Pull the sinew tight. You’ll feel a little tug. You CAN pull too tight and break your sinew so be aware of that!
- Grab the fabric just a little lower than your current tie, scrunch it up, and repeat this process.
- Some people like to do just one big geode. I like to do 2 or 3 on each of mine. If I’m doing something big like a swaddle I do up to 5!
How to Apply Dye for a Geode Effect
This is the DOI (dyed on ice) method. You can also do DUI (dye under ice) and get a slightly different result. I have a post coming soon with those exact comparisons.
Do not skip this step! Your dye will be extremely muted if you do. Trust me… I know.
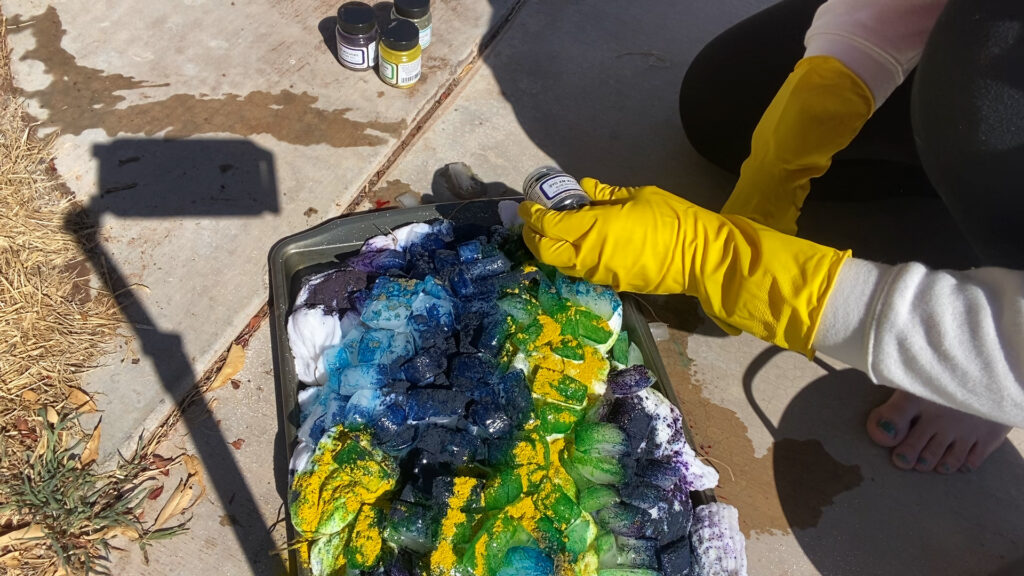
The dye I used – all Jaquard brand:
- Violet
- Medium Blue
- Golden Yellow
- Teal
All of these colors were part of this set.

How Long to Let It Sit & Rinse
Allow the ice to melt and sit for at least 24 hours. If you’re interested, I did a test on how long to let dye sit.
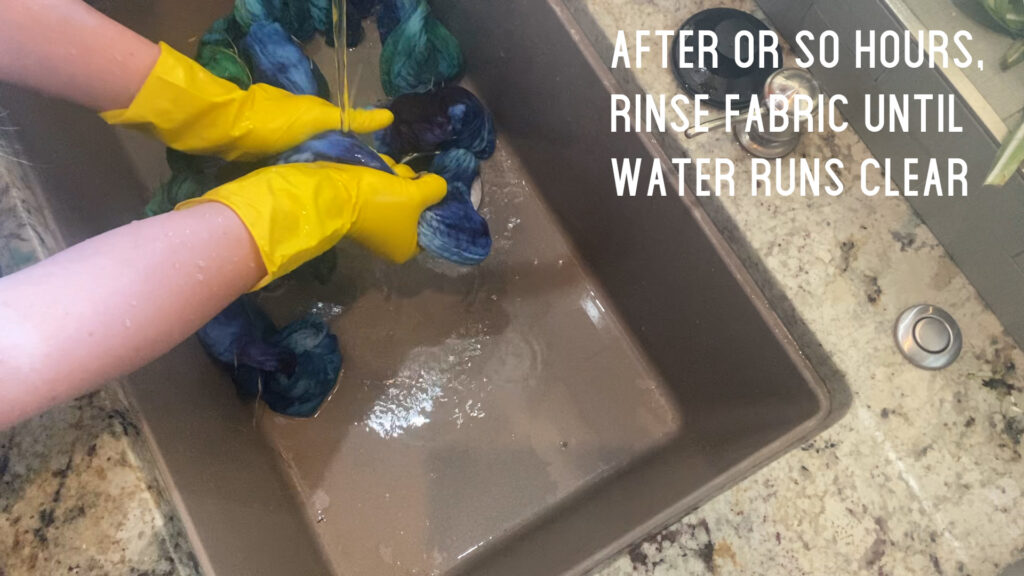
This takes quite a while. I rinse it while it’s tied, then start untying it as I continue to rinse. Here’s my full rinse out method.
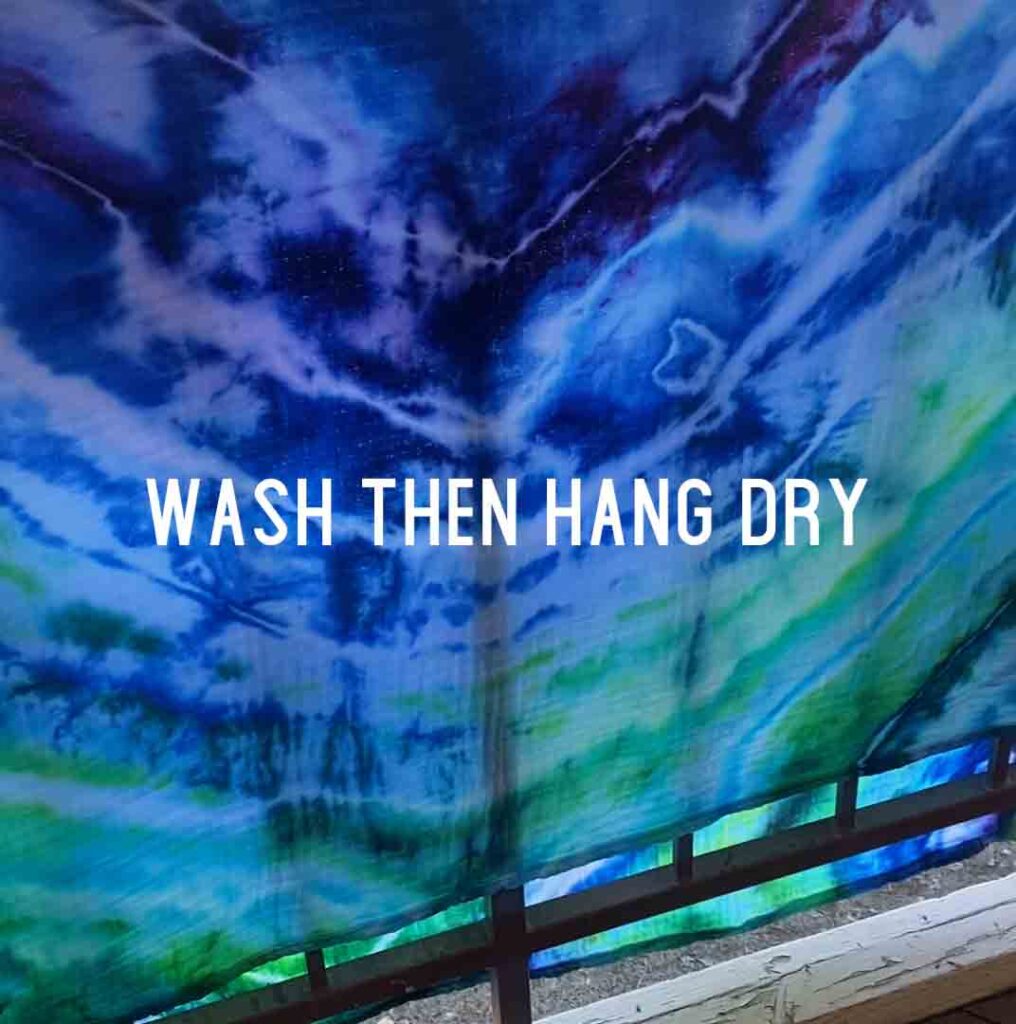
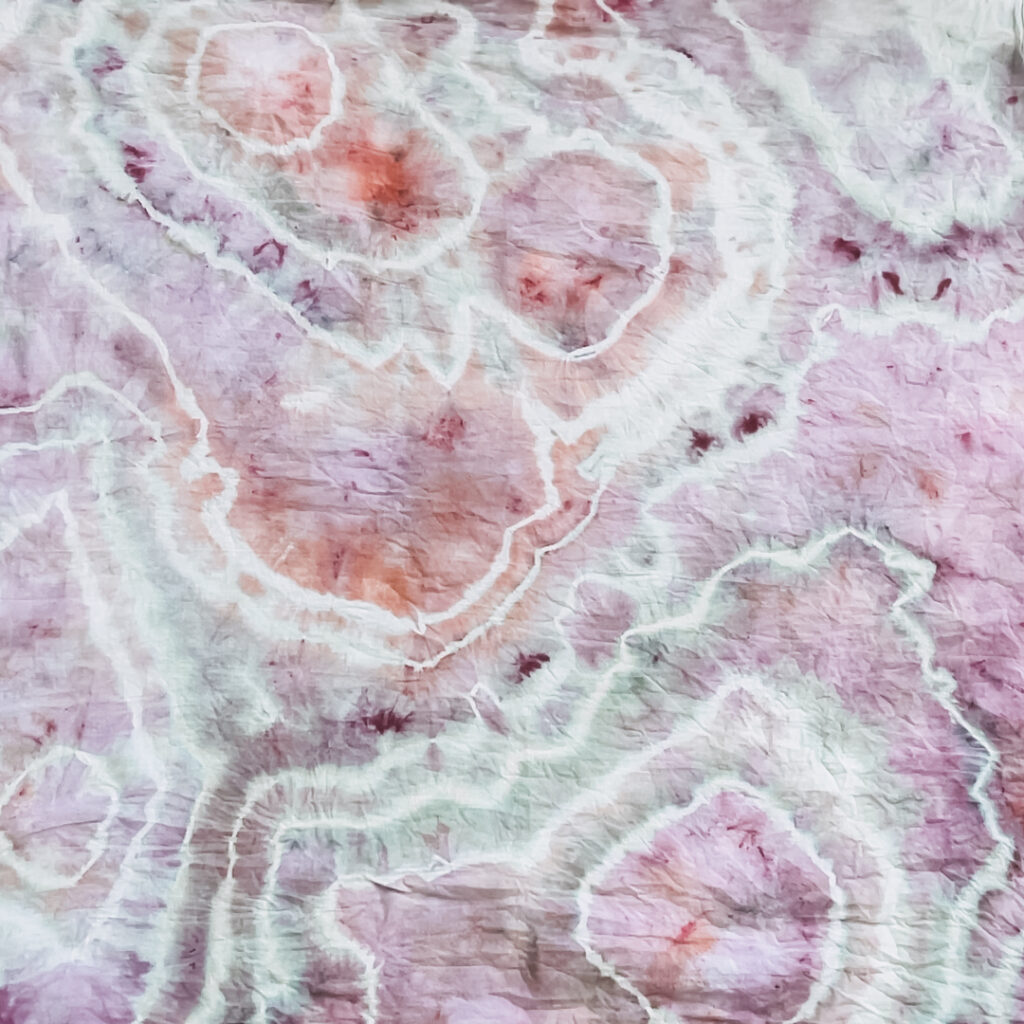
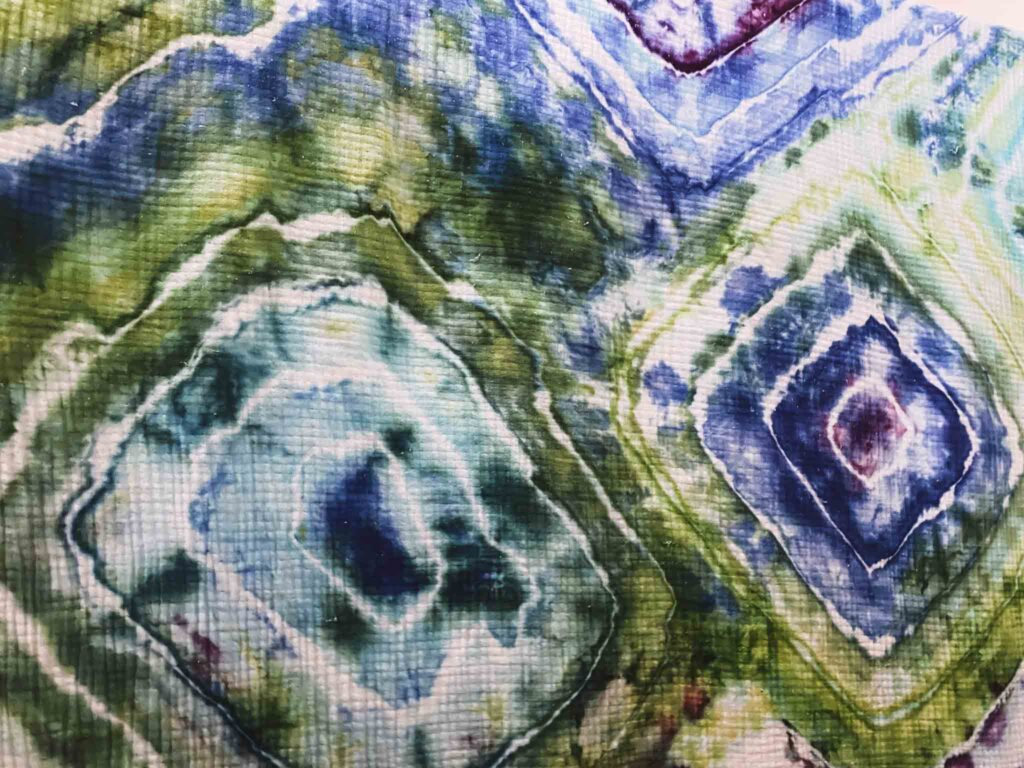
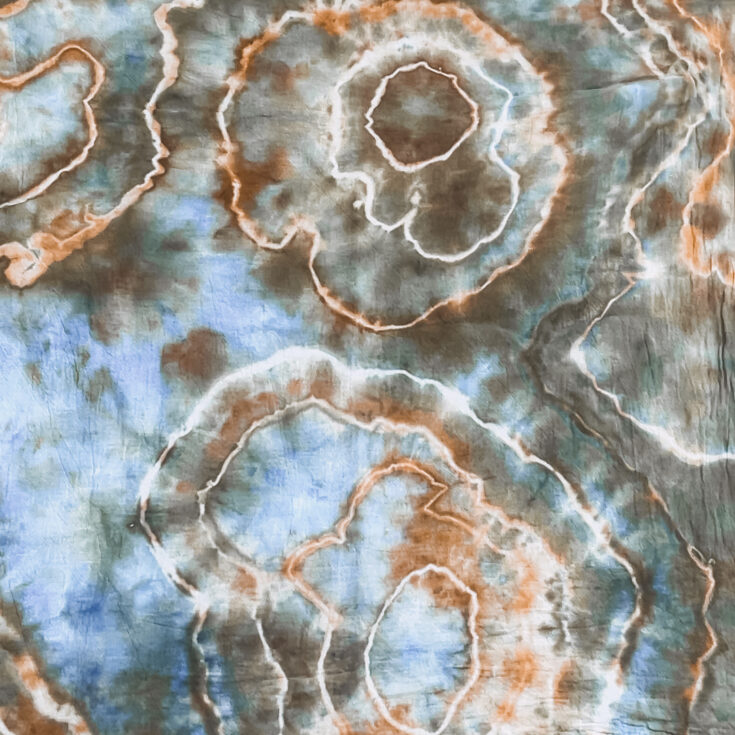
Here’s a shot at the final result. So beautiful!
Geode Tie Dye
Geode tie dye gives a gorgeous end result well worth the amount of time it takes! So many beautiful options and results!
Materials
- Blanket (or other natural fabric)
- Sinew
- Dye
Tools
- A pipe of some sort (I used a copper pipe I had laying around)
Instructions
- Grab a random area of your fabric and wrap the sinew 3-4 times.
- Use your pipe to pull it tight by wrapping it around the pipe and pulling it. Don't pull too hard as you may snap the sinew.
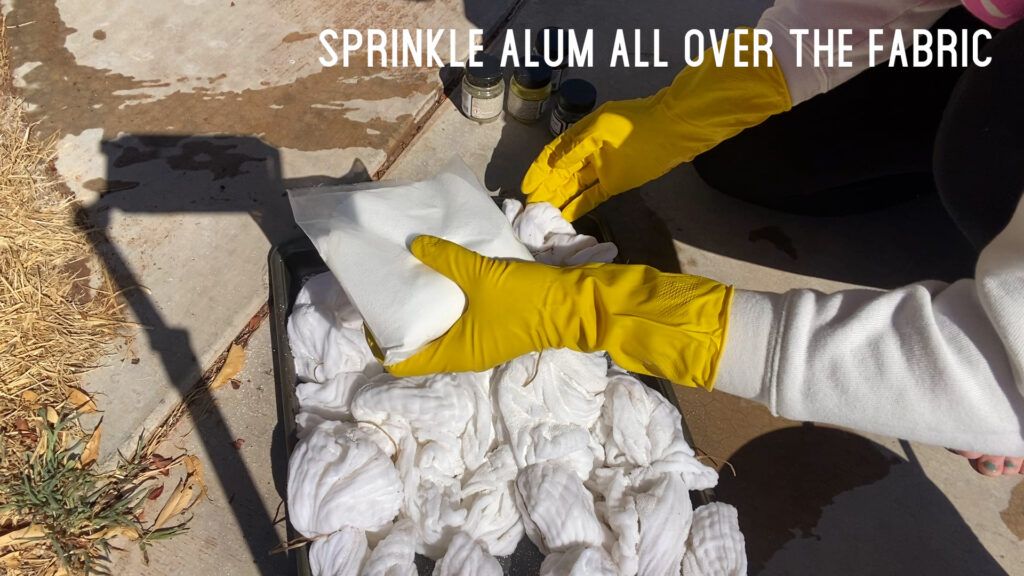
- After you have continued to do this with each area, get your fabric wet.
- Place your wet fabric in a bowl or cookie sheet. If you'd like more white than color, place a cooling rack on the cookie sheet so that it doesn't soak in the puddle that the ice will leave in the bottom of the sheet.
- Sprinkle the alum all over the fabric.
- Put your ice on your fabric.
- Sprinkle your dye on the fabric. Try to avoid having complimentary colors next to each other. This may cause muddy colors.
- Let the ice melt and let it set for at least 12 hours.
- Rinse with cold water until water runs clear then untie your fabric and continue to rinse. Then make your water hot to release the rest of the color.
- Run it through a quick wash in the washing machine then hang dry.
Recommended Products
As an Amazon Associate and member of other affiliate programs, I earn from qualifying purchases.


Agate Dye Video Tutorial
I have a full playlist of all of my geodes linked below!
FAQs About Geode Tie Dye
At least 24 hours under ice is best for deep color saturation.
I love using Jacquard or Dharma fiber reactive dyes for the most vivid colors. Here’s a full review of some of the top brands compared.
Absolutely! Just make sure it’s 100% cotton for best results.
Geode ice dye is just a way to tie regular tie dye. Just like you would make a spiral before you’d ice dye a spiral, this is how you start a geode tie dye project.
Yes! I haven’t braved a sheet yet, but I have done lots of crib sheets and blankets. It is definitely trickier and hard to manage but you can do it. I suggest trying it out on smaller things before you go big with a huge project.
📌 Love this? Pin it for later so you can come back when you’re ready to start your geode tie dye project!


Where can I buy fabric that is tie dyed geode?
A project that’s already dyed? I’d suggest searching etsy! If you’re looking for fabric to geode dye yourself I highly recommend these towels. They’re what I use to experiment and use around my house. https://amzn.to/48vnKnf
Thanks so much for publishing this site! I’m just learning to Tie Dye and I’m getting bored with the twist and the side sunset. Soon I’ll be retired and look forward to learning more! #66anddyingtotiedye
I love it! Follow along my YouTube too I post new inspo over there twice a week! https://www.youtube.com/@practicalandpretty