Hot water irrigation tie dye—sometimes called the 1-hour tie dye method—uses a pump sprayer filled with boiling water to heat-set Procion MX dyes quickly. Instead of batching for 12–24 hours, the hot mist activates the dye chemistry in minutes so you can rinse the same day. It’s perfect when you want a finished project fast without sacrificing vibrancy.
Supplies You’ll Need
- 100% cotton towel (or any cotton blank)
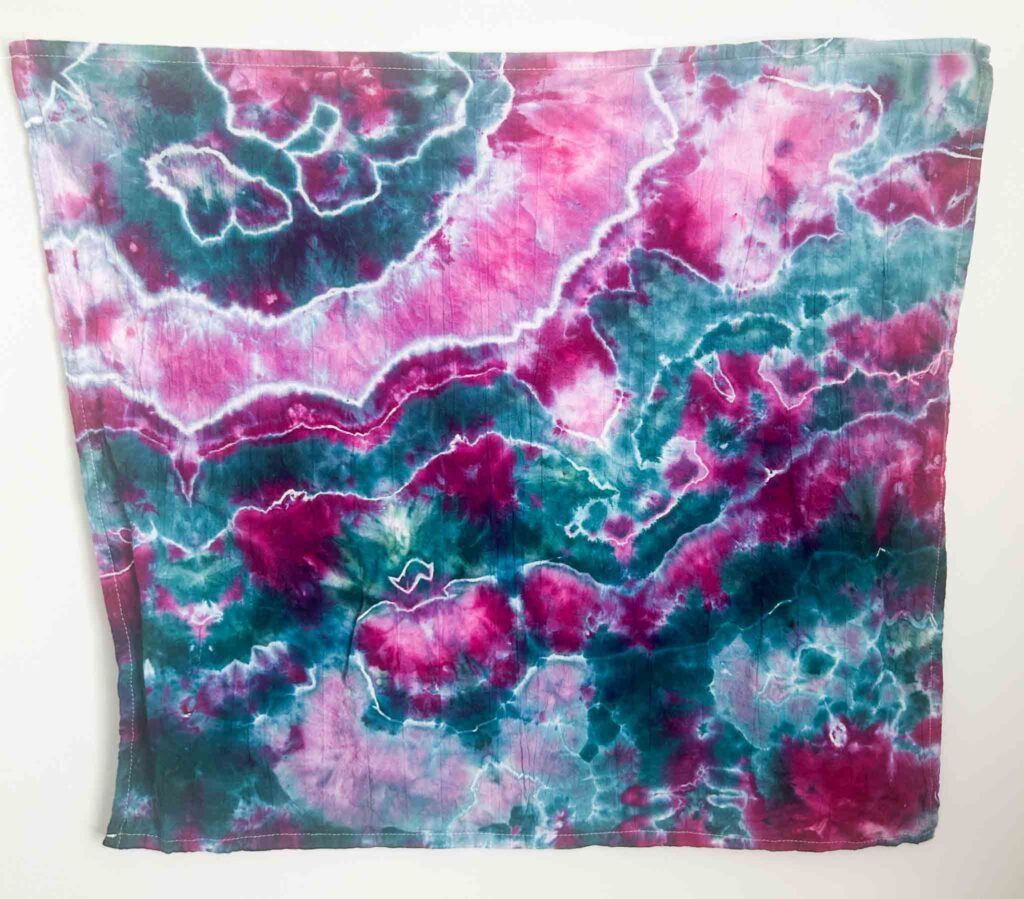
- Dharma Trading Co. Procion MX dyes — I used Amethyst and Kingfisher
- Pump sprayer (about $10 at home improvement stores or here on Amazon)
- Soda ash solution for pre-soak
- Gloves, protective surface, and a sink or rinse station
Shop my favorite dyes, blanks, and tools here → Amazon storefront
Before You Start: A Quick Note on the Fold
I used a classic geode fold. If you’re new to geodes, start with my detailed guide: How to Tie Dye Geode Patterns. You’ll get crisp white rings and dramatic color bands with this method.
Step-by-Step: Hot Water Irrigation Tie Dye
Step 1: Pre-Soak & Tie
Soak your cotton towel in a soda ash solution, wring until damp, then tie your geode pattern with sinew. Damp fabric helps dye grab right away—working dry can make powder slide off.
Step 2: Apply Dye (Wet Works Best)
Alternate Amethyst and Kingfisher in chunky sprinkles around the nodules. I used a long-handled spoon for control. Tip: Use less dye than you think—you’ll get great saturation and a much easier rinse later.

Step 3: Heat-Set with Hot Water Irrigation
Fill a pump sprayer with boiling water. From a distance, mist the tied towel so the hot water activates the dye without splattering. Let it sit at least 15 minutes so heat can fully set the color. (Spraying too close can blur your pattern.)

Step 4: Rinse & Wash Thoroughly
Rinse cold → warm → hot. Use Dawn dish soap between rinses to pull excess pigment (I did 2–3 soapy rounds). Finish with a hot machine wash. This prevents back-staining and keeps those geode whites crisp.

Results & What I’d Do Differently
The geode towel came out vibrant and deeply saturated. Next time I’ll mist from farther away to reduce splatter and I’ll use less dye for a quicker rinse. Overall, hot water irrigation tie dye is a fantastic way to get bold color in a single afternoon.
Pro Tips for Hot Water Irrigation (1-Hour) Tie Dye
- Dye on damp fabric so powder sticks and you use less product.
- Keep your distance with the sprayer to avoid splashes and muddy zones.
- Less is more with dye—save time on rinse-out and preserve crisp pattern edges.
- Soap between rinses to prevent back-staining onto white areas.
FAQs
They’re widely used to describe the same approach: using hot water to set dye fast. Many crafters say “1-hour tie dye,” while others use “hot water irrigation” or “hot water immersion.”
Yes—any 100% cotton blank is great. For flowy garments and festival looks, check out my festival pants tie dye tutorial.
Rinse-out is more like liquid dye (takes longer) than ice dye. See my side-by-side breakdown here: Ice vs Liquid Dye Explained.
Safety Notes
Use heat-safe gloves, protect your work area, and handle boiling water carefully. Always follow manufacturer guidance for dyes and equipment.
Get My Free Fold Guide + More Tutorials
Want more fold inspiration? Download my FREE ebook: 12 Favorite Tie-Dye Folds. Explore all my tie dye tutorials here → Tie Dye Projects.
Shop everything I use (dyes, blanks, sprayers, and tools) → Amazon storefront
Want to pin this for later? Use this image!


