So you want to learn how to ice dye a shirt? You’re in the right place. Ice dyeing is one of the easiest — and most magical — ways to get beautiful, one-of-a-kind results with tie-dye.
Whether you’ve never touched a bottle of dye or you’re just tired of spirals, this step-by-step tutorial will walk you through exactly how to ice dye your first shirt — with beginner-friendly tips, tools I actually use, and a video demo.
💌 Freebie for you: Want to try even more folds? Grab my free printable eBook with 12 of my favorite folds — click here to get it!
📺 Or jump straight to the video tutorial:
You don’t need a bunch of colors to start, here are some single-color projects to try out. And you’re going to want to avoid muddy results by checking out the most common tie dye results.
✂️ What You’ll Need
- 100% cotton shirt (turn it inside out — trust me!)
- Soda ash (from Dharma, Amazon, or Walmart — look for “washing soda”)
- Powdered dye (I used Tangerine and Amethyst from Dharma)
- Ice
- A bowl (the one I use is easy to clean — linked here)
- Gloves
- Dawn blue dish soap (yes, really)
- Optional: Synthrapol or Dharma’s dye detergent
Before you start, make sure you have the right supplies! I put together a full guide to the Best Tie-Dye Supplies I use for every project — check it out here.
🧪 Step 1: Prep Your Shirt with Soda Ash
Before you dye anything, you’ve got to soak your fabric in soda ash — this is what helps the dye bond to the fabric.
- Mix 1 cup of soda ash per gallon of water (you can eyeball it).
- Soak your shirt for at least 20 minutes.
- Wring it out by hand (or use a spinner if you have one — but be careful not to rinse out your soda ash in a washing machine).
🎨 Step 2: How to Ice Dye a Shirt
Once your shirt is prepped, it’s time to fold it up! For this one, I used a basic scrunch and placed it into a plastic bowl.
- Scrunch the shirt loosely into the bowl.
- Cover it with ice — don’t overthink this part.
- Sprinkle your dye powder on top. I used a spoon and kept it light, leaving some white space to let the colors “split.” Tangerine splits into yellow and orange, and it’s chef’s kiss.
🕒 Step 3: Let the Magic Happen
Let it sit for at least 24 hours after the ice has melted. You can check in and see how it looks, but don’t rush it. Once the dye has set, it’s time to rinse.
💧 Step 4: Rinse, Soap, Repeat
Here’s how I rinse out excess dye to get soft, vibrant results that last:
- Cold rinse first — until water runs mostly clear.
- Hot rinse second — this gets more dye out.
- Dawn dish soap rinse — just a few drops makes a big difference in removing leftover dye (the grease-fighting formula works magic here).
- Final wash in your washing machine with hot water + Dharma dye detergent (or a scent-free detergent if you don’t have that).
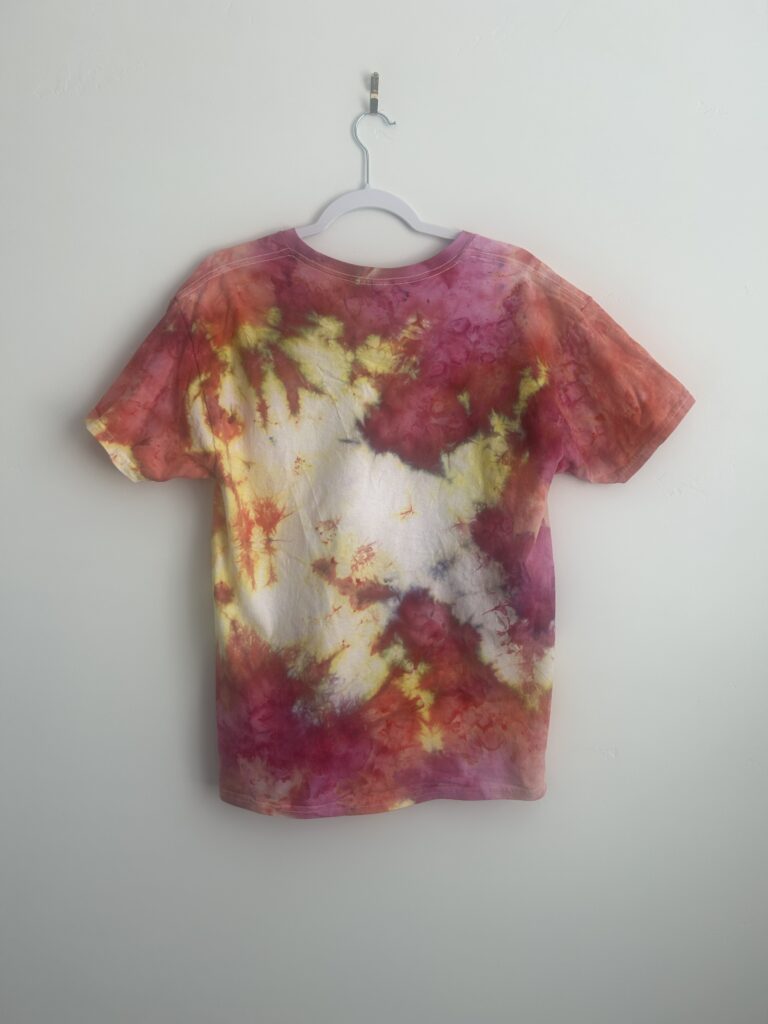
🧡 Final Result
You’re done! You should have a totally unique, one-of-a-kind shirt. Even if you follow every step exactly like I did, your result will still be yours. That’s the beauty of ice dye — there are no mistakes, just surprises.
I loved how this one turned out — lots of white space, color splits, and fun texture.
💌 Want More Tie-Dye Tips Like This?
- 📩 Grab your free fold eBook with 12 beginner folds
- 🛍 Check out my Etsy store for finished tie-dye shirts
- 📺 Watch the full YouTube tutorial here
Got questions about tie-dye? Drop them in the comments or email me. I read everything. 💬
Pin it for later!