• Skip to main content
  • Skip to primary sidebar
  • Skip to footer

Practical and Pretty logo

  • HOME
  • DYEING
  • DIY
  • PARTIES
  • CRICUT
  • SHOP
  • ABOUT
You are here: Home / DIY / Infusible Ink Pens on Coasters

November 12, 2019

Infusible Ink Pens on Coasters

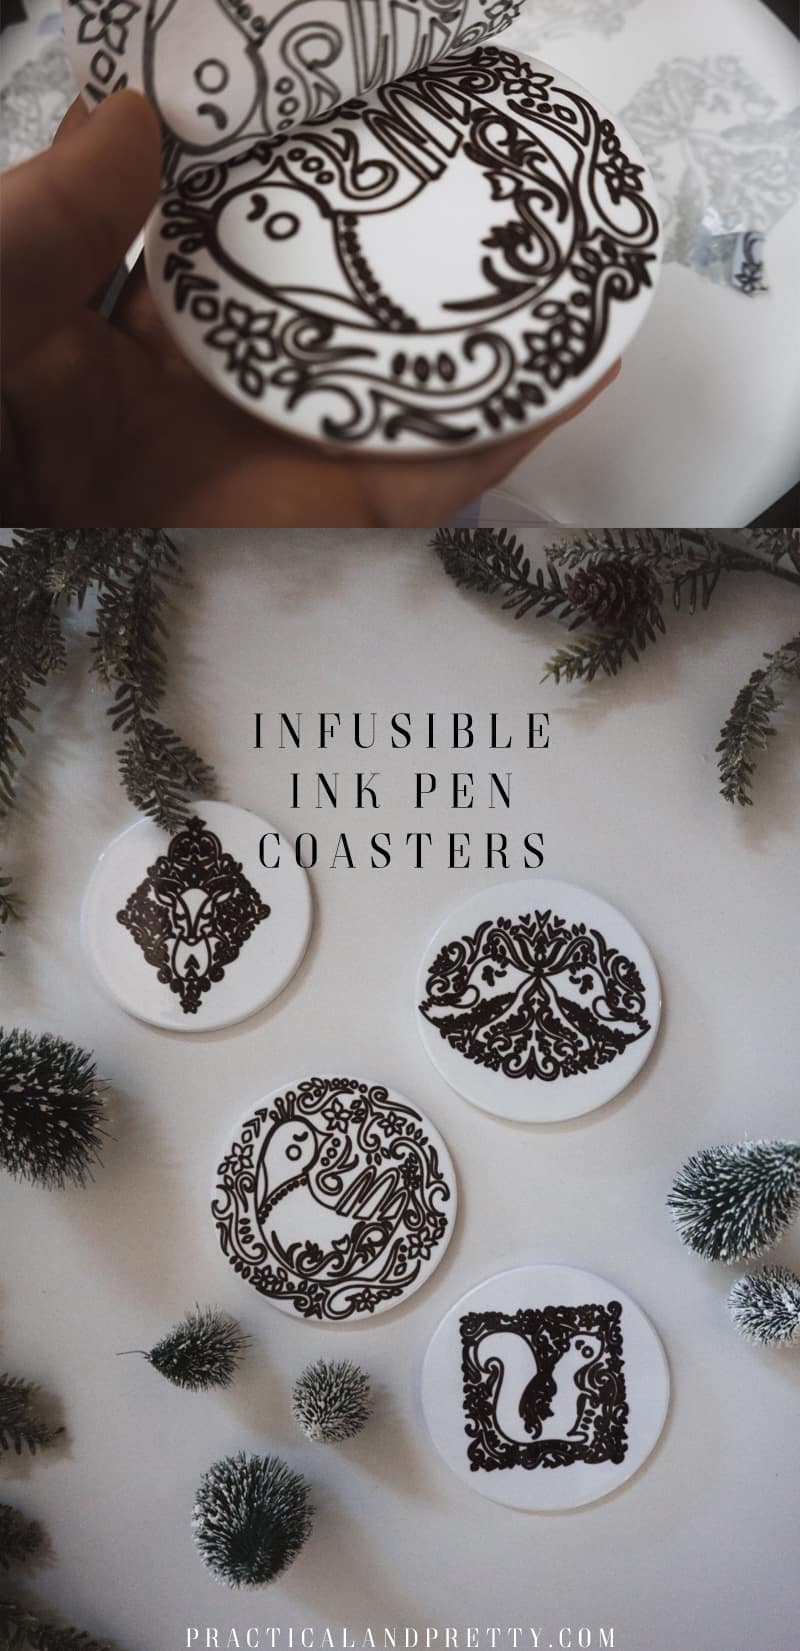
I tried out some Infusible Ink Pens on these Scandinavian-inspired Christmas coasters and learned a lot! You’d think they were store-bought!

This is my fourth post in a row about Infusible Ink but I’m not ashamed! I’ve had a lot of fun experimenting with it and figuring out what it’s all about. These pens have been SUPER cool because the possibilities just opened up a ton! I don’t do a lot of paper crafts so pens weren’t used often but INFUSIBLE INK PENS definitely will be after this project!

I tried out some Infusible Ink Pens on these Scandinavian inspired Christmas coasters and learned a lot! You'd think they were store bought!

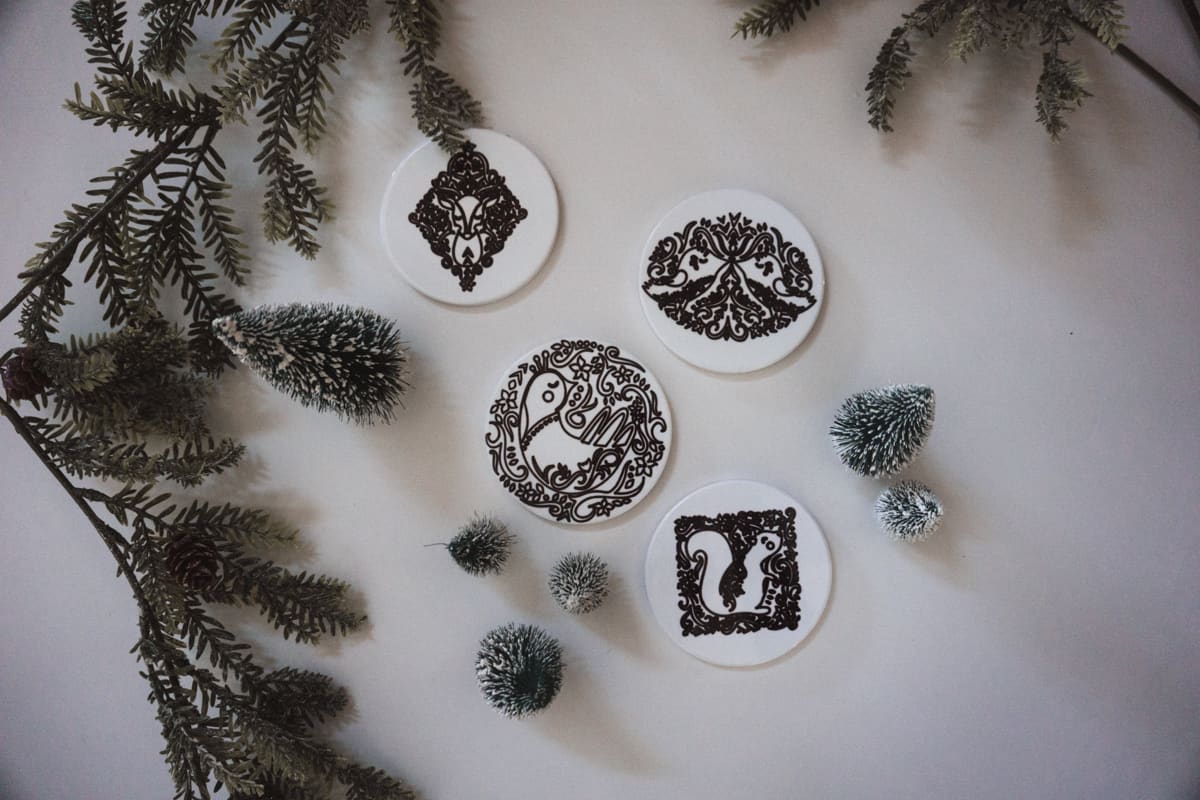
My sister has a Scandinavian inspired Christmas theme which I LOVE. I wanted to make her something fun for her home. That’s where this project idea was born!

What I Used for My Infusible Ink Pens Project

  • Sublimation Round Coasters
  • Black Infusible Ink Pens
  • Laser Printer Paper
  • Heat Resistant Tape
  • Cardstock
  • Butcher paper
  • Light Grip Mat
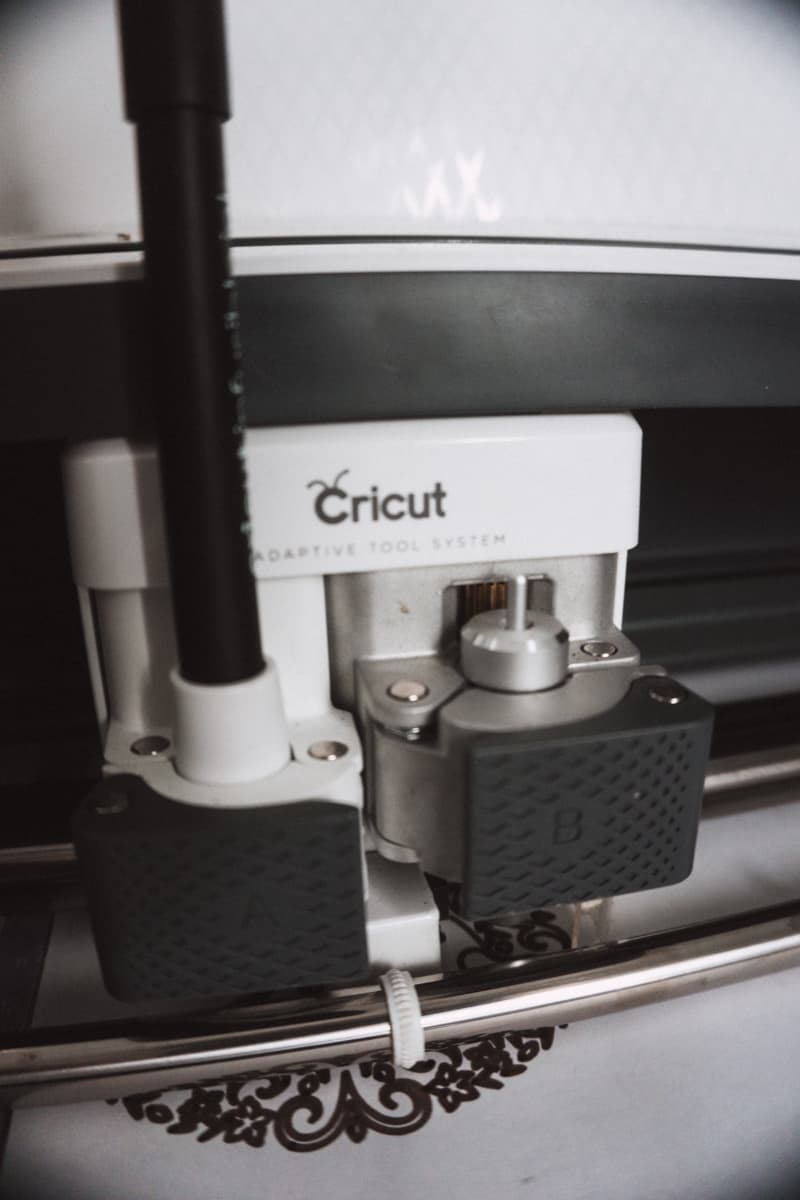
  • Cricut Explore Air 2 or Maker
  • EasyPress 2
  • EasyPress Mat
  • This Cut File

Open up your cut file and insert the pen into the left clamp of your machine with the lid off. Place your printer paper on your light grip mat and load it in then press go! This is just the same as most other projects we’ve done with our Cricut.

I tried out some Infusible Ink Pens on these Scandinavian inspired Christmas coasters and learned a lot! You'd think they were store bought!

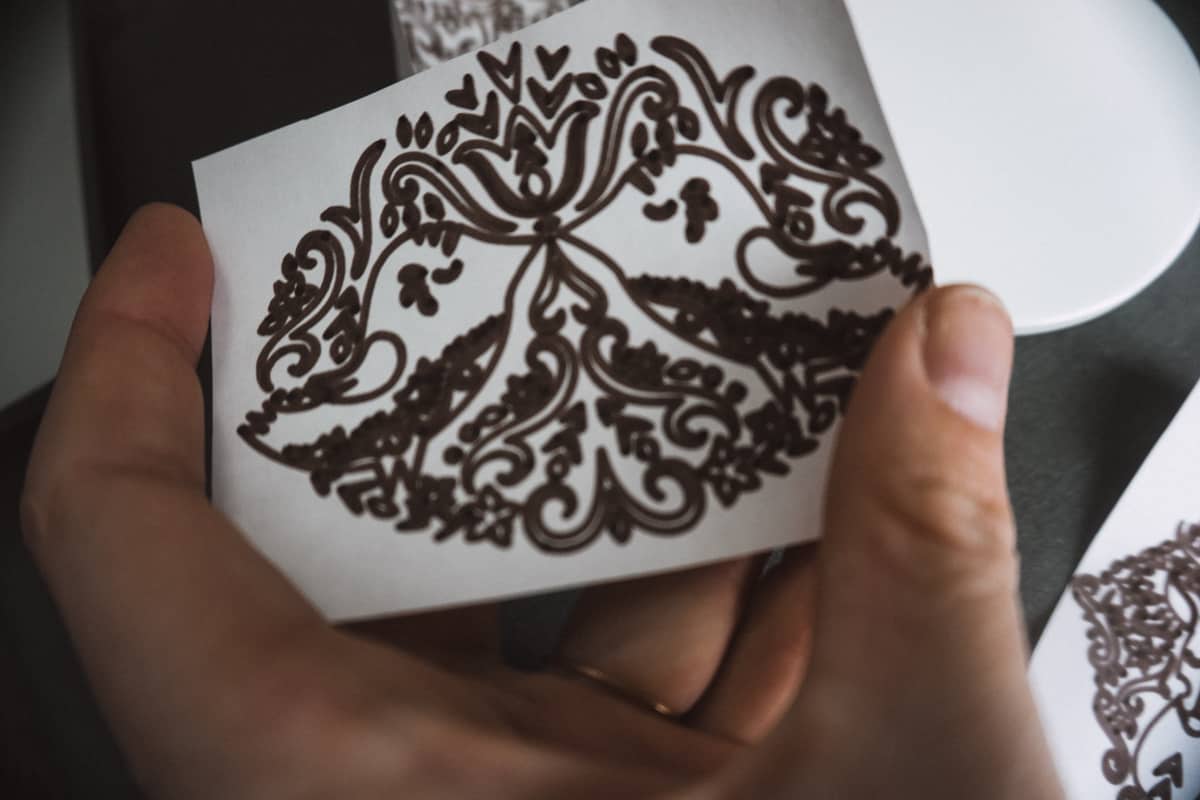
Cut out your designs and tape them with the pen side facing the shiny side of the coaster using your heat resistant tape.

infusible ink coasters

Grab your EasyPress mat and put down a piece of card stock. Next, you will layer the coasters on top with the paper facing down. Your coasters should be upside down.

Place the butcher paper on top of the upside-down coasters.

Heat your EasyPress 2 to 400 degrees and set the time to 240 seconds.

Put your EasyPress 2 on the coaster sandwich and hit the go button! DON’T MOVE ANYTHING. It can cause ghosting which won’t give as crisp an image.

After 240 seconds you are going to remove the heat and wait for them to cool. So, this took about 15 minutes because they are ceramic and hold heat well.

infusible ink process

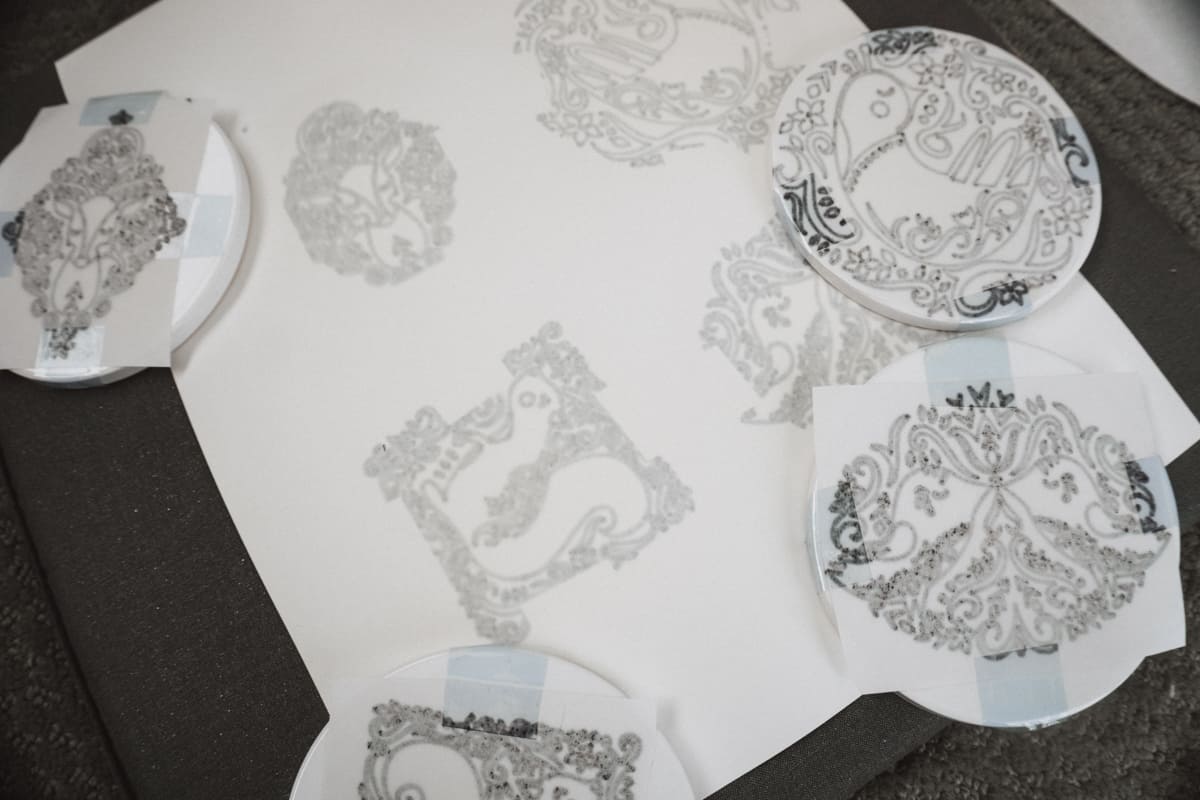
I took a picture of exactly why you need your cardstock below your coasters!

infusible ink on printer paper

This is what it will look like as you remove the paper. It’s like magic! I could do it all day.

They turned out so beautiful. I am IN LOVE.

I tried out some Infusible Ink Pens on these Scandinavian inspired Christmas coasters and learned a lot! You'd think they were store bought!

This was a part of Inspire My Creativity a super fun link party we do each month. This theme was ‘DIY Gifts’! Here are the cohosts.

Shani  |  Sunshine & Munchkins
Candice  |  She’s Crafty
Anna  |  Practical and Pretty
Alexandra  |  EyeLoveKnots
Ashley  |  A Day in the Life of Mom
Aimee  |  Things Small and Simple

Filed Under: Christmas, Cricut, DIY, Holidays, Tips Tagged With: Christmas, christmas diy, cricut, diy

Reader Interactions

Leave a Reply Cancel reply

Your email address will not be published. Required fields are marked *

Primary Sidebar

SEARCH

I’m Anna!

Welcome!

I’m Anna and love practical and pretty things. You will find DIYs here as well as party ideas and of course, natural dyeing tutorials. I’m so glad you’re here.

FEATURED ON

PARTIES

DIY Custom Tablecloths

Customize a tablecloth to your event using this step by step tutorial for custom tablecloths. This was for a birthday party but it will apply to any event!

Blippi Party Ideas and Supplies

Customize this party hat to your color scheme and needs for your next fun party! I show you how I made a simple pom pom and assembled the hat.

Birthday Blippi Shirt

This silly Blippi shirt is perfect for the birthday child or you could even make a few for all the guests! They will get a kick out of what it says. 

Free ‘It Is Your Birthday’ Banner

it is your birthday banner

NATURAL DYEING

Best Tie Dye Brands Compared

what is the best tie dye brand

Refresh Used Crib Sheets

crib sheets tie dye

Geode Tie Dye

Forest Fairy Costume Featuring Tie Dye

CRICUT PROJECTS

It’s Frickin Bats

Fabric Growth Chart with Cricut Joy

The Cricut Joy is the perfect tool to create a height chart! I walk you through how to cut the iron on and then create a cute fabric height chart. 

DIY Disneyland Coupons with New Maker Tools

This coupon book of fun Disneyland coupons is a great idea for your next Disneyland trip! I'll walk you through how I created it with my Cricut Maker Tools.

DIY Yoga Shirts with Your Cricut

Footer

Copyright © 2023 Practical and Pretty on the Brunch Pro Theme