Hosting a tie dye party sounds like one of those things that should be simple. Grab some dye, grab some shirts, let everyone loose, right? Then you’re standing in the kitchen at 9pm wondering how there’s dye on the ceiling, whose shirt is whose, and why one kid’s project is mud-brown while another’s is pure white.
I’ve hosted tie dye parties for birthdays, summer camps, church groups, and just because. I’ve seen every possible thing go wrong, and I’ve figured out how to avoid all of it. This guide walks you through everything from supplies to setup to what to hand guests as they leave.
If you want the shortcut, I put together a free Tie Dye Party Starter Kit with the two most important checklists and printable wash cards for your guests. Grab the free starter kit here.
What is a tie dye party, really?
A tie dye party is any gathering where guests fold, band, and dye their own wearable piece. It works for kids’ birthdays, bridal showers, team-building events, end-of-school celebrations, and summer camps. The party itself usually takes about two hours, but the full project stretches over a day or two because of the resting and washing steps.
The reason it works so well as a party format is that everyone gets something tangible to take home, the activity keeps guests busy for a solid chunk of time, and the results are genuinely beautiful even when beginners are doing it. The trick is setting it up so it’s low-stress for you as the host.
How to set up a tie dye party (the short version)
Before I get into every detail, here’s the high-level flow:
- Decide on your guest count, shirt count, and color palette one week out.
- Pre-wash and soda ash soak the shirts the day before.
- Set up a folding station, a dyeing station, and a finished-project area.
- Demo one fold to the group, then let everyone work at their own pace.
- Bag each finished piece with the guest’s name on the outside.
- Send guests home with wash instructions attached.
- Let pieces rest 8-24 hours, then rinse and wash.
That’s the whole party. Everything below fills in the details.
What supplies do you need for a tie dye party?
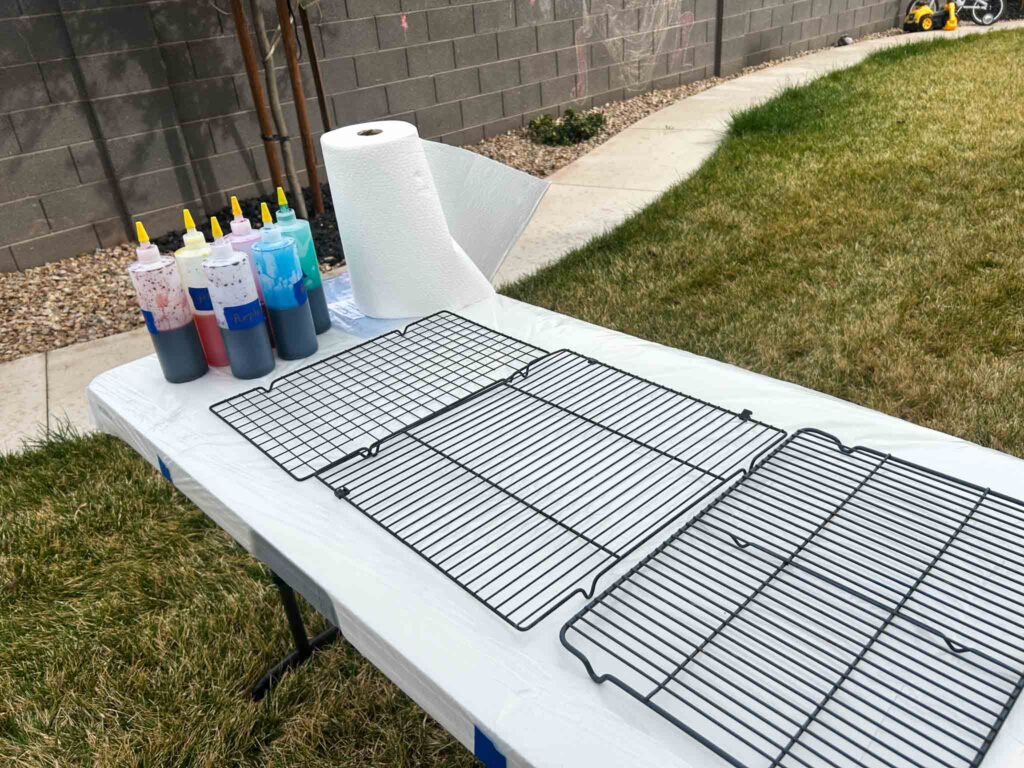
Here’s the complete list. I’ll explain a few of the less obvious items below.
- 100% cotton or rayon shirts (plus at least 2 extras)
- Fiber reactive dye, either a kit or individual colors
- Soda ash
- Plastic gallon bags (one per guest)
- Plastic drop cloths for your tables
- Nitrile gloves (two pairs per guest, because one set always tears)
- Rubber bands
- Squeeze bottles if your dye didn’t come in bottles already
- A bucket or bin for the soda ash soak
- Fabric marker or masking tape for labeling shirts
A few things to flag on supplies:
Shirts must be 100% cotton or rayon. This is non-negotiable. Fiber reactive dye, which is what almost every tie dye kit uses, only bonds to cellulose fibers. Polyester shirts will look white again after the first wash. If you’re buying blanks, check the tag.
Soda ash is what makes the dye stick. I’ll talk about this more in the vinegar question below, but short version: soda ash is the activator that makes fiber reactive dye bond permanently to cotton. Without it, your colors will rinse right out.
Two pairs of gloves per guest is not overkill. Nitrile gloves tear easily, especially when people are twisting and banding fabric. One set always rips mid-dye, and a kid with blue hands for three days is not a good party memory.
Buy 2 extra shirts. Someone always wants a do-over, forgets a sibling came, or messes up a fold beyond saving. Having extras is the difference between a calm host and a stressed one.
How much do you need to buy?
This depends on guest count, but here’s a rough guide:
For 6-8 guests, you need 8-10 shirts, one 8-color dye kit, 1 pound of soda ash, about 50 rubber bands, 12-16 pairs of nitrile gloves, 10 gallon bags, one 9×12 foot drop cloth, and 6-8 squeeze bottles.
For 10-12 guests, plan on 12-14 shirts, 1-2 dye kits, 1-2 pounds of soda ash, 75 rubber bands, 20-24 pairs of gloves, 14 gallon bags, a 9×12 drop cloth, and 8-10 squeeze bottles.
For 15 or more guests, you’ll want 17+ shirts, 2 dye kits, 2 pounds of soda ash, 100+ rubber bands, 30+ pairs of gloves, 20 gallon bags, two drop cloths, and 10-12 squeeze bottles.
If you want this broken down into a reference table you can print and take to the store, that’s included in the full Tie Dye Party Host Kit on Etsy.
How to organize the space
You need three zones: folding, dyeing, and finished projects.
Folding area is a flat, clean surface where guests lay out their shirts, pinch and twist, and apply rubber bands. This table needs to stay dye-free, so keep it separated from the dye station. A kitchen table or counter works well.
Dyeing area is the messy zone. Cover it with plastic drop cloths, and keep dye bottles upright in a tray or container so they don’t tip. If you can do this outside on a patio or in a garage, even better.
Finished projects zone is where bagged shirts wait until guests take them home. I usually use a laundry basket or set them on a drying rack. They need to stay flat so dye doesn’t pool in one spot.
If you only have one table, you can combine folding and dyeing on one half-and-half setup, then move finished projects outside. Just make sure the folding side stays dry.
When tie dying, do you wet the shirt first?
Yes, but not with plain water. You soak the shirts in soda ash solution. Here’s the full sequence:
- Pre-wash shirts in hot water with no fabric softener. This removes the sizing that manufacturers add, which can block dye.
- Mix your soda ash solution: 1 cup of soda ash per gallon of warm water.
- Soak the shirts for at least 20 minutes.
- Wring out each shirt well. You want them damp, not dripping.
- Fold, band, and dye while they’re still damp.
Damp shirts take dye much better than dry ones, and they twist into spirals more easily. Skipping the soak is the single most common reason tie dye projects fail.
Why use vinegar in tie dyeing?
Short answer: you don’t, not for the dye most tie dye kits use.
Vinegar is the activator for acid dyes, which are used on protein fibers like wool and silk. Fiber reactive dye, which is what tie dye kits sell, uses soda ash instead. Soda ash raises the pH of the fabric, which lets the dye molecules form permanent chemical bonds with the cotton.
If you see a tie dye tutorial that says to use vinegar, it’s either talking about a different type of dye or it’s wrong. Stick with soda ash for any fiber reactive tie dye project, and your colors will stay bright wash after wash.
How long do I let tie dye sit before rinsing?
This is one of the most-searched questions and one of the most misunderstood. The answer is 8 to 24 hours.
I know that feels like a long time when you have a freshly dyed shirt in a bag and everyone is excited to see the result. But the dye needs time to react with the fiber. Rinse too early and the colors are dull, patchy, and wash out later. Let it sit the full time and colors come out vibrant and permanent.
Most of the reaction happens in the first 8 hours. Going to 24 hours gives you a little extra insurance, especially in cooler rooms. I’ve never waited longer than 24 hours because at that point the dye is fully reacted and there’s no benefit.
What to do after letting a tie dye shirt sit for 7 hours
If you’re almost at the 8 hour mark and wondering if you can rinse early, hold out for at least one more hour. The difference between 7 hours and 8 hours isn’t dramatic, but the difference between 4 hours and 8 hours is huge. If you’re at 7 hours, just wait.
When your wait is up, here’s what to do:
- Rinse the shirt in cold water while it’s still banded. Keep rinsing until the water runs mostly clear.
- Remove the rubber bands.
- Rinse again in cold water to get any dye trapped in the folds.
- Wash the shirt in hot water with regular detergent. Wash it alone or with other brand-new tie dye pieces for the first wash.
- Dry normally.
After that first wash, your tie dye can go in with regular laundry and hold its color for years.
These exact steps are printed on cut-out cards in my free starter kit so you can attach one to each guest’s bag and they don’t have to remember any of it.
What not to do when tie dying
These are the mistakes I see at every single party:
Don’t mix complementary colors next to each other. Red next to green, blue next to orange, and purple next to yellow all turn muddy brown where they touch. Use analogous colors (ones that sit next to each other on the color wheel) or leave white gaps between bold contrasting colors.
Don’t skip the soda ash soak. I said this above and I’ll say it again. This is the step people cut when they’re in a rush. It’s also the step that makes or breaks the entire project.
Don’t use polyester or poly-blend shirts. I know those Hanes Beefy-T packs are tempting, but check the tag. Anything with polyester in it won’t dye properly with fiber reactive dye.
Don’t dilute your dye to make it stretch. Weak dye makes pastel, washed-out results. If you’re worried about running out, mix less dye per shirt rather than watering down what you have.
Don’t rinse before the 8 hour minimum. I know I already covered this, but people rush this step constantly.
Don’t let wet shirts touch each other before they’re bagged. Dye travels in wet fabric. A bright pink sleeve resting on a green shirt will tint it pink.
How to get the best results when tie dying
On top of avoiding the mistakes above, these habits make a big difference:
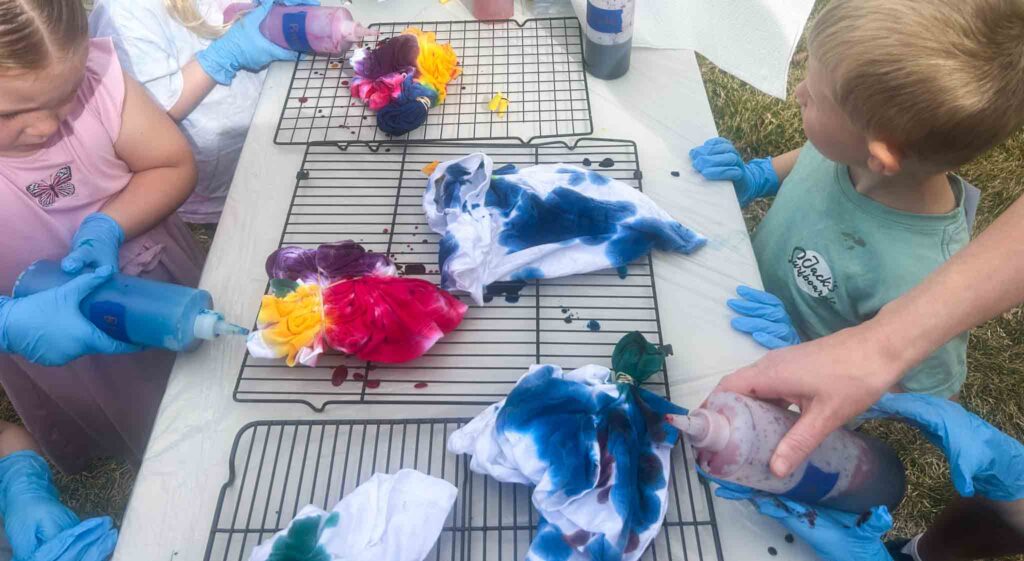
Squeeze the dye into the folds. Don’t just pour it on the surface. Dense folds need dye pushed into them with gloved fingers, or you’ll end up with white spots.
Dye both sides. Flip the piece over halfway through and dye the back too. Most beginners only dye what they can see.
Keep your color palette simple. 3-4 colors total almost always looks better than 6-8. Restraint is what separates beautiful tie dye from muddy tie dye.
Use reference photos. Pull up images of the patterns you want to create and keep them at each station. Guests do way better with a visual than with verbal instructions.
How long does tie dying take?
The active party time is about 1 hour for a group of 8-10. Here’s how that breaks down:
- 10-15 minutes for introductions and demo
- 30 minutes for folding, banding, and dyeing
- 10 minutes for bagging, labeling, and cleanup
But the full project stretches longer because of the resting and washing. Guests take their bagged shirt home, let it sit 8-24 hours, rinse and wash the next day. Most will see their final result the day after the party.
If you want guests to see finished results at the party, you’d need to do it as a two-session event (dye day one, reveal day two) or accept that the party ends with everyone holding a mystery-wrapped bag.
Tie dye party ideas by occasion
Birthday parties. Works for ages 6 and up without much supervision, younger with a helper per kid. Match the color palette to the birthday theme (hot pink and purple for a girly party, blue and green for an ocean theme, rainbow for anything).
Summer camps and classrooms. Ice dye is a great variation for camps because kids can prep their projects, let ice melt on top with dye sprinkled over, and the chemistry lesson writes itself. Ice dye takes longer to develop, so plan for that.
Bridal and baby showers. Matching bridesmaid or guest shirts, onesies for a baby shower, or monogrammed pieces make great takeaways.
Corporate team building. Everyone gets a matching company-color shirt to dye. The results get posted to the company Slack for a year. I’ve seen this work shockingly well.
Just because. Some of my best tie dye parties were on a random Saturday with my sister and a few friends. No occasion needed.
What folds should you teach at a tie dye party?
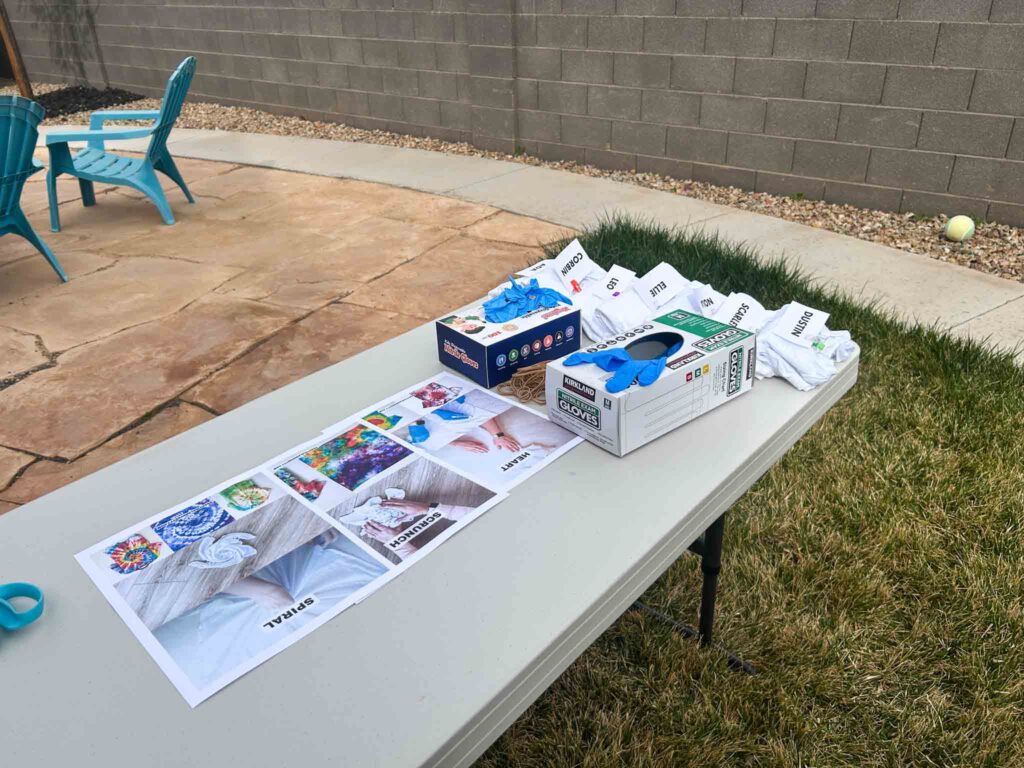
For beginners, stick to three folds: spiral, scrunch, and heart.
Spiral is the classic rainbow pinwheel look. It’s a little fussy to demonstrate but everyone can do it with one try. Pinch the center, twist the fabric clockwise into a flat disc, band it into wedges, and dye each wedge a different color.
Scrunch is the easiest. Push the fabric into random folds and crumples, flatten into a loose disc, and dab colors in patches across the surface. It’s hard to mess up, which makes it great for little kids or first-timers.
Heart is popular for birthday parties and gifts. Fold the shirt in half, draw half a heart on the folded edge, accordion fold along the line, band tightly, and dye the heart a bold color with a contrasting background.
Demo one fold to the whole group at the start, then circulate to help with questions. Don’t try to teach more than three folds at a first-time party. Pick one, master it, add variations next time.
Step-by-step photo guides for all three folds are included in the full Tie Dye Party Host Kit. Printing one out and laying it at each station is the single best thing I’ve ever done to reduce “how do I do this again?” questions during a party.
How to label shirts so they don’t get mixed up
This is the number one problem at tie dye parties with more than 5 guests. Everyone’s white shirt looks identical after it’s been folded and banded, and even more identical after it’s bagged wet.
Two methods work:
Fabric marker on the tag. Write the guest’s name on the inside tag before the party starts. Use a marker designed for fabric so it doesn’t wash out.
Masking tape on the bag. Write the guest’s name on a piece of tape and stick it to the outside of their gallon bag as soon as their shirt goes in. This is my preferred method because it’s visible without unbagging anything.
Don’t rely on memory. You will forget.
Cleanup and dye stain removal
Dye on tables, floors, or sinks comes up with a mixture of equal parts white vinegar and water. Spray, let sit five minutes, then scrub with dish soap and a sponge. For really stubborn spots on non-porous surfaces, a bleach-based cleaner works.
Dye on skin fades in 1-3 days with regular washing. Baking soda and water or a pumice stone speeds it up. Dye on clothes that weren’t the target of dyeing is usually permanent, which is why aprons or old t-shirts are a must.
What to send home with guests
Each guest should leave with:
- Their bagged, dyed piece
- Wash instructions (I put mine on a printed card attached to the bag)
- Optionally, a small bag of candy or a thank-you note tied to the bag
The wash card is the most important. If guests don’t know to wait 8-24 hours, rinse cold, and wash hot the first time, their beautiful shirts will come out looking sad.
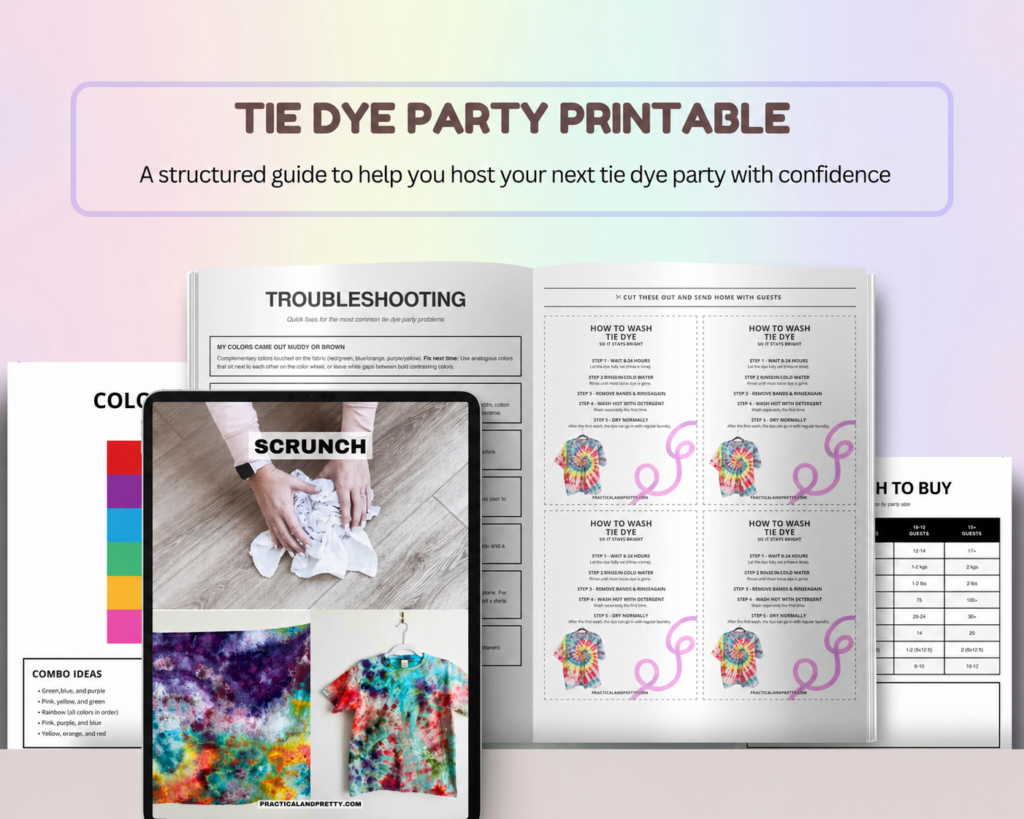
Grab your free Tie Dye Party Starter Kit
I put together a free 4-page Tie Dye Party Starter Kit with the two most important checklists and printable wash cards for your guests:
- Supply checklist (fillable)
- Host preparation checklist (fillable)
- Cut-out wash instruction cards to send home with guests
It’s free when you sign up for my email list: Grab the free starter kit here.
Want the complete Host Kit?
If you want to hand the entire party over to a printable and walk in with zero question marks, I also sell a complete 13-page Tie Dye Party Host Kit on Etsy for $9. It includes everything in the free version plus:
- Party timeline from one week out through after guests leave
- Quantity guide table broken down by party size
- Table setup diagrams for one-table and three-table layouts
- Color swatches and combo suggestions
- Step-by-step photo guides for spiral, scrunch, and heart folds
- Troubleshooting guide for the most common problems (muddy colors, dye not showing up, washouts, and more)
Get the full Tie Dye Party Host Kit on Etsy.
Final thoughts
The difference between a chaotic tie dye party and a calm one is almost never about the dye itself. It’s about prep. Pre-washed shirts, pre-mixed soda ash, labeled bags, and wash cards ready to hand out make the whole thing run smoothly. Your actual job during the party is just helping with folds and bagging finished pieces, which is the fun part.
If this is your first time hosting, start small. Six guests, three folds, four colors. You’ll be shocked at how well it goes. Then scale up from there.
Happy dyeing, Anna
More tie dye guides on the blog: – Tie dye patterns ranked by difficulty – Best black fiber reactive dyes compared – Liquid dye vs. ice dye bullseye tutorial


