If you have ever wondered whether you can tie dye a hat, the answer is yes and it is a lot easier than you might think. Whether you are working with a bucket hat or a baseball hat, the process is beginner-friendly and the results can be really fun.
In this post I am walking you through everything you need to know from the supplies, the steps, and what to keep in mind depending on the type of hat you are dyeing. I am also sharing some tips I have picked up from dyeing hats myself, including one thing you absolutely cannot skip if your hat has a metal clasp.
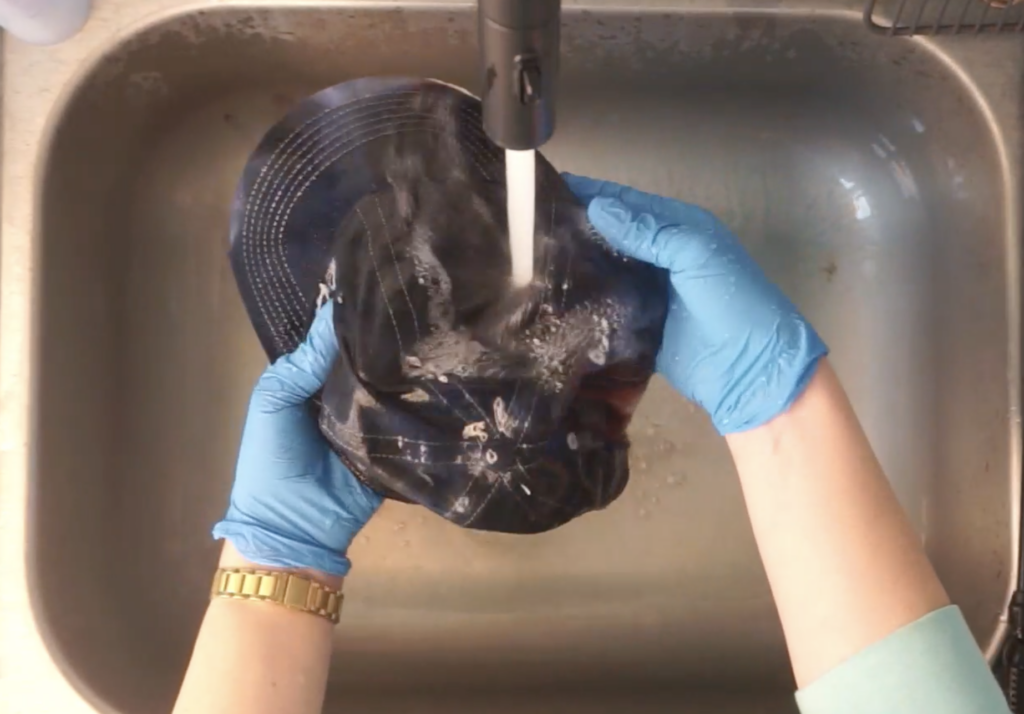
If you are more of a visual learner, I also have a video where I dye two completely different hats using ice dye — you can watch that here on YouTube.
Before we dive in, if you are new to tie dye, grab my free guide — 12 Tie Dye Folds You Need to Know. It covers the most popular folding and scrunching techniques so you can get great results every time.
What You Need to Tie Dye a Hat
The supply list for a tie dye hat is pretty short. Here is what to gather before you get started:
- Fiber-reactive dye (I love Dharma Trading Co. and Jacquard — use code ANNA for 20% off Jacquard products)
- Soda ash
- Warm water
- Squeeze bottles or applicators
- Gloves
- Plastic wrap or a zip-top bag
- A hat made from a dyeable fiber (more on this below)
If you want to try ice dyeing your hat like I did in my video, you will also need a wire rack, a shallow container, and plenty of ice.
What Kind of Hat Can You Tie Dye?
This is the most important question to ask before you buy or grab a hat to dye. Fiber-reactive dyes (the kind used in tie dye) bond to natural fibers — specifically cotton, rayon, linen, bamboo, and silk. They do not work well on polyester or synthetic blends.
Here is a quick breakdown by hat type:
Bucket Hat
Bucket hats are often 100% cotton, which makes them an ideal candidate for tie dye. They take color beautifully and the flat, even surface gives you a lot of design flexibility. This is honestly my favorite hat type to dye. I have a different tutorial written out for exactly how to tie dye a bucket hat here.
Baseball Hat
Baseball hats can be trickier. Many have a structured bill and foam or polyester panels that will not absorb dye the same way as cotton. Look for a baseball hat that is labeled 100% cotton — the blanks I use and link in my videos are specifically chosen for dyeability. You also cannot fold or scrunch the bill, so keep that in mind for your design.
Trucker Hat
Trucker hats typically have a foam front panel and a mesh back, both of which are usually synthetic. These are difficult to dye with fiber-reactive dye and are generally not a great choice unless the front panel is specifically cotton.
Cowboy Hat and Fishing Hat
Natural fiber cowboy hats (wool, cotton, or straw) and cotton fishing hats can both be tie dyed, though the structured shape limits how much you can scrunch or fold them. For these styles, a painted or dripped dye approach tends to work better than a traditional tie dye fold.
The Metal Clasp Tip
If your hat has a metal clasp or snap, do not soda ash soak it. Soaking a hat with metal hardware in soda ash can corrode the metal over time and cause it to rust.
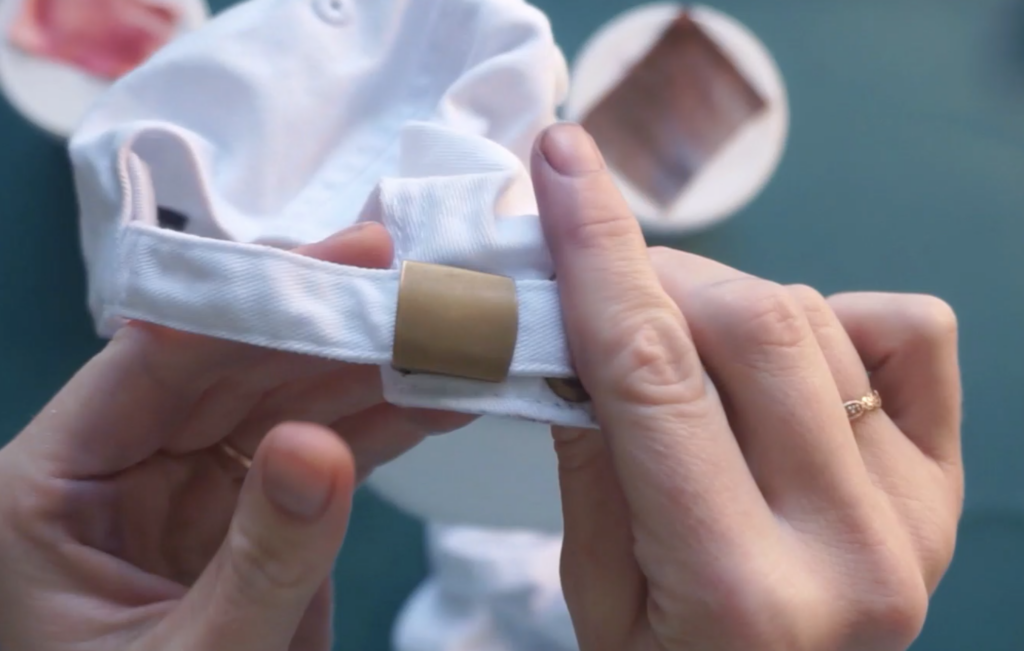
Instead, do one of these two things:
- Sprinkle dry soda ash directly onto the hat after it is wet, avoiding the metal parts as much as possible.
- If you prefer to soak, keep it to 20 minutes or less and rinse quickly.
Bucket hats with fabric closures or no clasp at all give you the most flexibility here.
How to Tie Dye a Hat Step by Step
Once you have your supplies and hat ready, here is the basic process. I will note where things differ depending on whether you are using the standard squirt bottle method or ice dye.
- Wet your hat. Run it under warm water until it is fully saturated, then wring out the excess.
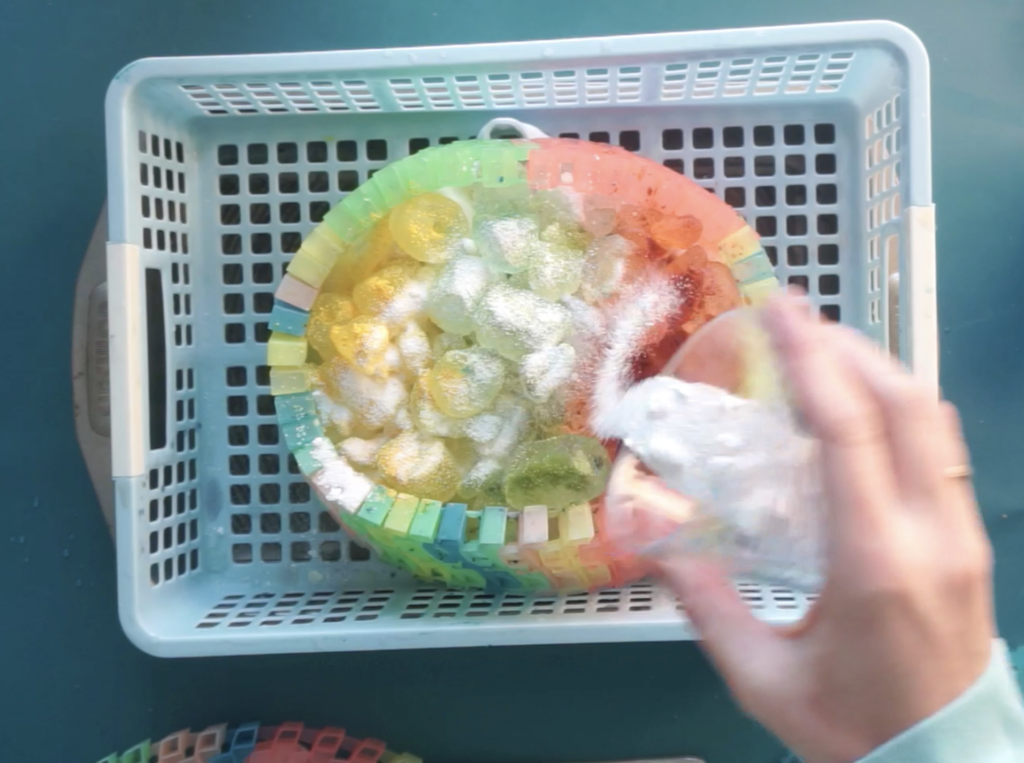
- Apply soda ash. Either soak for up to 20 minutes (skip if there is metal hardware) or sprinkle dry soda ash over the wet hat. Soda ash is what helps the dye bond to the fabric with procion dyes, do not skip it.
- Set up your design. For a bucket hat, you can lightly scrunch the back and crown area. The bill of a baseball hat cannot really be manipulated, so focus your design on the crown. If you are ice dyeing, place the hat on a wire rack over a container, cover with ice, and apply powdered or liquid dye over the top.
- Apply your dye. Squeeze or sprinkle your dye colors over the hat. Work in sections and be intentional about where colors meet. Adjacent colors will blend where they touch.
- Wrap and wait. Cover the hat loosely with plastic wrap or place it in a zip-top bag. Let it sit for at least 8 hours, or up to 24 hours for the richest color. If you are ice dyeing, wait for the ice to melt completely, then let it sit another 24 hours.
- Rinse it out. Start with cold water and work your way up to hot water. Use a small amount of dish soap to help remove excess dye. Continue rinsing until the water runs clear.
- Wash and dry. Most cotton hats can go in the washing machine on a gentle cycle. I skip the dryer to protect the shape. Reshape the hat by hand and let it air dry.
Tips for Getting Great Results
- Use 100% cotton hats whenever possible. Blends will give you patchy, faded results.
- Do not oversaturate the hat. Too much dye can muddy your colors, especially where they meet.
- For a pastel look, use less dye powder or dilute your liquid dye more. I tried this on one of my hats and the dye actually took more intensely than expected. So test first if pastels are your goal.
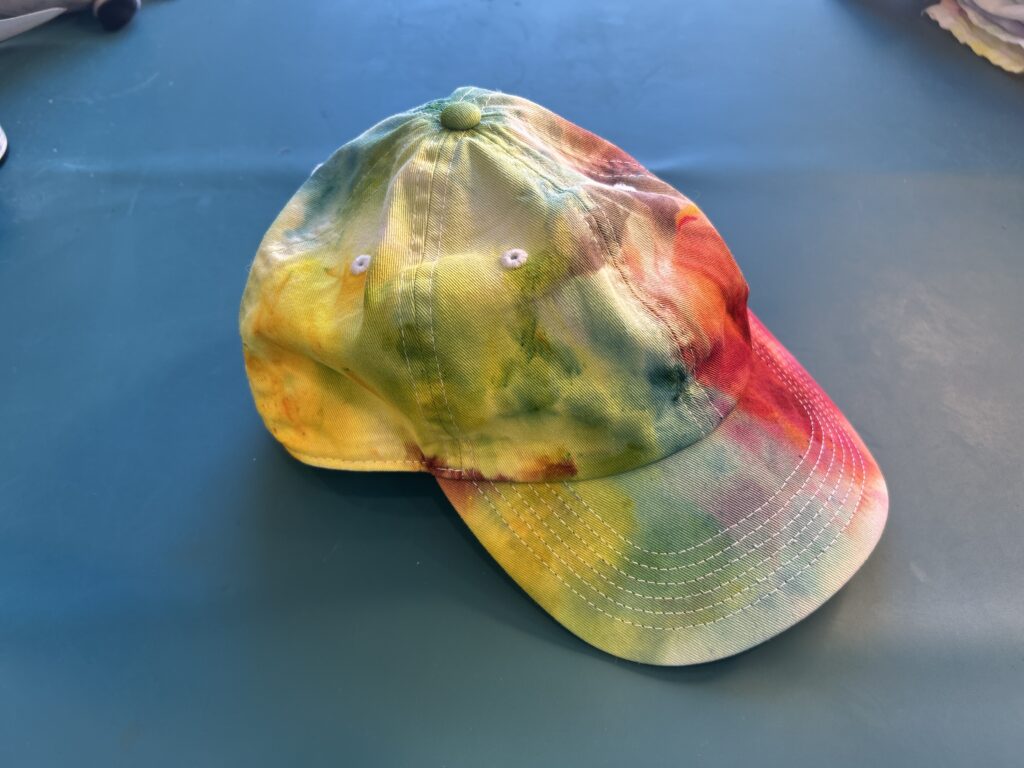
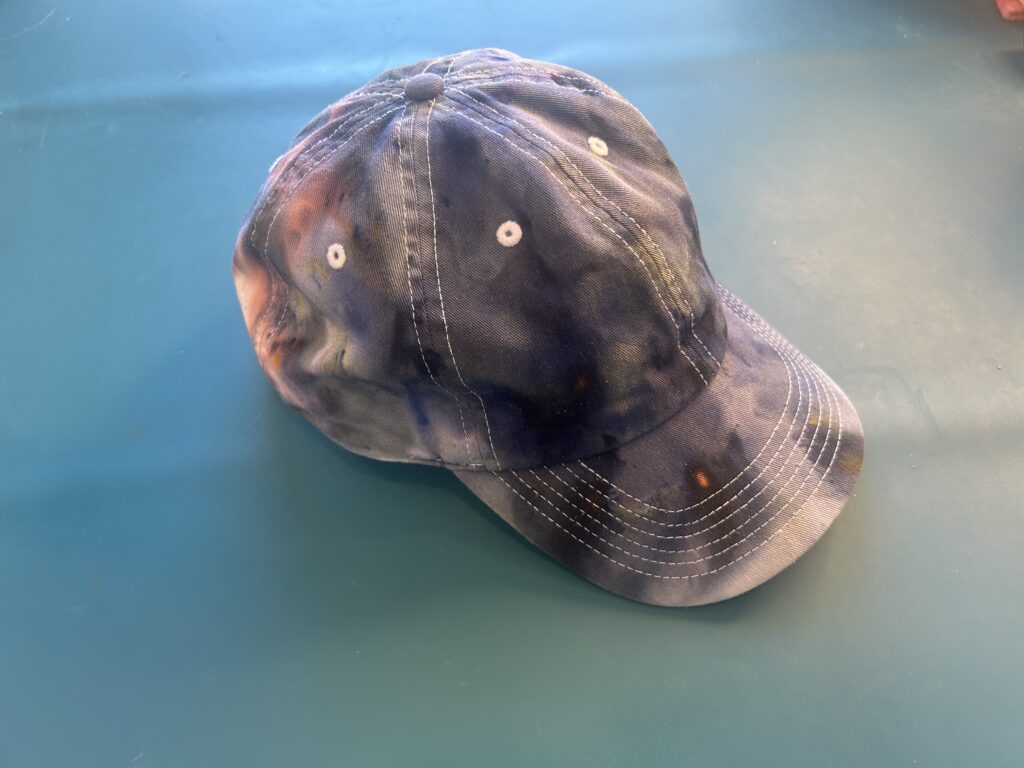
- Single-color designs can be stunning. One of my favorite hats I have made was dyed with just one color: Pillars of Creation from Grateful Dyes. It looks like a galaxy and required zero color-placement stress.
- Hot water irrigation is optional but helpful. After the ice melts (if ice dyeing), I sometimes mist the hat with warm water from a pump sprayer and let it sit another 20 minutes to help the dye set.
What Dye Colors Work Well on Hats?
Any fiber-reactive dye color will work, but here are a few that I have used on hats with great results:
- Himalayan Salt (Dharma) — a muted, dusty pink
- Seafoam (Dharma) — a soft blue-green that is really versatile
- Citrus Yellow (Dharma) — bright and punchy, great for summer
- Pillars of Creation (Grateful Dyes) — a moody mix of blue, brown, and gray that photographs beautifully
You can find Dharma dyes at Dharma Trading Co. and Jacquard dyes on Amazon or Walmart. Use code ANNA at Jacquard for 20% off.
Hat Tie Dye DIY Kit — What to Buy
If you are putting together a tie dye hat kit for yourself or for a group, here is what I would suggest:
- A tie dye kit with multiple colors (great for beginners who want everything in one box)
- Extra soda ash if your kit does not include enough
- 100% cotton blank hats — These are the ones I tried and they’re great but they are children sizes.
- Gloves (the ones in kits are often thin, so a box of nitrile gloves is worth it)
You can shop my curated Amazon and Walmart storefronts for everything you need: Amazon Storefront | Walmart Storefront.
Can You Buy Tie Dye Hats Instead of Making Them?
Absolutely. If the DIY route is not for you, there are plenty of places to find unique tie dye hats online. Etsy is my top recommendation for handmade tie dye things.
If you want a handmade tie dyed item from someone me, you can also check out my Etsy shop — I sell handmade tie dye pieces and add new items regularly.
More Tie Dye Tutorials
If you enjoyed this, here are some other posts and videos you might like:
- How to Wash Tie Dye
- Tie Dye Folds for Beginners
- How to Soda Ash for Tie Dye
- How long should tie dye sit?
Happy dyeing! If you make a tie dye hat using this tutorial, I would love to see it — tag me on Instagram at @storebrandanna or find me on TikTok @practicalandpretty.
And if you have not already, grab the free guide: 12 Tie Dye Folds You Need to Know. It is the perfect companion to this tutorial.


