Looking for fresh inspiration for your next project? In this post I’m showing you six of the most popular tie dye techniques, each with its own unique fold and finished result. The folds work for both liquid dye and ice dye, so you can use whichever method you prefer. I filmed a fast-paced video that shows every fold in action, followed by the final shirt. Pure tie dye eye candy. Perfect for sparking ideas before your next batch.

6 Tie Dye Techniques to Try
Each of these folds creates totally different results, from soft watercolor blends to bold, defined patterns. Try one or all six. I’ve linked full tutorials for each technique below if you want to see the complete step-by-step process.
If you’re brand new to tie dye, start with my complete tie dye guide for supplies, fabric prep, and the basics. Then come back here for the techniques themselves.
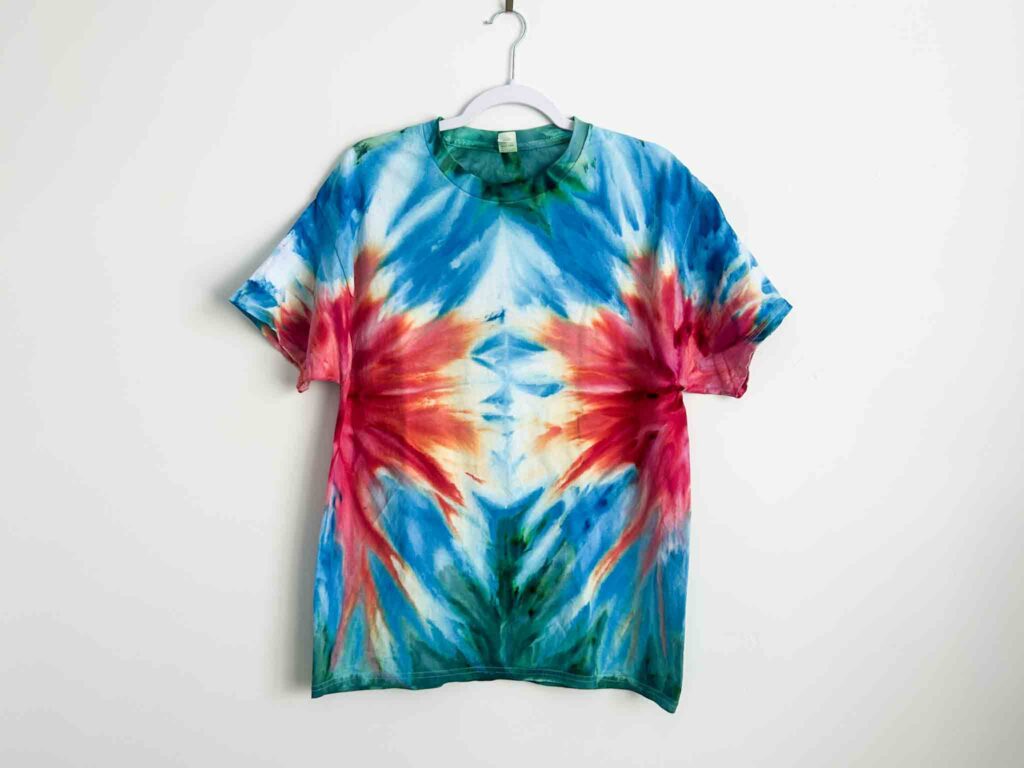
1. Mirror Scrunch
The mirror scrunch is a fun twist on the classic crumple. Fold your fabric in half (or quarters) before scrunching to create a mirrored, symmetrical pattern. The result is a soft, organic look with reflective color flow.
How to fold it: Lay your fabric flat, fold it in half lengthwise, then scrunch the entire bundle into a flat disc. Band lightly to hold the shape. Apply dye on both sides for full saturation.
Best for: beginners, watercolor effects, multi-color palettes, ice dye.
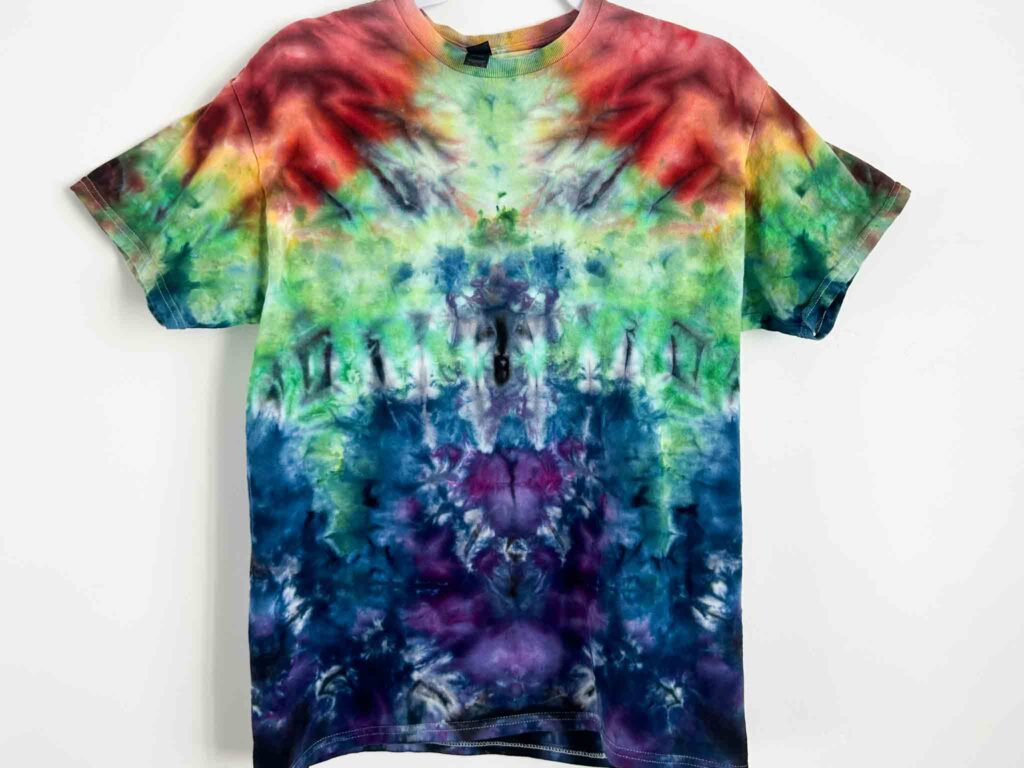
2. Tall Deep Scrunch
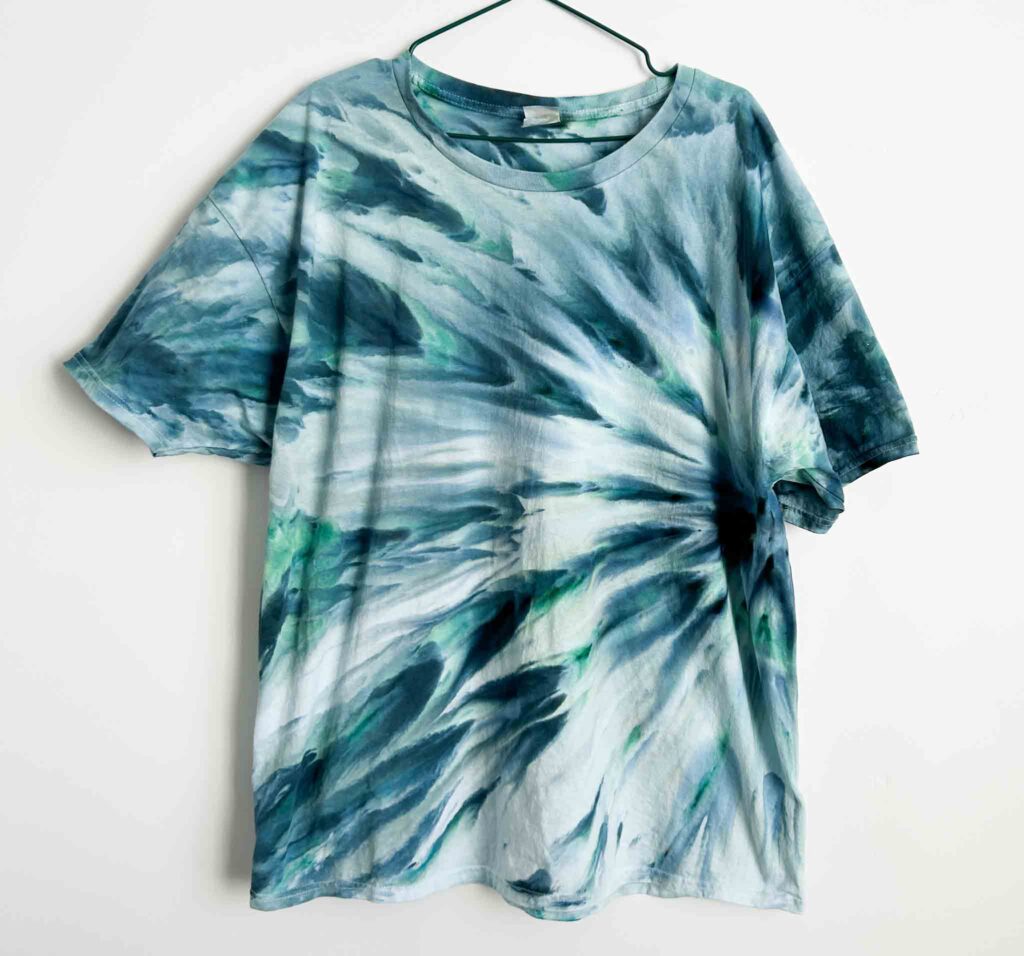
The tall deep scrunch (TDS for short) gives dreamy, vertical color movement. It’s one of my favorite techniques when I want softer, more blended results. The “tall” part of the fold creates natural highs and lows in the fabric, which lets the dye settle into deep pockets.
How to fold it: Lift the fabric up in tall sections to create “pillars,” then gently scrunch them down. Place fleece or a wire rack underneath to help with drainage, especially for ice dye. Band the bundle lightly to hold the shape.
Best for: ice dye, moody and atmospheric color palettes, split-heavy dyes that separate as they melt.

3. Double Fan Fold
The double fan fold is one of the most visually striking tie dye techniques. It creates a repeating, kaleidoscope-style pattern that looks impressive even if you’re new to folding. Each layer catches color differently, which gives the finished piece beautiful symmetry.
How to fold it: Lay your fabric flat and accordion fold it from one side, like a paper fan. Then accordion fold the resulting strip from the other direction, creating a smaller stacked rectangle. Band it in a few places along its length. Apply dye in alternating colors for maximum kaleidoscope effect.
Best for: bold patterns, high-contrast color combinations, intermediate dyers looking to level up.
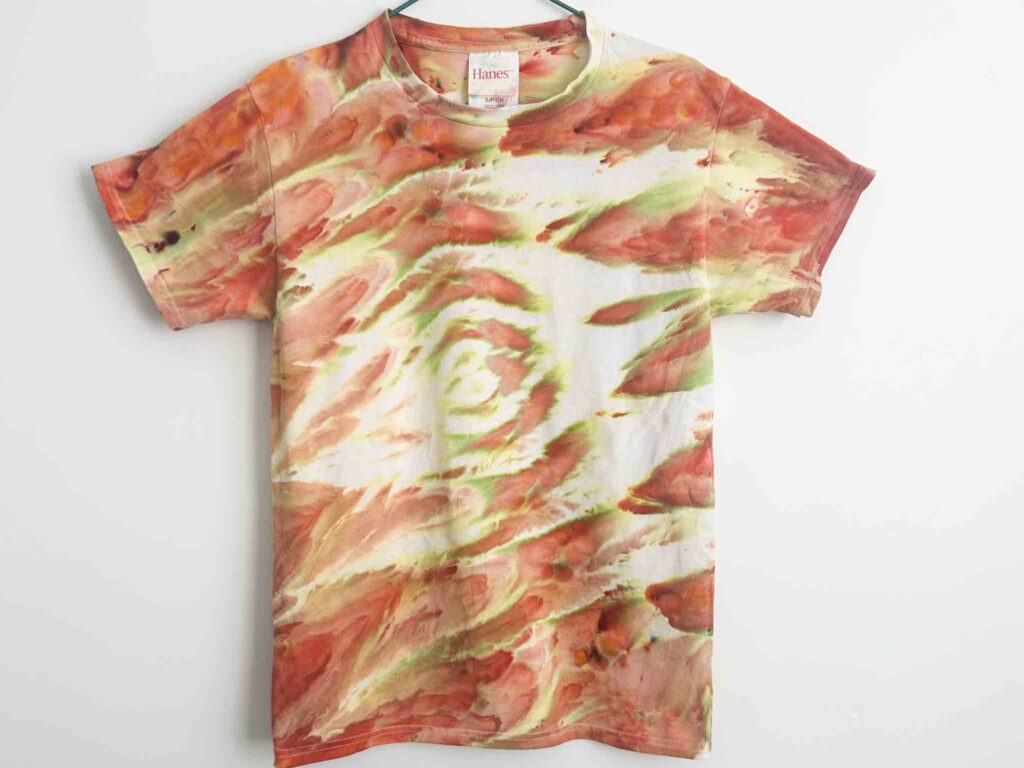
4. Roll (Psychedelic Roll)
This one is fast and bold. The roll fold (sometimes called the psychedelic roll) gives strong directional streaks and natural color flow across the fabric. It’s my favorite when I want to use high-contrast colors or experiment with a full rainbow palette.
How to fold it: Lay your fabric flat and roll it tightly from one edge into a long tube. Band the tube in several places along its length to create sections. Apply different colors to each banded section. The roll naturally creates lines and streaks that flow across the shirt.
Best for: rainbow palettes, directional patterns, high-energy designs.
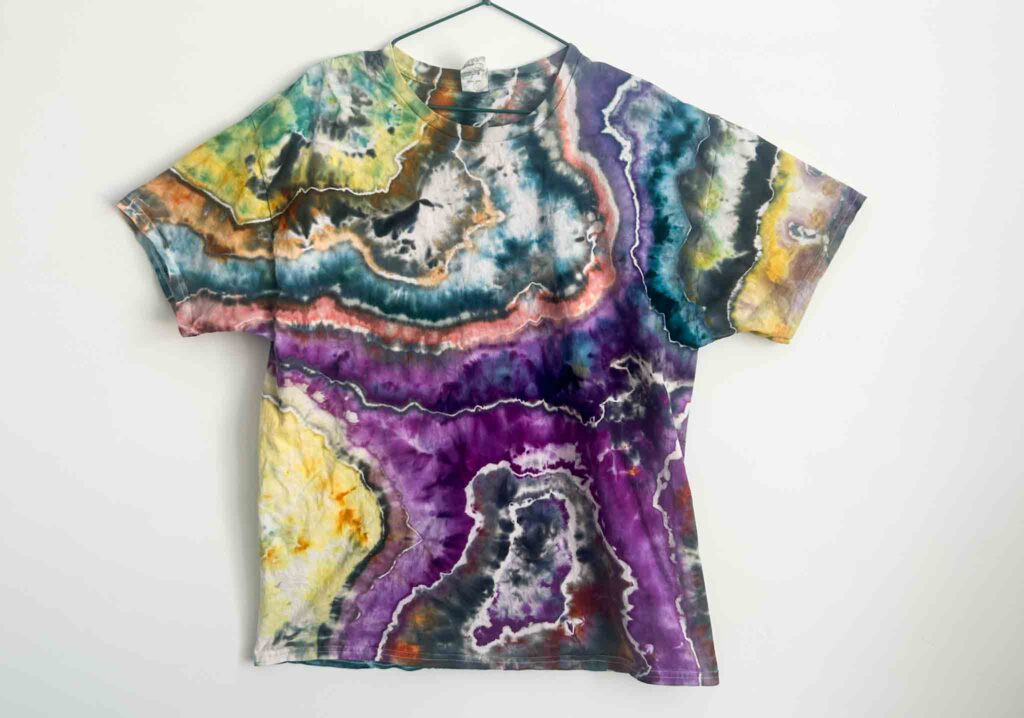
5. Geode Fold
The geode fold is one of my signature tie dye techniques. It’s all about wrapping sinew tightly around clusters of fabric to mimic natural crystal patterns. Every section dyes differently, so no two shirts ever come out the same. That unpredictability is the fun of it.
How to fold it: Pinch the spot where you want your geode center to be and pull straight up. Wrap sinew tightly around the bundle to form repeating “rings.” Continue adding rings down the bundle until you have your desired geode shape. You can create one large geode or several smaller ones across the fabric.
Best for: dramatic patterns, high-contrast colors, ice dye, statement pieces.
6. Fan Fold
The fan fold is a simple, beginner-friendly favorite that creates repeating lines of color. Whether you apply ice in sections or sprinkle dye evenly across, the results always look professional. It’s one of the easiest ways to experiment with flow and contrast.
How to fold it: Lay your fabric flat and accordion fold it from one side, making long even pleats. Band the bundle in several spots along its length. Apply dye in stripes across the bands for clean linear results.
Best for: beginners, clean stripes, controlled designs, gradient palettes.
Which Tie Dye Technique Should You Try First?
If you’re not sure where to start, here’s my quick recommendation by skill level:
- Total beginner: mirror scrunch or fan fold. Both are forgiving and look great even on your first try.
- Some experience: tall deep scrunch or roll. These create more dramatic results and let you experiment with color flow.
- Ready to level up: double fan fold or geode. These take more time and precision but the results are extraordinary.
Try These Techniques Next
If you loved this roundup, check out my other tie dye tutorials for more detailed walkthroughs:
- Complete Tie Dye Guide for Beginners
- How to Ice Dye a Shirt
- Hot Water Irrigation Tie Dye
- One Color Tie Dye Projects
For more folding inspiration, grab my free ebook 12 Favorite Tie Dye Folds and shop my favorite supplies on my Amazon storefront.
Happy dyeing. I can’t wait to see which tie dye techniques you try next. Tag me on Instagram @storebrandanna to share your results.
Tie Dye Techniques: Frequently Asked Questions
How many tie dye techniques are there?
There’s no fixed number. Most fall into a handful of fold families though: scrunch, spiral, accordion (fan), bullseye, and geode. The six techniques in this post (mirror scrunch, deep scrunch, double fan, roll, geode, and fan fold) cover the most popular variations. Once you understand these, you can combine and modify them endlessly.
What is the easiest tie dye technique for beginners?
The scrunch is the easiest. You push the fabric into random folds, flatten it, band it lightly, and apply dye. It’s genuinely hard to mess up, which makes it perfect for first-timers or kids. For a slightly more controlled look, the fan fold is the next easiest.
What is the least messy way to tie dye?
Ice dye. Instead of squeezing liquid dye onto fabric, you pile ice on top of your folded piece and sprinkle dye powder over the ice. As the ice melts, the dye drips through. There’s no spraying, no splashing, and no mixing bottles. It’s still messy in the sense that dye exists, but it’s the cleanest method by far. See my full ice dye tutorial.
What colors should you not mix when tie dyeing?
Avoid placing complementary colors directly next to each other: red next to green, blue next to orange, and purple next to yellow all turn muddy brown where they touch. Either stick with analogous colors (ones that sit next to each other on the color wheel) or leave a white gap between contrasting colors so they don’t bleed together.
Why do people use vinegar in tie dye?
They probably shouldn’t. Vinegar is the activator for acid dyes, which are used on protein fibers like wool and silk. The fiber reactive dyes used for cotton tie dye need soda ash, not vinegar. If you see a tie dye tutorial that calls for vinegar, it’s either talking about a different fiber or the instructions are wrong. Always use soda ash for cotton.
What else can you tie dye besides shirts?
Almost any natural fiber item works. I’ve tie dyed socks, bandanas, tote bags, pillowcases, dish towels, sheets, baby onesies, hoodies, sweatpants, and even shoelaces. The rule is the same: it needs to be 100% cotton or rayon for the dye to bond. Check the tag before you start.
Is tie dye still popular?
Yes, and it has steadily moved from trend to staple over the last several years. Tie dye keeps showing up in mainstream fashion, kids’ clothing, home goods, and craft culture. The techniques have also evolved beyond the classic rainbow spiral into more sophisticated styles like ice dye, geode, and minimalist one-color designs.
To save this inspiration for later, pin it here.


Love the patterns, what dye is used? What supplies do you need? This type of dying is really interesting .
I use procion dyes! You can get them from Dharma or other places like that! Here’s some supplies you might want. https://www.amazon.com/shop/annamcnamara?ref=ac_inf_tb_vh&ccs_id=e09cba6d-f6b7-4e57-9be0-0fb1268429e8