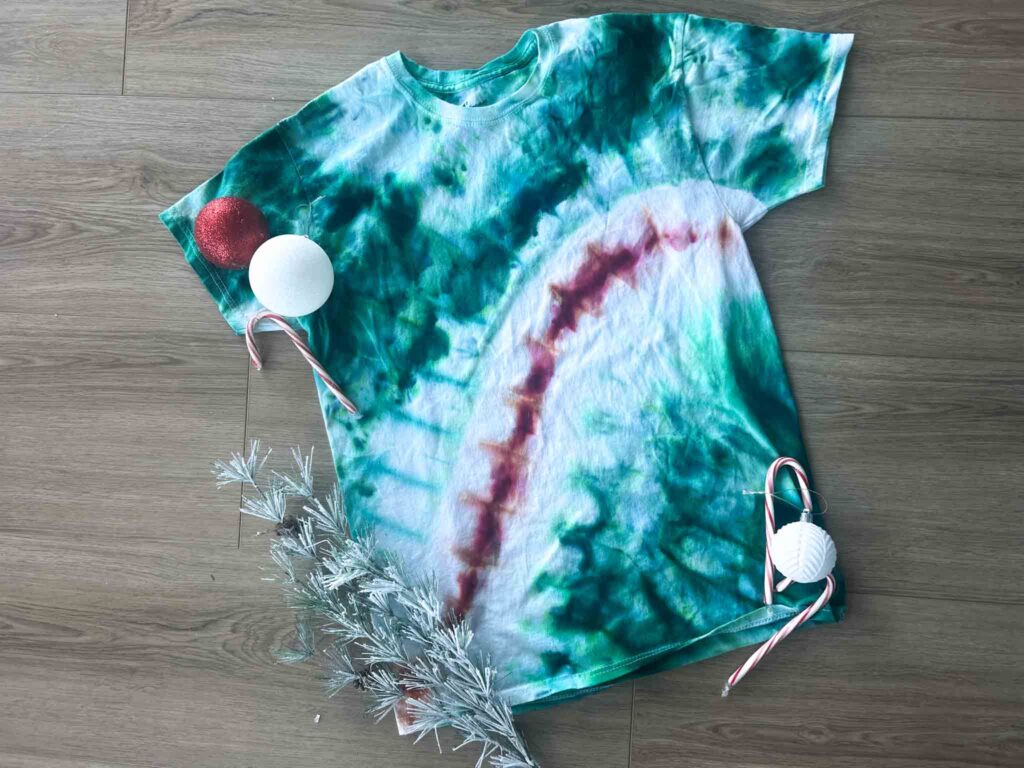
If you are looking for a simple Christmas tie-dye idea, a candy cane t-shirt pattern is great for beginners! This pattern can be done on a t-shirt, hoodie, or even a tea towel for a neighbor’s gift!
I always have at least one tie-dye project going on at any given time and know the time and effort each project will take. When I tell you this one is simple I mean it! You could even have kids get in on the action.
In this tutorial, you will see me utilizing the ice dye method. Ice dyeing is my favorite because it is a bit unpredictable and adds more dimension than using liquid dyes. I will walk you through how you could use liquid dyes as well, but all the images shown here are ice dyes!
What You Need for Candy Cane Tie Dye
- Tailor’s chalk or Washable Marker
- 2 Rubber bands or Sinew
- Soda Ash
- Dye of your choice (I used Dharma Oxblood and Better Blue Green)
- Plastic spoon
- Cotton T Shirt
- Synthrapol
How to Tie Dye a Candy Cane Shirt
(These instructions are for using fiber-reactive dyes. Dyeing and rinsing with Rit or Tulip is slightly different. Follow instructions given on the packaging)
Tie the Shirt
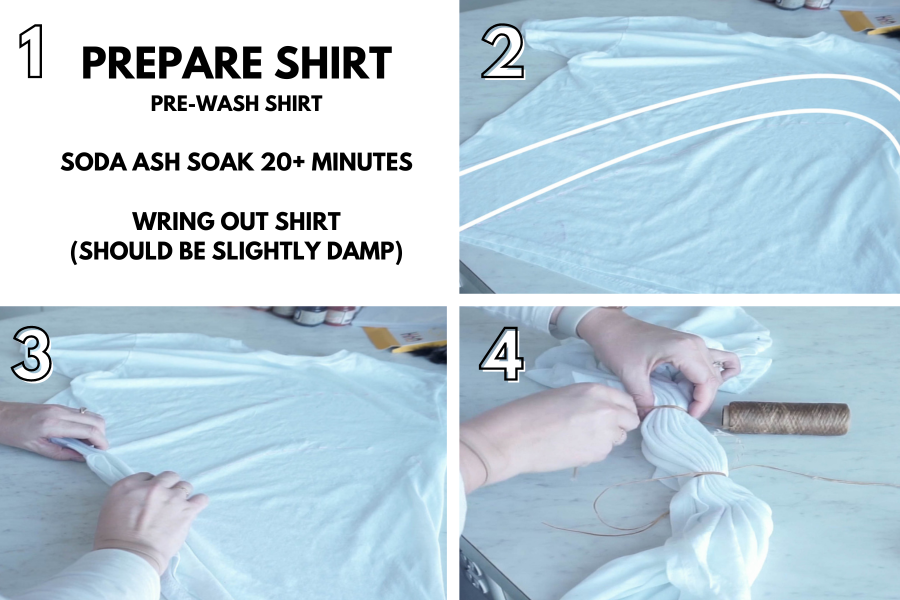
- Prepare your shirt by washing it then putting it in a soda ash soak for 20+ minutes. Sometimes I let my items soak for overnight or a day. It won’t make much difference unless you let the fabric sit dry with the soda ash. (It can eat through the fiber of the fabric.)
- Use tailor’s chalk or a washable marker to draw two parallel lines in a candy cane shape.
- Begin accordion folding along the drawn lines. You will continue folding this way all the way to the top of the candy cane. Once folded, it should look like one straight line on the pleats.
- Tie along the lines. Here you can see I used sinew, You could also use rubberbands or even kite string.
Apply the dye
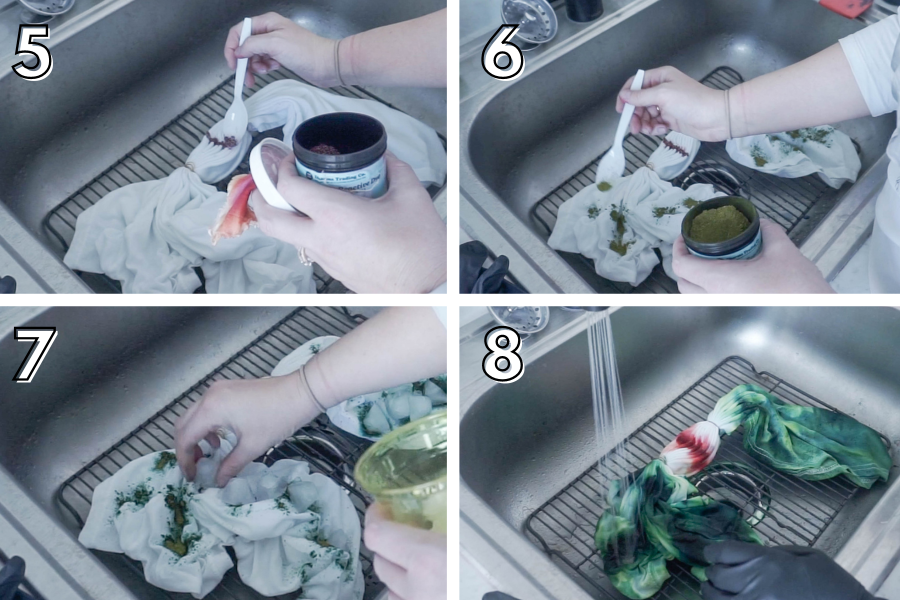
- Use a spoon to place the red dye between the two tied lines. I kept a lot of white space around my dye so that I wouldn’t have the green and red bleed into each other. This will create brown if you aren’t careful.
- Use a spoon to sprinkle the green around the outer edges of the shirt.
- Place ice on the project. Sometimes I just dump the ice on my project but for this one, I carefully placed the ice so the red and green wouldn’t touch.
- Once the ice is melted, rinse the shirt in cold water until the water runs clear. Turn the heat up and continue rinsing until water runs clear.
- Heat a bowl or pot of near-boiling water with dish soap in it and place your project in the hot water. This will set the dye as well as rid the shirt of excess dye so as not to bleed on other clothes in the washer.
- Wash in a washing machine using synthrapol.
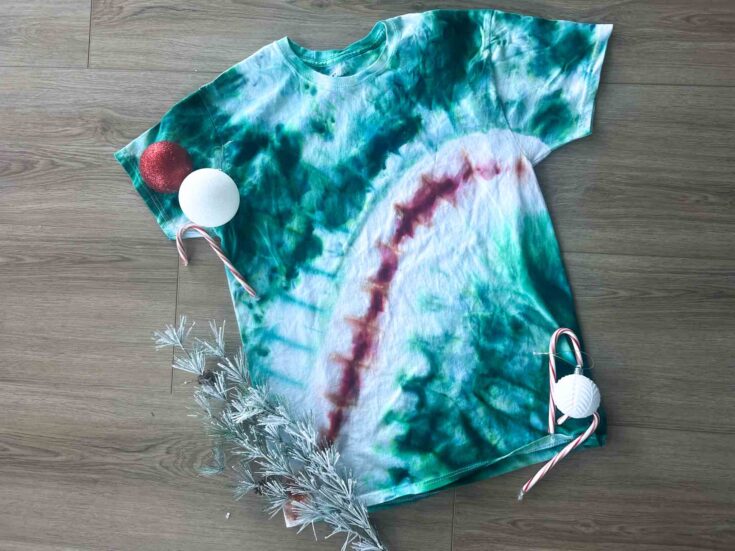
Candy Cane T Shirt
Follow along with this simple tutorial on how to tie dye your very one candy cane t-shirt. Visual, written, and video instruction included!
Materials
- T Shirt
- Soda Ash
- Dye
- Rubber bands, String or Sinew
Tools
- Tailor's Chalk or Washable Marker
- Plastic Spoon
- Cookie Rack
Instructions
- Prepare your shirt by washing it then putting it in a soda ash soak for 20+ minutes. Sometimes I let my items soak for overnight or a day. It won't make much difference unless you let the fabric sit dry with the soda ash. (It can be through the fiber of the fabric.)
- Use tailor's chalk or a washable marker to draw two parallel lines in a candy cane shape.
- Begin accordion folding along the drawn lines. You will continue folding this way to the top of the candy cane. Once folded, it should look like one straight line on the pleats.
- Tie along the lines. Here you can see I used sinew, You could also use rubberbands or even string.
- Use a spoon to place the red dye between the two tied lines. I kept a lot of white space around my dye so that I wouldn't have the green and red bleed into each other. This will create brown if you aren't careful.
- Use a spoon to sprinkle the green around the outer edges of the shirt.
- Place ice on the project. Sometimes I just dump the ice on my project but for this one, I carefully placed the ice so the red and green wouldn't touch.
- Once the ice is melted, rinse the shirt in cold water until the water runs clear. Turn the heat up and continue rinsing until water runs clear.
- Heat a bowl or pot of near-boiling water with dish soap in it and place your project in the hot water. This will set the dye as well as rid the shirt of excess dye so as not to bleed on other clothes in the washer.
- Wash in a washing machine using synthrapol.
Notes
Using liquid dye is similar. Instead of place the dye directly on the project, you will mix it with water and apply using a squirt bottle.
Recommended Products
As an Amazon Associate and member of other affiliate programs, I earn from qualifying purchases.
-
 Procion MX Dye Color Set - Includes 13 2/3 Ounce Jars - 2-1lb Soda Ash Dye Fixer - Instruction Sheet - Color Chart
 -
 OZXTYO Triangle Tailors Chalk,Sewing Fabric Chalk and Fabric Markers for Quilting,Sewing Supplies Accessories (10Pcs)
 -
 Hanes mens Essentials Short Sleeve T-shirt Value Pack (4-pack) athletic t shirts, White, Large US
 -
 Jacquard Products Soda Ash Dye Fixer, 1 Pound Bag
 -
 Amazon Basics Assorted Size and Color Rubber Bands, 0.5 lb.
 -
 Jacquard Synthrapol Prewash and After Wash Liquid detergent for Dyed or Painted Fabrics, Industrial Strength, pH Neutral, 8 fl oz
I have two other fun Christmas tie dye options for you! Did you know you can tie dye the shape of Christmas tree? I. give you two options on how to do it whether you want to go simple or a little more complex.
I also made this video of how to do a peppermint candy inspired tie dye project!


