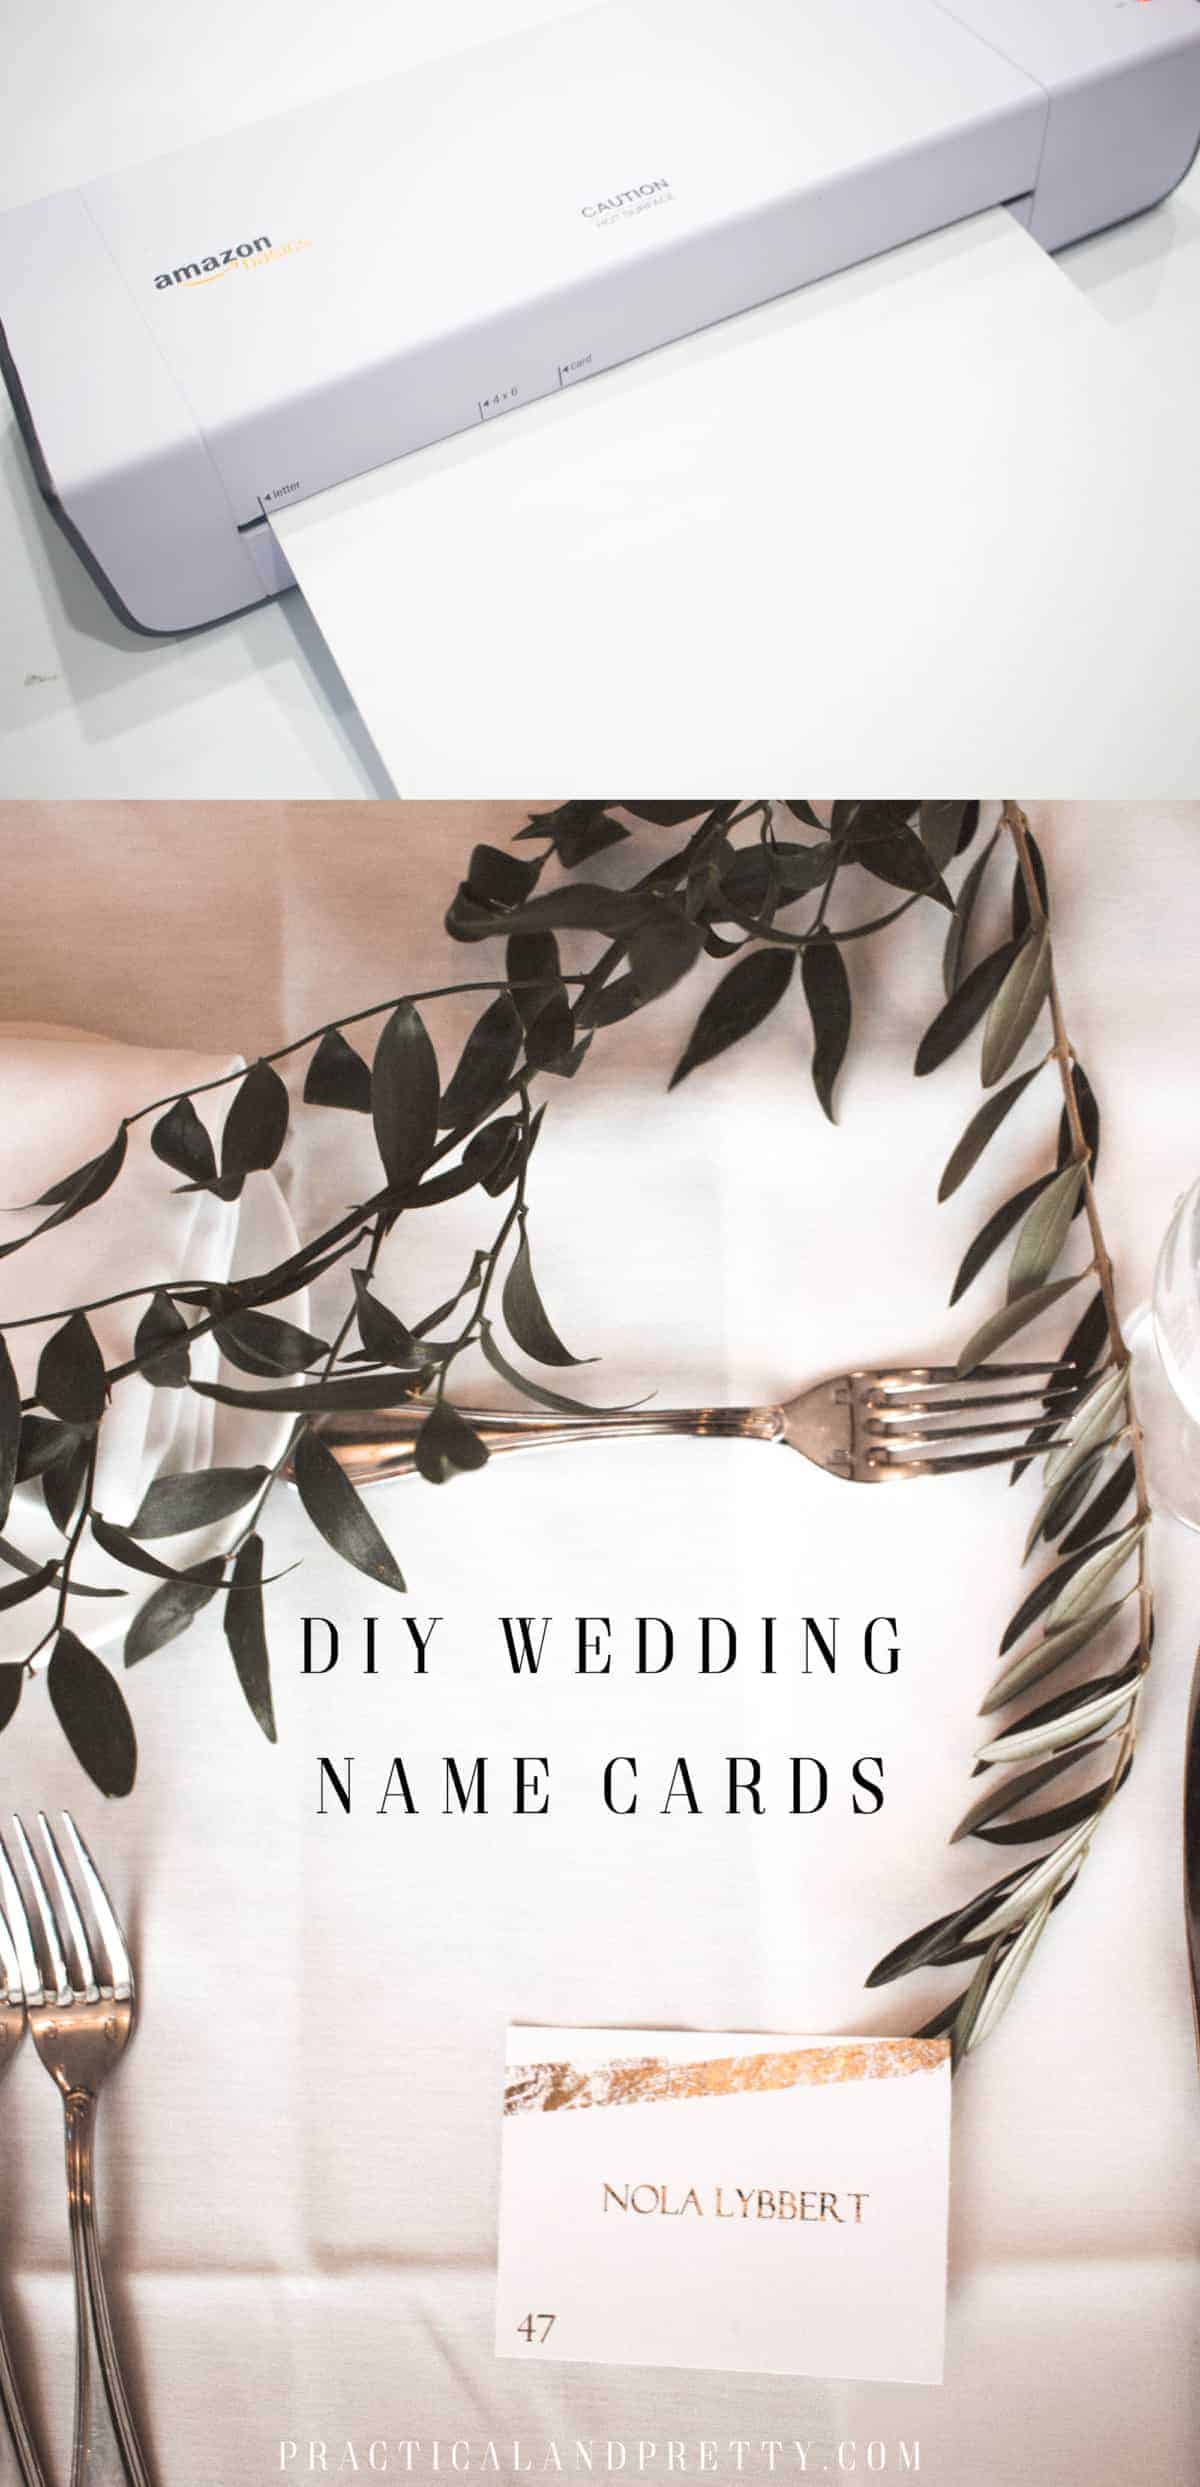
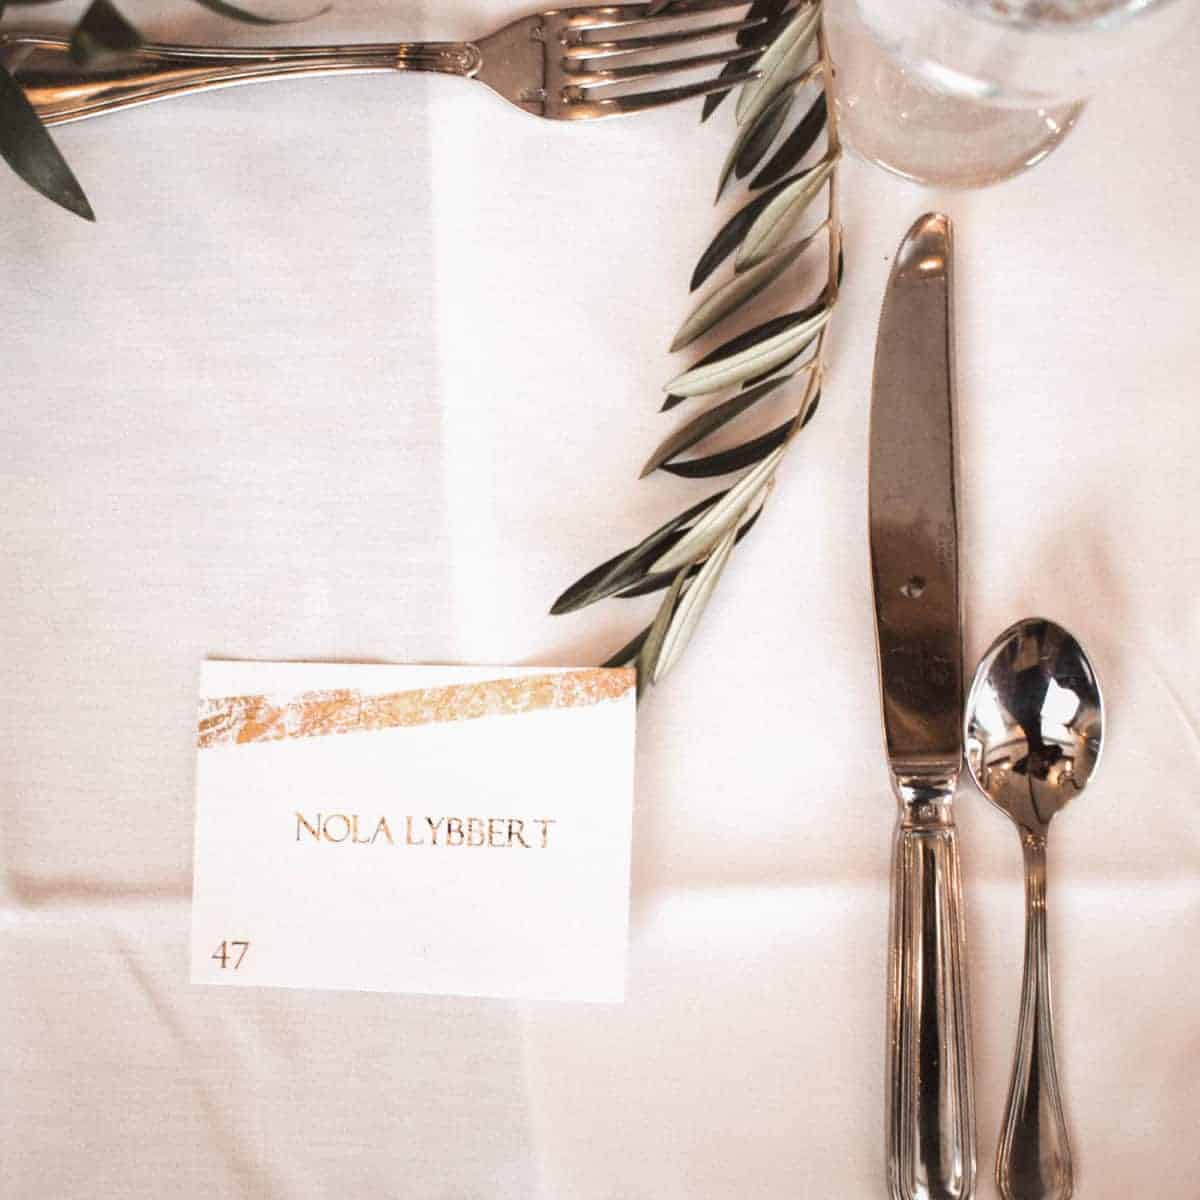
Add a touch of gold to your wedding lunch or dinner with these name cards. Save some money with some simple DIY wedding elements like this.
My sister recently got married and I begged and pleaded to do SOME sort of DIY element for her. We settled on name cards because they’re a simple little DIY but are obviously super important.
I wanted a subtle gold touch on these cards because I didn’t want them to distract from the other decor but I wanted them to coordinate.
How to make Gold Foiled DIY Wedding Name Cards
- Transfer Foil
- Glaminator
- Laser Printer
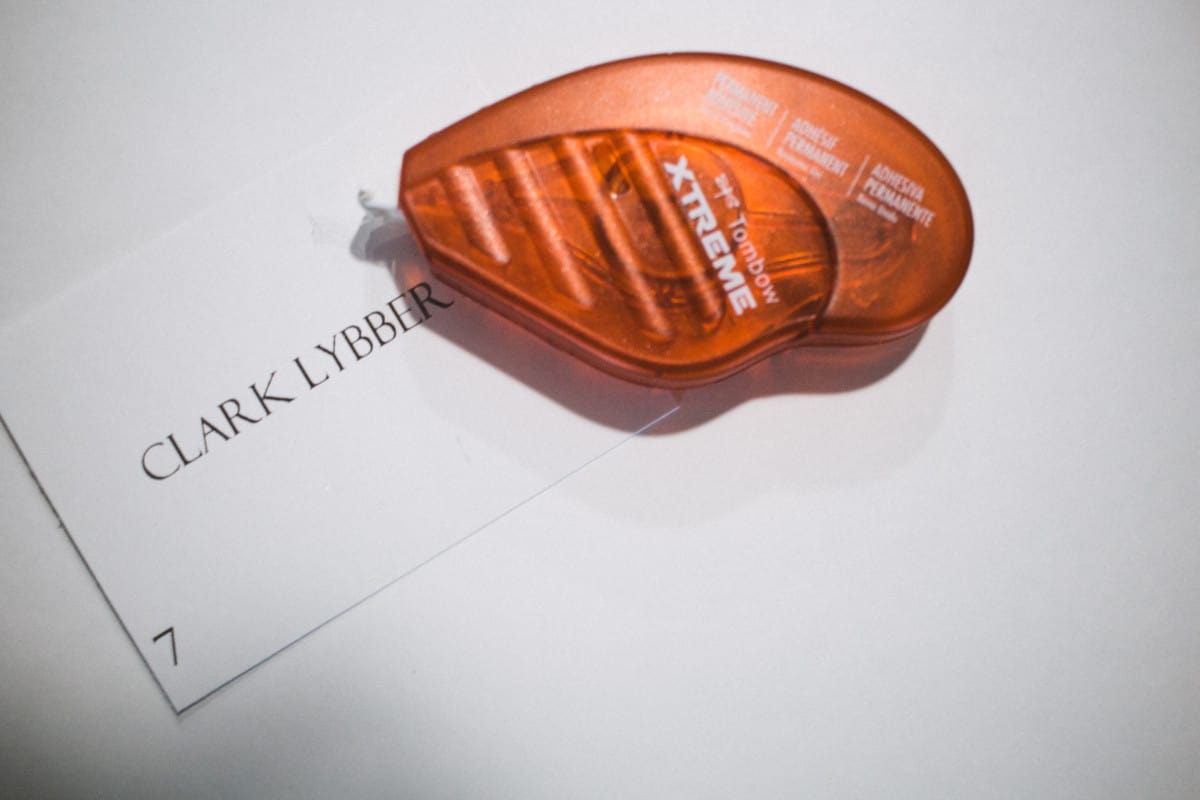
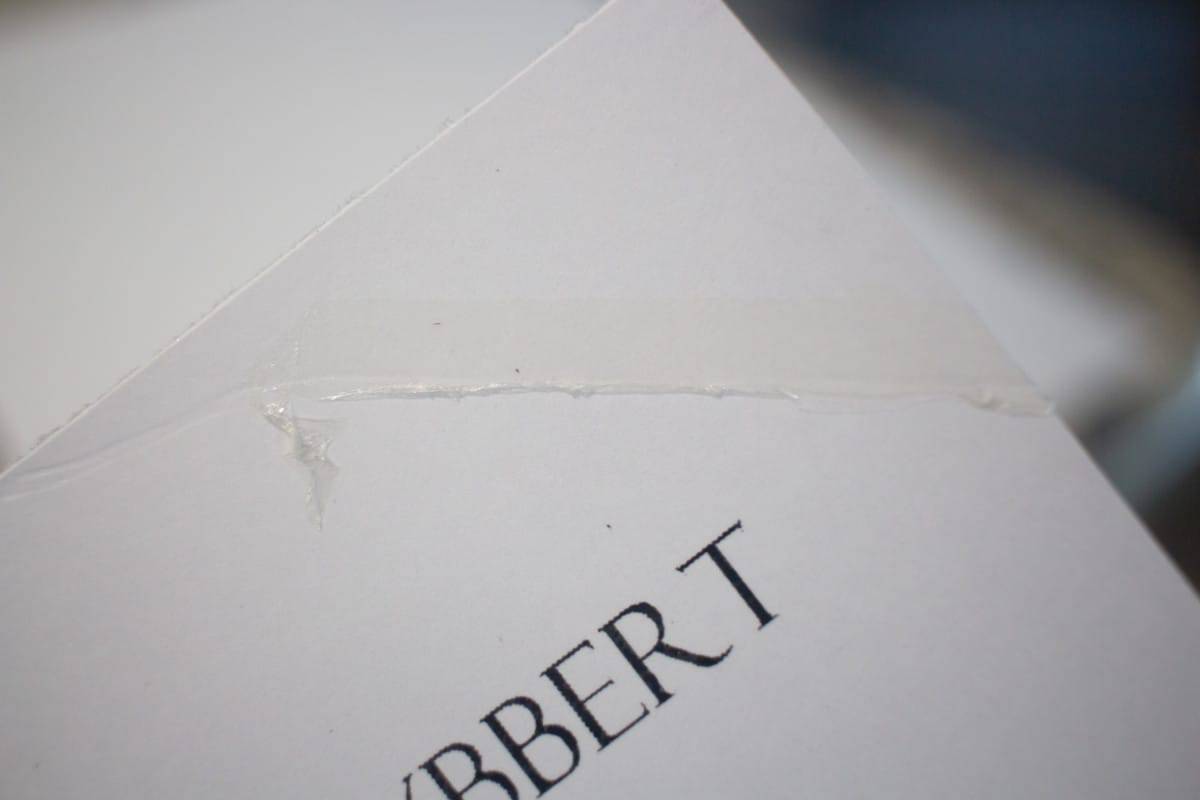
- Glue Tape
- Paper Cutter (optional, but I used this to make sure my cards were all the same size.)
Print your cards using a laser printer. This is what the foil adheres to so is very important! If you only have an inkjet printer, most print shops print using laser printers. That’s what I do!
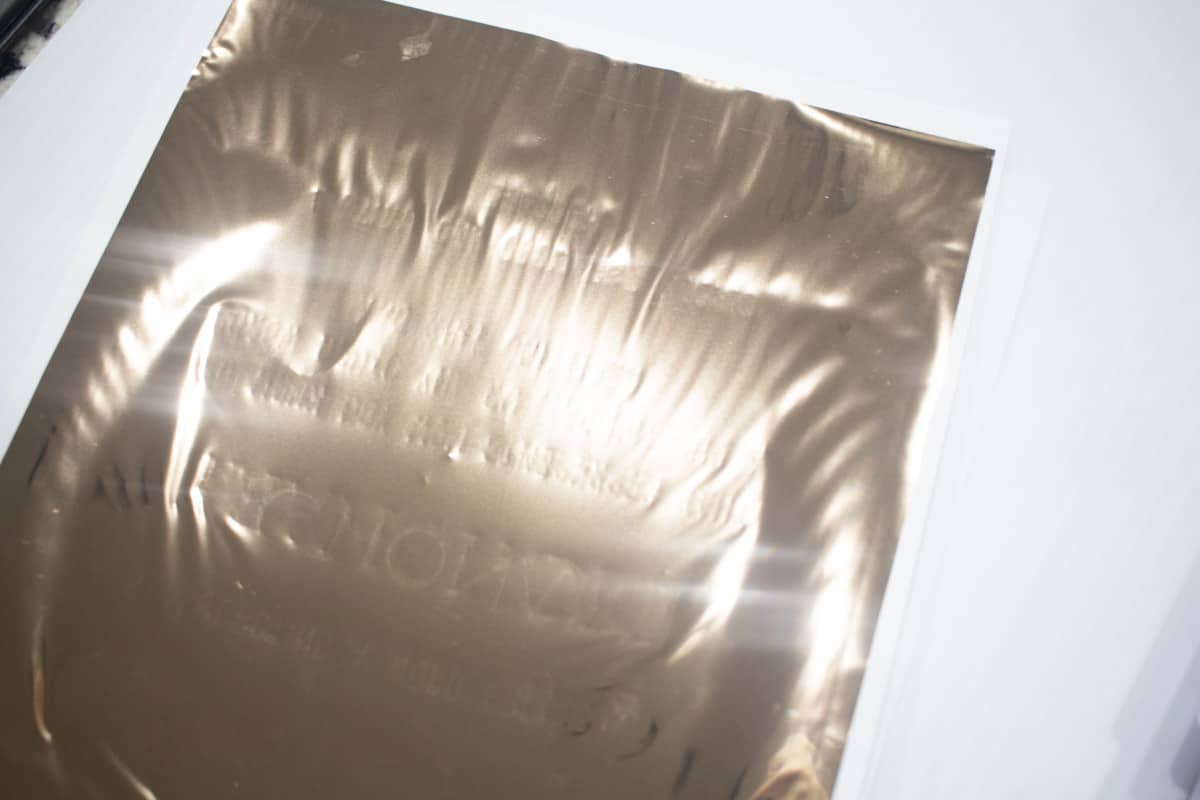
Now I crinkled up my transfer foil so that it had a brushed look to it.
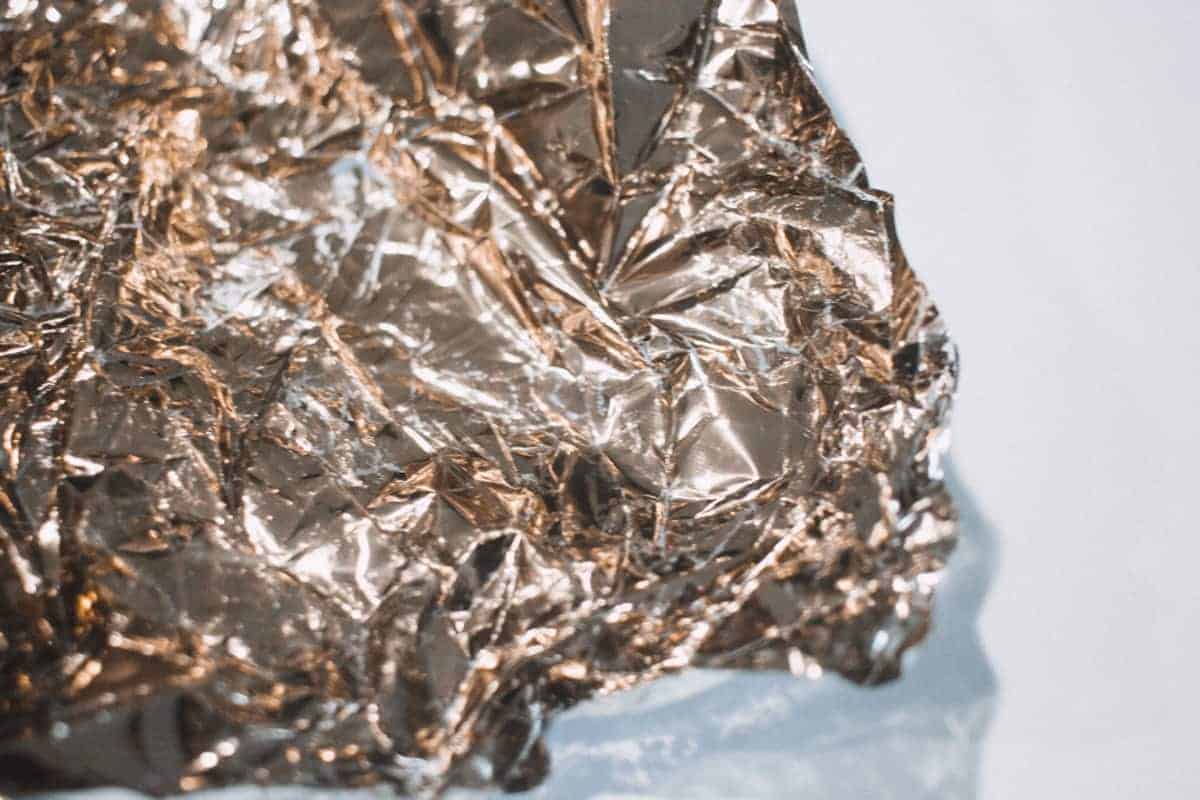
I used my glue tape to make a single strip and pressed the gold foil against the sticky portion. It made it look like I swiped gold foiling on it! I used the same gold sheet for quite a few of the cards until the foil was mostly used up.
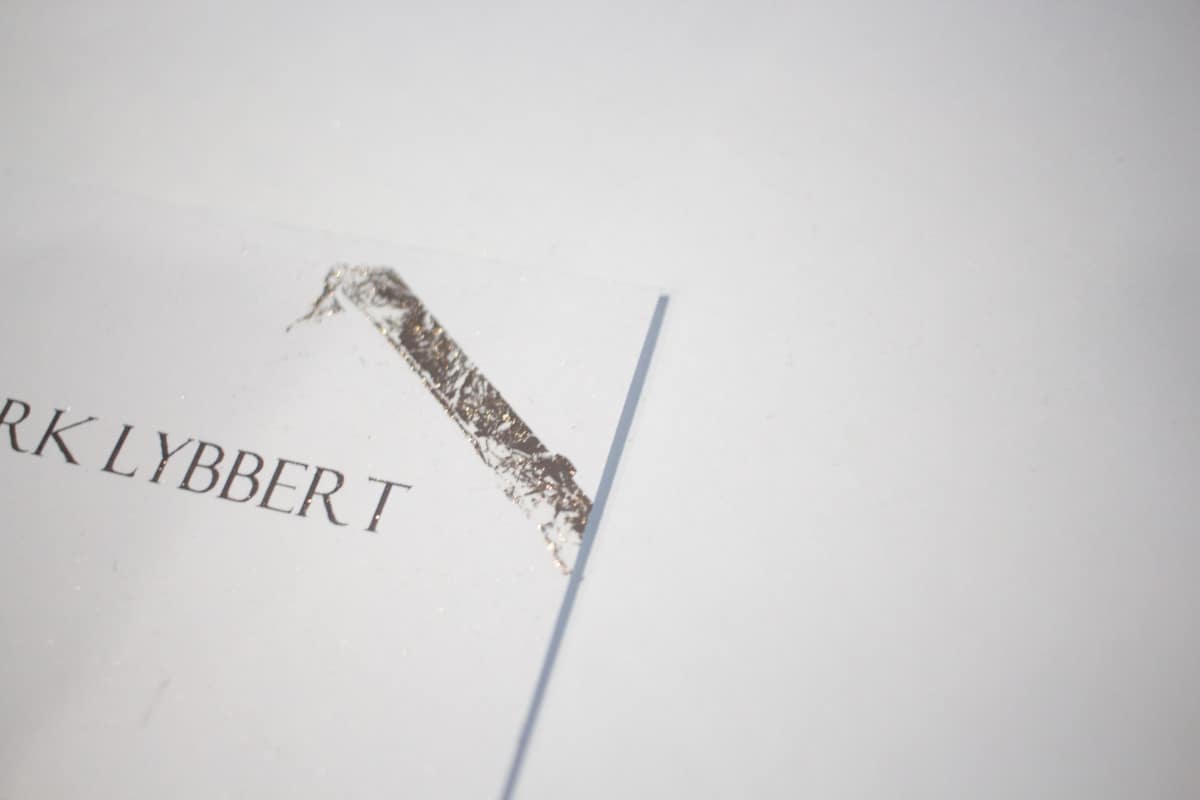
I did this for all of the name cards but did a different swipe on each one so that they were all unique. They turned out so beautiful and looked super classy.
I think every wedding should have some sort of DIY element because it makes it more personal in my opinion.
If you liked this you might also like this gold foiled printable tutorial I have. I also have a tutorial of how to gold foil napkins which would be another way to add to a DIY wedding.


