If you’re searching for a heart tie-dye tutorial that actually explains what to do (and what not to do), you’re in the right place. In this post I’ll show you the classic heart tie dye pattern step by step, plus a few variations I use when I’m restocking hearts for my shop.
The best part? This is one of those easy heart tie dye patterns for beginners where the “magic” comes from one simple fold. You can keep it basic, or level it up with ice dye, a rainbow exterior, or even a geode-style heart.
Quick Answer: How to Make a Heart Out of Tie-Dye
- Fold the shirt in half vertically.
- Draw half a heart along the folded edge.
- Accordion fold along that line until the heart edge becomes a straight “spine.”
- Tie tightly with sinew (sharper lines) or rubber bands (softer lines).
- Dye the heart edge thoroughly so the color goes all the way through.
- Add soda ash (soak or sprinkle), batch, then rinse.
Supplies for a Heart Tie-Dye Pattern Tutorial
- Shirt (100% cotton is brightest; cotton/poly will be more muted)
- Washable marker (Crayola is my favorite) or tailor’s chalk
- Sinew or rubber bands
- Fiber reactive dye (Procion MX)
- Soda ash
- Gloves
- Ice (if ice dyeing)
- Pan + rack OR a setup for gravity dye
Step-by-Step: How to Do a Heart in Tie-Dye
Step 1: Find the center (don’t trust the tag)
First, find the true center of the shirt. Never go off the tag—it’s often slightly off-center, which can shift your heart.
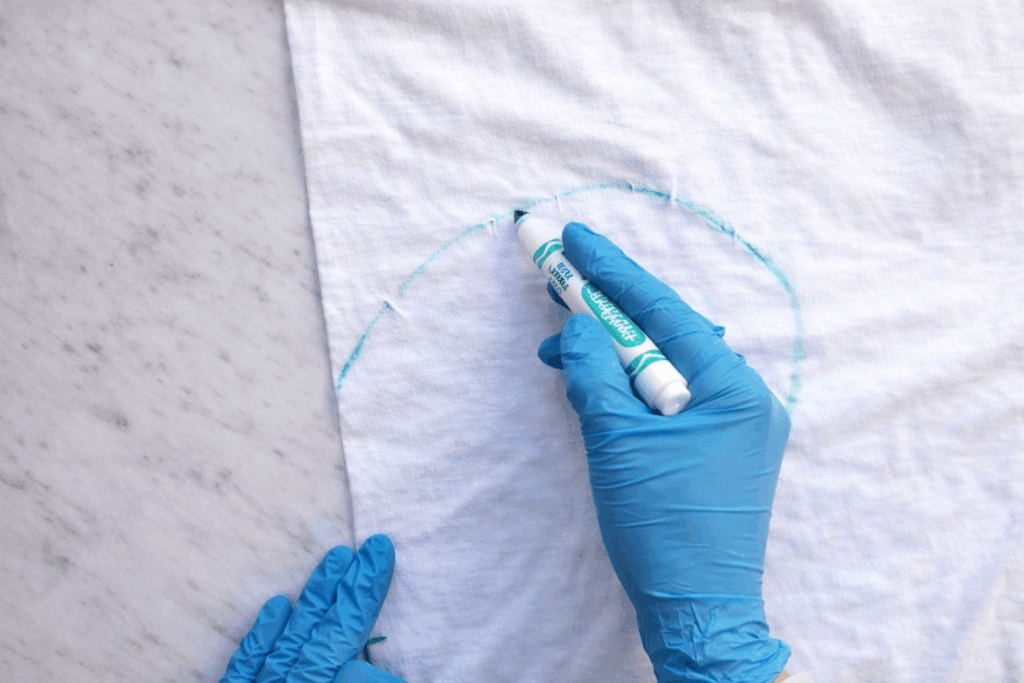
Step 2: Fold and draw half a heart
Fold the shirt vertically. Then draw half a heart along the fold line. I like placing the top of the heart slightly below the armpit so it sits nicely on the chest.
Common mistake: not going deep enough at the bottom point. If you keep the “V” too shallow, you’ll get something that looks like a guitar pick instead of a heart.
Step 3: Accordion fold the shape
This is the key. Start at the bottom point and accordion fold along the drawn line. Your goal is to turn the curved heart outline into a straight folded edge.

This is also why you can draw basically any shape (cow, frog, peace sign, whatever) and get it to work—because you’re using the fold to “translate” the drawing into a clean dye edge.
Step 4: Tie it (sinew vs rubber bands)
Sinew gives sharper lines and is easier to remove. Rubber bands work too, but the edge is usually softer and sometimes you’ll need to cut them off (carefully).
I tested wrapping sinew from 2 all the way up to 7 times. After about 3–4 wraps, it didn’t look dramatically different—BUT removing 7 wraps is a pain. So I usually stick to 3–4 tight wraps.
No Soda Ash Soak? Do a Soda Ash Sprinkle Instead
You do need soda ash for fiber reactive dye to bond well—but you don’t have to soak if you don’t want to. If you’re avoiding wet hands, saving time, or you’re sensitive to soda ash, you can use a soda ash sprinkle.
- Soda ash soak: more consistent, classic method
- Soda ash sprinkle: faster and works well for many projects
3 Heart Tie-Dye Variations (DIY Options)
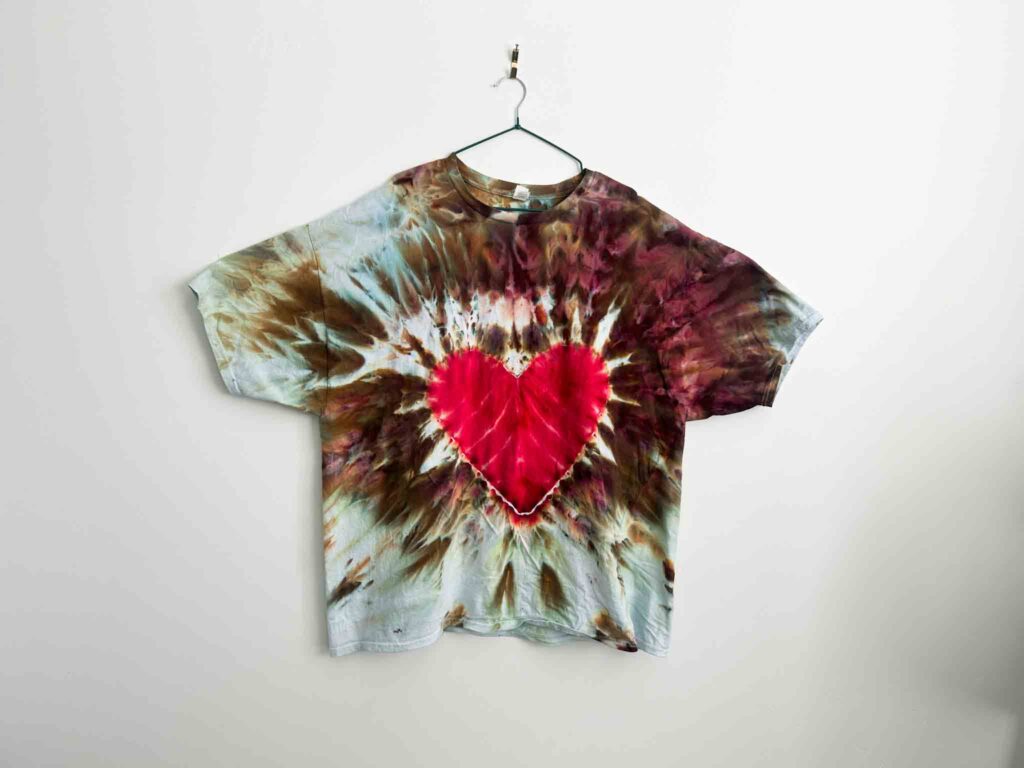
1) Solid heart + gravity dye exterior
This is my “wow” option. I dye the heart edge solid (liquid dye is great for this), then add another color on the outside and set it on an incline so gravity pulls the melt downward. It creates an “exploding heart” look.

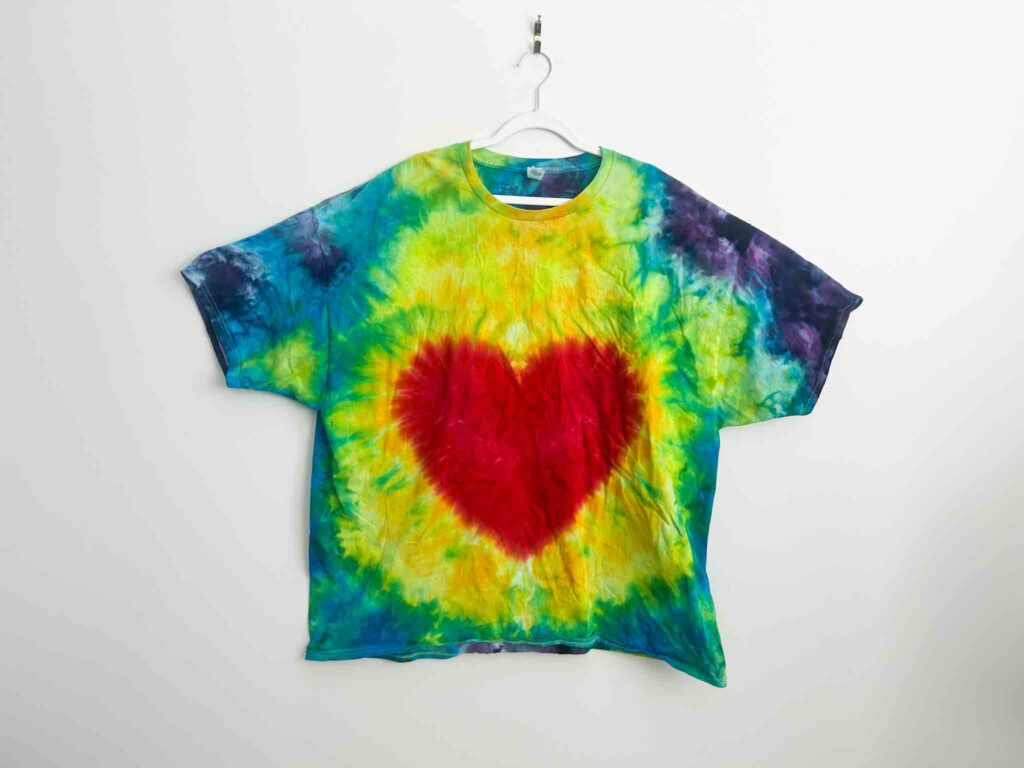
2) Rubber band heart + rainbow ice dye
This is a super fun heart tie dye patterns DIY option: make the heart with a rubber band, then scrunch and do a rainbow over ice on the exterior. It’s playful and beginner-friendly.
Example rainbow colors I used: Daffodil, Lime Pop, Mermaid’s Dream, and Power Berry.
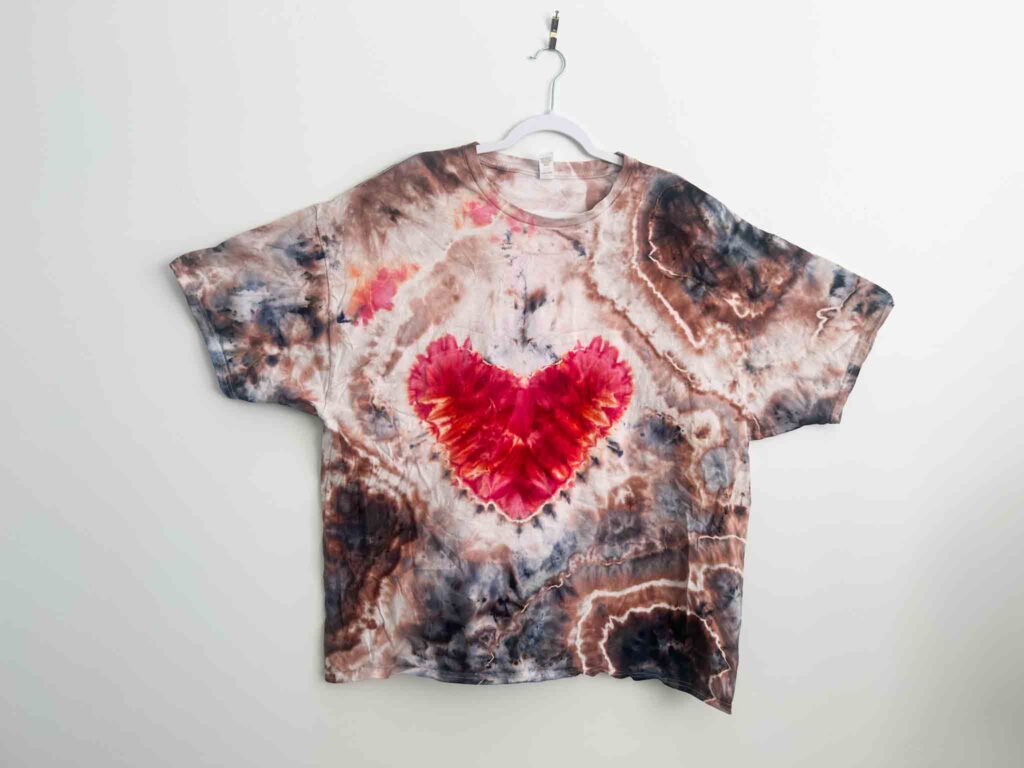
3) Geode-style heart (more advanced)
If you’re going for a more organic look, avoid perfect concentric ties. Scrunch, angle your wraps, and let the shapes be uneven. That asymmetry is what keeps it looking natural.

Heart Tie-Dye FAQ
Fold the shirt in half vertically, draw half a heart on the fold, accordion fold along the line, then tie tightly and dye the straight heart edge thoroughly so it penetrates through the folded layers.
After accordion folding, tie directly across the heart “edge” with sinew or a rubber band. The tighter and more even the tie, the cleaner the heart outline will be.
On the folded shirt, start the top of the heart slightly below the armpit (if using a smaller shirt. If you’re doing a plus size shirt go a bit above the armpit), then draw a deeper bottom point than you think you need. If the bottom is too shallow, the heart turns into a pointy “pick” shape.
Yes! Especially if the shirt is new. Washing removes sizing, softeners, or finishes that can block dye absorption. Skip fabric softener.
It depends on your goal. Damp fabric can help dye spread and blend more softly. Drier fabric can keep edges sharper. For a classic heart outline, I focus more on a tight fold and solid saturation on the heart edge. These shirts were damped when I dyed them.
Not washing new shirts first
Using fabric softener
Not using soda ash at all (you need it—soak or sprinkle)
Expecting cotton/poly blends to be as bright as 100% cotton
For Procion MX dye, soda ash is the standard. If you don’t want to soak, use a soda ash sprinkle. Either way, soda ash is what helps the dye bond to the fiber.
Not really, there are just tradeoffs. Some methods are more consistent, some are faster, some create softer blends, and some create sharper lines. If your result isn’t what you wanted, it usually means one step needs tweaking and not that you “failed.”
It can if you let dye sit. Rinse immediately, wipe down right after, and avoid dumping concentrated dye powder in the tub. When in doubt, rinse in a dedicated bin or outside.
For bright, long-lasting results on cotton, fiber reactive dye (Procion MX) is the go-to. Rit can work, but it’s not the same category and typically won’t be as vibrant or as washfast on cotton as fiber reactive dye. Here’s a comparison post if you’re curious.
Use 100% cotton when possible
Use soda ash (soak or sprinkle)
Use enough dye and make sure it penetrates the folds
Batch long enough for the dye to react
Yes. After batching, rinse cool first to remove excess dye, then gradually warm up the water. Finish with a wash to fully remove loose dye particles. Here is a full breakdown of how to wash tie dye.
Tie dye is less of a “trend” and more of a technique now. The loud rainbow spiral isn’t the only look anymore—modern tie dye includes geodes, watercolor/gravity dye, minimal one-color projects, and more wearable palettes. (In other words: it’s not out of style, it just evolved.)
Easy Heart Tie-Dye Patterns for Beginners: Final Tips
If you’re new, don’t overthink the tie. Tie it, dye it, learn from it. You can always make another, and your second heart will be better than your first.
If you want an especially clean heart outline: focus on a tight accordion fold, 3–4 firm ties, and solid dye saturation on the heart edge.
Pin this post for later!


