If you’ve been wanting to learn how to tie dye a hoodie, you’re in the right place. Hoodies take dye beautifully, but because they’re thicker than t-shirts, some folding methods work MUCH better than others. This guide walks you through three beginner-friendly ways to tie dye a hoodie: the gravity fan fold, a tall deep scrunch, and the classic geode technique.

Before you start, make sure to check out my guide on tie dye mistakes so you can avoid the most common issues beginners run into. And if you’re using ice dye for your hoodie, you might also like my tutorial on how to ice dye a shirt.
If you’d like to watch these folds in action, here’s the video!
What you’ll need to tie dye a hoodie
Before you start, here’s everything you’ll need. I’ll explain anything that’s not obvious below the list.
- A 100% cotton or rayon hoodie (check the tag, polyester blends will work but be more subtle if it’s 50/50)
- Fiber reactive dye (I use Jacquard or Dharma Trading)
- Soda ash
- Rubber bands or sinew (sinew works better on thick hoodies)
- Nitrile gloves
- A bucket for the soda ash soak
- A wire rack and tray (especially if you’re ice dyeing)
- Plastic bags for the resting stage
About the hoodie: Tie dye only bonds to natural fibers like cotton and rayon. A 50/50 blend will dye but the colors will be muted (basically half-strength). Always check the tag before you start. Some of my favorite blanks come from Hanes, Gildan, and Tultex. The ones I sell in my store can be found here: Tultex hoodie for tie dye.
About the dye: Skip the craft store all-in-one kits if you want the brightest possible results on a thick hoodie. Real fiber reactive dye from a dye company will outperform a kit every time. If you’re using Jacquard, my code ANNA gets you 20% off.
You can find all my favorite tie dye supplies on my Amazon storefront and Walmart storefront.
How to prep your hoodie for tie dye
Prep is the single most important step, and it’s the one most people skip. If you do nothing else right, do this part right.
- Pre-wash the hoodie in hot water with no fabric softener. This removes the sizing that manufacturers add to new clothes, which blocks dye from absorbing evenly.
- Mix your soda ash solution: 1 cup of soda ash per gallon of warm water. Stir until dissolved.
- Soak the hoodie in the soda ash solution for at least 20 minutes. For a thicker hoodie, I let it soak for 30 minutes to make sure the solution penetrates the fleece.
- Wring it out well. You want the hoodie damp, not sopping wet. Hoodies hold a lot of water, so really squeeze it out.
- Fold while damp. Damp fabric folds and bands much more easily than dry, and the dye spreads more evenly.
Soda ash is what activates fiber reactive dye and lets it bond permanently to cotton. Without it, your colors will rinse out in the wash. There’s no skipping this step. For a full walkthrough, see my fabric prep guide.
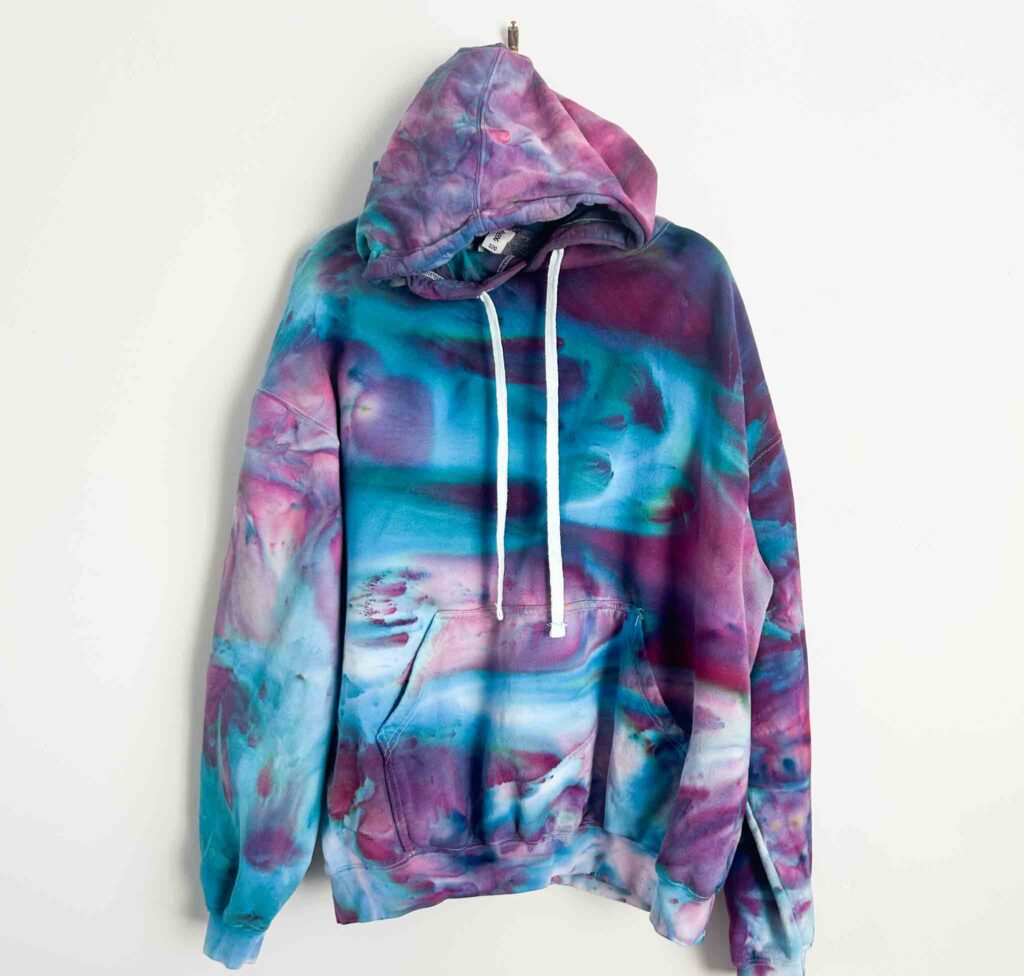
1. Gravity Fan Fold Hoodie
The gravity fan fold creates a flowing, streaked pattern that looks incredible on hoodies. If you’re learning how to tie dye a hoodie for the first time, this method is forgiving and gives stunning results.
How to Fold It
Start with your hoodie damp. Lay it flat and accordion fold it from one side, allowing the folds to gently curve as you move across the hoodie. Keep the folds looser than a strict fan fold — this is what creates the soft gravity effect.
Why It Works
The curved folds help dye blend beautifully while still creating defined movement. It works especially well for blended palettes or multi-color designs. If you want a full step-by-step tutorial of this exact fold, check out my gravity tie dye hoodie post.
Best For:
Beginners, blended palettes, and showing off color splits.
2. Tall Deep Scrunch Hoodie
If you want a super easy and bold option while learning how to tie dye a hoodie, the tall deep scrunch technique is perfect. It creates strong texture and dramatic color variation.
How to Fold It
Lift the hoodie up in sections, creating tall “pillars,” then gently scrunch them down. Secure with a few rubber bands, keeping everything chunky and uneven. The thicker the scrunch, the deeper the dye will settle.
Why It Works
Scrunching creates natural highs and lows in the fabric, leading to gorgeous organic patterns. This method shines with ice dye, so be sure to read my tutorials on how to ice dye a shirt and how to prep fabric for tie dye.
Best For:
Ice dyeing, moody colorways, split-heavy dyes.
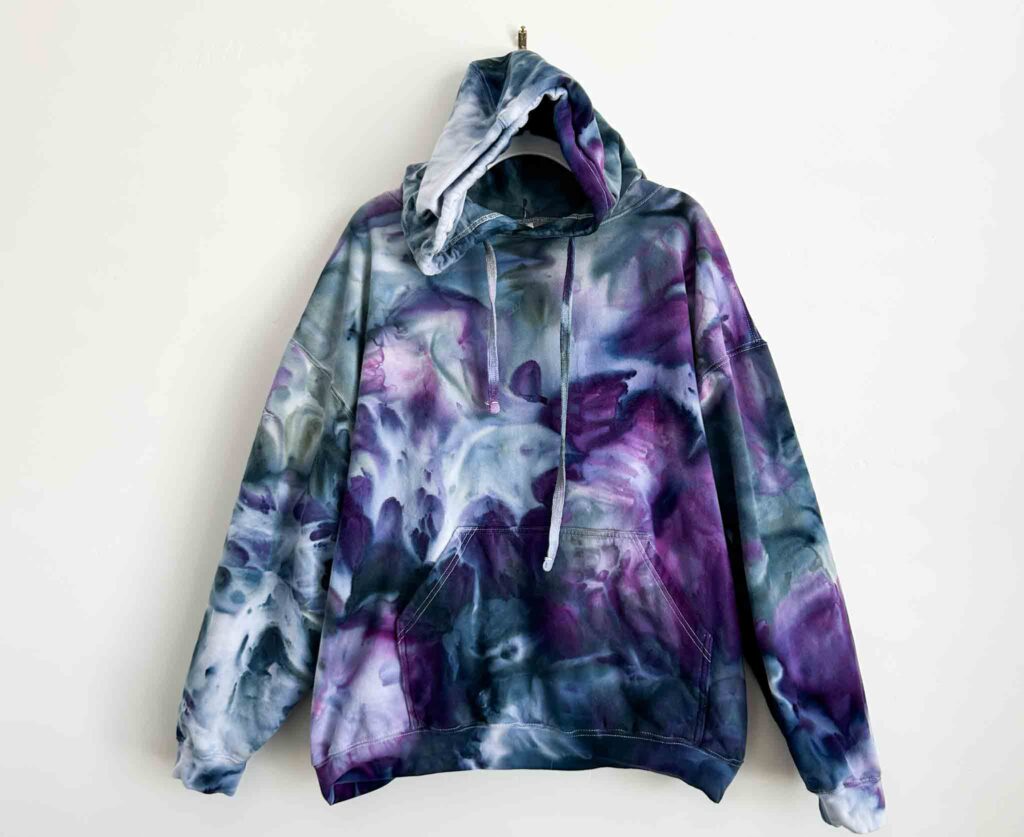
3. Geode Tie Dye Hoodie
The geode method is bold, dramatic, and absolutely beautiful on thicker hoodie material. If you’re searching for how to tie dye a hoodie with sharp, defined rings, this is the technique to choose.
How to Fold It
Select where you want your geode center to be and pinch that spot upward. Tie sections down with sinew to form repeating “rings.” You can create one large geode or several smaller ones across the hoodie.
Why It Works
Sinew creates tight resist lines that show up clearly on hoodies, even through thick fleece. For best contrast, many people use black dye — if you’re considering it, make sure to read my post on how to tie dye with black.
Best For:
High-contrast colors, ice dye, dramatic patterns.
Which Tie Dye Method Should You Choose?
If you’re not sure which method to try first, here’s a quick guide:
- Gravity fan fold → flowy blends and colorful palettes.
- Tall deep scrunch → super easy with bold, textured results.
- Geode → crisp, dramatic ring patterns.
If you want a deeper dive into hoodie dyeing techniques, visit my other post on how to tie dye a geode hoodie.
How to apply liquid dye to a hoodie
Hoodies are thicker than t-shirts, which means dye does not soak through on its own the way it does with a thin tee. A few adjustments make a huge difference:
- Use more dye than you think you need. A hoodie can absorb almost twice as much dye as a t-shirt. Mix double batches in your squeeze bottles if you’re doing liquid.
- Squeeze the dye into the folds. Don’t just dab the surface. Push the tip of your squeeze bottle into the deepest part of each fold and squeeze firmly. With gloved fingers, work the dye into the fabric.
- Flip and dye the back. Once one side looks fully saturated, flip the bundle over and dye the back too. Dye does not penetrate through a thick fleece bundle, so the back side will be white if you skip this.
- Use sinew instead of rubber bands for tight resist lines. Sinew creates crisper white lines on thick fabric. Rubber bands work, but the resist won’t be as defined.
- Keep your color palette simple. Three to four colors total looks better than six to eight on a hoodie. Restraint is what separates beautiful tie dye from muddy tie dye, especially on a larger garment.
If you’re using ice dye, elevate the hoodie on a wire rack over a tray so the melt water can drain. Otherwise the colors pool at the bottom and get muddy. For a full walkthrough of ice dye specifically, see how to ice dye a shirt.
How long to let a tie dye hoodie sit
Once your hoodie is dyed, put it in a plastic bag and let it rest for at least 24 hours. This is longer than I’d tell you for a t-shirt (where 8 hours is the minimum) because hoodies are denser and need more time for the dye to fully react with the fiber.
Why so long? Fiber reactive dye works through a chemical reaction between the dye, the soda ash, and the cotton. That reaction needs time, moisture, and warmth. A thicker hoodie takes longer to fully react all the way through. Rinse too early and the colors will look dull or wash out later.
Keep the bagged hoodie at room temperature (not in a cold garage or basement). The dye reacts faster when it’s warm. In summer I sometimes leave it for a full 48 hours.
How to wash a tie dye hoodie for the first time
The first wash is where a lot of beautiful tie dye projects get ruined. Here’s the sequence:
- Rinse in cold water with the bands still on. This pulls out the excess unreacted dye before colors have a chance to bleed onto the white sections. Keep rinsing until the water runs mostly clear.
- Remove the rubber bands or sinew. Be careful with scissors if you used sinew.
- Rinse again in cold water to flush out any dye trapped in the folds.
- Rinse with hot water until water runs clear then add Blue Dawn dish soap and repeat the process.
- Wash in HOT water with regular detergent. Hot water is counterintuitive but correct. It releases any remaining unreacted dye so it won’t bleed in future washes. Wash the hoodie alone or with other brand new tie dye pieces for this first wash.
- Dry normally. Tumble dry is fine.
After this first wash, your hoodie can go in with regular laundry. Tie dye made with fiber reactive dye and soda ash holds its color for years if you’ve followed these steps.
Want something super simple? Try my one color tie dye projects for easy beginner ideas.
Tie dye hoodie FAQ
Can you tie dye a fleece hoodie?
Only if the fleece is mostly cotton. Most fleece you find at retail is polyester or a poly-cotton blend, which will not take fiber reactive dye. Always check the tag. Cotton fleece (sometimes called french terry or sweatshirt fleece) dyes beautifully.
What are the best hoodies to tie dye?
Look for 80% cotton or rayon or more, ideally in white or natural. My favorite is the Tultex hoodie. Skip anything labeled “performance” or “moisture-wicking” since those are synthetic.
Can you tie dye a black hoodie?
Tie dye sits on top of whatever color is already there, so a black hoodie will not show bright colors. To dye a dark hoodie, you would first need to bleach or reverse tie dye it to lift the color, then apply your dyes. For more on this, see my how to tie dye with black post.
How do you tie dye a hoodie with just one color?
One color tie dye looks stunning on hoodies because the white space becomes the design. Fold using a tight scrunch or fan fold, then apply only one color of dye to create high-contrast value variation. See my one color tie dye projects for inspiration.
How much dye do I need for one hoodie?
Plan on roughly 16 ounces of mixed dye per hoodie if you’re using multiple colors, or 8 ounces if you’re doing a one-color design. That’s about double what you’d use for a t-shirt. It’s better to have leftover dye than to run out mid-project.
Why did my tie dye hoodie come out faded?
Faded results almost always come down to one of four things: you skipped the soda ash soak, you didn’t use enough dye, you rinsed before 24 hours, or you used a poly-blend hoodie. For more troubleshooting, see my guide on tie dye mistakes and how to fix them.
Final Thoughts
Learning how to tie dye a hoodie is one of the most rewarding dye projects. The thicker fabric holds onto color beautifully, and each of these three methods gives you a unique finish.
For more help troubleshooting, visit my guide on tie dye mistakes and how to fix them. And if you’re experimenting with ice dye, you’ll love my tutorial on how to ice dye a shirt.
If you make a tie dye hoodie, tag me so I can see your creations. I love seeing what you come up with!
Want to come back later? Pin this!


