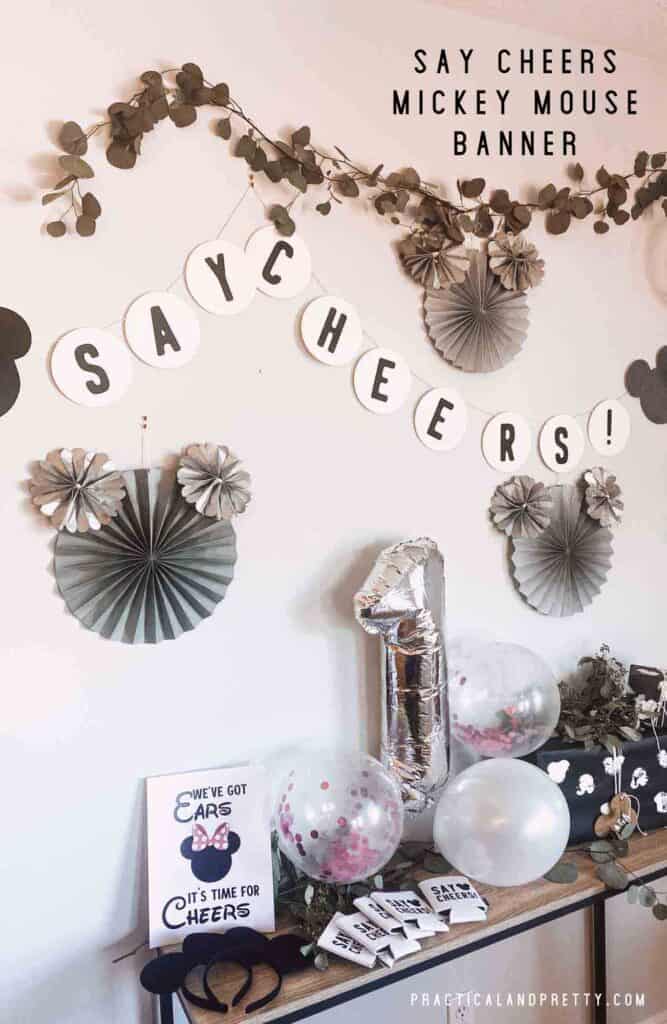
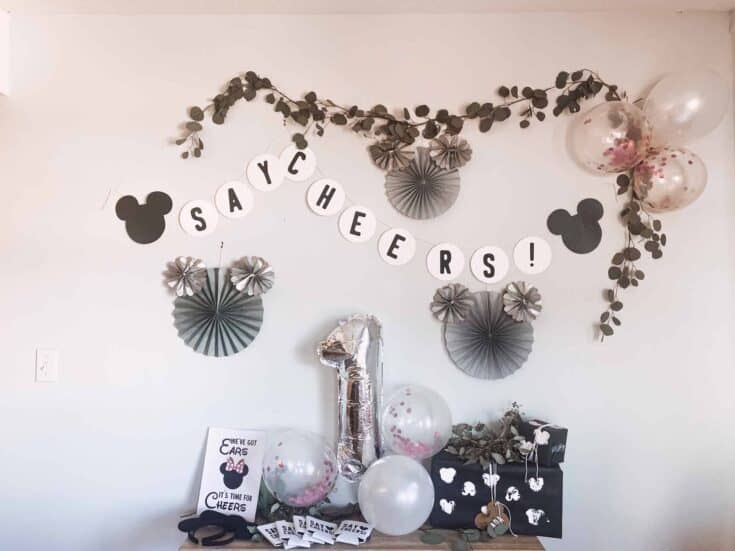
If you’re throwing a Mickey Mouse Birthday Party, then I have a really great DIY banner that will have all of your party-goers saying ‘cheers!’
This post is a part of my Minnie Mouse party supplies series that you won’t want to miss. I also have a Blippi party you may be interested in. Throwing a party for a grown-up? I have so many party ideas.
I used my Cricut for this project and it turned out SO CUTE. I have the project link for you but I uploaded the Mickey shape on my own so those won’t be included in the project link. However, below the free printables will include a mickey silhouette you can upload to Design Space. The tutorial for how to do this is below.
If you’re looking for inexpensive party supplies for your Disney party and have two weeks or less (sometimes stuff comes quicker but just so you make sure!) I cannot recommend Temu highly enough. If you search ‘Cartoon Mouse’ you may find more because of copyright issues. You’ll find super inexpensive Mickey ears and all sorts of other themed things. There are also tons of balloons and other party supplies. This code will get you 30% off your first order.
Mickey Mouse Birthday Party Banner
If you’re throwing a Mickey Mouse Birthday Party, then I have a really great DIY banner that will have all of your party-goers saying ‘cheers!’
Materials
- Kraft board
- Iron on
- String
Tools
- Hot Glue Gun
- EasyPress 2
- Cricut Explore Air 2 or Maker
Instructions
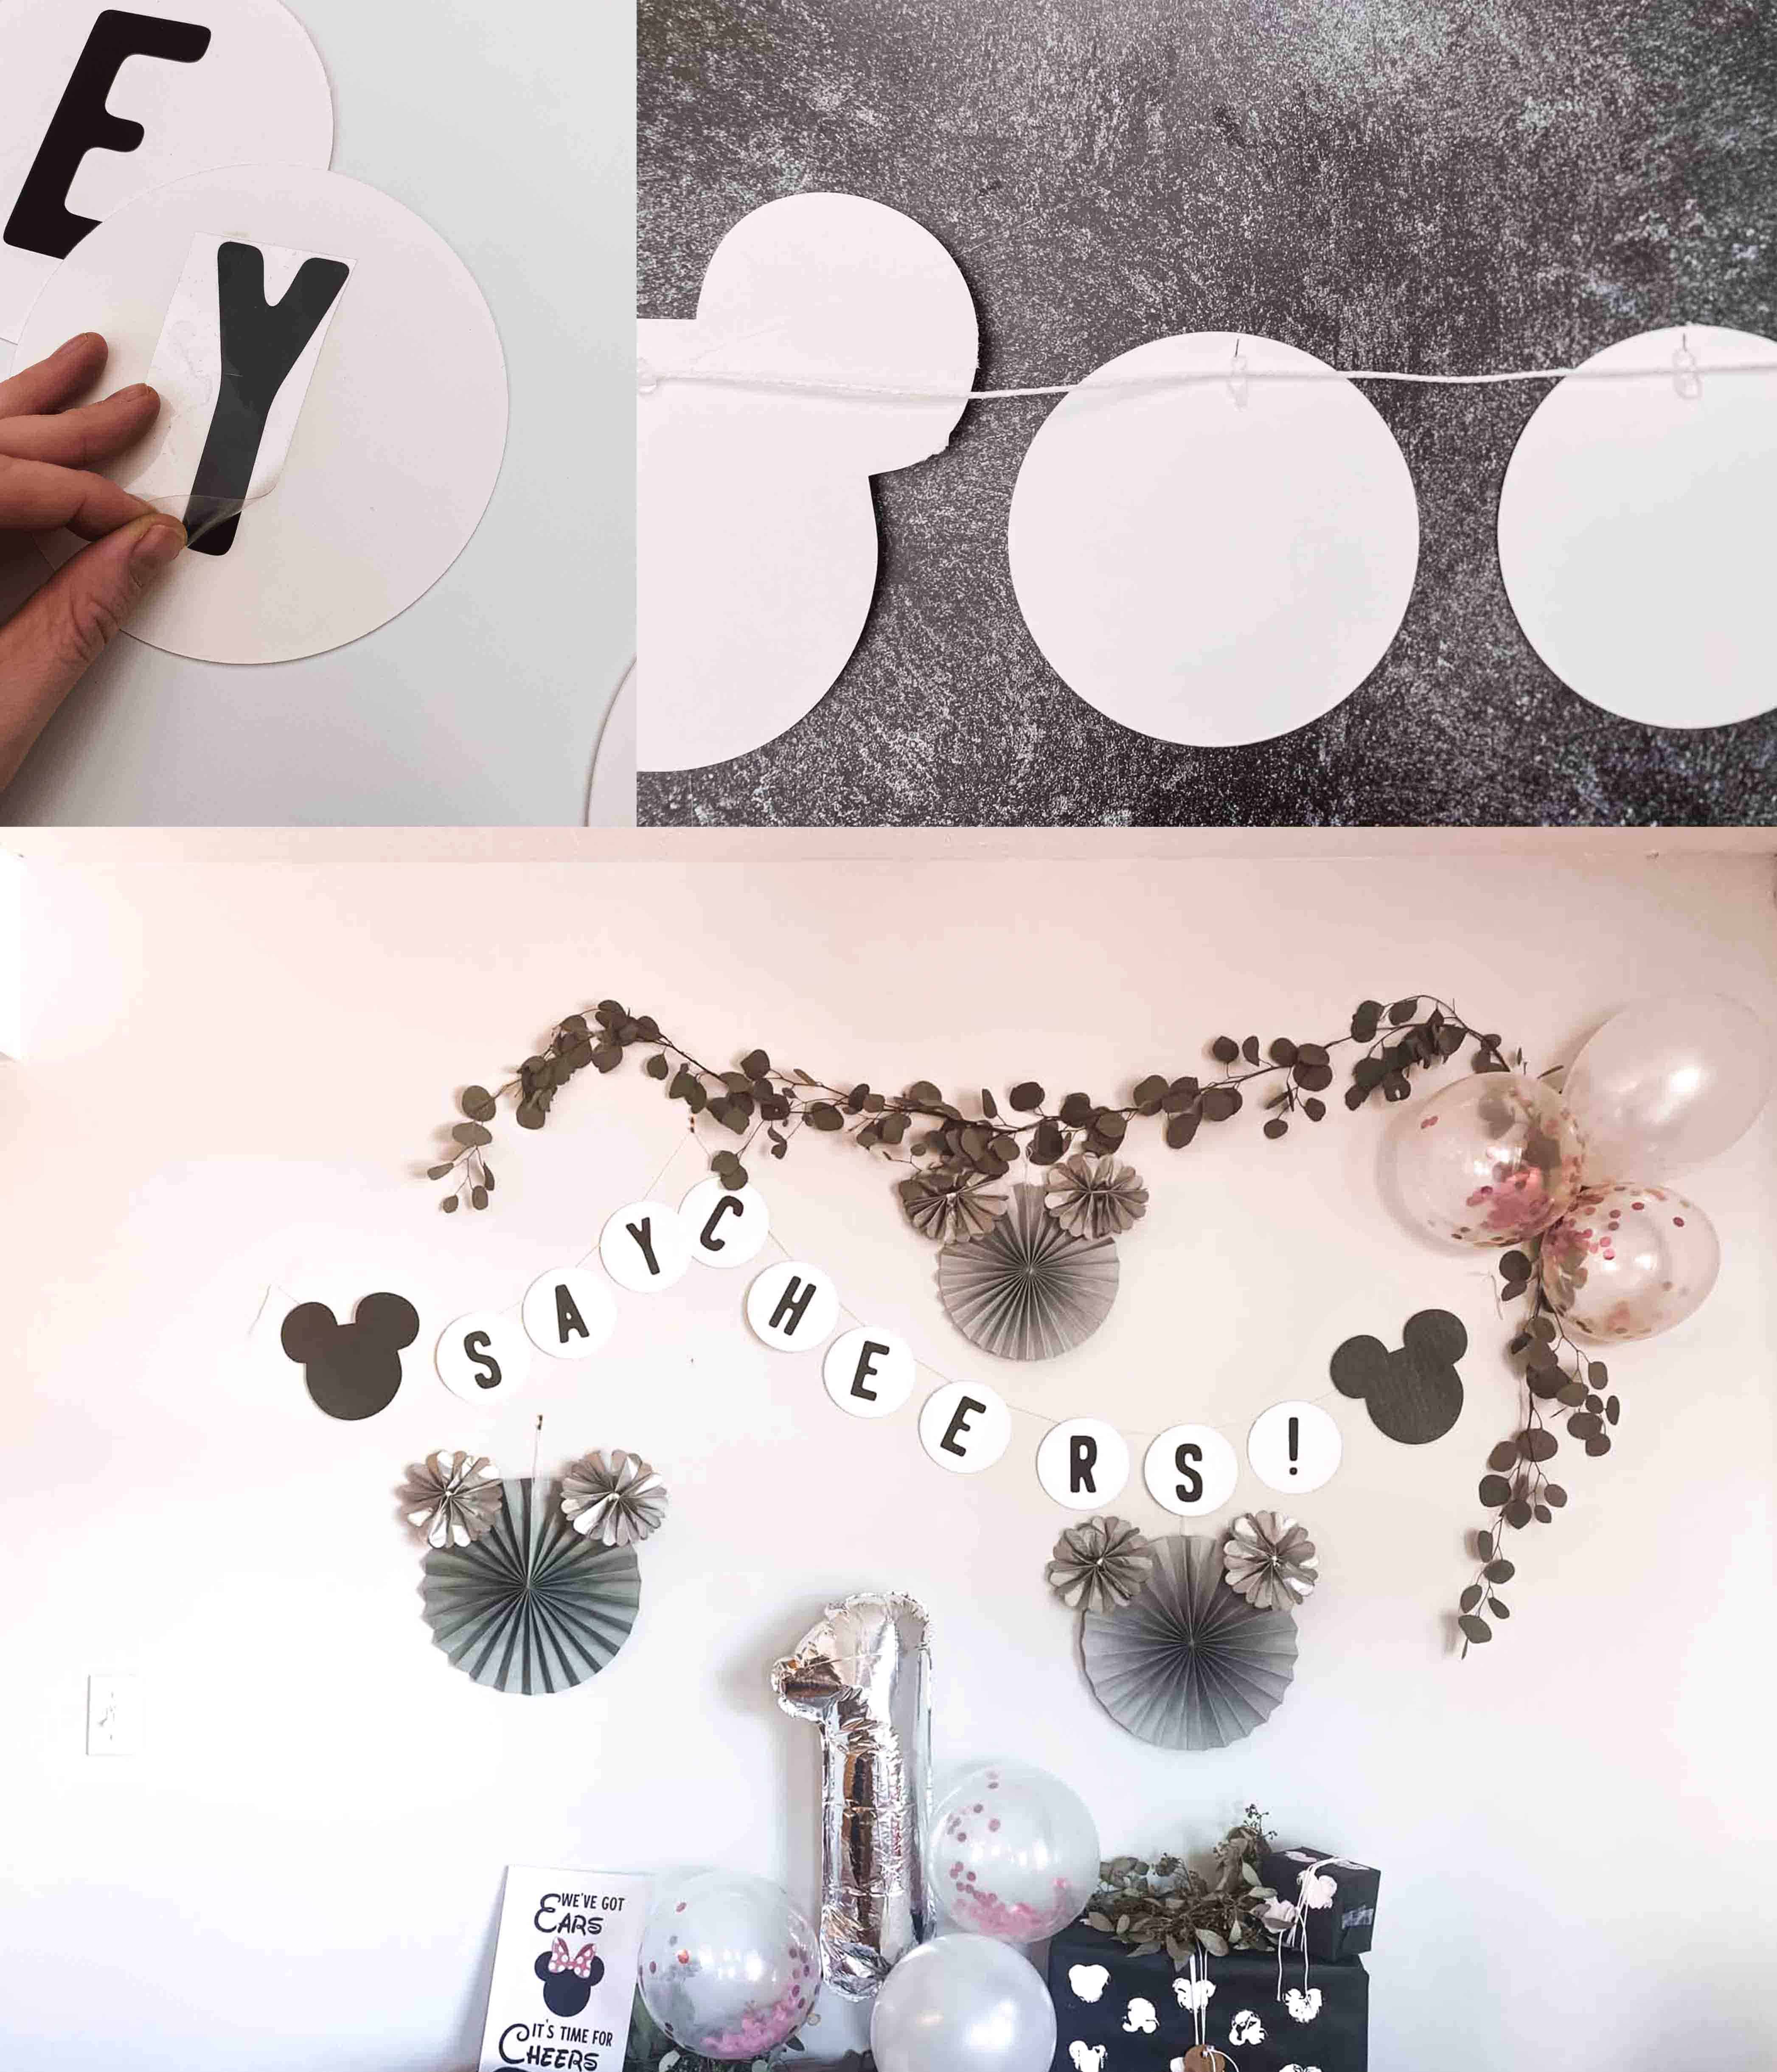
- Open the cut file and cut the circles using Kraft Board. You can use regular cardstock but the Kraft Board is so nice because it lays flat and doesn't warp.
- Cut out the iron-on. Don't forget to mirror for iron-on!
- Place your iron-on where you'd like it to go on your Kraft Board and iron it using the EasyPress at 240 degrees for 30 seconds. Allow it to cool to the touch then remove the plastic film.
- When all of your letters are down, lay them down on a string cut large enough for all of your letters.
- Dab some hot glue onto the back of the Kraft board and place the string in the glue.
- Complete the process with all letters and allow your glue to dry.
Recommended Products
As an Amazon Associate and member of other affiliate programs, I earn from qualifying purchases.


This turned out so dang cute. I couldn’t be happier! I will say I ended up doing it twice because I hot glued the letters on in reverse. So don’t do that. The good news is if you mess up, you can easily remove the letters if you carefully pull the glue.
Mickey Mouse Birthday Party Supplies
I have a lot of other ideas for Mickey Mouse party supplies including these DIY Can Koozies! You can also DIY your own Mickey wrapping paper. This DIY can Koozies post was created for this party too but are customizable to whatever you want!