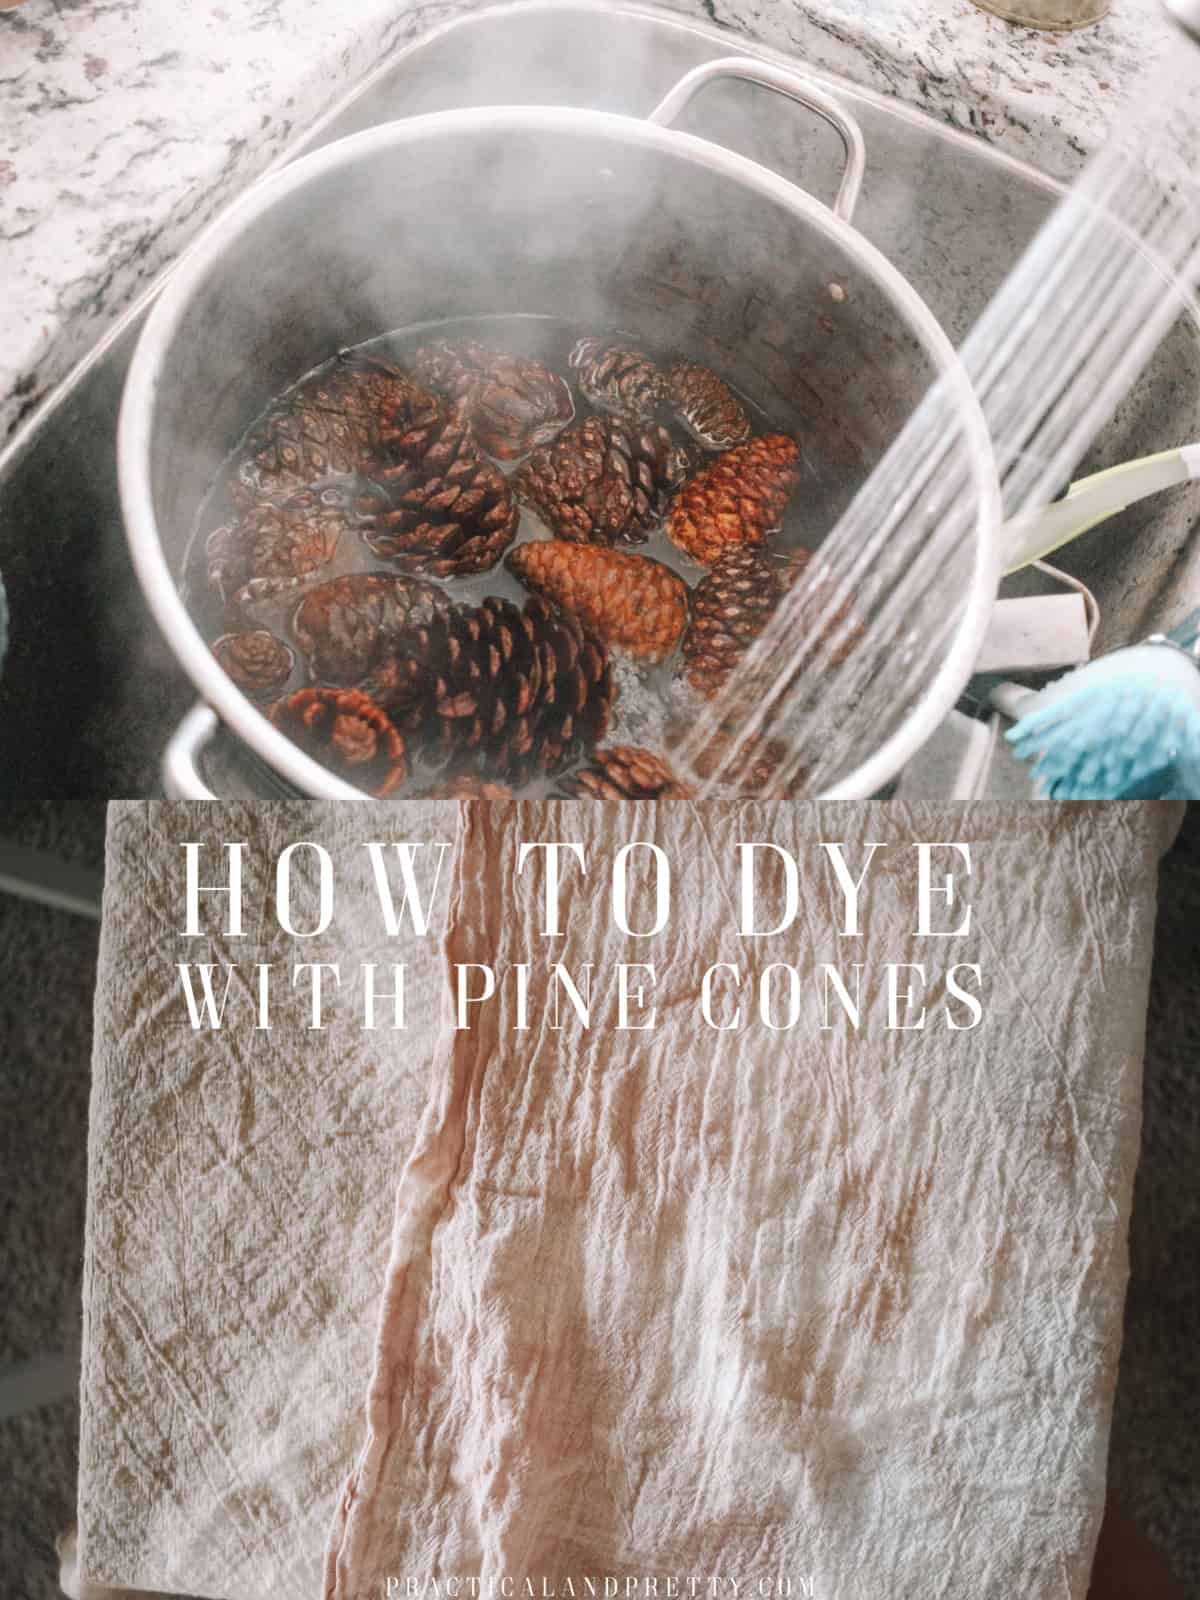
Next time you see some pine cones gather them up and put together this easy dye vat to make a beautiful pink color.
Don’t miss all my other dyeing tutorials. If you want to tie this fabric before you use pine cones to dye, check out my shibori folds post. Another simple natural dye is turmeric dye, so I think you’d be interested in that as well.
I put together my dyeing must haves so if you’re interested in using my favorite and most recommended products you can find that post here.
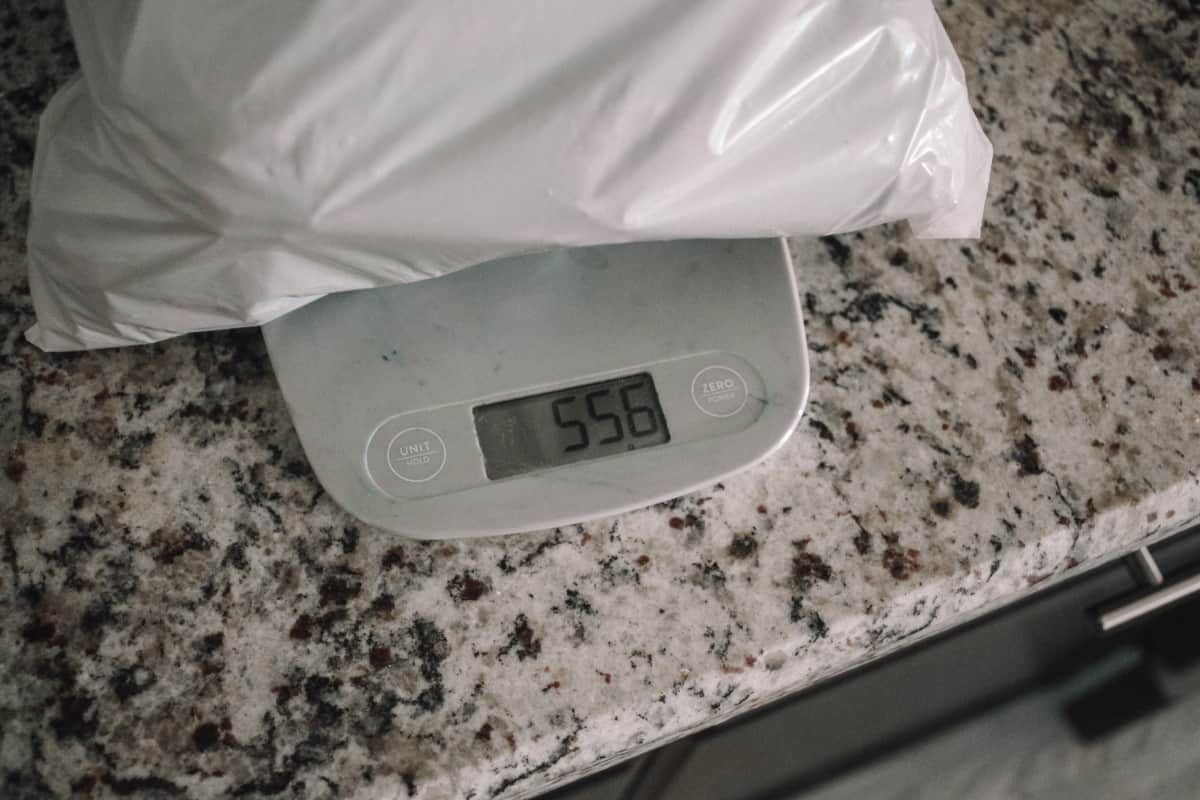
I love dyeing fabric and I especially love using things that are FREE to dye fabric! For this project, I did two large towels about 20″x20″. I weighed the fabric first and each towel was about 70 grams.
After I did this I also weighed the pine cones. I don’t always try to get things to an exact science because the differences in vats are fun to me but I wanted to record what I used here so I could remember! So, 140 grams of fabric, 550 grams of pine cones! If you want this color, that’s the ratio you will do. About 1:3, fabric: pine cones!
Next you will boil some water. Just make sure there is enough to fully cover the pine cones! If there’s enough for that it will likely cover the towels as well.
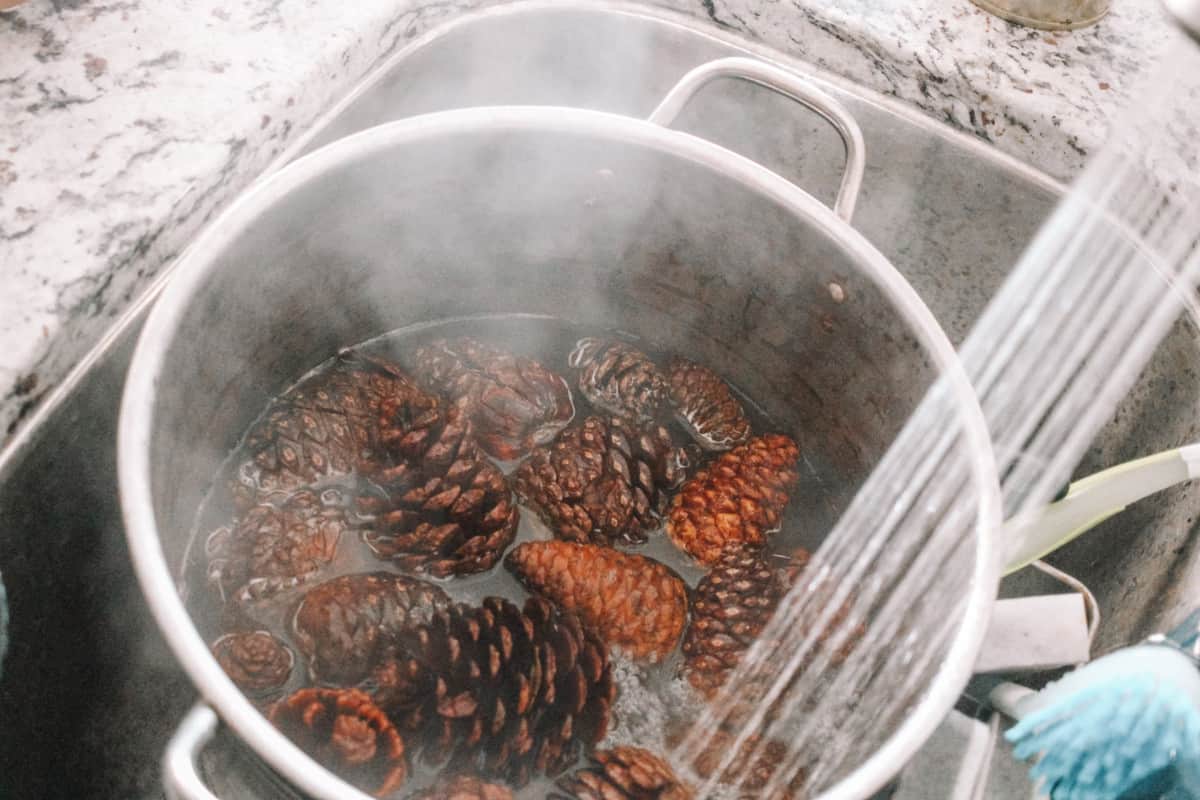
I always fill my pot with hot water and then put it on the stove immediately. I brought the water to a boil and then let it simmer for about 30 minutes. Then I turned the stove off. If you want to let this sit overnight, go for it! The longer the pine cones sit, the better. But you will need to reheat it to put the fabric in so keep that in mind.
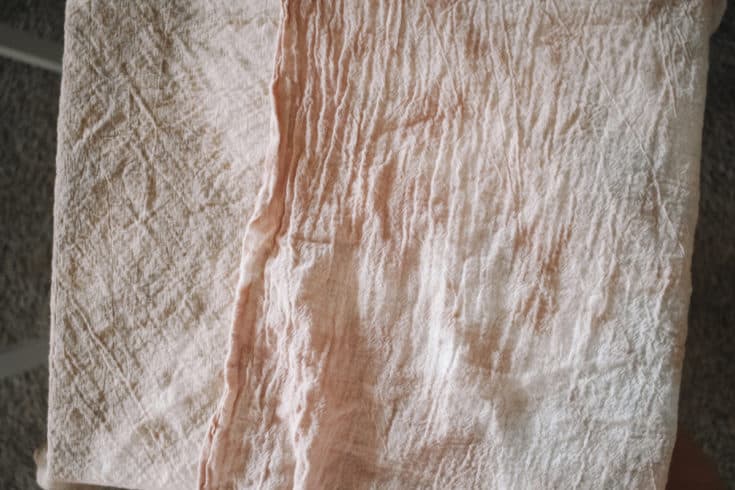
After 30 minutes, I removed the pine cones and put the wet fabric in the pot. I like to tie my fabric using different shibori folding methods. I mostly do this because dyeing even colors is very hard so I prefer to make the variations in color look like they’re on purpose!! Now you know all my deep, dark, dyeing secrets!
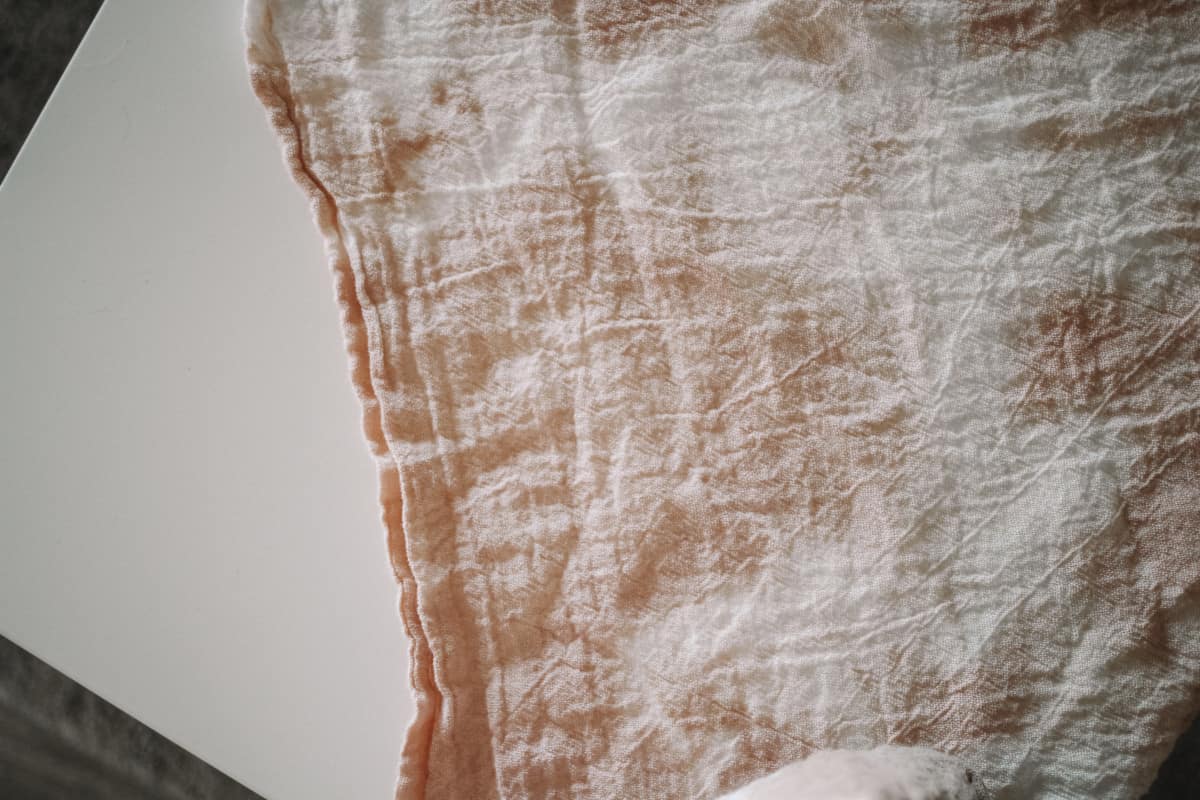
I let the fabric sit overnight and when I pulled it out this is the color I had. I love it! Such a pretty pink.
I also decided to do one of the towels in an iron bath. I’ve got that process all written out for you here. After the iron bath, this is the color I got!

Here they are next to each other so you can see the variation.
Dye with Pinecones
Next time you see some pine cones gather them up and put together this easy dye vat to make a beautiful pink color.
Materials
- Pinecones
- Tea Towel or other natural fiber material
Tools
- Large pot or bucket
- Something to Stir
- Rubberbands (optional)
Instructions
- Bring your water to a boil
- Place your pinecones
- Simmer for about 20 minutes.
- Place your damp towel in the water and heat off.
- Allow the fabric to sit as long as you need. I let it sit overnight.
- Take it out of the water and rinse.
Recommended Products
As an Amazon Associate and member of other affiliate programs, I earn from qualifying purchases.


I loved dyeing with pine cones! It took so many pine cones to get this color but I feel like pine cones are so easy to come by it’s worth it. Plus, most people just throw them away! This will be part of a series so stay tuned and I’ll show you how I dye with avocados, onion skins, logwood trap dye, and more!
You’ll notice I didn’t do an alum bath for these. I get really lazy and forget to do that often! I will try it with an alum mordant bath and let you know how it affects the color.
I’ve got another tutorial using pinecones here! Simple DIY flocked pinecones.


