In this tutorial, I show you and walk you through the steps to get an amazing ice dye effect. This will work on any natural fiber!
There are so many FAQs regarding this like how long does ice dyeing take, can I ice dye with natural dyes, and can I use liquid dye to ice dye? Good news! I answered these in the linked posts! I have SO many dyeing posts so be sure to check those out too. Mess up your ice dye? Here is how to use color remover.
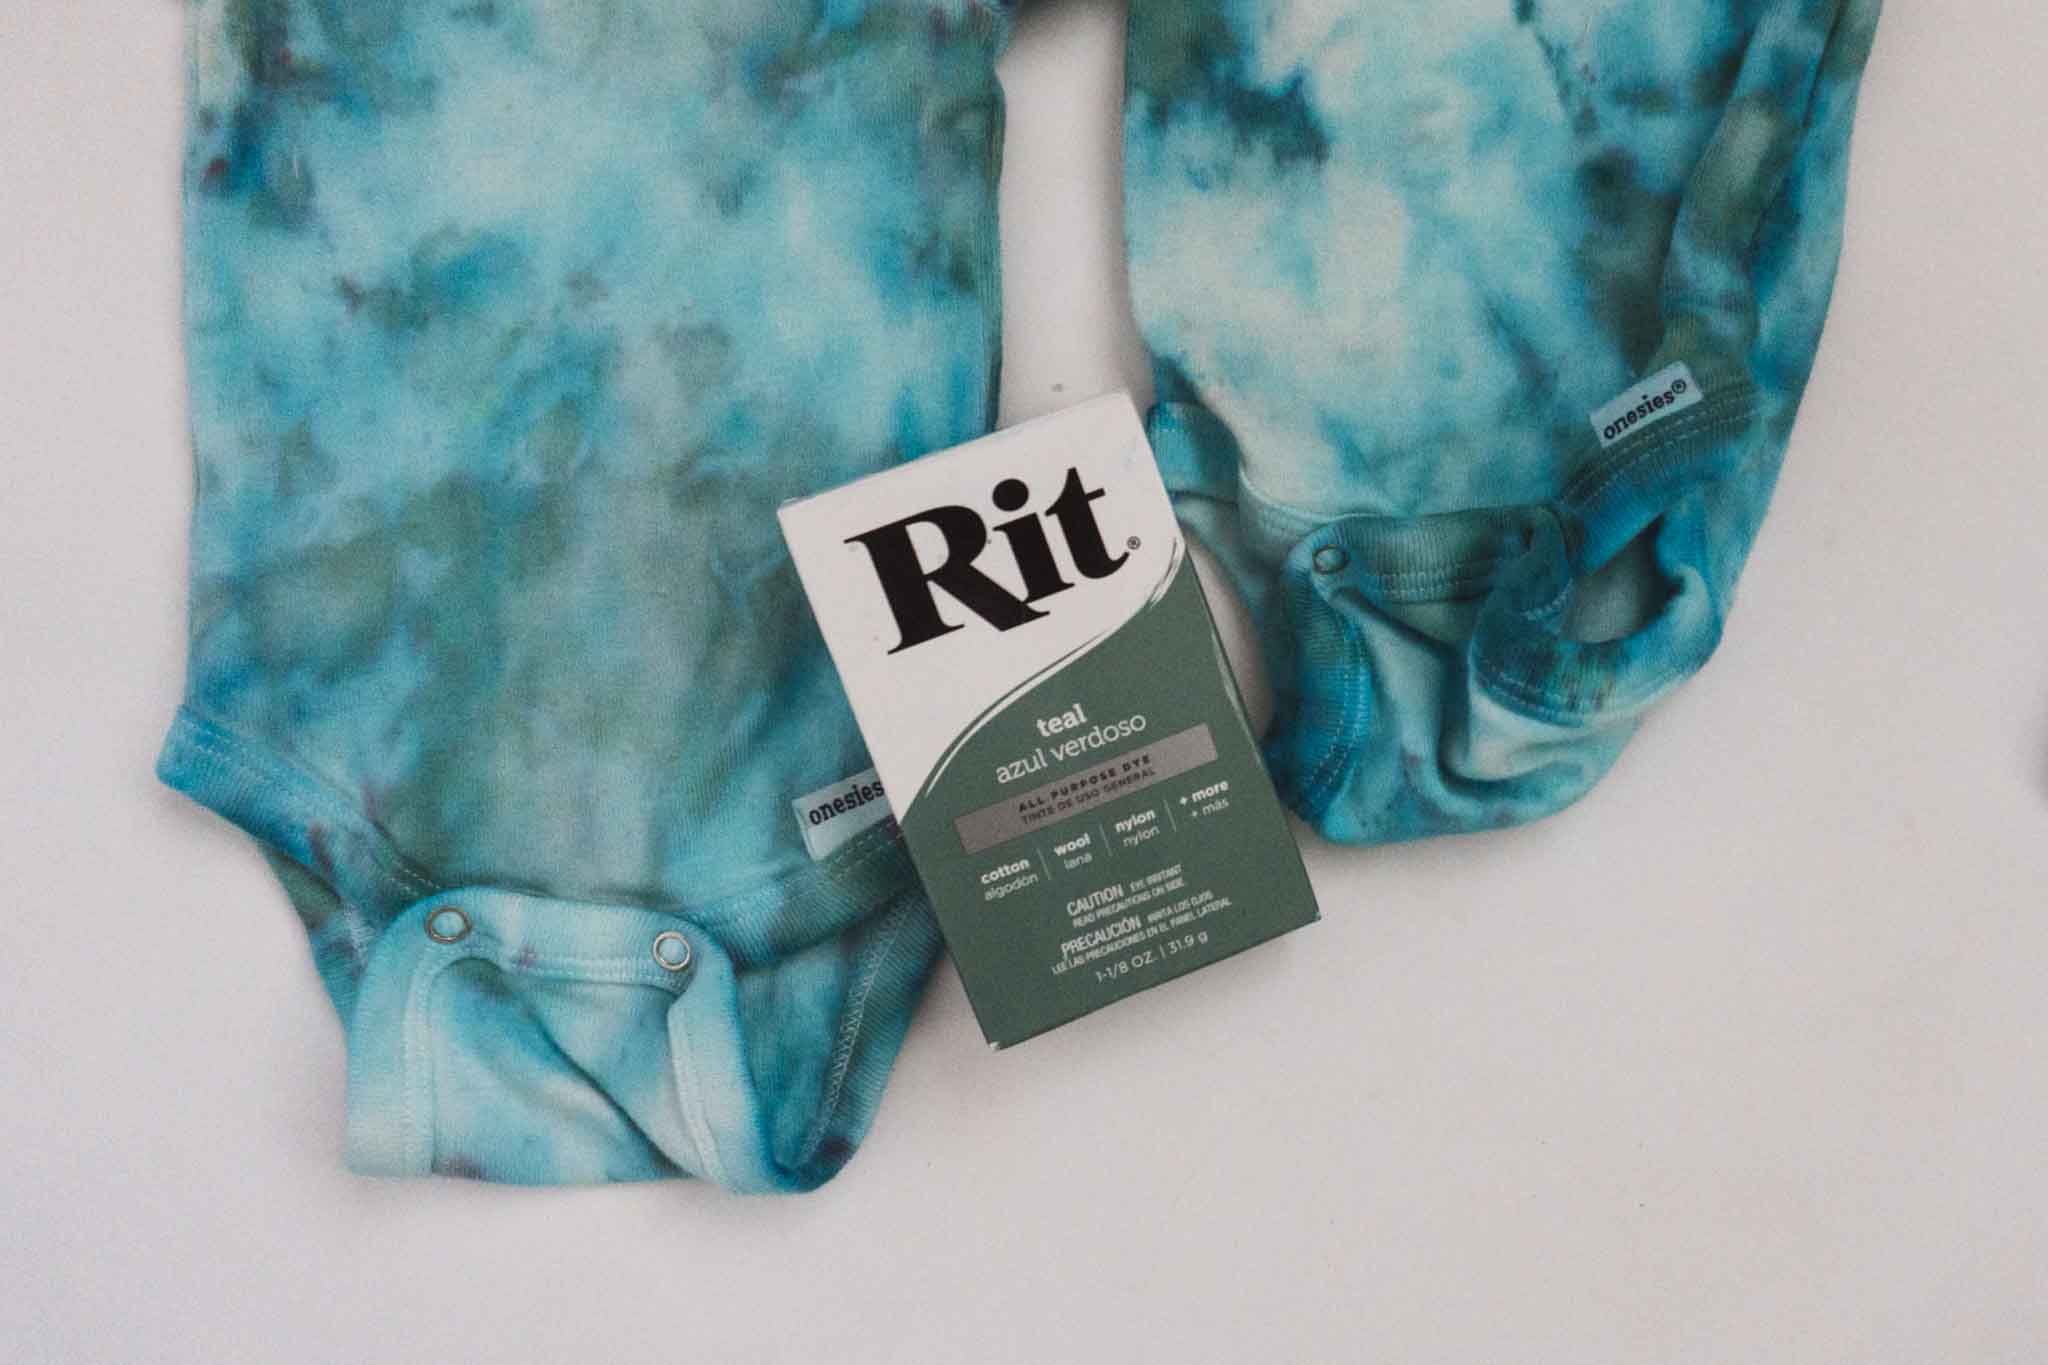
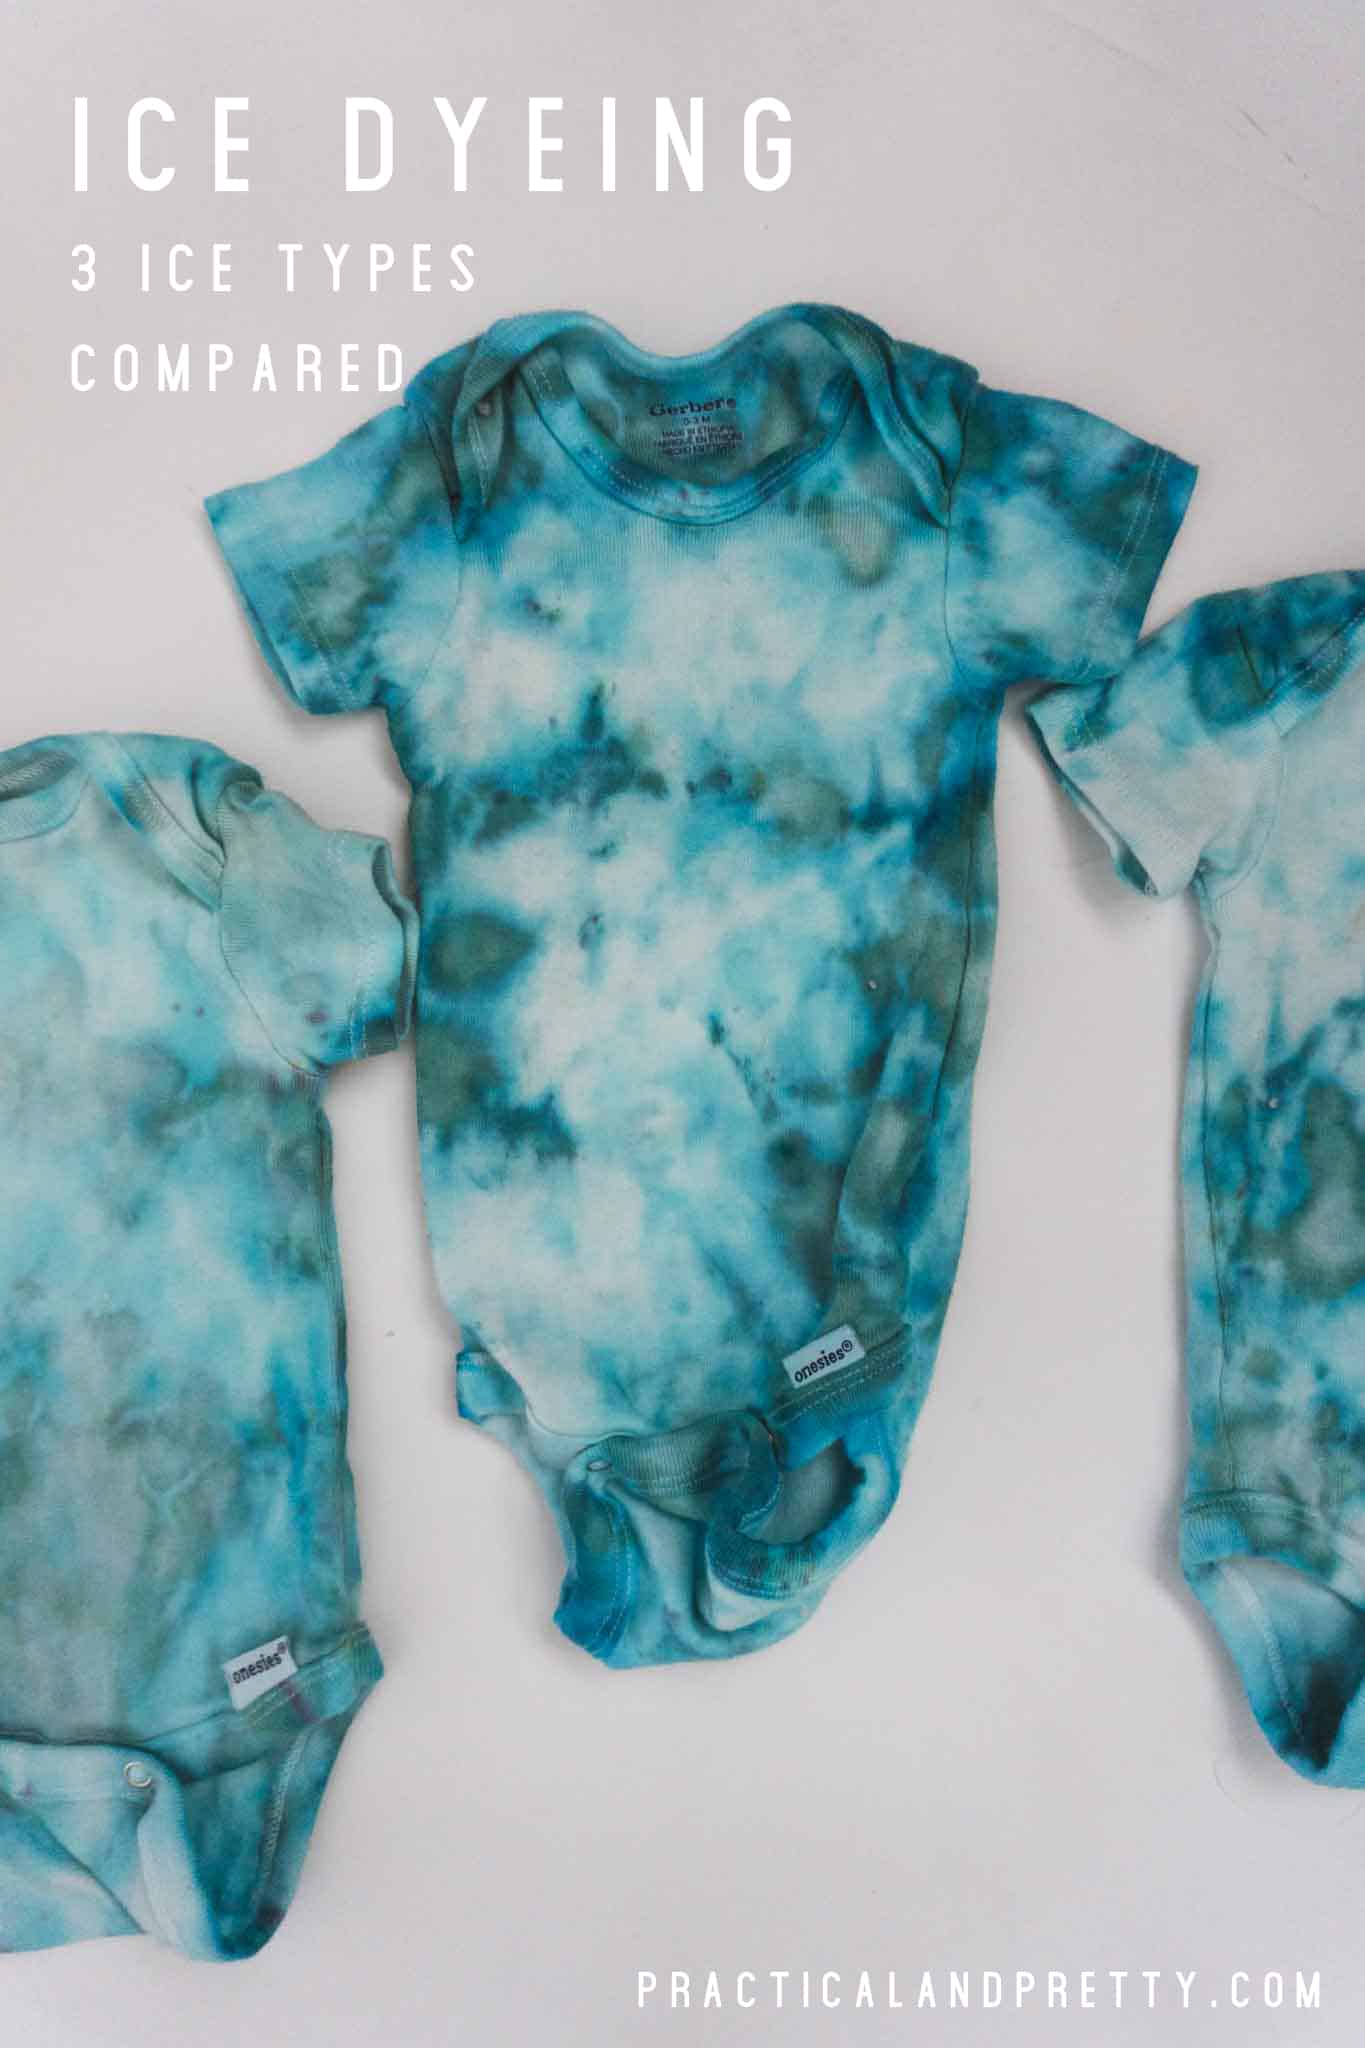
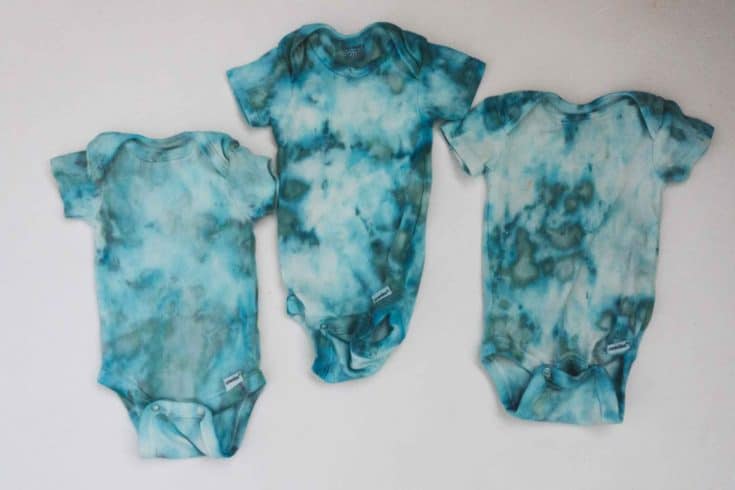
I am so excited to have finally tried ice dyeing. As you know, I do a LOT of tie-dye and saw this trend on Rit’s Instagram and there were so many cool-looking things. I read somewhere the shape of ice you use will alter the way the pattern looks so I decided to test it out for you. You can pick which look you like the most or maybe you’ll conclude it really doesn’t matter.
What You Need to Ice Dye
- Powdered Dye (liquid dye also works!)
- Ice
- Natural fiber material
- Cooling rack
How do you tie-dye with ice dye?
Watch this video tutorial or view the instructions below! I have them written out here and there’s also a way to print them in the card below.
- Get your fabric wet and ring it out.
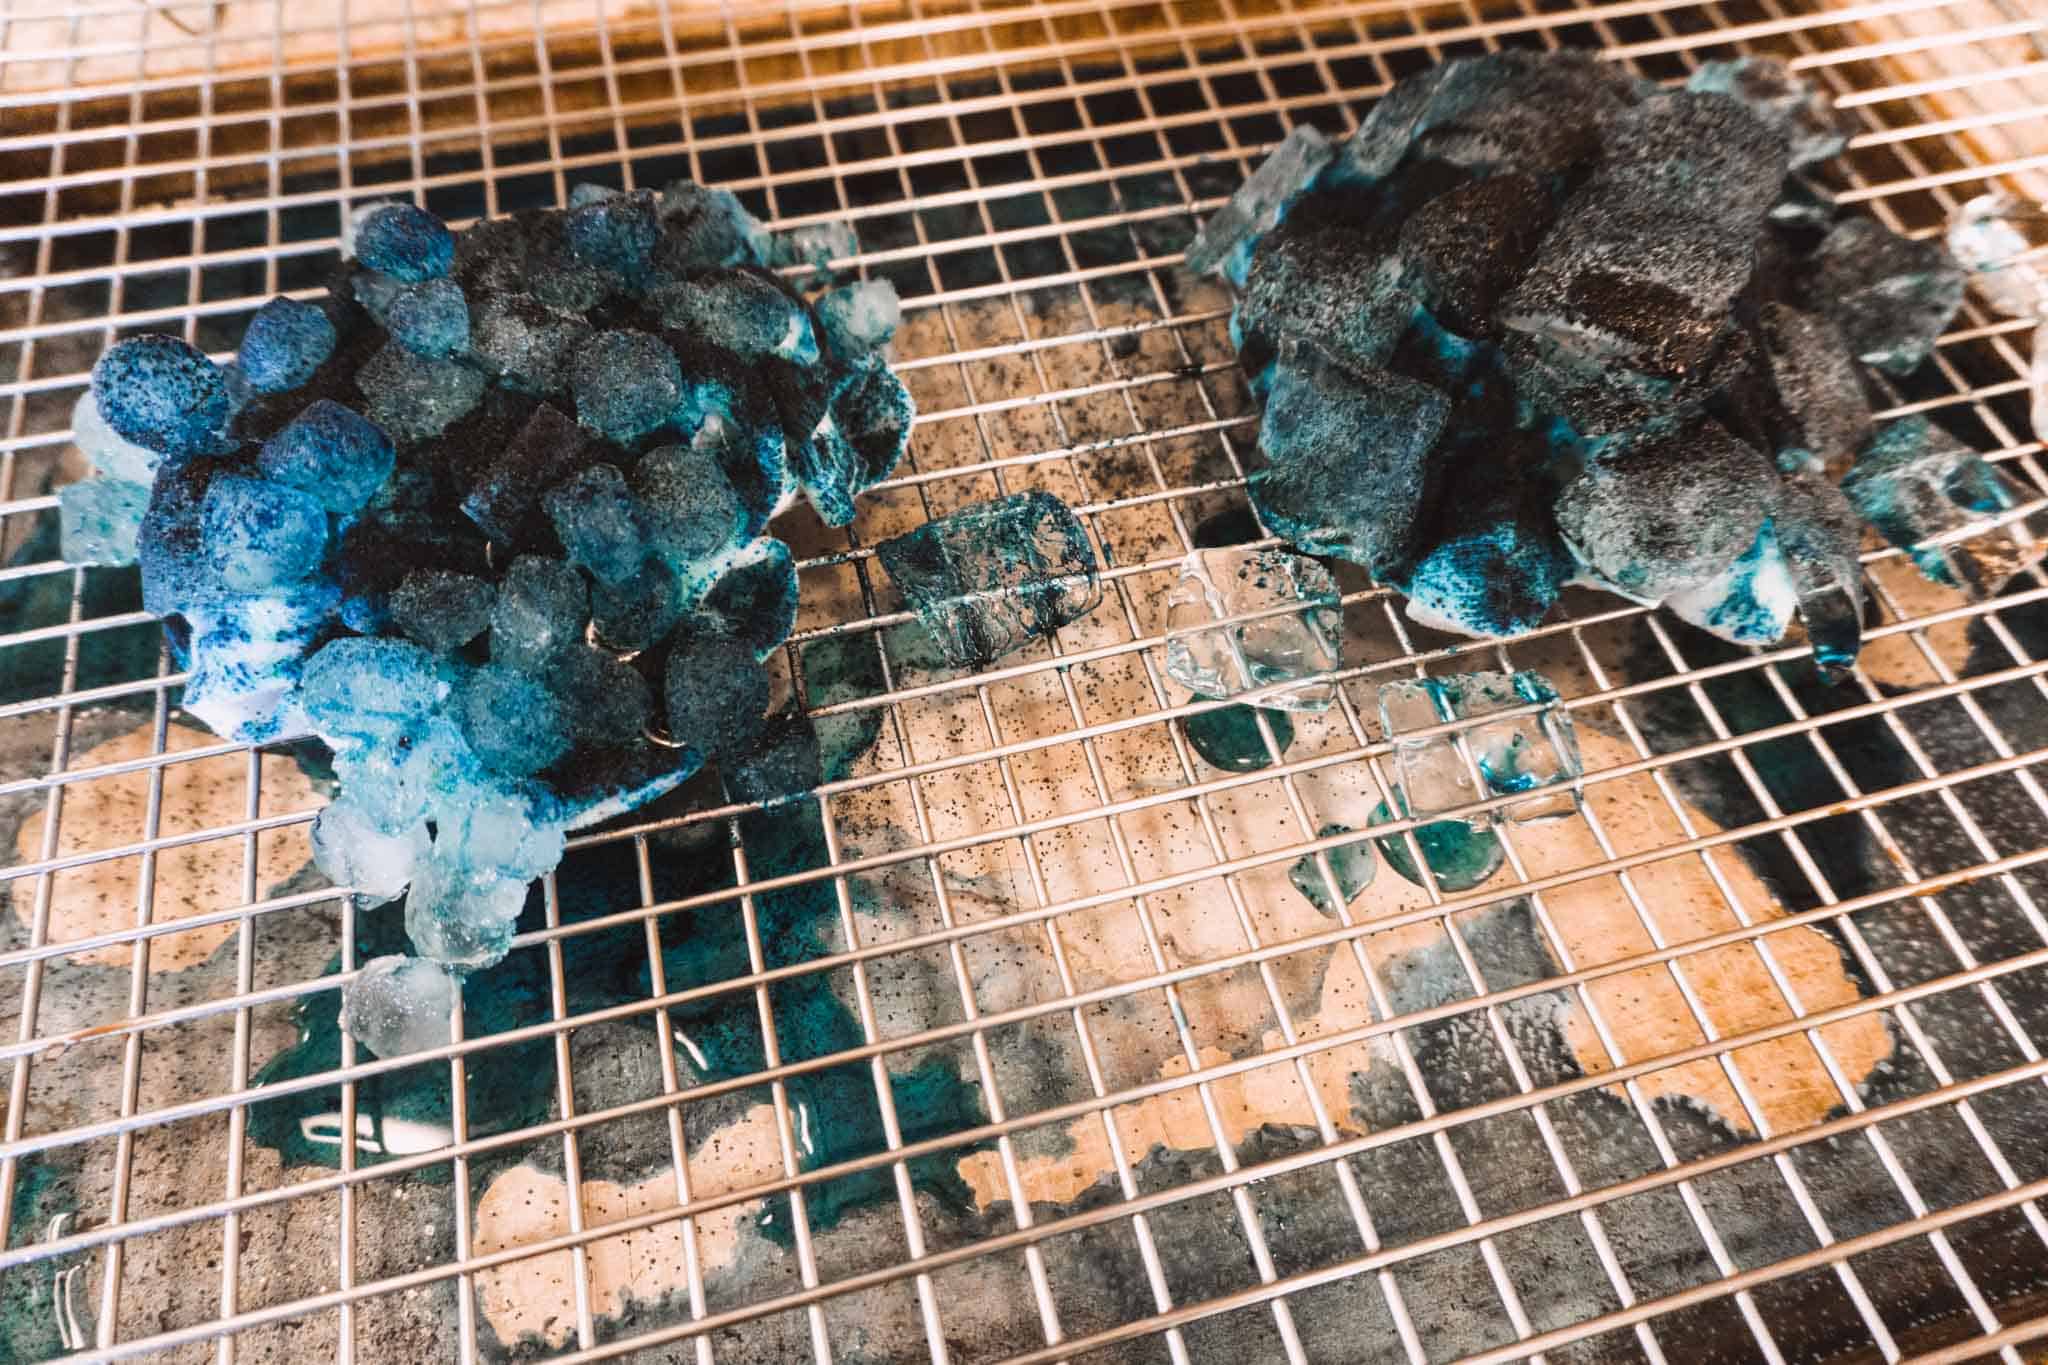
- Crumple up your fabric and set it on the cookie rack. The cookie rack is nice because it holds it all scrunched up.
- Place ice all over the scrunched-up material. The less ice you do the less white space you’ll have. I completely covered my cloth in ice.
- Sprinkle dye all over the ice.
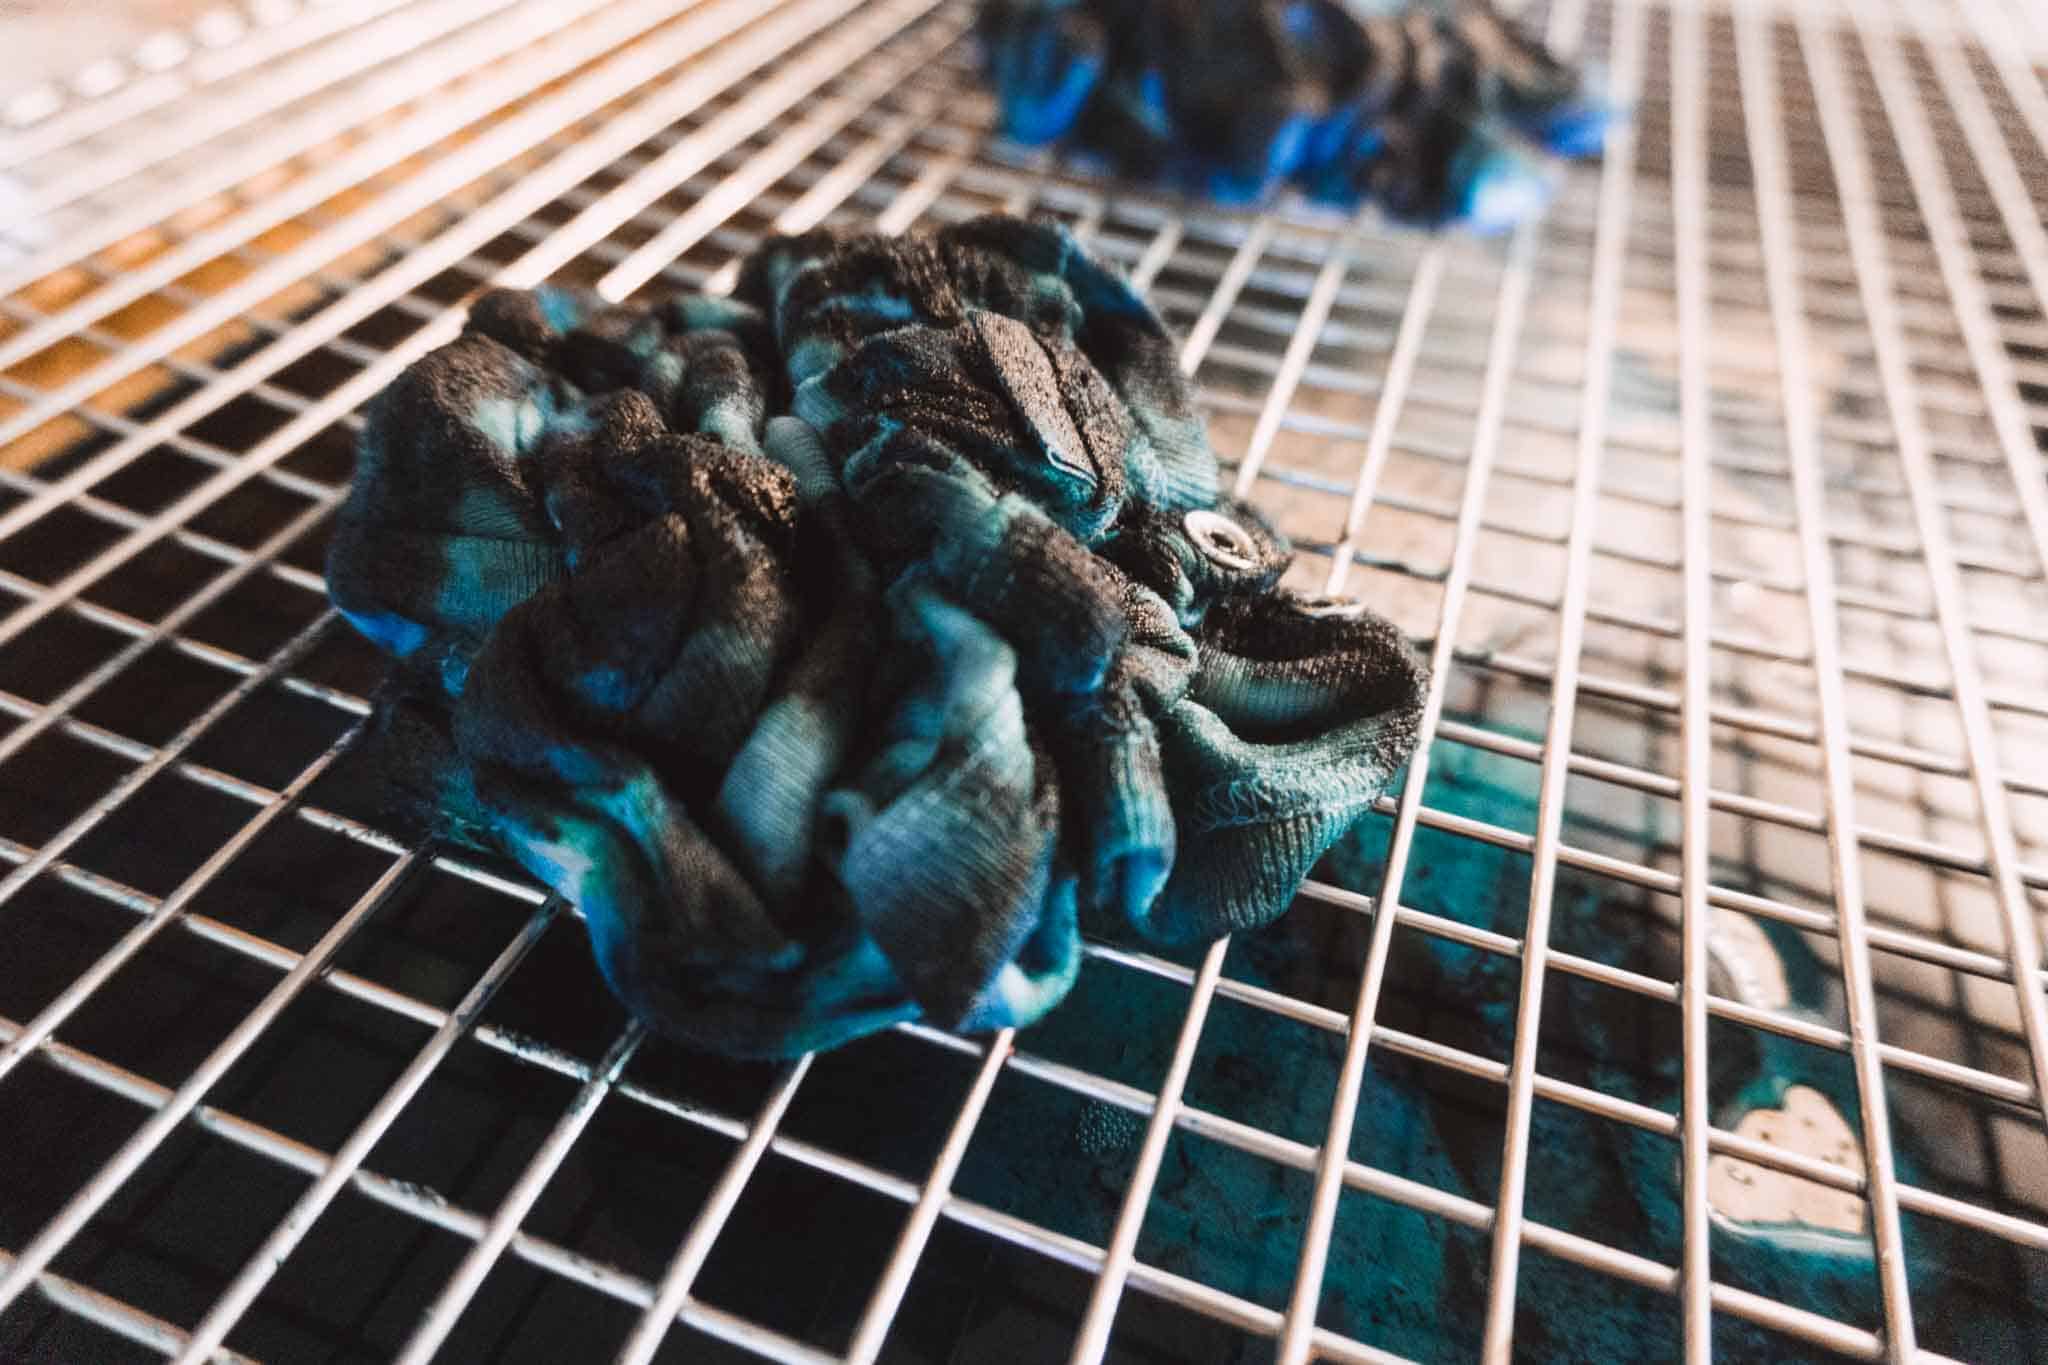
- Let it sit until the ice completely melts.
- Rinse out your fabric until the water runs clear then put it in a wash on cold. After this initial wash, you should be ok to wash it with other colored clothing.
What Ice Should I Use to Dye
Alright, let’s talk about types of ice! I used pebble, square, and moon-shaped ice (the kind the fridge ice machine creates.) Here are my results.

As you can see there IS a difference. Whether or not you care about the differences is all your preference. I liked them all so I’m just going to go with what’s most convenient which happens to be my freezer’s ice. Although we are going to do this as a family on a camping trip and for that I’ll be using the square ice that you can buy from any gas station.
What ice do you like most? My Instagram voted on the pebble ice but I can’t bring myself to just let those perfect nuggets melt on fabric because those make every soda better.
Frequently Asked Questions about Dyein with Ice
How long does it take to ice tie dye? Read this post for all the answers to that question. I tried out different speeds of the ice melting to see if it made a difference.
Can you ice dye with natural dyes? Great question. The short answer is no. But watch my process here to see how I tried it out and the different dyes I used.
Happy dyeing my friends.
How to Ice Dye (With 3 Different Kinds of Ice!)
In this tutorial I show you and walk you through the steps to get an amazing ice dye effect. I used onesies but this will work on any natural fiber!
Materials
- Powdered Dye
- Natural fiber material
Tools
- Cooling rack
- Ice
Instructions
- Get your fabric wet and ring it out.
- Crumple up your fabric and set it on the cookie rack. The cookie rack is nice because it holds it all scrunched up.
- Place ice all over the scrunched up material. The less ice you do the less white space you’ll have. I completely covered my cloth in ice.
- Sprinkle dye all over the ice.
- Let it sit until the ice completely melts.
- Rinse out your fabric until the water runs clear then put it in a wash on cold. After this initial wash, you should be ok to wash it with other colored clothing.
Recommended Products
As an Amazon Associate and member of other affiliate programs, I earn from qualifying purchases.


Did you know you can reverse tie dye with ice too? Don’t miss that post. It’s really cool!


