If you’ve ever wondered which tie dye folds to start with, you’re in the right place! These five beginner-friendly folding techniques; spiral, crumple, bullseye, shibori, and heart, are the foundation of almost every tie dye project you’ll ever make.
I tried each of these folds in my YouTube video to show exactly how different they look once dyed. Whether you’re brand new to tie dye or just want to try a few new patterns, this guide will walk you through how to fold each one and when to use it.

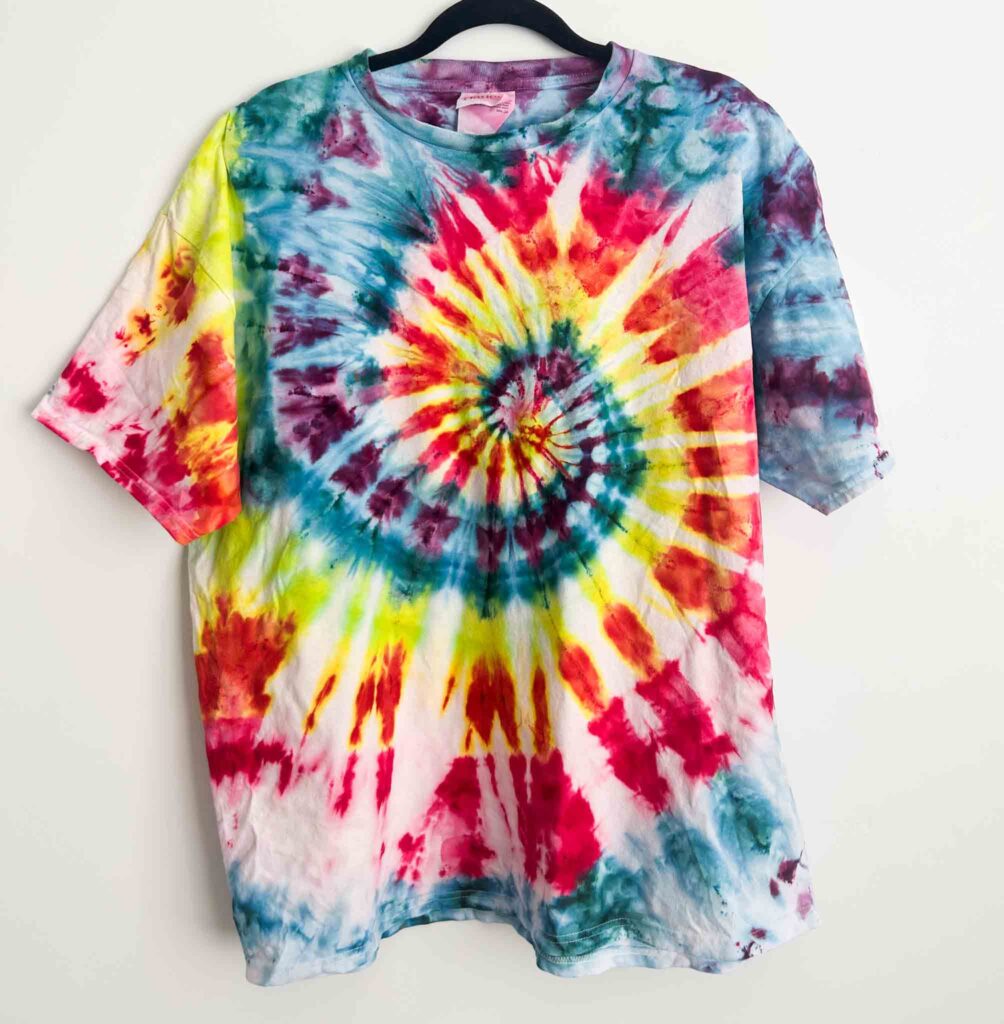
1. Spiral Fold
The spiral fold (also called a bullseye spiral or rainbow spiral) is probably the most iconic tie dye design of all time. To create it, pinch the center of your shirt and twist until the entire piece coils into a flat disc. Secure with rubber bands like a pie, or painters tape around the edges, then apply your colors in wedges.
This fold works beautifully with rainbow colors, complementary palettes, or even single hues for a subtle swirl. If you want a visual tutorial, check out my post on how to spiral tie dye for more detail.
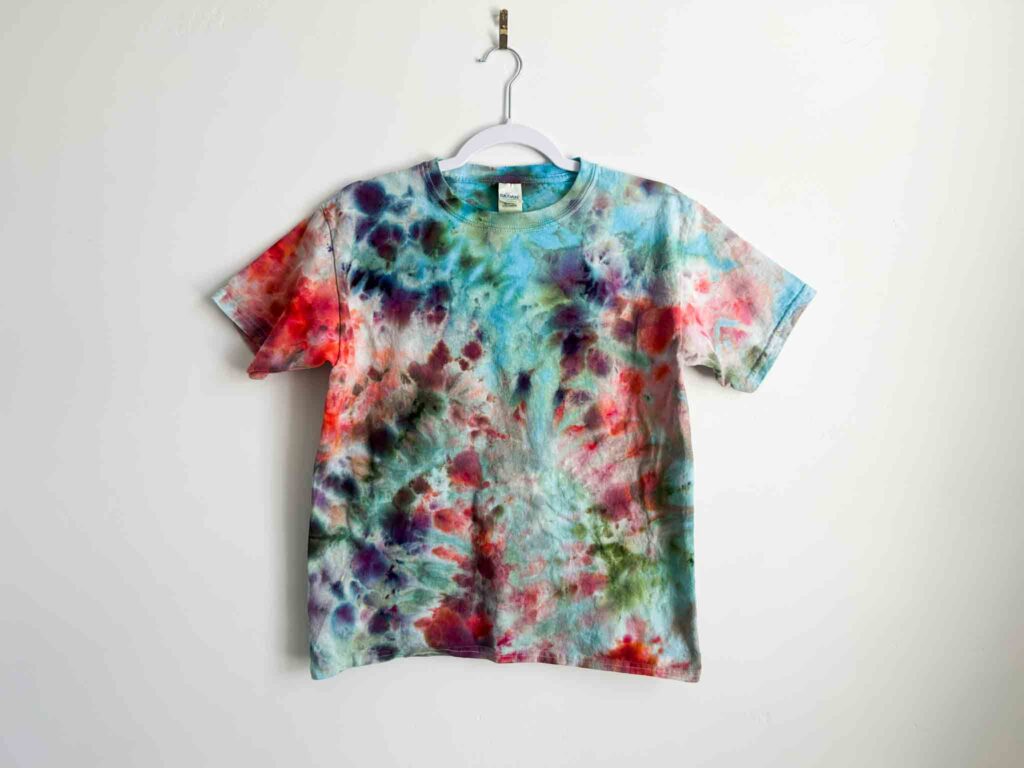
2. Crumple (Scrunch) Fold
The crumple fold (also called scrunch) is the easiest and most forgiving tie dye fold. Simply bunch your fabric randomly into a loose pile and secure it with rubber bands or kite string. The less perfect it looks, the better your finished design will be!
This technique is perfect for ice dyeing because it allows the dye to flow through in unpredictable ways, creating organic marbled patterns. This is a simple fold that works with every style of tie dye (hot water, ice dye and liquid!)
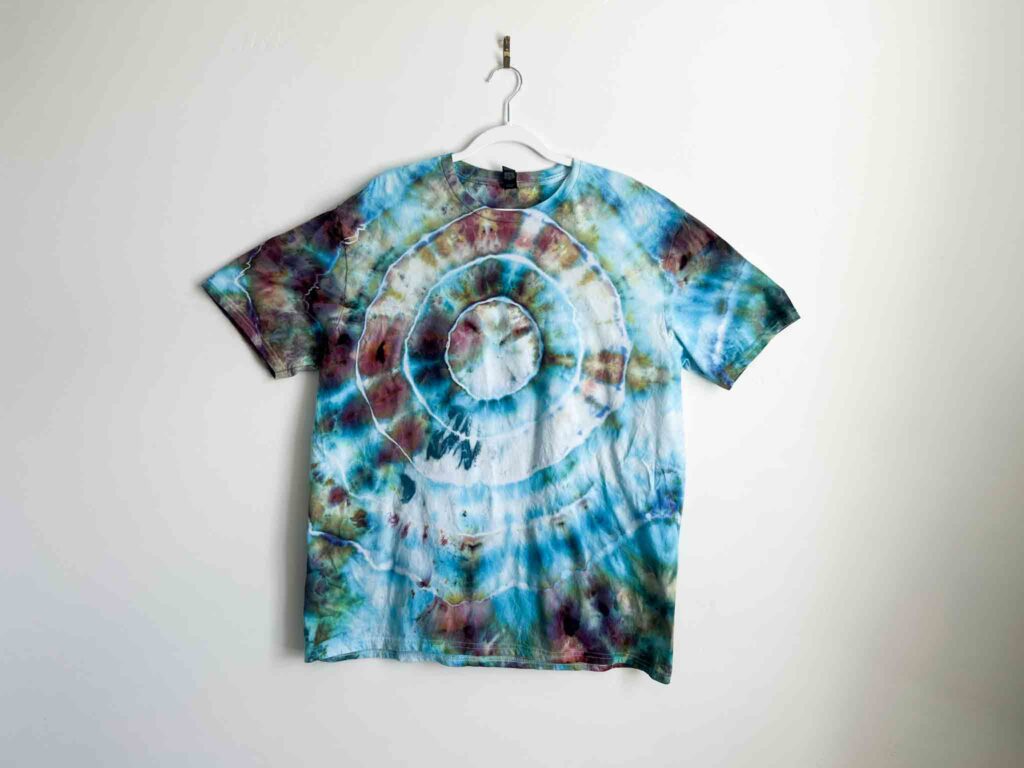
3. Bullseye Fold
The bullseye fold is created by pinching the center of the shirt and pulling it straight up into a cone shape. Wrap rubber bands every few inches down the length of the cone to form rings. Once dyed, this creates those perfect concentric circles you see on classic tie dye tees.
Try this fold with contrasting colors for maximum pop, or use a single shade like black or indigo for a more subtle, modern look. This one was done with the color ‘alchemist’. I usually only do liquid dyes with this fold, but here’s what it looks like with an ice dye project!
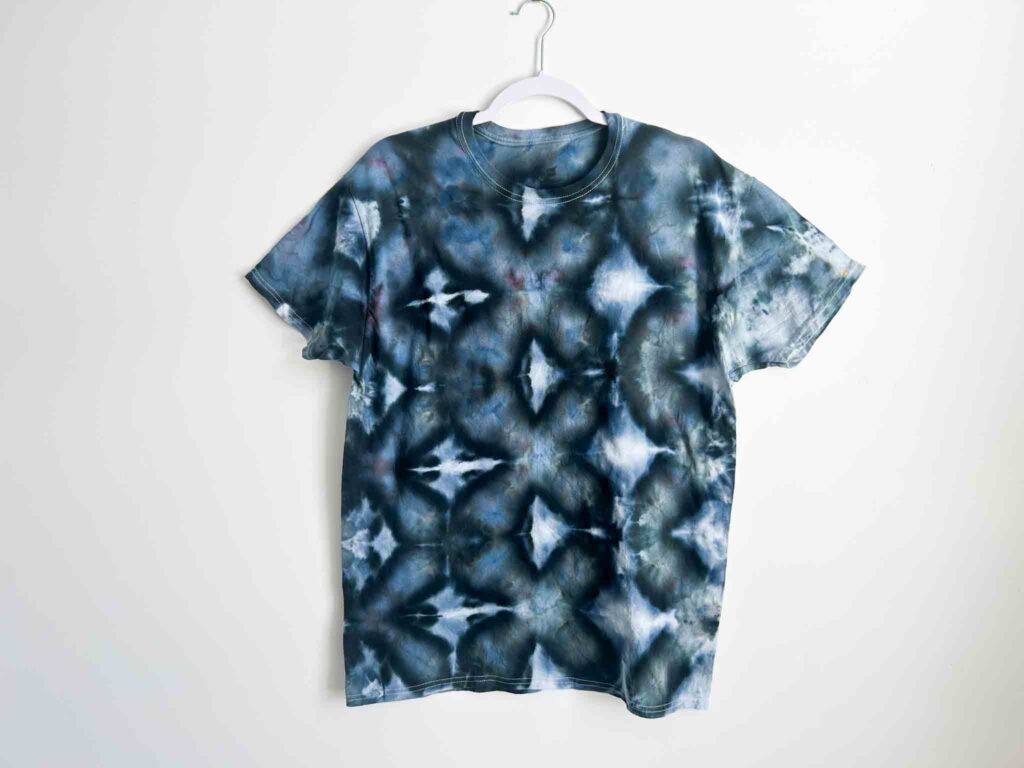
4. Shibori Fold
Shibori tie dye is inspired by traditional Japanese dyeing methods that use folding, pleating, and binding to create geometric patterns. For a simple version, fold your fabric accordion-style (either side-to-side or diagonally) and secure with rubber bands or wood blocks before dyeing. I usually just use rubber bands myself!
This fold creates striking stripes or chevrons and looks especially good with black or navy dyes for that classic indigo look. It’s also great for upcycling old linens or napkins into modern home decor.
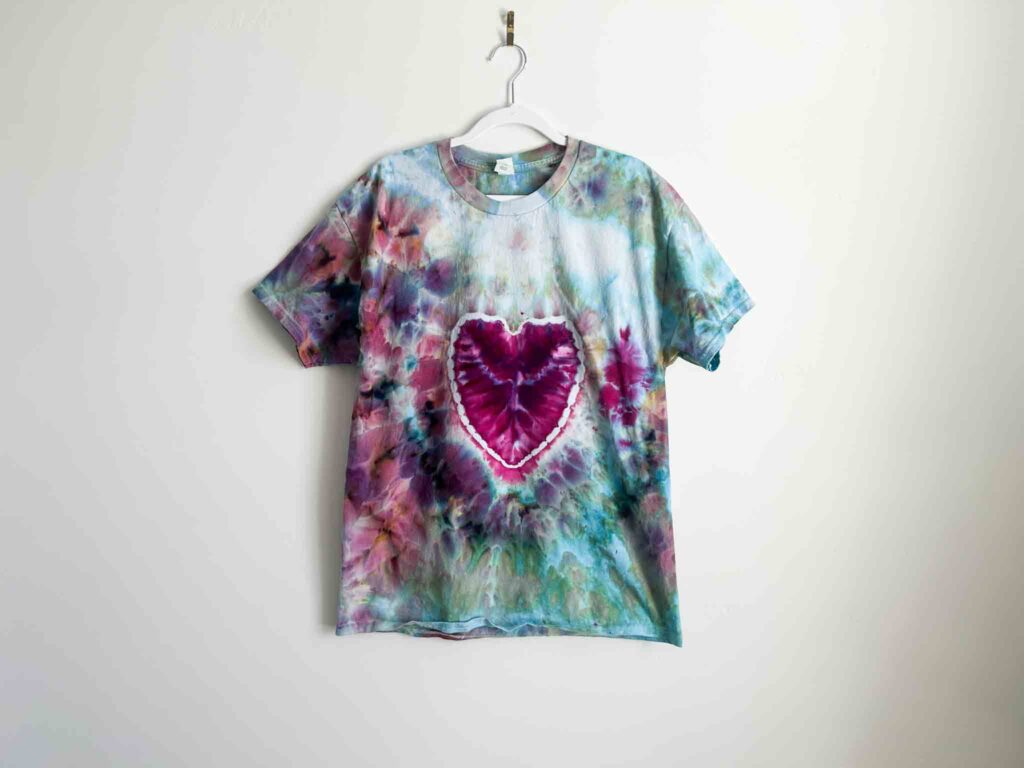
5. Heart Fold
The heart fold looks tricky but is easier than it seems! Fold your shirt in half lengthwise and draw half a heart along the fold using a washable marker. Accordion fold along that line, tie it off with sinew, and then apply color around the heart shape.
When you unfold it after rinsing, you’ll have a perfectly symmetrical heart in the center. This fold is a crowd favorite for holidays, festivals, and anyone who just loves a cheerful design. See the full heart tie dye tutorial here.
Final Thoughts
Once you’ve tried these five folds, you’ll have the foundation to experiment with just about any tie dye technique. From hot water irrigation to using dark dyes like Raven Black. Each fold gives you different control over how the colors blend and where the white space lands, so play around and find your favorite.
If you want to watch me demonstrate each one in real time, head to my YouTube video here 👇
🎥 Watch the “5 Tie Dye Folds You Need to Know” video on YouTube
And don’t forget to grab my free ebook — 12 Favorite Folds for Tie Dye — for more folding ideas and project inspiration!
Pin this post for later!


Your work is beautiful!!