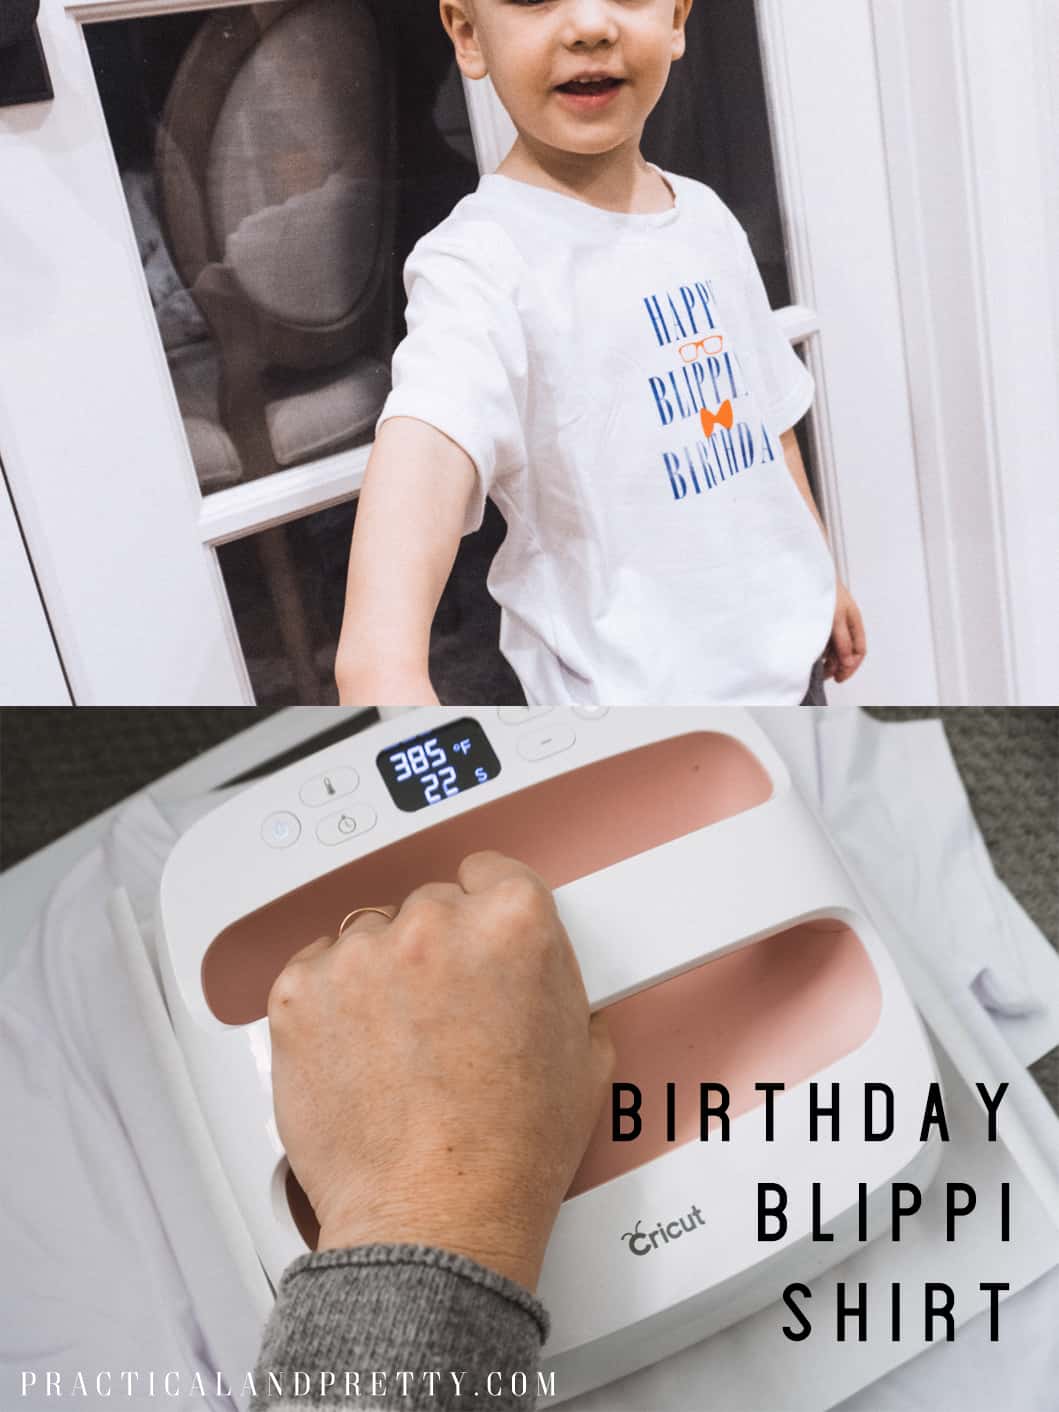
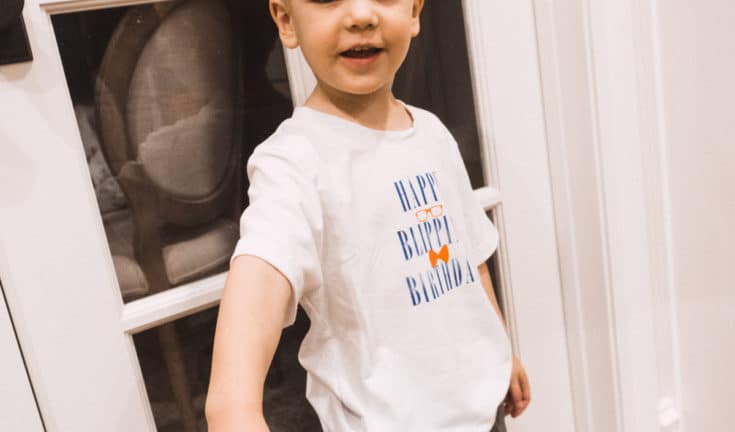
This Blippi shirt is perfect for the birthday child or you could even make a few for all the guests! You will get a kick out of what it says.
I LOVE throwing DIY parties so don’t miss out on all the fun ideas like my Minecraft Party and an Encanto party.
This tee shirt was a HUGE hit. My son loved it but so did the other guests! I incorporated infusible ink and regular iron into this project which I hadn’t done before. It turned out really well!
What you need to make this Birthday Blippi shirt
Open your cut file and before you go to cut make sure you mirror for iron on!
I started with the infusible ink. You will place the infusible ink sheet face up on the mat. Set your Explore Air 2 smart dial to ‘Custom’ and select ‘infusible ink’ as your material.
After your sheet is cut you will use your fingers to weed it out.
Place your regular iron on a standard grip mat with the shiny side facing down and cut it out!
Iron on your pieces
Now you will be ironing on the two separate materials.
Start with your infusible ink by placing a piece of cardstock in the shirt.
Place the weeded sheet upside down with the color facing the shirt.
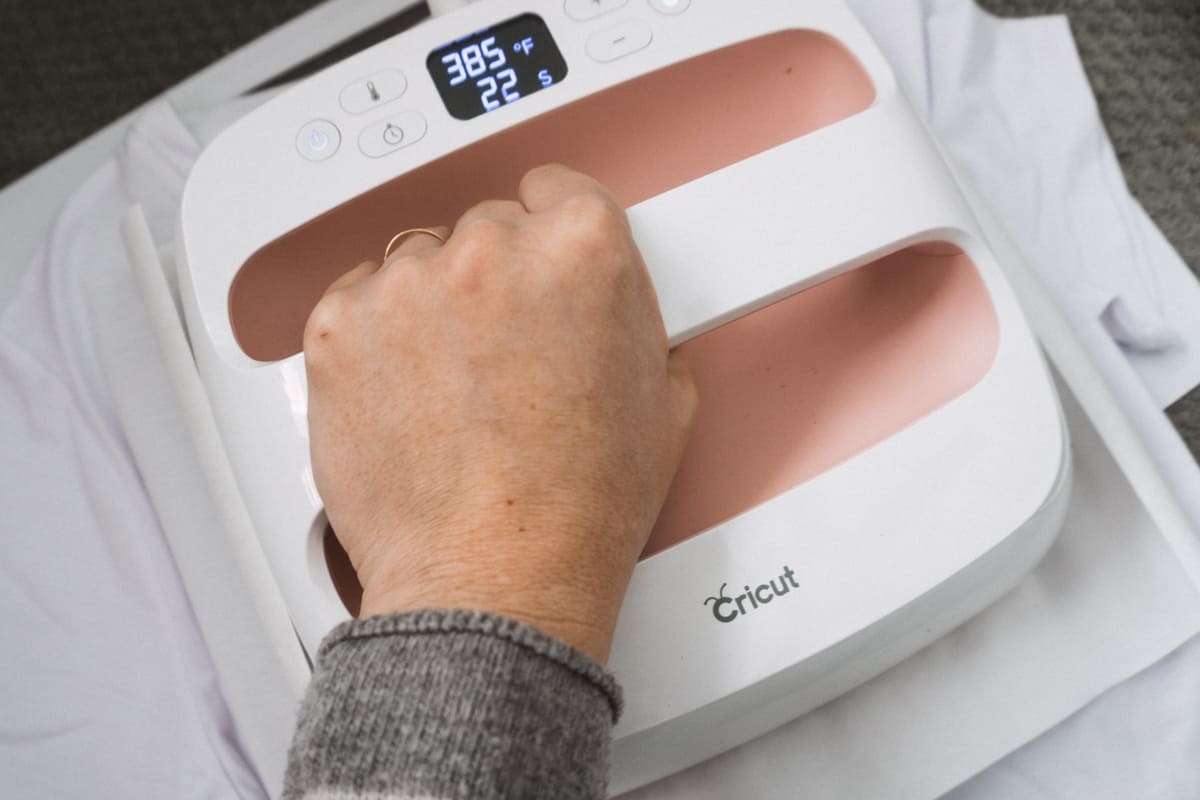
Place a piece of butcher paper over the plastic and then place your EasyPress 2 on for 40 seconds at 385 degrees.
Let the ink cool before removing all of the pieces.
Next, you will remove the plastic piece and see the design!
After the blue part is finished you will place the orange piece on and then place the butcher paper over it again. I did this to protect the infusible ink I already had applied. This time you will heat it at 320 degrees for 30 seconds.
Remove the plastic when the plastic has cooled off a bit but is still warm.

Funny Blippi Tee Shirt
This silly Blippi shirt is perfect for the birthday child or you could even make a few for all the guests! They will get a kick out of what it says.
Materials
- Infusible Ink
- Everyday Iron On
- Infusible Ink Blank Shirt
- Cut File
Tools
- EasyPress 2
- EasyPress Mat
- Cricut Explore Air 2
- Cut File
Instructions
- Open your cut file and before you go to cut make sure you mirror for iron on!
- Start by cutting your Infusible ink. Place the sheet face up on the mat. Set your Explore Air 2 smart dial to 'Custom' and select 'infusible
ink' as your material. - Use your fingers to weed the Infusible ink. I suggest wearing gloves to prevent transferring the ink to the plastic.
- Place your regular iron-on on a standard grip mat with the shiny side facing down and cut it out
- Start with your infusible ink by placing a piece of cardstock in the shirt.
- Place the weeded sheet upside down with the color facing the shirt.
- Place a piece of butcher paper over the plastic and then place your EasyPress 2 on for 40 seconds at 385 degrees. Let the ink cool before removing all of the pieces.
- Next, you will remove the plastic piece and see the design!
- After the blue part is finished you will place the orange piece on and then place the butcher paper over it again. I did this to protect the infusible ink I already had applied. This time you will heat it at 320 degrees for 30 seconds.
- Remove the plastic once it is cooled off and you are all done!
Recommended Products
As an Amazon Associate and member of other affiliate programs, I earn from qualifying purchases.


I am OBSESSED with how this turned out. I don’t usually love blue and orange together but I don’t cringe when I put this on my kid because it’s not ‘too much!’ ha!!
If you are interested in the other things you see in these photos that we used for his Blippi party then check out the links below!


